
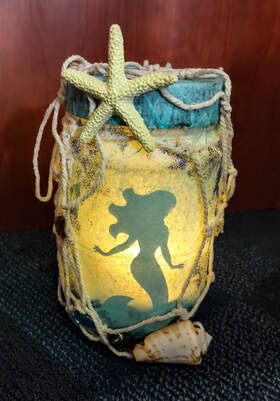
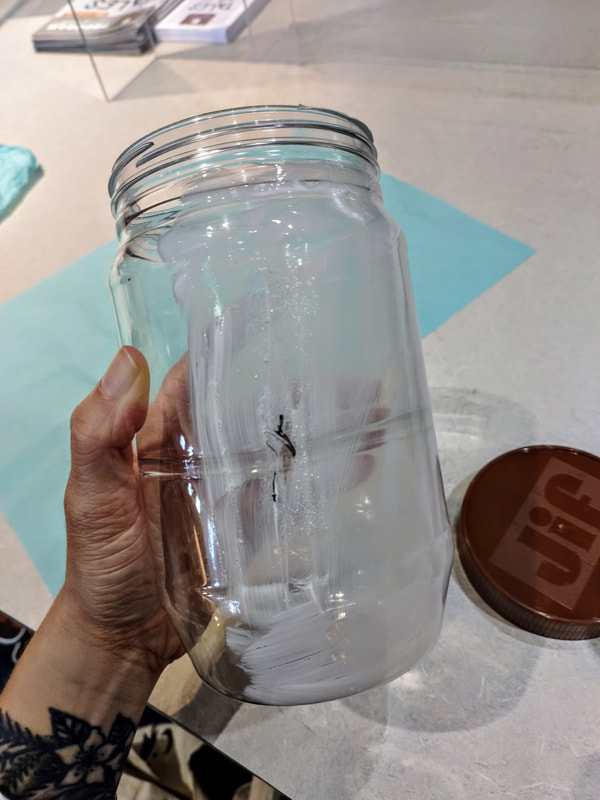
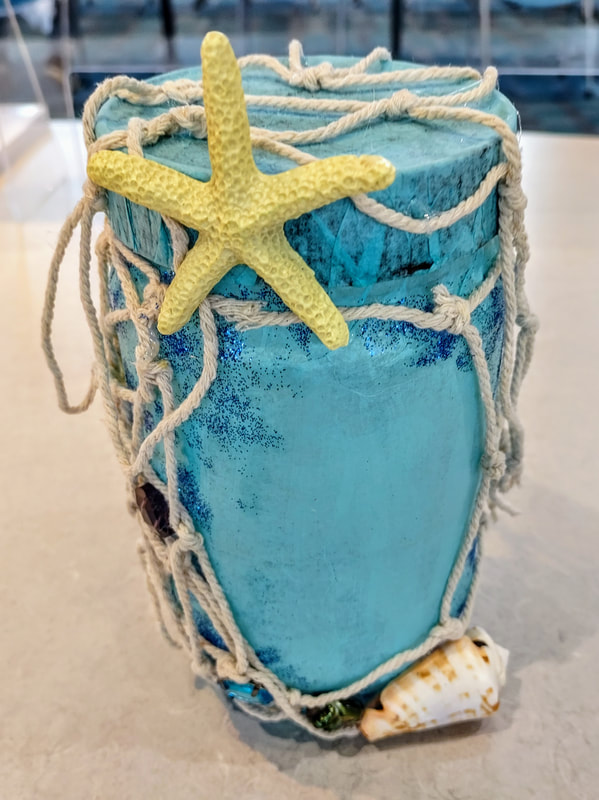
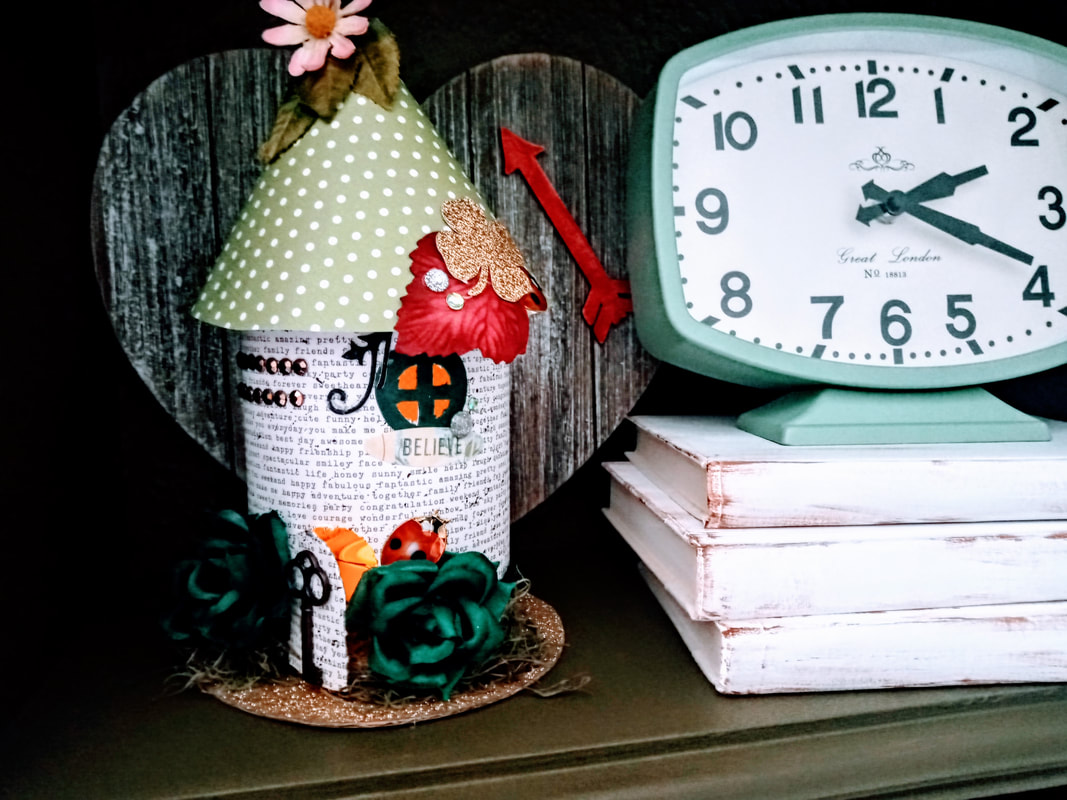
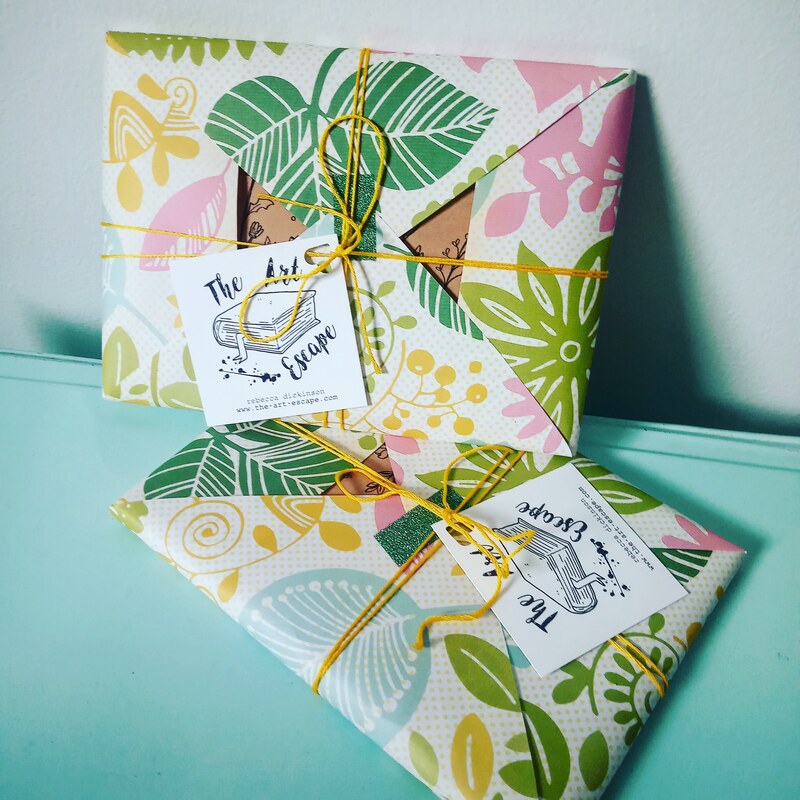
 I've never been a beach girl. Well, I guess I like to sit on beaches but not swim and such... does that make sense? I'm the girl that wants to just sit and read outside in the sun with a drink then go cool off by putting my feet in and then repeat the process! Anywho, regardless of not being a beach girl... I have to say I love how this Mermaid Lantern came out. I have previously done many renditions of a fairy lantern seen here but this change up was really fun especially for summer. For this particular craft I utilized a readily available peanut butter jar but you could definitely use just about any jar you may have at home! If you want to make this project a little more fun and involved (especially for kiddos) take a trip to the beach to look for shells, sea glass, and interesting beach finds to use instead of buying items at the store! Even broken jewelry or random gems will look perfect on this jar if you think about what is often lost and found at beaches! I did purchase this cool starfish on Amazon as I was doing it for a class and it came in a pack of 24. As well as this pack of fish netting that I cut and hot glued to the outside and lid! Supplies:
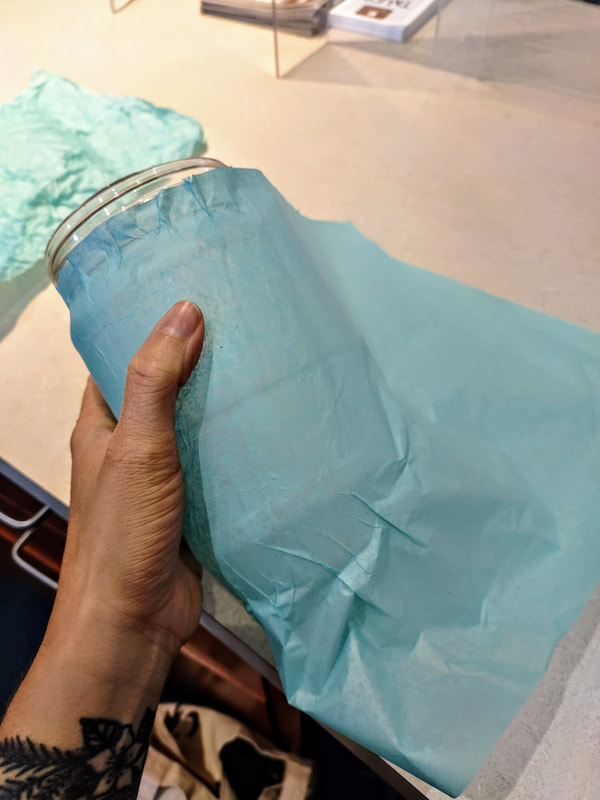
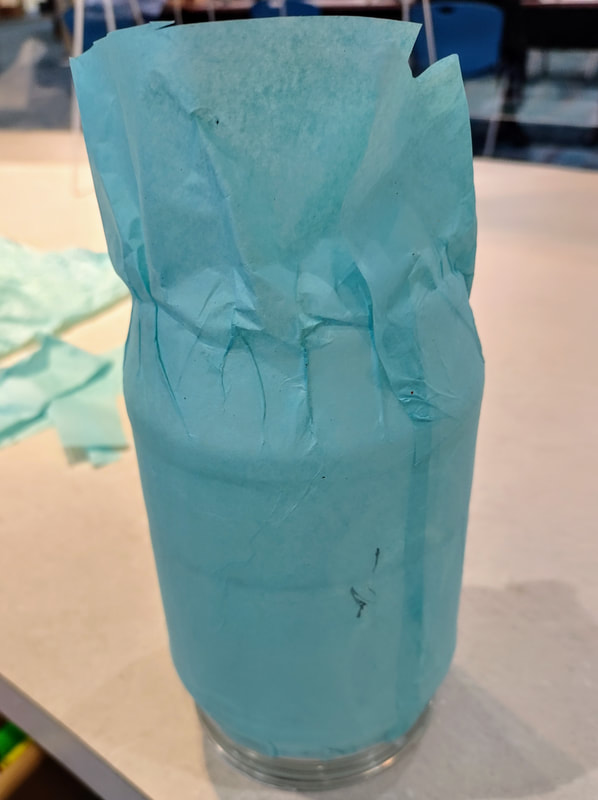
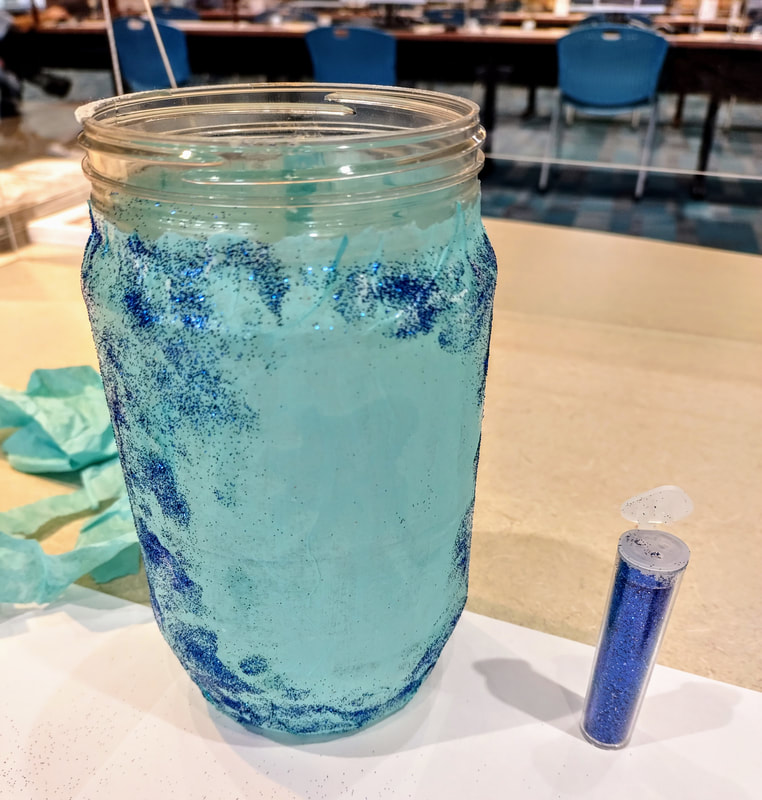
1. So let's begin! For this project I utilized light blue tissue paper (you could use any color though!). You can cut it down beforehand to better fit your jar so you don't have a bunch of extra in your way! I chose to leave this flat and not crinkle it at up like I had done with my fairy lanterns. Start by brushing your liquid glue onto your jar in about a quarter of a section at a time. Then lightly lay your tissue paper (right under the top of the jar so you can still put the lid on!) into the glue and smooth it out gently. Repeat the process until the jar is covered.
2. Flip the jar upside down so that you can cover the bottom. Trim away some if there is too much, paint on some glue and fold over the paper into the glue to cover it completely.
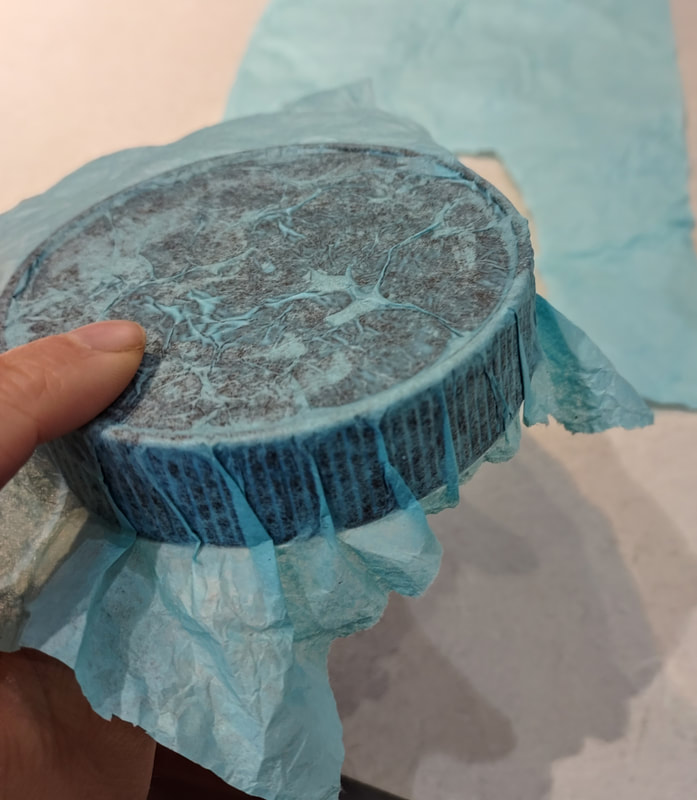
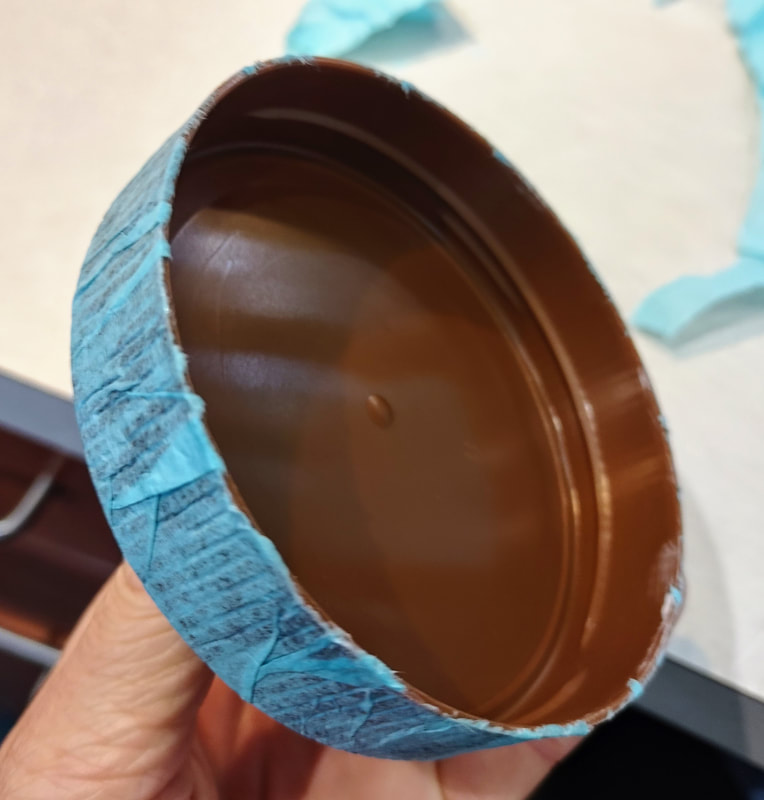
3. Work on covering your lid by doing the same thing. Paint on your glue and cover it the lid with the paper. I put one layer on and did another to make it a bit darker! Trim away the excess from the lip of the lid.
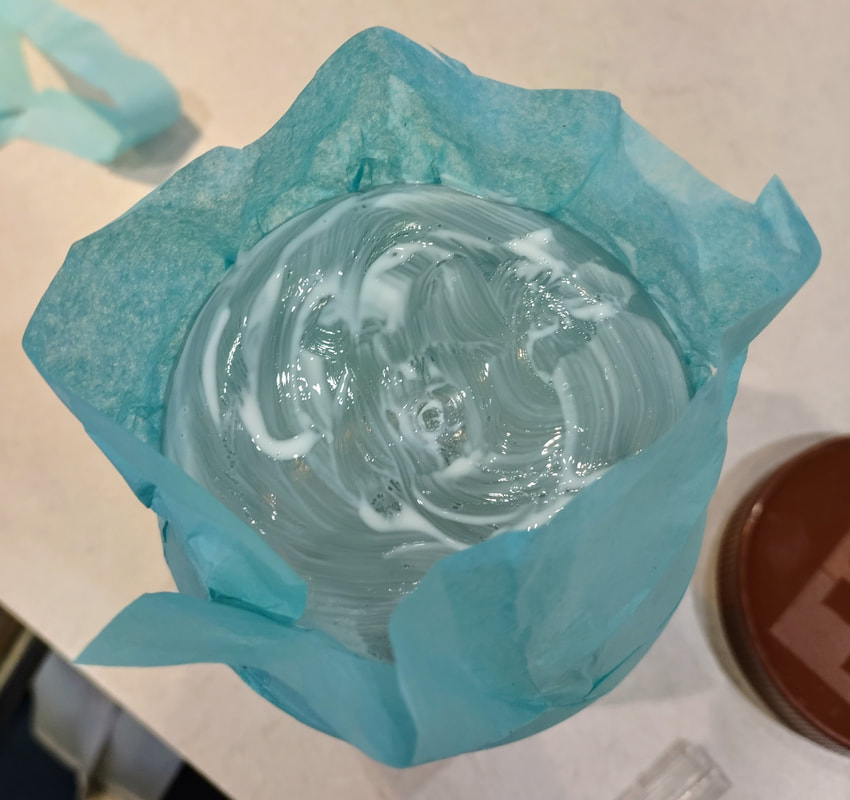
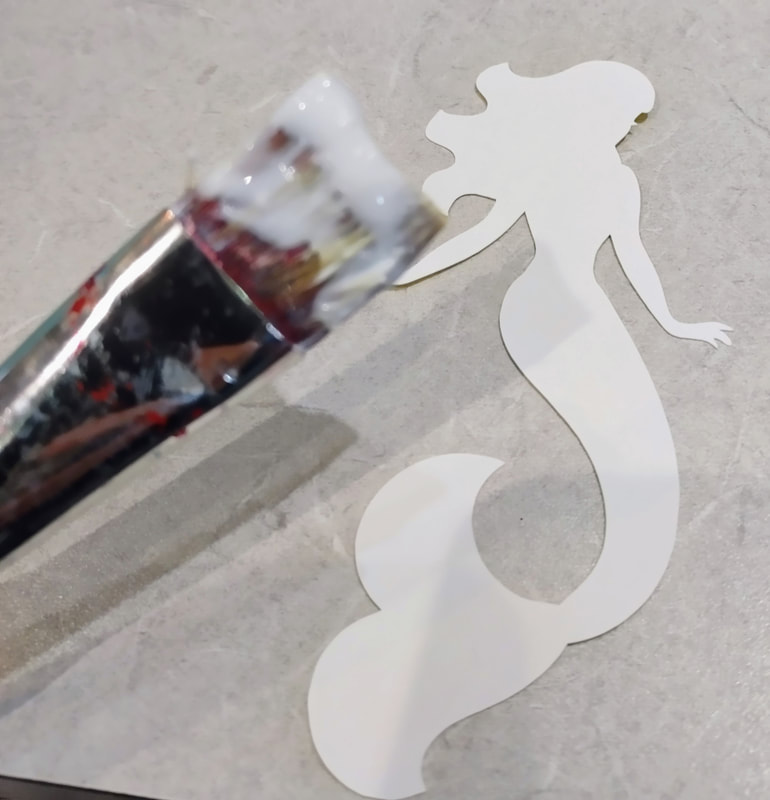
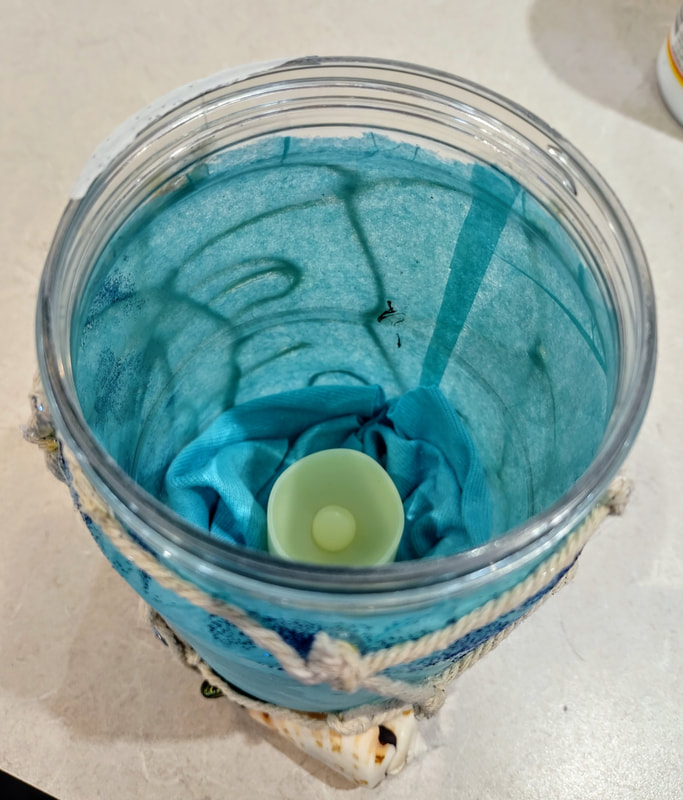
4. Add your mermaid to the inside of the jar by painting the one side with the glue and pressing her on the inside of the jar where you would like (avoid the seam from your tissue paper!). (Optional) Add glitter to the outside of the jar by painting glue on where you would like the glitter to be and sprinkle the glitter into it. I used it to “frame” around where the mermaid is in the jar. Use your finger to tap the glitter into the glue and shake off the excess.
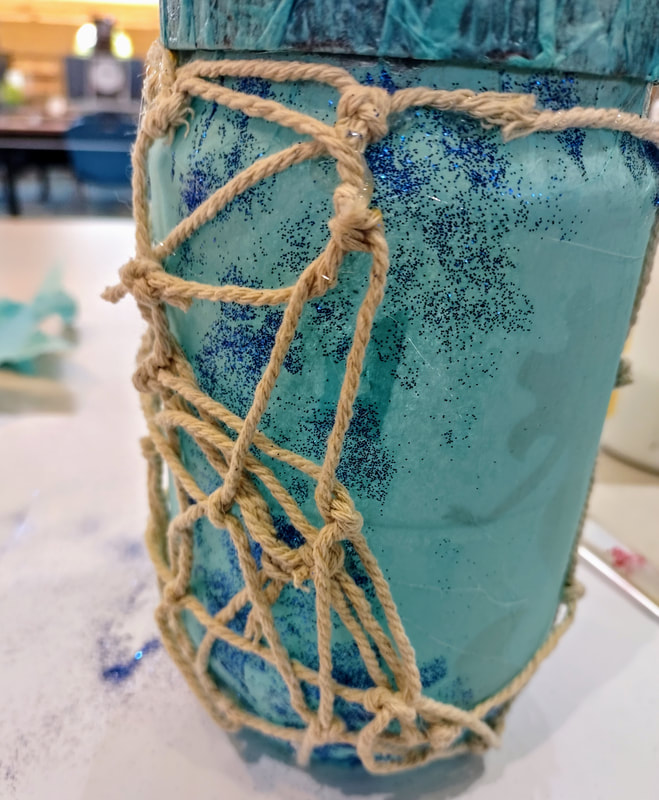
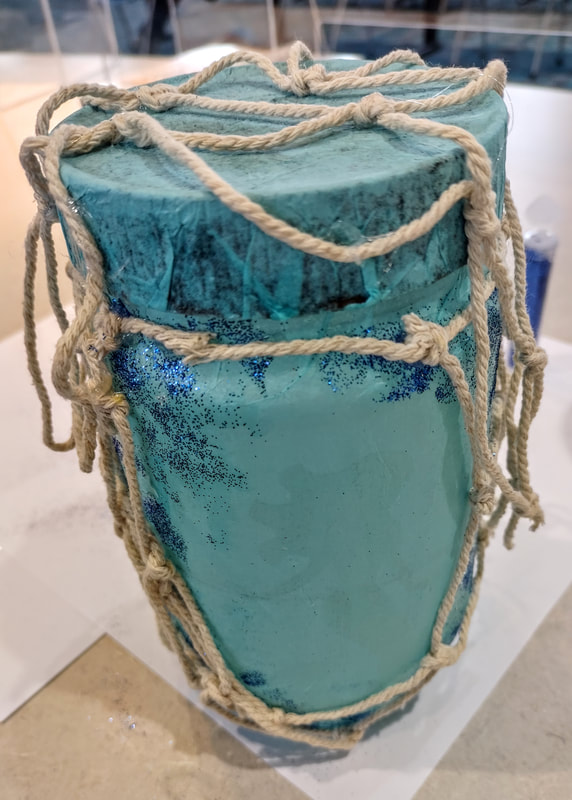
5. Next, add the netting! I found this surprisingly tricky! You can stretch it across your jar, cover the entire jar, or overlap it in a messy way (option I chose!). Secure it in various spots with hot glue, careful with your fingers! I also added some to my lid so that it would hang over the sides!
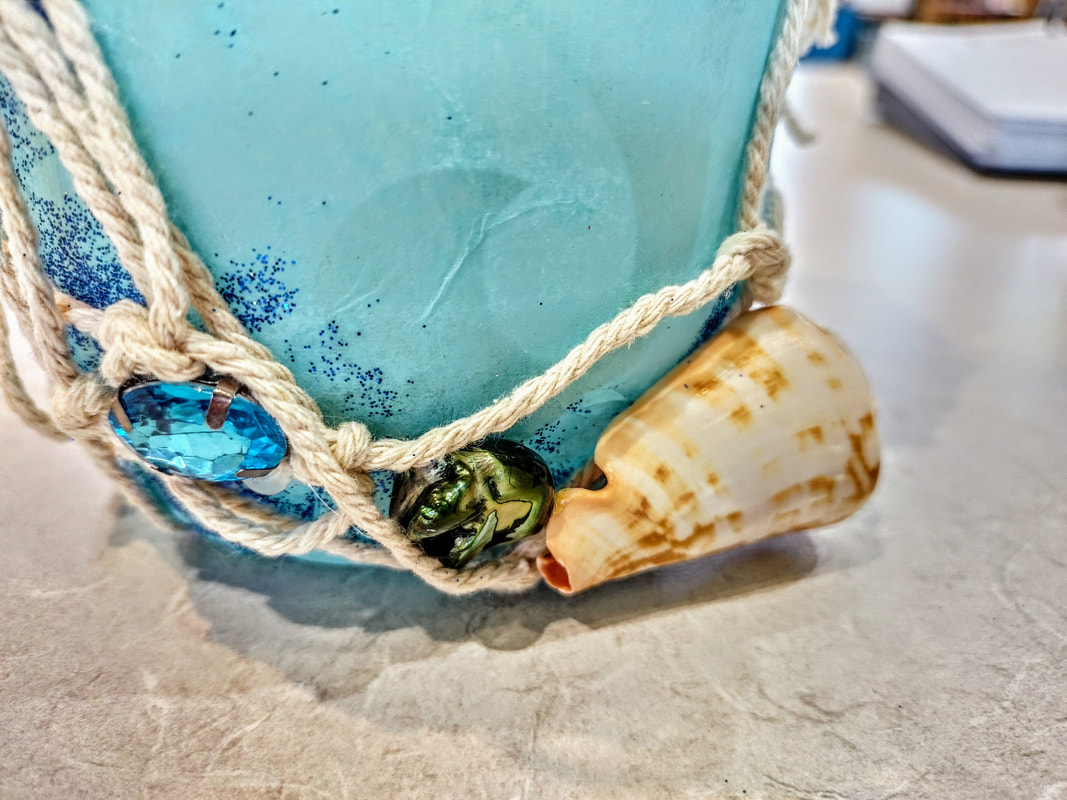
6. Once you get your netting situated, you can hot glue your embellishments! You could really add however many you want to your jar and all the way around too. We only had a limited number of supplies so I added them mostly around where the mermaid is to frame her silhouette.
7. Last step, add your candle! Again, I got my candles from Amazon, because they came in bulk for the class, but I also liked these ones because they were a bit taller than normal too since the jar was also taller and wider. Mine kept rolling around in the bottom of the jar so I also added a piece of scrap fabric in the bottom first so that the candle would have something to sit into. Turn the candle on, put the lid on, and watch it glow! Ps. you don't have to actually twist the lid on, just close it enough so the top is covered :)
0 Comments
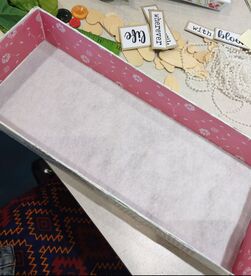
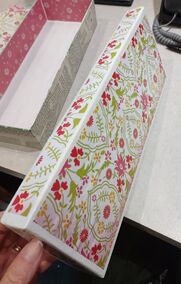
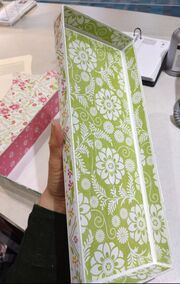
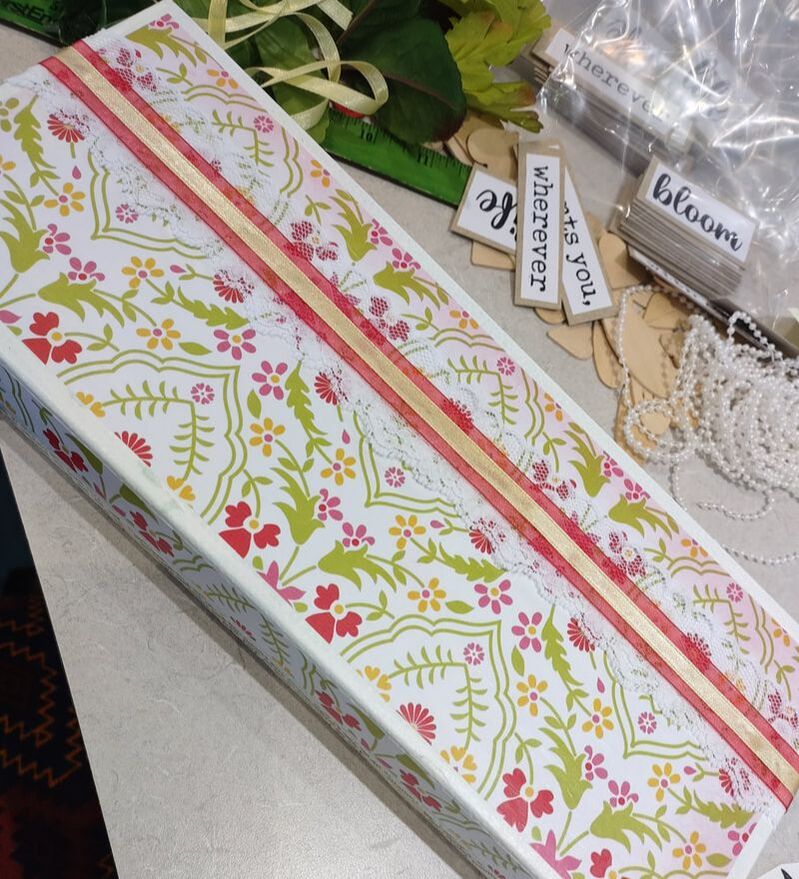
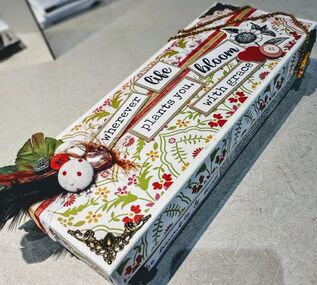 I don't know if you saw my post on making Harry Potter wands but they were pretty awesome sauce if I do say so myself! The box I used for them came from a gentleman at work who likes to give me random things to use for my crafts. Well, he gave me some of the same style of box but they were double the width (if that makes sense). So I had to come up with something to do with them! I have a lot, so it will take a few different crafts to use them up, but, to start, I came up with this simply pretty trinket box! Supplies I used:
I had some of our staff at work help me with the prep for these. I had them paint the outside and inside of the lid as well as the inside of the box white. I did this because I knew the paper I was going to be using on the top wouldn't completely cover the green and I thought was a little too much to show through and thought white would be a softer choice.
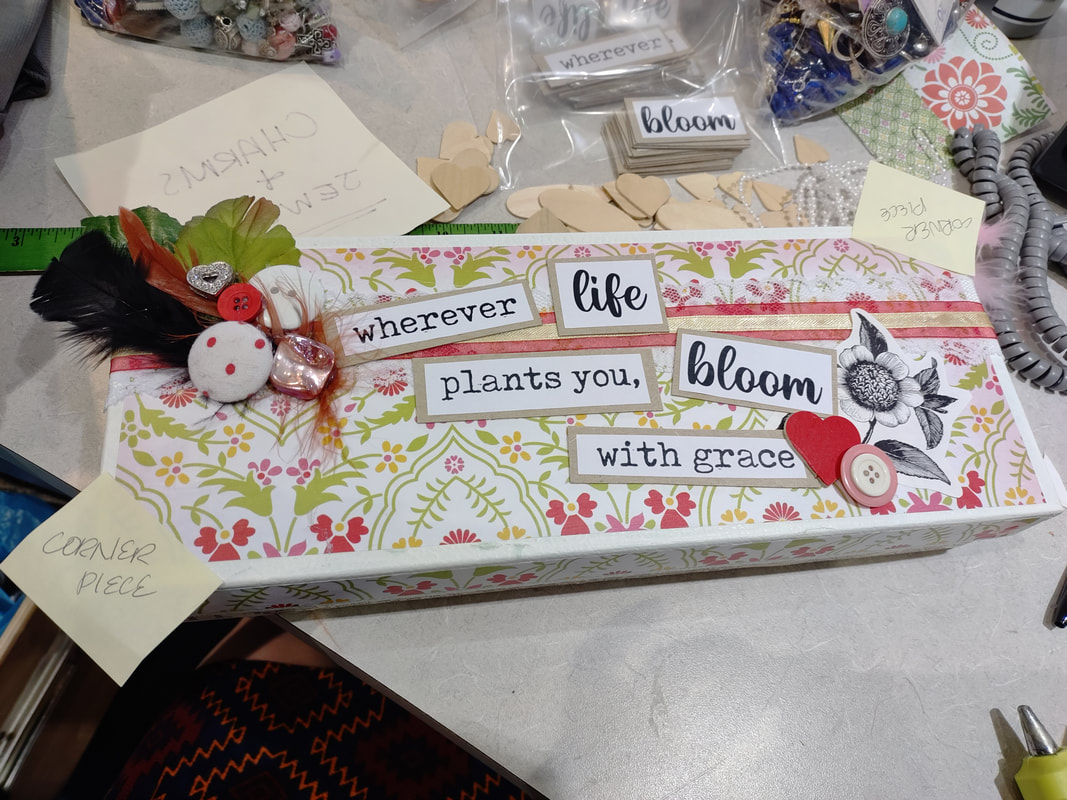
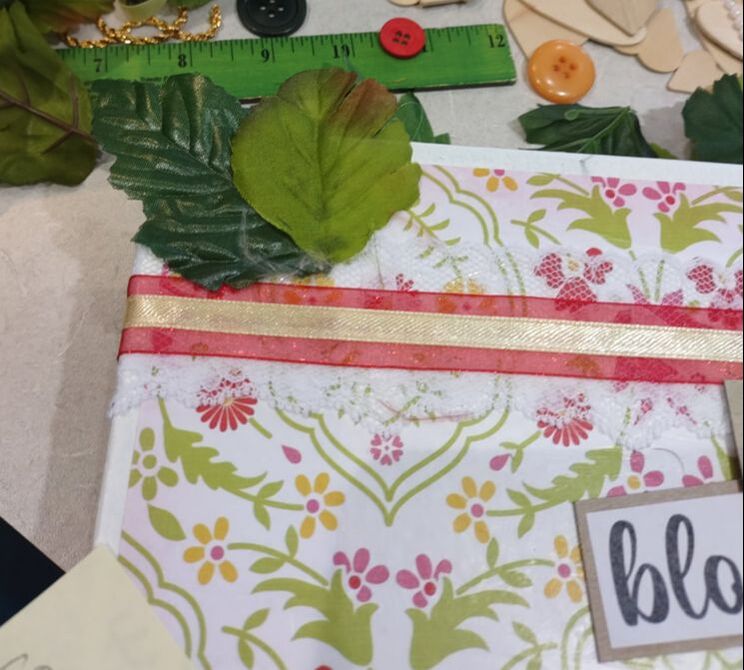
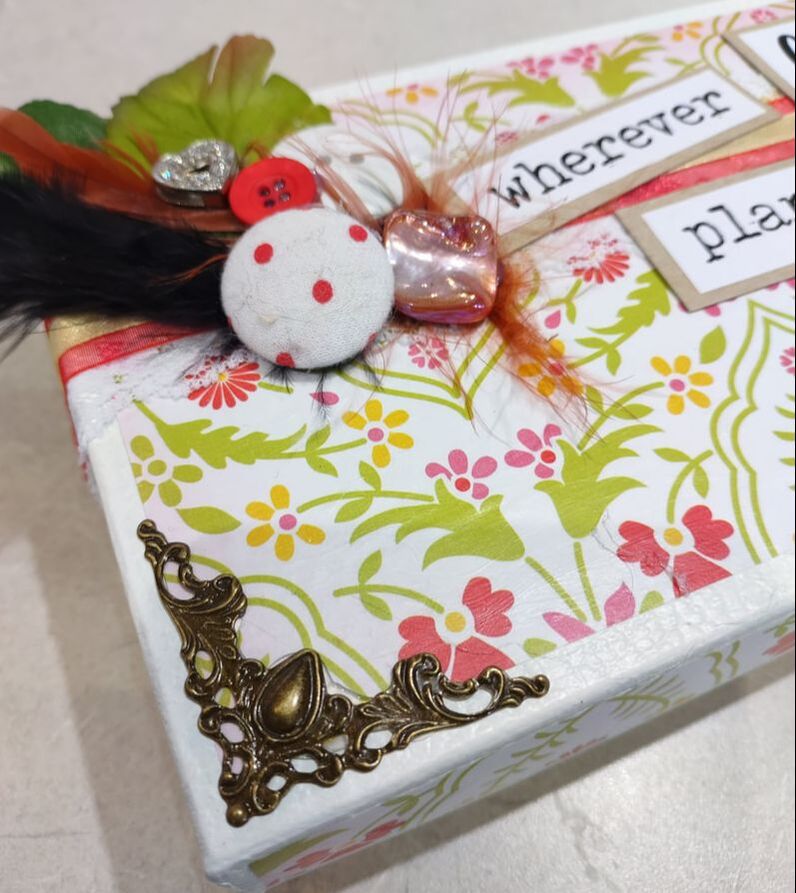
The next part is the really fun part! So, I did this for a virtual work program. This means that I made up prepacked "craft kits" that the participants picked up ahead of time. This included the box, soft vinyl, quote pieces, and embellishments. The quote I made for the box reads, "wherever life plants you, bloom with grace". I ended up adding another quote for the side of the box that read, "be humble and kind". I wanted these to be a little bit nicer than just gluing copy paper on the box, so I first glued them to a thin matt board and cut them out. Adding changes like this adds depth and texture to projects! The embellishments I included in the boxes ranged from all sorts of mismatched stuff such as: buttons, lace, ribbon, floral leaves, jewels, stickers, clip art, broken jewelry, feathers, etc. People are also always encouraged to add things they may have at home too. I laid out my quote pieces until I had them where I thought I liked them and glued them down with hot glue. I then started playing with my embellishment pieces. I have to say... this was shockingly hard! I could not decide where I wanted things and kept moving items back and forth and back again! Slowly, I started feeling happier with what I picked out for each item and began gluing them down, although apprehensively!
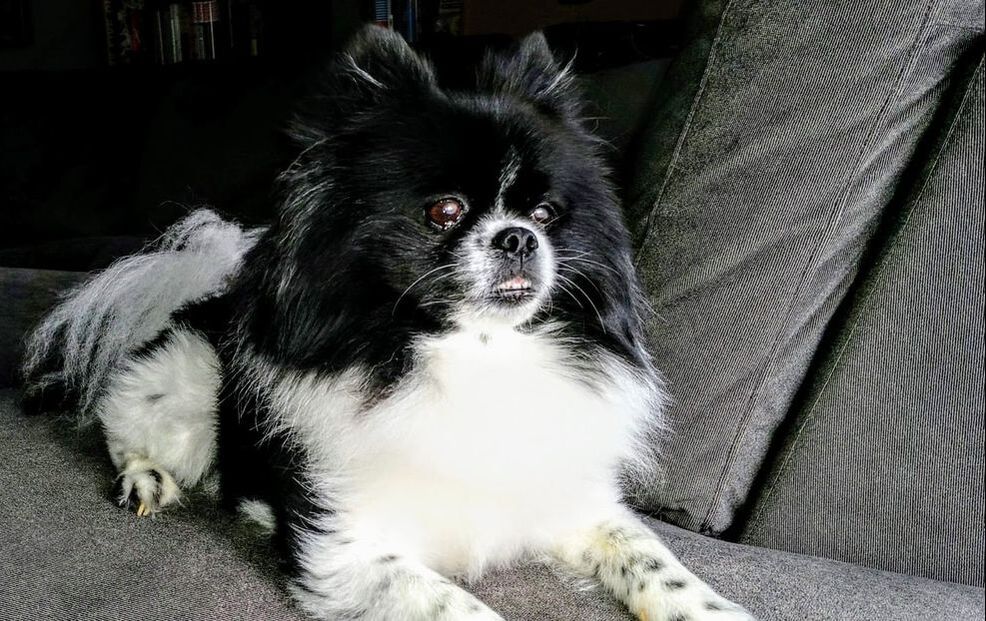
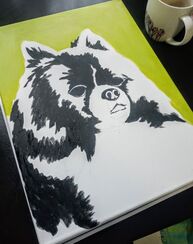
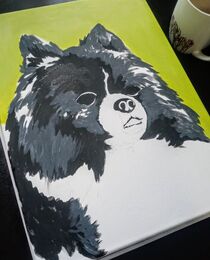
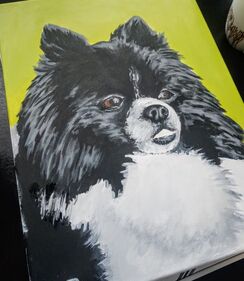
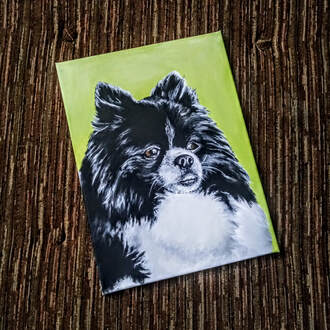
Essentially, to finish the box up, just keep fenagling with it until you feel happy! You can also always add more items later too, especially if you have something that is uniquely special in some way. Thanks for reading & crafting! 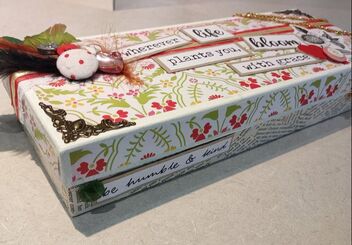  I was asked to work with another library branch at work and create a "Pop Pet" Portrait class where people would bring in pictures of their pets and we would rock the Andy Warhol style of bright colors and large images. I had never done one of those before but said "sure, why not!". I decided to practice a bit ahead of time with my childhood dog Ginger aka Pinge, Ginge Pinge, Pinger, etc. you get the picture. You can see the results in my previous post here. At the end of last year, I was asked to teach a class for The Little Birdie Wine Nest in Parma to help people "realistically" paint their pets. Again, I had never done that before, although I had a little experience with the "pop" style, but "realistic" would be a little bit different. Again, I decided to practice ahead of time! I watched a variety of YouTube videos on what other artists do and adapted to those techniques. Below I will walk you through those steps!
Yes, I can choose to just sketch this out freehand but... I have found the best way to get his basic shape down first and that is with a projector! I save the picture to a flash drive, plug it in to my projector, and project it onto a canvas in order to sketch out the animal. That way, all the features are the right size and shape and located where they're supposed to be! Because.. you know.. that's kind of important. I do want to address here something essential to painting a pet. So when we talk about our animals we might say "I have a black dog... a white cat.." but do you really? If you really study your animal's fur, you will see that your black dog has some copper brown hair in some spots, or your white cat has some grey undertones. Pay attention to these areas because they will come into play while painting your pet! We work from darkest to lightest colors and then go back and forth to create more detail towards the end.
After the basic colors are done, I kind of start hopping all over the place! I worked a bit on Simba's mighty chest which is all white but using a bit of black, then grey, then white. Next, I focused on his snout which is a bit tricky! The key here is just to make sure they don't end up looking like pigs! Which seems to happen a lot :)
I hope this helps break down the steps of painting your own pet realistically! It takes a little bit of getting used to at first but you will get the hang of it, practice practice practice, right?! If you try this out share it below so I can see what you create!
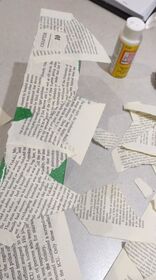
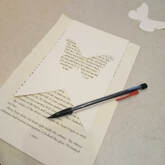
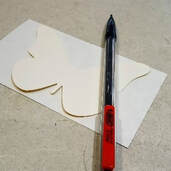
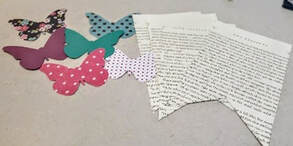
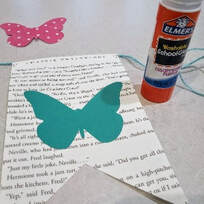
I have always, always loved butterflies. I became particularly attached to them when my elderly babysitter passed away when I was little. I remember.. or at least this is the story that's in my head.. that when she passed I made a wish for her to come back to me as a butterfly. And, lo and behold, the next day I was outside playing and a butterfly landed right next to me. Now, do I think it was quite a coincidence with it being spring and all that a butterfly would be flying around on a bright, sunny, April day, maybe. But to my little eyes and heart, it was her. I was looking for a simple craft that booklovers would (hopefully) love to make and came up with this sweet craft involving book pages, butterflies, and bright fabric scraps. Below are my step by step instructions to make it, enjoy! 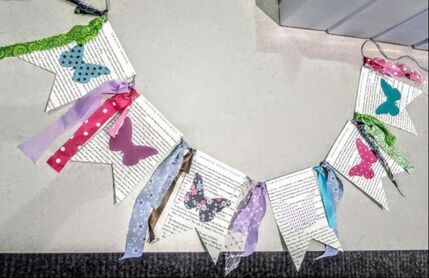 Supplies:
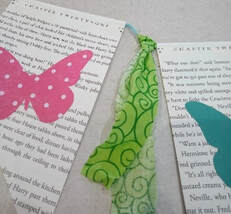
1. Lay out all your supplies to get organized 😊 I made a template for both the pennant and the butterflies so that they'd all be the same size. Trace your book page banner shapes and the butterflies. Then cut them all out.
2. Glue your banner book pages onto the twine by first folding the top over for a crease. Then, lay a line of glue (I used a glue stick) across the crease. While holding the twine in place, fold over the smaller top piece and press it into the glue.
4. Lastly, add your scrap fabric, ribbon, etc. in between each banner. You can tie it with a loop or a regular knot. That’s it 😊
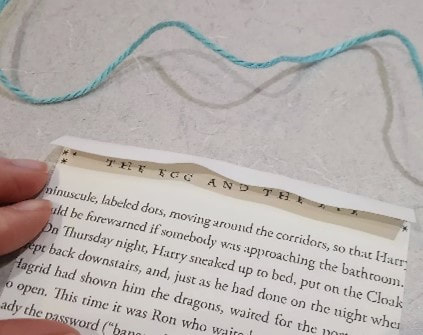
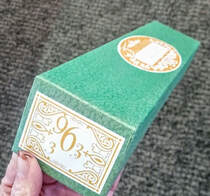
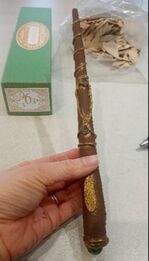
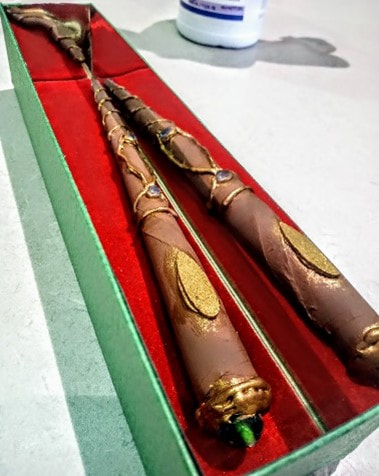
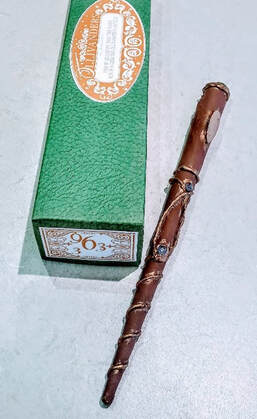
Look how cute! 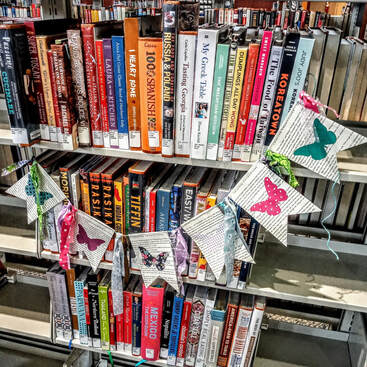 I have a confession to make... I didn't read Harry Potter when I was a kid (enter shocked faces)! I know, I know, how could I not have?! To be honest, I remember my parents buying the first book for me and coming home with it. I remember one of them saying "Here, everyone's talking about this, kids supposedly are obsessed with it". Well, maybe that comment was what threw me off because I, for as long as I can remember, hate doing what everyone else does. I do remember trying to read it, however, but never made it past the first chapter. So, once I became a librarian, I decided that this shame was unacceptable, I MUST read HP and ASAP! Well, I don't know what changed, but I read them all within a a couple of weeks and was in love with them. So yes, I am an HP fan, but it just took me 20 years! With my job at the library I am constantly receiving strange and unusual things from customers and fellow staff members in the hopes that I will save the item from the dumpster. To be honest, I kind of love it! It's like... a "thing" now and I love the challenge. One of our patrons who I have grown to know quite well over the last couple of years, is a gentleman named Ralph. I first met him when he came into the library saying he worked at a warehouse that was closing and asked if we librarians would want anything for crafts or programs. Well on to his warehouse I went and ever since then he stops by and gives me more fun things to use, I love it. One item he gave me was 2 hugeeee boxes of long skinny green boxes. I had no idea what I'd use them for but as always I said, "Yep, I'll take 'em". So there I was staring at 200 of these narrow boxes and the only thing I could think of... wand box. These boxes were perfect, I mean perrrrrfect for a wand so that's what they became! Below are the steps I took to make a simple wand with easily found materials, hopefully you can find a similar box to use too or just make the wand itself! 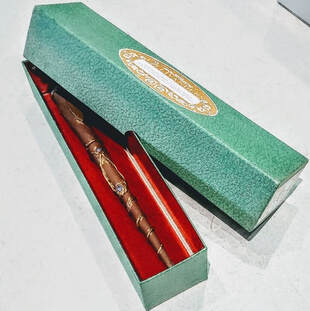 SUPPLIES:
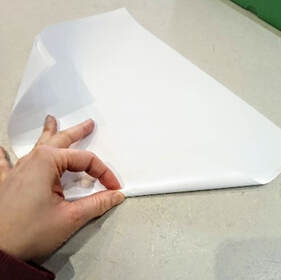
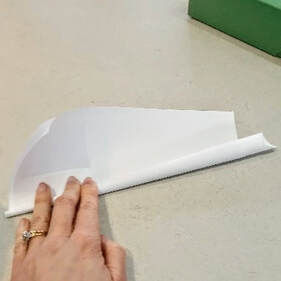
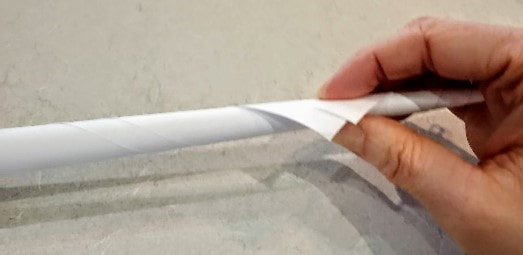
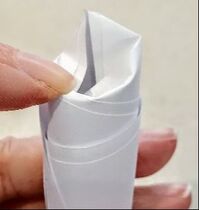
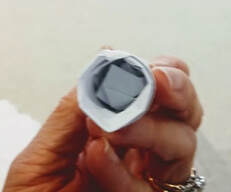
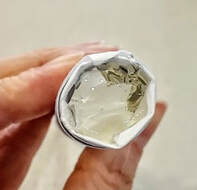
1. Layer 2 sheets of copy paper and begin rolling from one corner into a cone shape (it might take a few tries to get the right look/size).
4. This will leave a hole at the end, fill this in with crumpled up paper so the wand becomes sturdier, and fill the end with hot glue to secure.
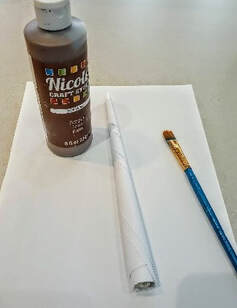
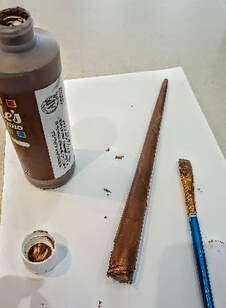
5. Paint your wand whatever color you would like. It may take a couple of coats to cover completely.
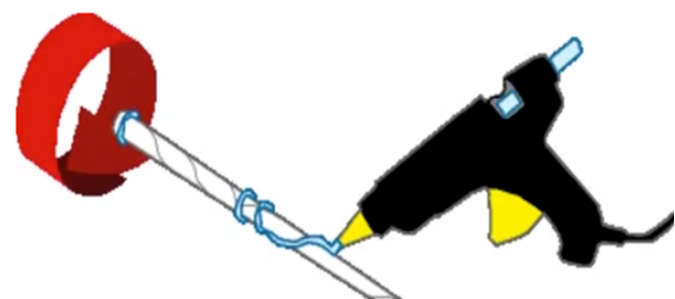
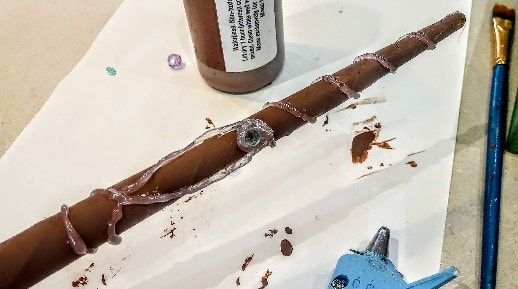
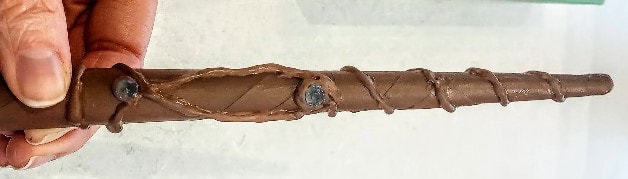
7. Use hot glue to create the character of your wand. While holding the wand, slowly rotate it as you create your lines and shapes with the glue and be careful with your fingers!
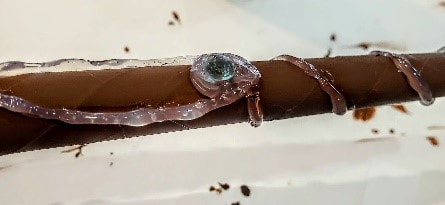
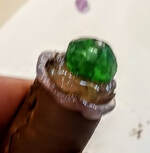
8. Place some of your beads into the hot glue for a “jeweled” effect. One at the end looks very authentic!
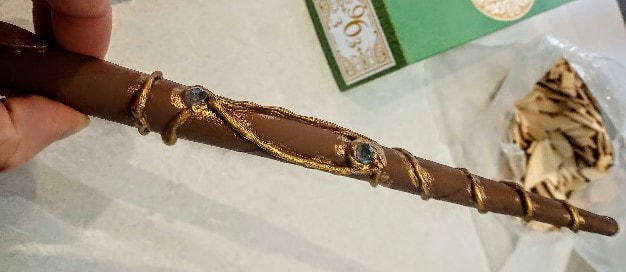
9. Paint over the hot glue with your base color and then again with the metallic paint.
11. Lastly, I wanted to make the box look more "legit". I found both velvet and adhesive mirror pieces to use. I measured and cut the pieces to fit the interior of each side and glued them in each spot. And ta-da! Just look at that beautiful wand! I think it'd be really cool to make a velvet pillow for the inside of the box for the wand to rest on as well!
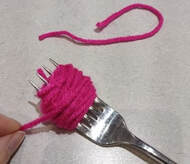
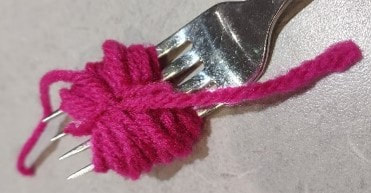
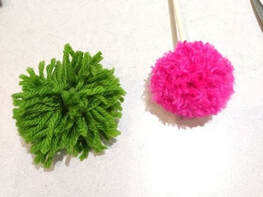
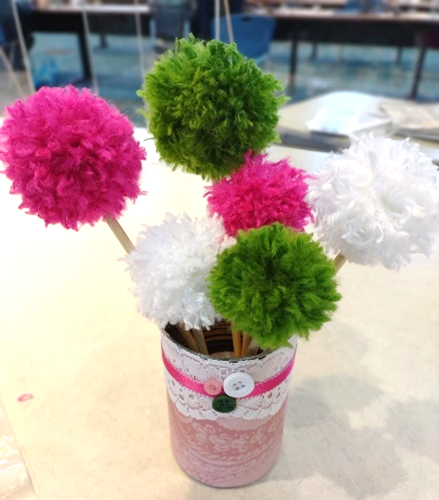
 Are you looking for something cute and fun for these summer days ahead? Really this craft can be done for any season or holiday, let's be honest, but I think they are particularly cute for summer! It is a very simple and relatively quick craft that just about anyone can do. If you have littles wanting to help, just make sure you supervise cutting and that you handle the hot glue of course! Supplies for flowers:
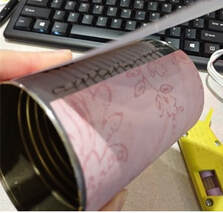
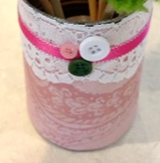
Supplies for upcycled vase:
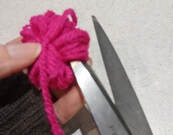
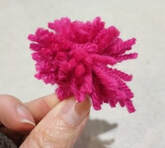
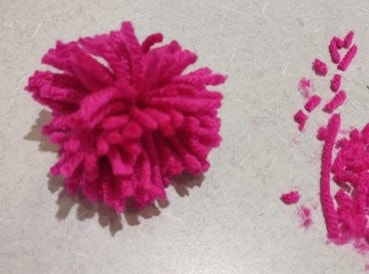
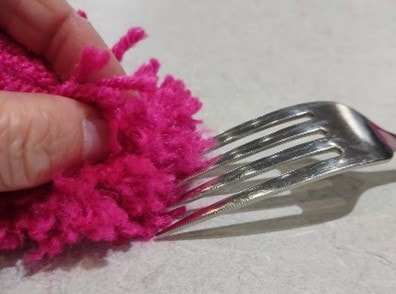
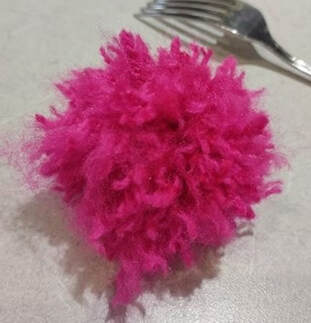
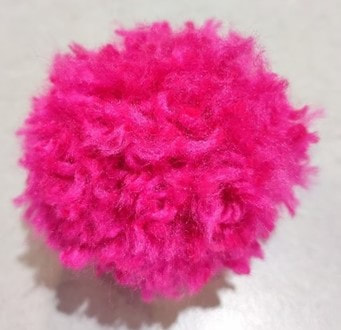
6. It will look pretty uneven, so just trim around the yarn all over again 😊 Do this step with each of your pom pom flowers.
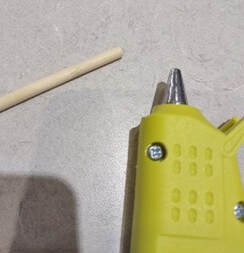
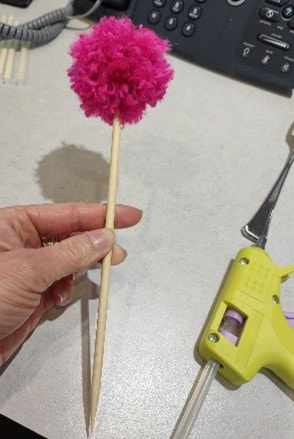
7. Next, using hot glue, glue each of your “flowers” on top of the wooden sticks. I had 6 sticks but cut 3 of them down to smaller sizes so that they would be at different heights! You're all done with your pom pom flowers at this point!
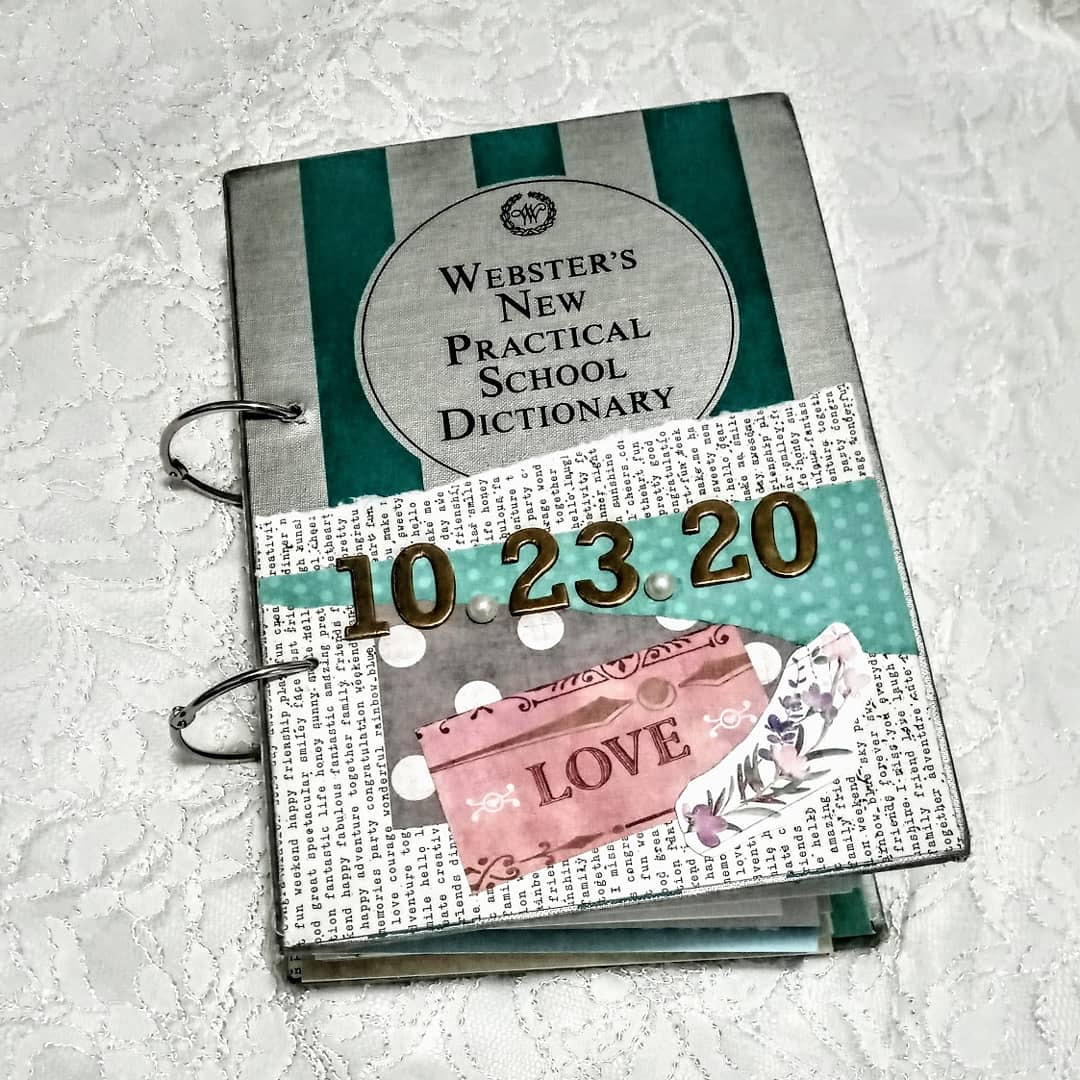
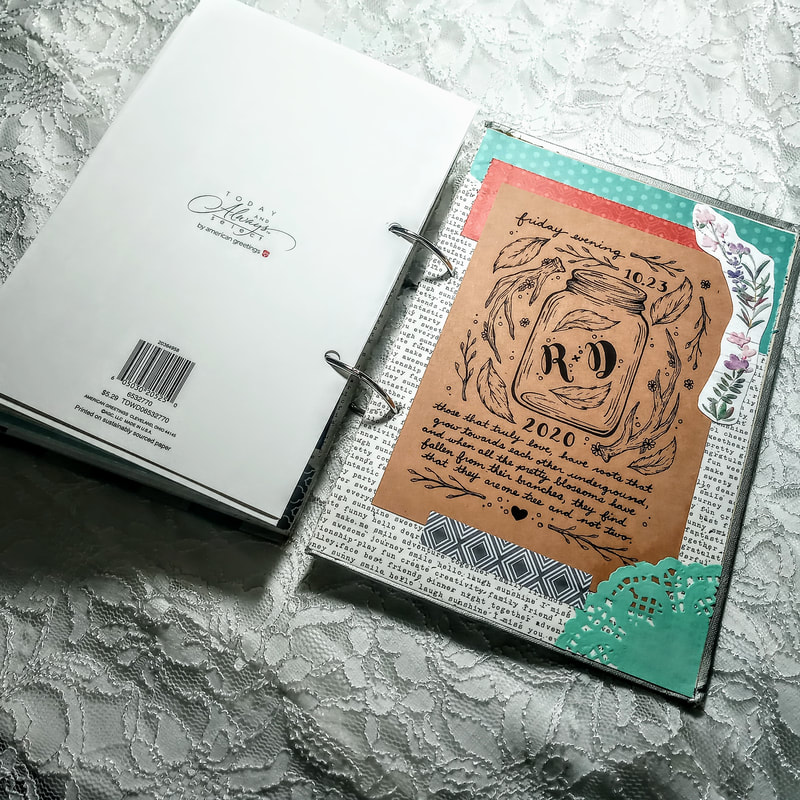
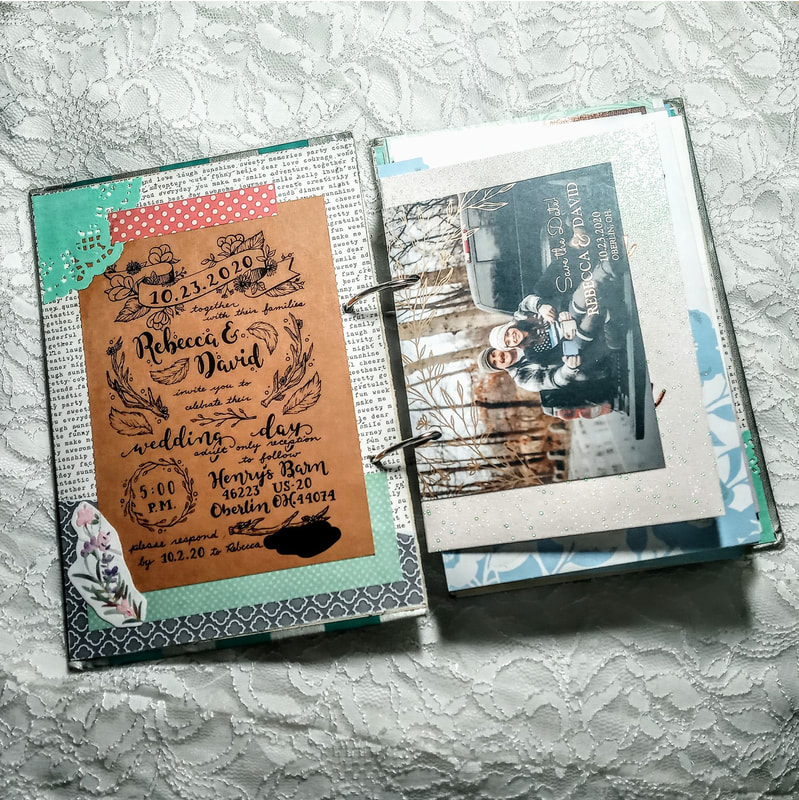
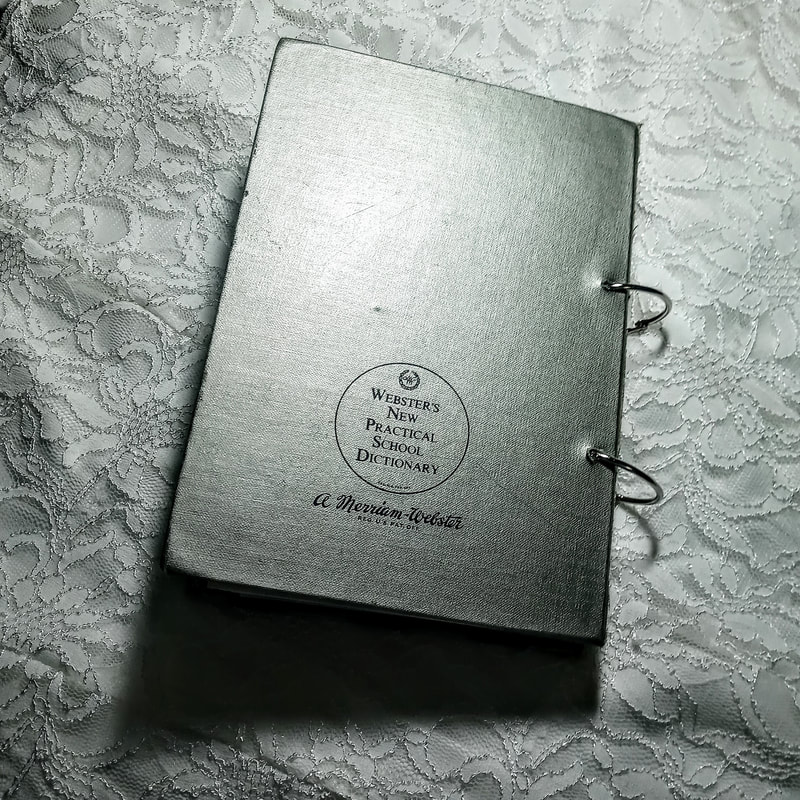
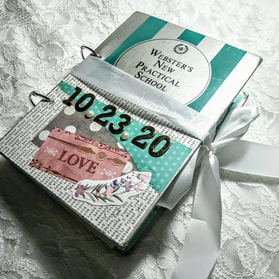 I GOT MARRIEDDDDDD!!!!! I'm a little excited, can you tell?! Wedding planning in general can be stressful but add COVID to the mix and it's just down right exhausting! We went back and forth for so long about what the heck we were even doing and basically started outlining two different wedding possibilities for our day. We ended up still having it at our venue and just had to limit our list down. Despite all the stress over every little detail, dresses, decor, the weather, and covid, it turned out to be the most perfect and beautiful day! I still can't believe just how perfect everything was and felt. To have those closest to us there to celebrate with us and enjoy a happy evening during all the craziness in the world was so incredibly heartwarming! With any big life event, we received plenty of cards! Not just any cards, wedding cards of course. They were just so beautiful, sparkly, meaningful, etc. and I just could not throw them away. I saw the idea people have been making where they punch shapes out of them and put them in a frame but I thought, what if I get tired of having it on my wall, or want to move it around? Then I'm stuck with a big frame to put somewhere else! And I mean that in the best way possible obviously! So instead, I thought, how could I make these into a book or album of some sort and tried looking up ideas on that. Some people take this very seriously and sew sections together just like you would a real handcrafted book but that was a little too much for me! When I began my "dictionary art" I had one singular dictionary and my goal was to use up every bit of that dictionary. After using all the pages and feeling so accomplished I then decided to hoard the cover and backing of the dictionary like a crazy person. Well, well well! Did those come in handy or what?! This became my front and back of our new wedding card book! I did not take step-by-step photos but I'll attempt to explain my process! *Optional: I first decorated both the cover and the backs to spruce up the book. I used scrapbook paper, copies of our wedding invite, and stickers. 1. I found my smallest card and lined them up centered with the cover of the book so that I could mark off roughly where 2 holes would go into the cover, card, and back of the book. 2. I used an electric drill to drill through both the cover and back. 3. Next, I marked every card with matching holes to the cover and hole punched all of them. 4. Optional. I also cut every card in half with an E-xacto knife so that they would flip more easily. 5. I used 2 large binder rings (3in to fit the amount of cards we had), and fed the rings through each card!
Note: This was the amount of cards from about 60 people, so if you have a larger event you might want to/need to make multiple books! And that was it! Now we have a gorgeous keepsake!
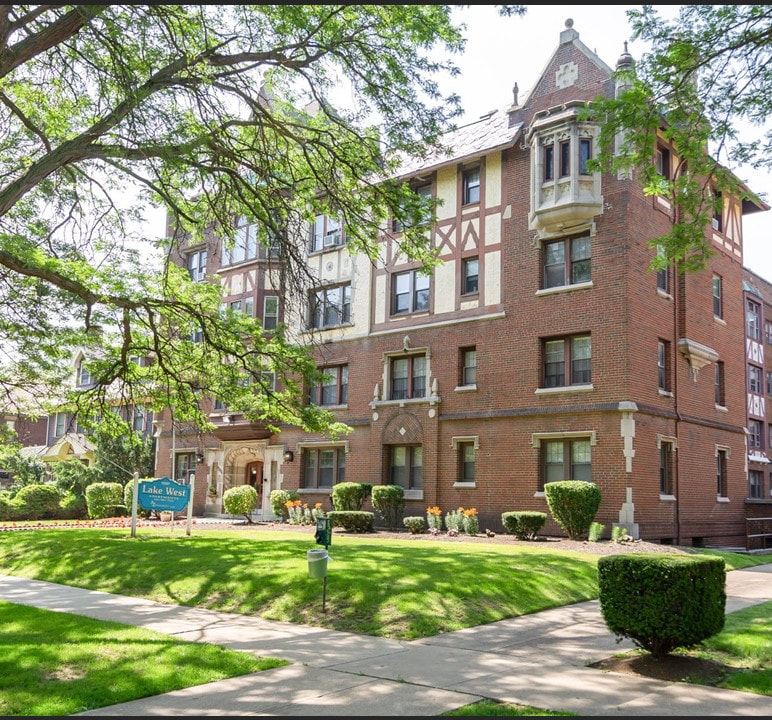
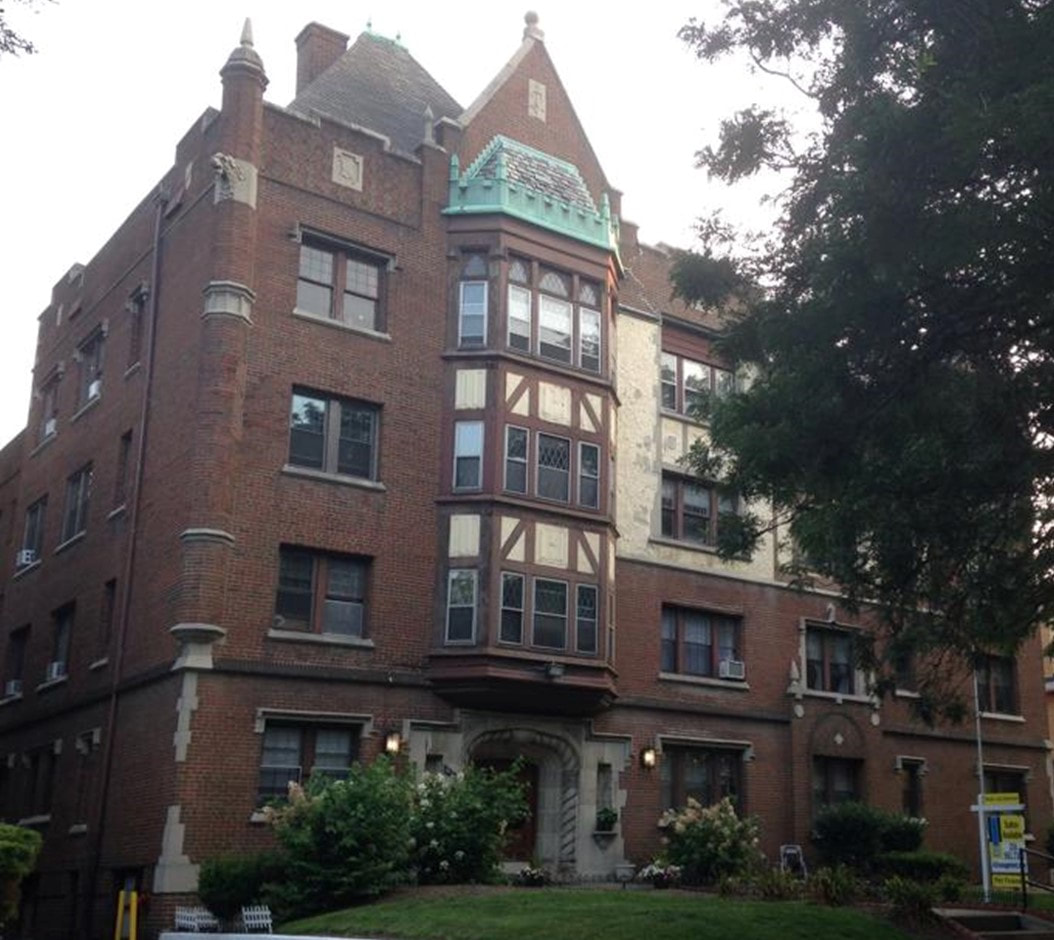
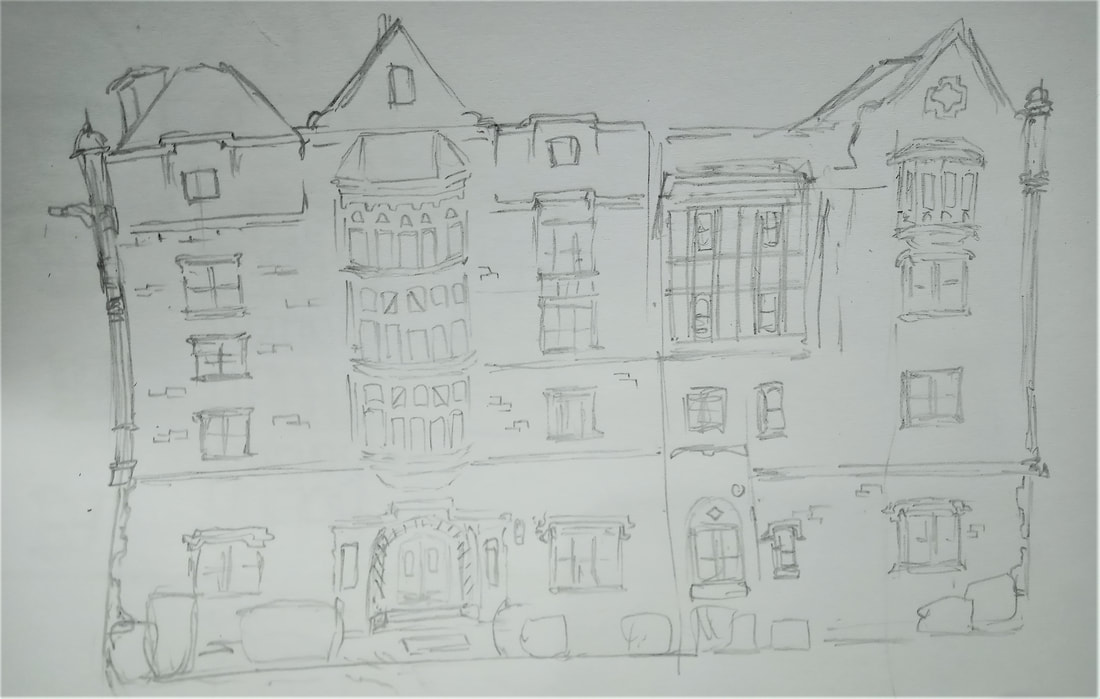
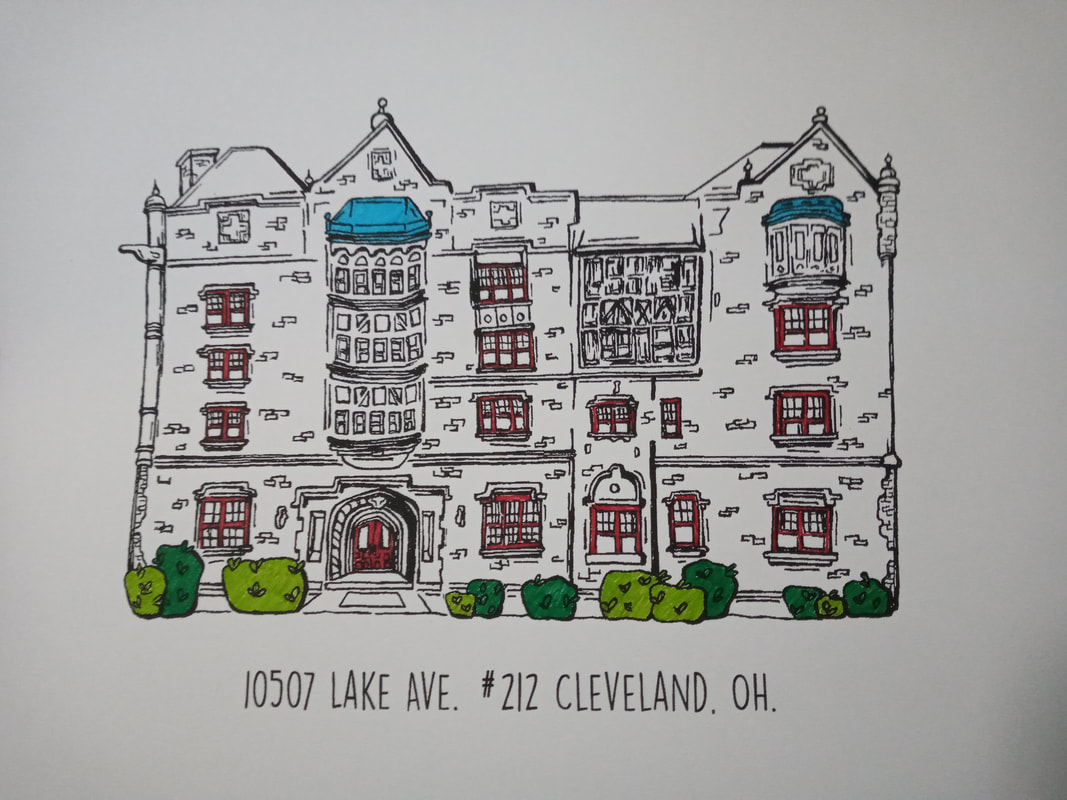
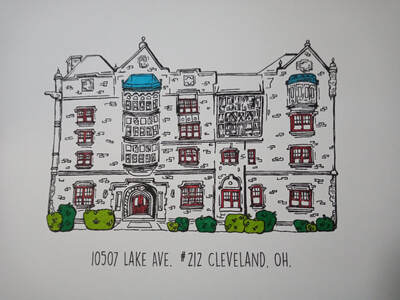 I'm still here I promise, just haven't posted in a while... yet again. Getting back into the swing of things at work has been difficult. The days are long and strange with our new Coronavirus world. By now we are all so used it though, I feel like it will be weird to see everyone's faces again whenever that happens. I was lucky enough to participate in a local flea this summer at Heritage Farms in Peninsula, Ohio. It's my most favorite show of the year and was the only one that didn't get cancelled. I am thankful for their dedication to the arts and offering a safe show during this time. I think being able to do this show kept me sane for the summer because now I feel like I am in such a funk! Thankfully, I have been getting many art requests from old friends and new! These range from logo designs, dictionary art, and this new found art... "Line Art Buildings" (not really sure if this is the actual name but that's what I'm call it!). This all started with a friend wanting to order an anniversary gift for her husband. She was specifically looking for an interpreted drawing of their first apartment together. She showed me some examples and asked if I thought I could do it. I decided to give it a try and the results were adorable! She sent me some photos to go off of for reference and I also utilized Street View in Google Maps!
Next, I darkened up the building with some thicker lines. I knew I would be scanning this in for printing so I wanted to make sure the lines were nice and clear. I wanted some print copies because she requested some color highlights and we weren't positive where to put them so I had a few copies to work with. We also added the address in a fun modern font!
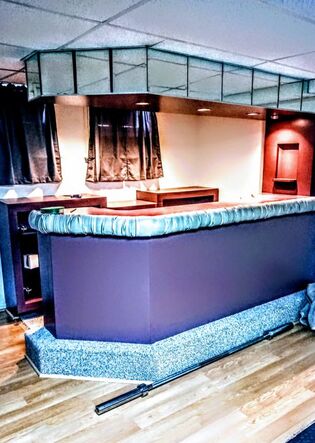
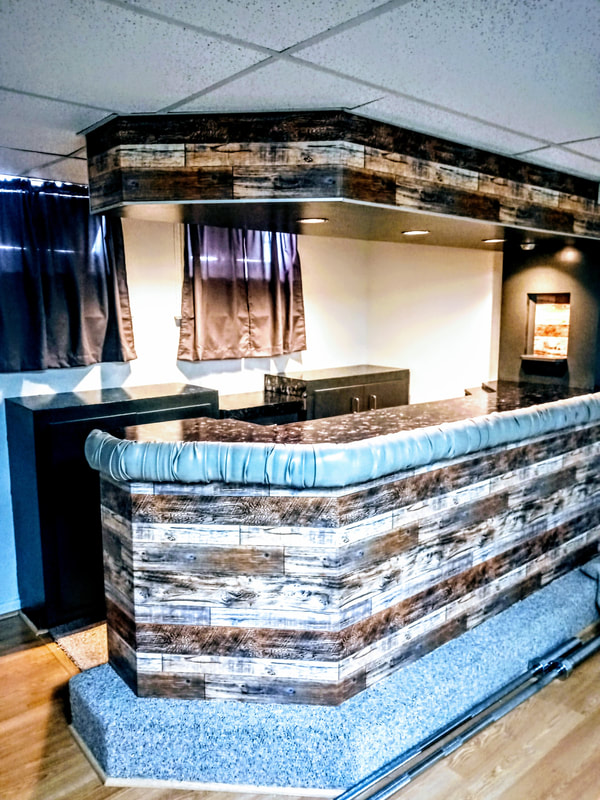
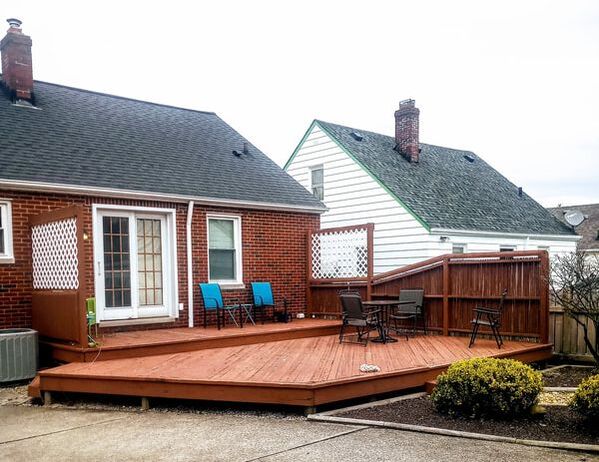
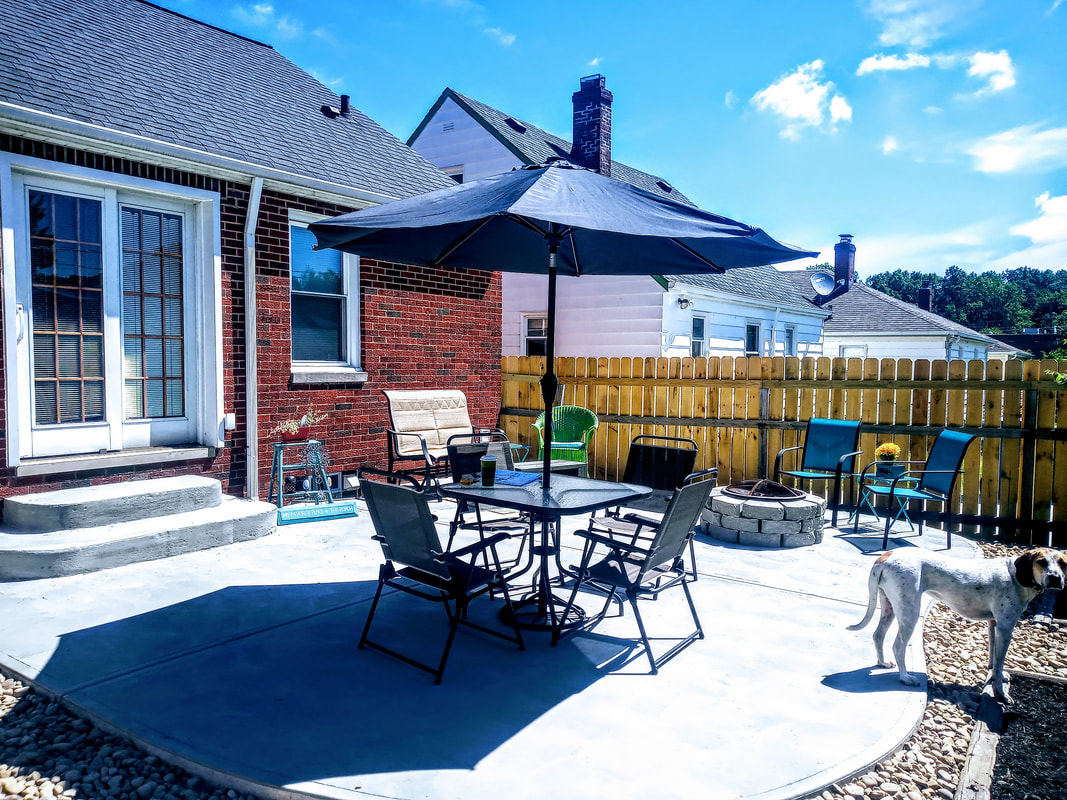
The completed result is gorgeous! I love it! 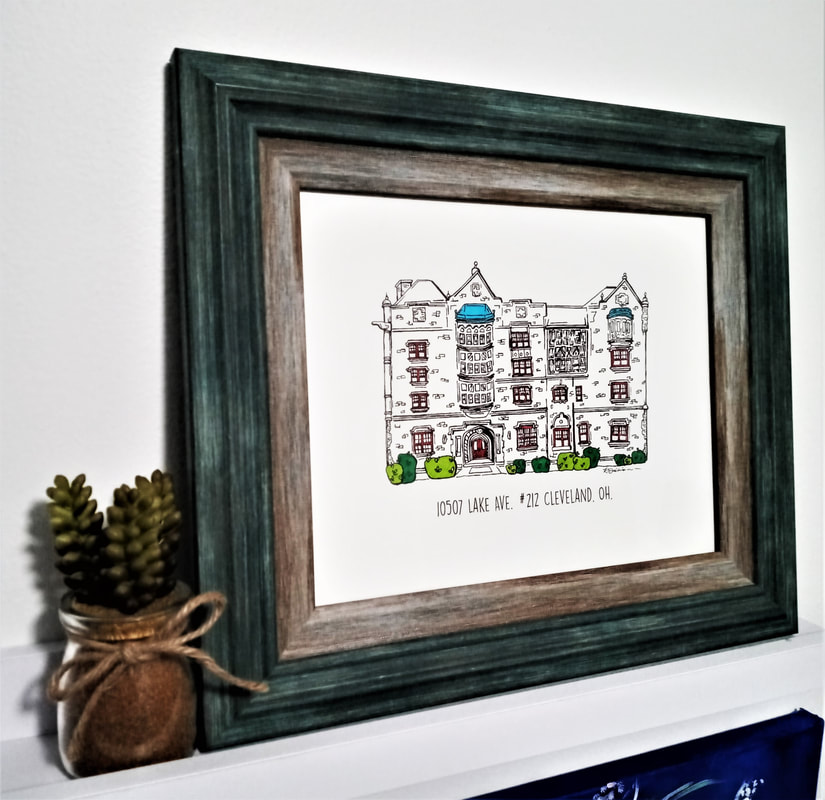 It's safe to say I have officially failed at blogging! But let's be real, Corona happened, is that a valid excuse? I think it is. Being a librarian, we were shut down during the Ohio quarantine back in March. When it first happened I said "We won't be closed longer than a few days". Then the days turned into weeks, "No way we'll be closed a month" and the month went by, then another, and another. I was baffled! I started off quarantine strong with lots of projects and goals in mind. I completed major ones fast, almost too fast for the amount of time I unknowingly had on my hands. I thought I'd share some of the projects I have done during this very weird time to get me back on the blogging ball. My first order of business with oodles of time off, was to get home projects done! You know, the things you keep thinking about needing to do but don't do them, yea those. With owning a home there is always something to get done and I could've gotten more done but I definitely fizzled out my house-reno flame at some point! I finallyyyy fixed our 1980's basement bar and loved how it turned out. We're not big drinkers but wanted to get this done as a selling point for whenever that happens. We also had a company rip out our old deck and put in a patio! What a mess that project was, but so happy it's done and we love hanging out in our backyard now! After the patio was done we also added taller fencing around the patio to get our privacy back. I also did random other projects like painting the stairwell and hallway but that's boring stuff.
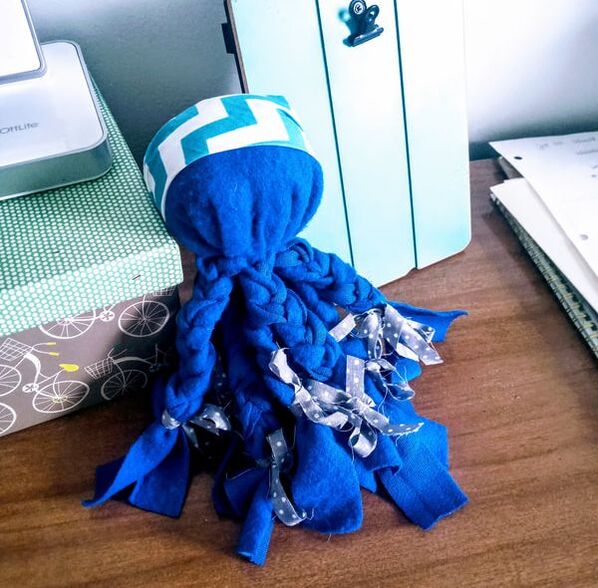
Being a librarian and being away from our community, we were asked to start filming ourselves doing book recommendations, kindergarten help, maker activities etc. I jumped on the maker train and started creating a variety of hands-on activities mostly for kids but can also be done by any age. Here are some of what I created (in order from left to right - fairy hut, "less mess" finger painting, paper mountainscape, and a scrap fabric octopus!). You can find some of the instructional videos at https://www.youtube.com/user/cuyahogalibrary.
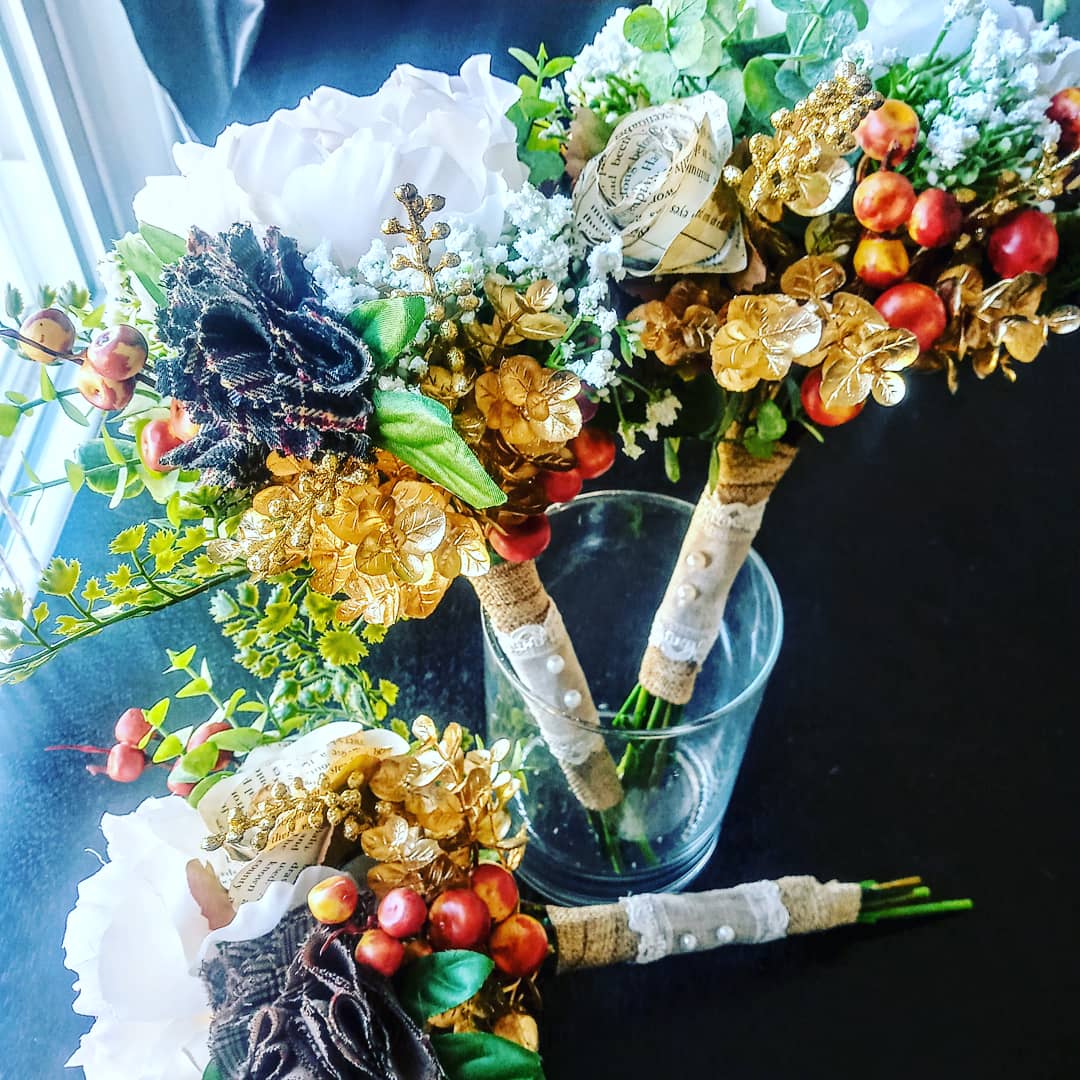
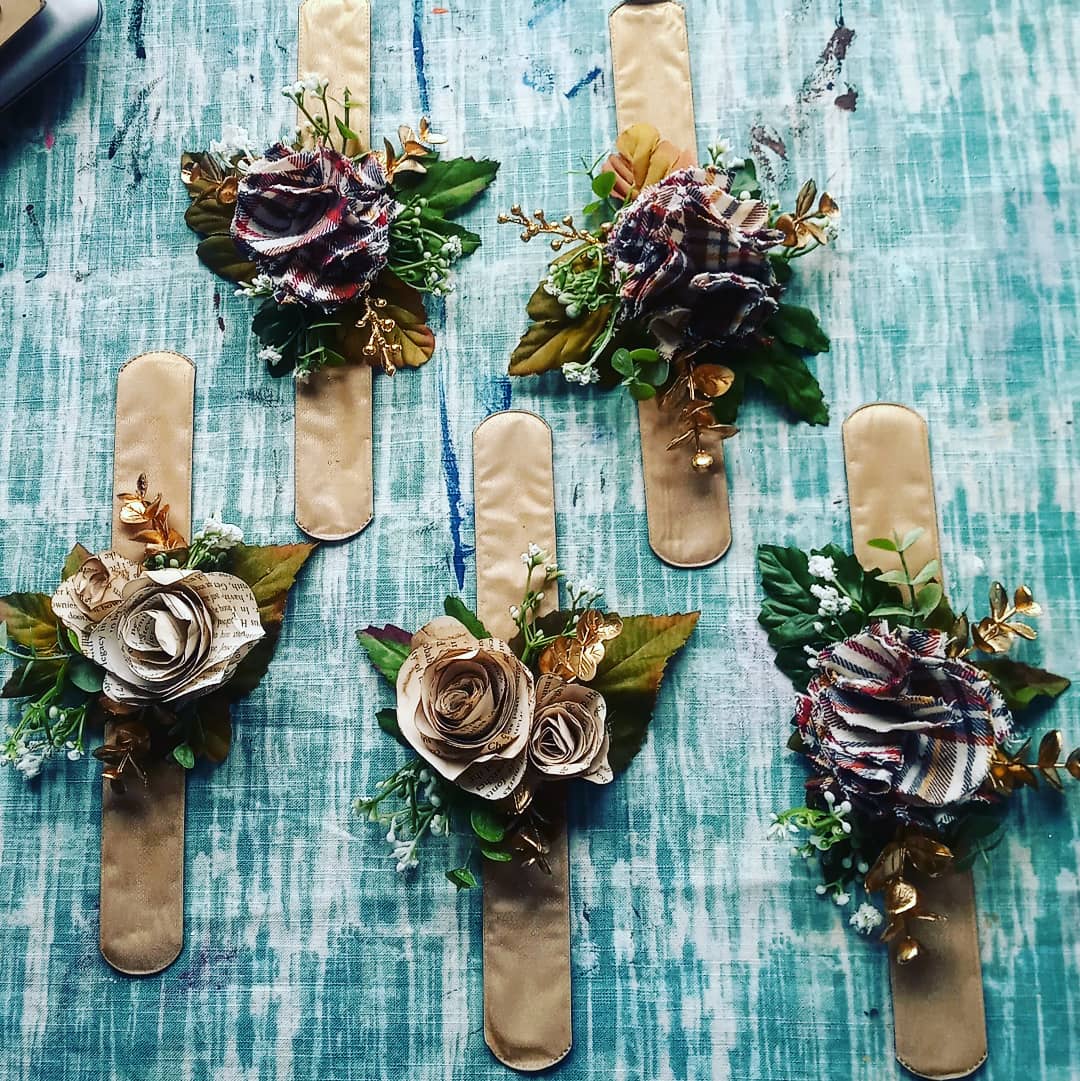
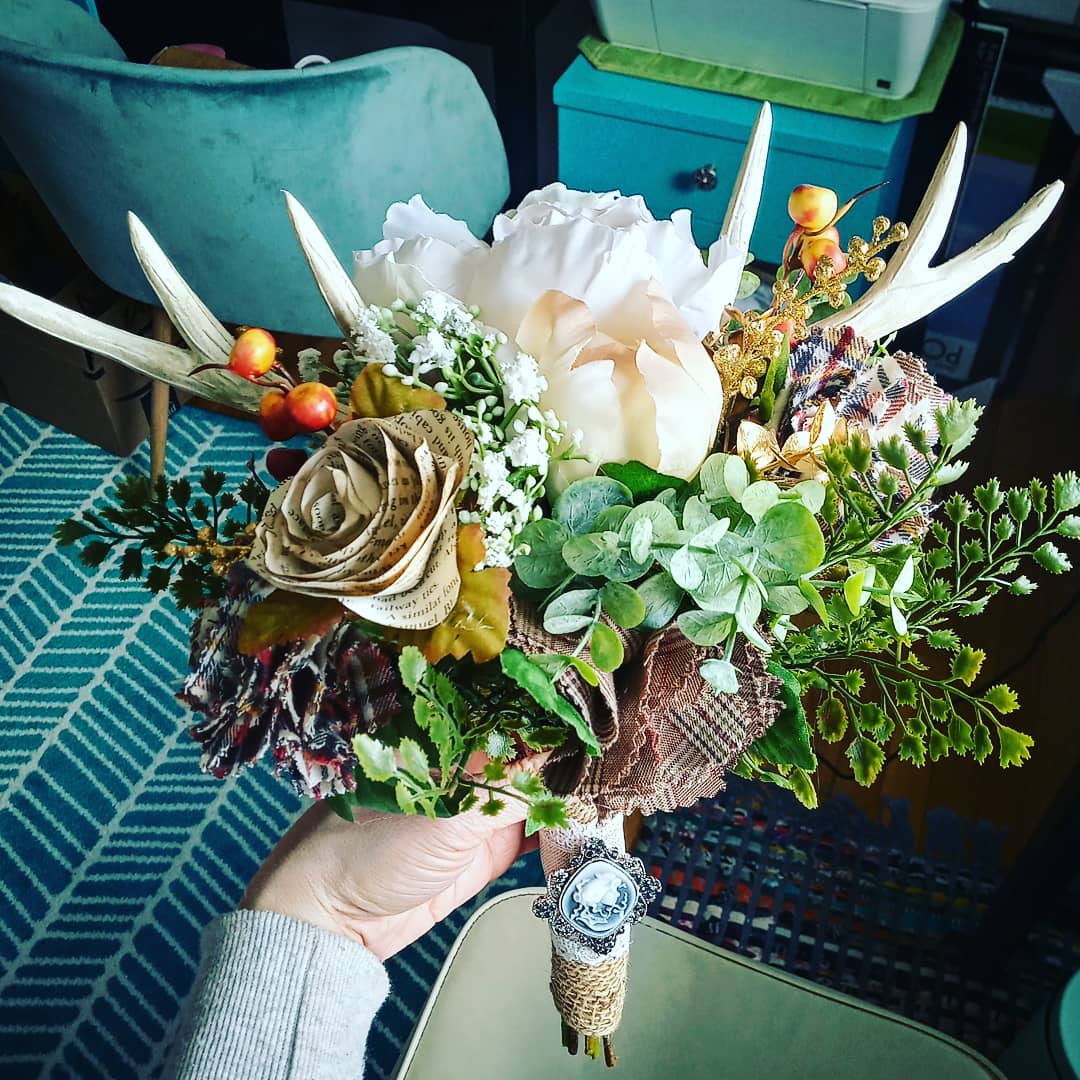
Another category that took up some of my time was wedding planning. That's right, I'm a #coronabride! We're getting married still on our original date in October, but what that looks like right now I really have no idea. We are still waiting to hear of any changes and as we all know, that happens daily. So, I kept myself busy with wedding projects. The very first weekend I was off I finalized my hand-drawn wedding invites and printed them all so they were ready to go (hopefully I still get to use them!). I created my own bouquet and love it more than anything. It's made from book pages, my papaw's old flannels, and includes fake antlers and even my great-grandmother's old broach. I also put together my bridesmaid's bouquets, and the mother/grandmother corsages (Amazon has a great arm band for this!). I have more to do but taking a break for the time being!
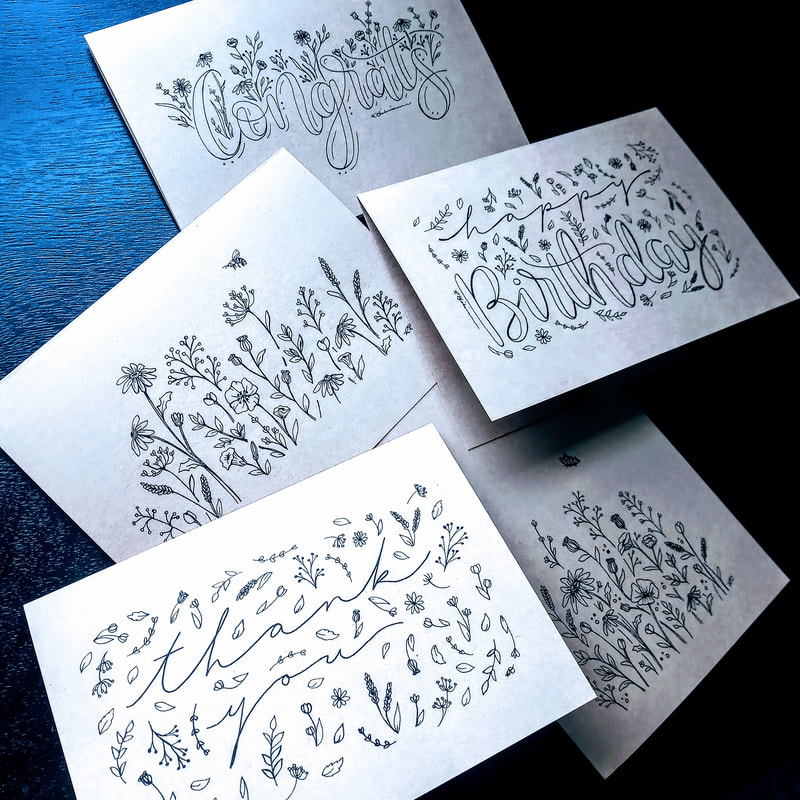
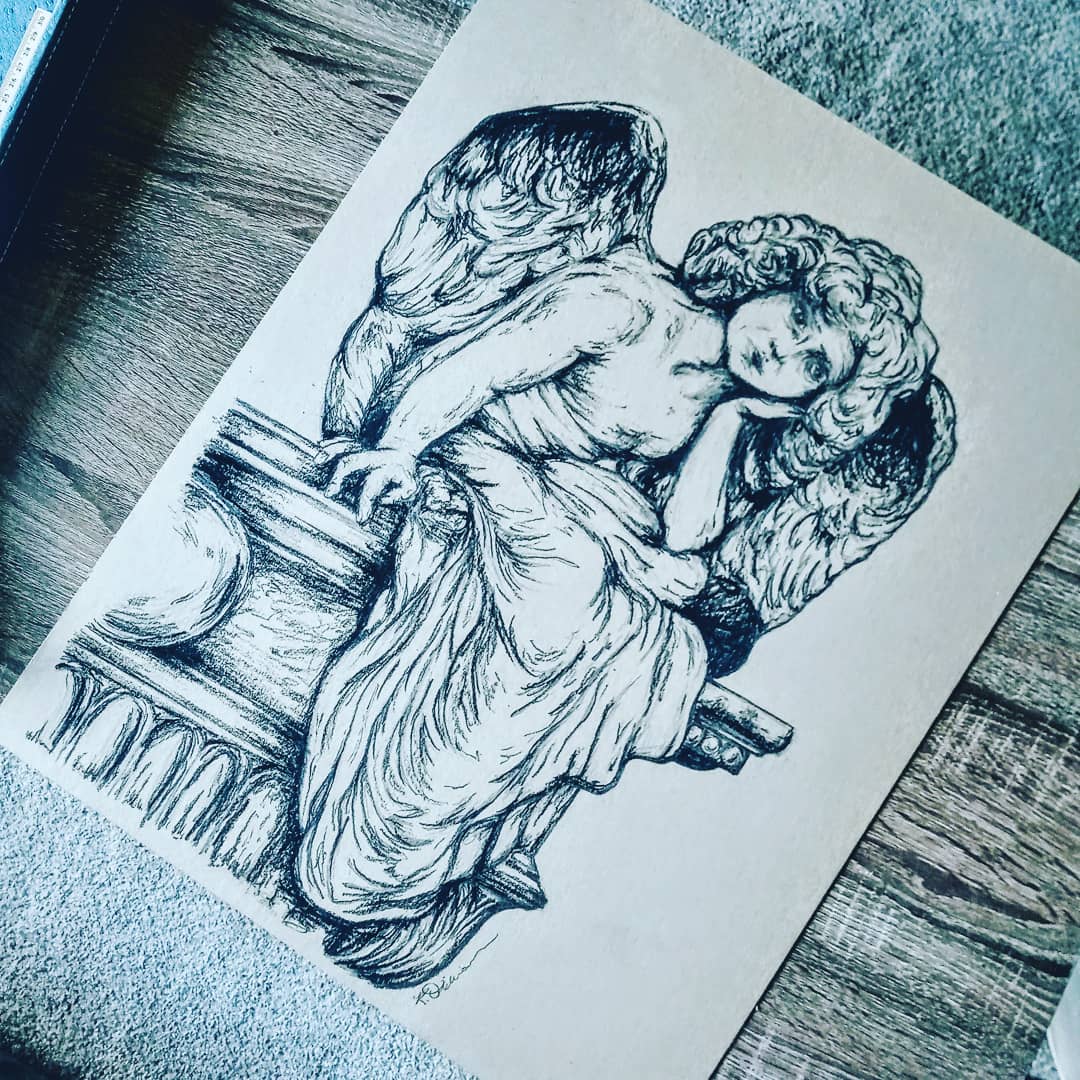
Lastly, I continued with my art projects, I'm always doing something! I tried getting ahead with my dictionary pages but didn't do as many as I'd hope. I created a hand-drawn card set for a couple of friends and loved packaging them up even more. I also worked on a couple of commissioned pieces for father's day and sketched a cemetery angel just because.
It looks like I stayed busy during quarantine but I feel like I should've and could've done more. Although I am back to work, things are quiet and calm during this unusual time. Now that I am back settled into my new-old routine I'll be getting back to doing more projects and sharing my processes with you!
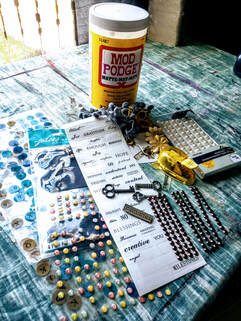
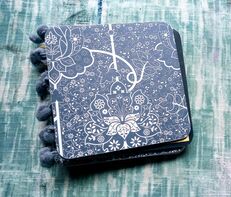
Stay happy, healthy, and safe! 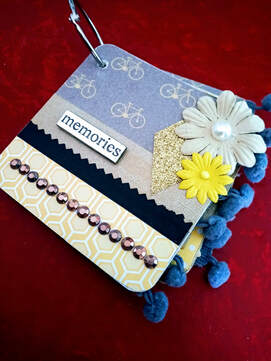 This is a quick project that you can give as a gift with pictures already in it or left empty for the person to fill. They're super cute and itty bitty! Something fun and different to brighten up any day. Supplies:
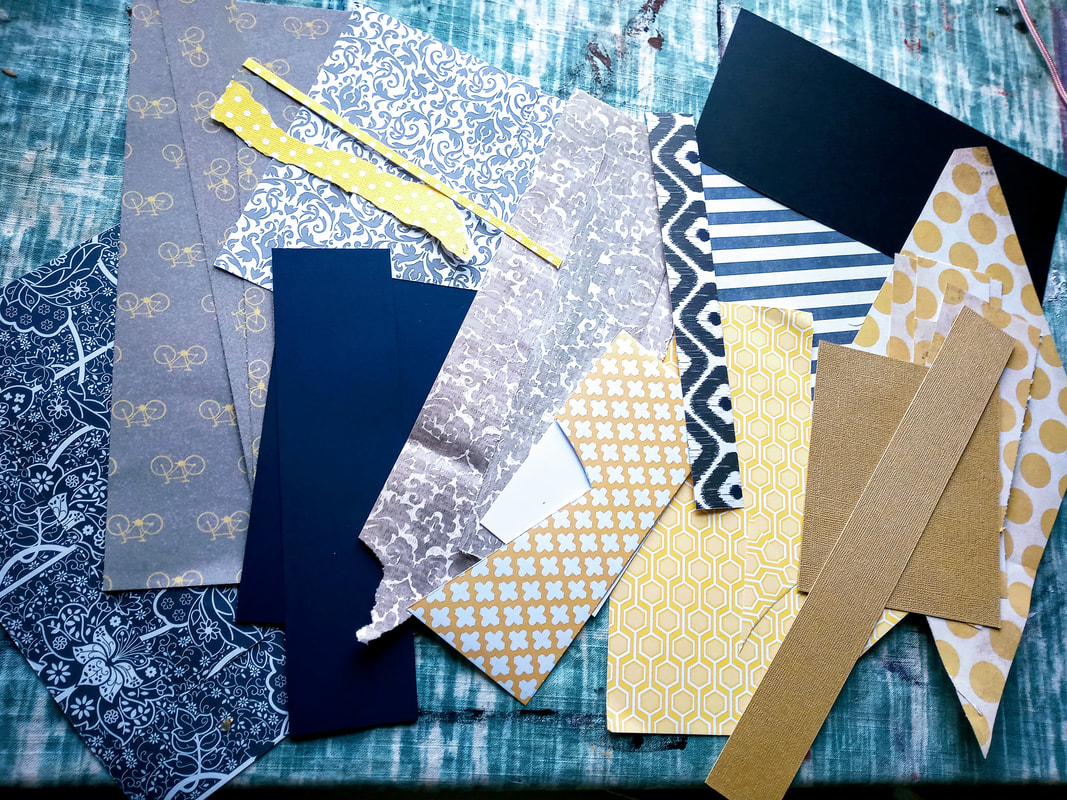
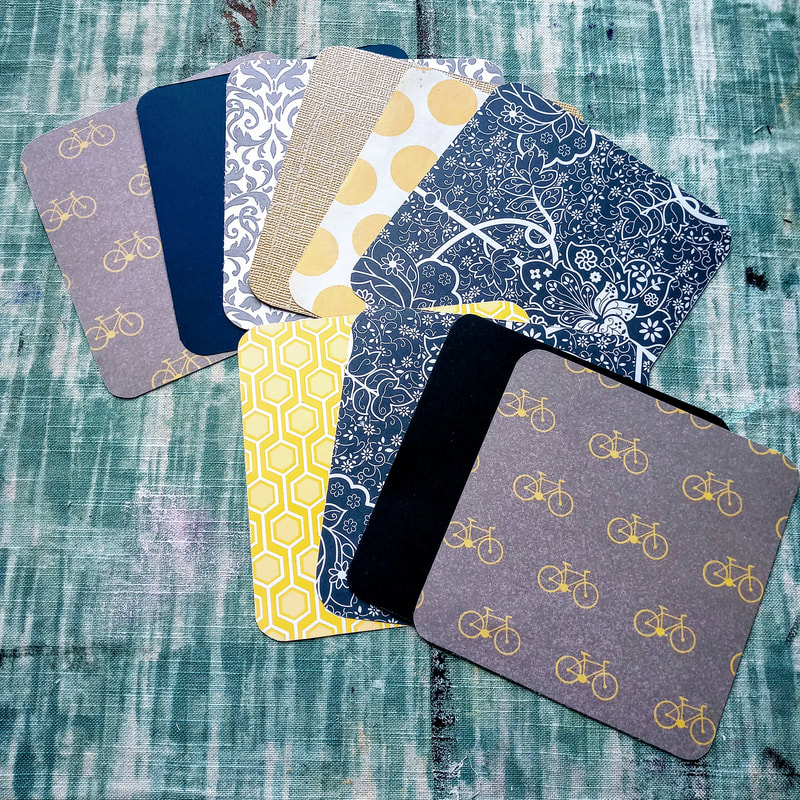
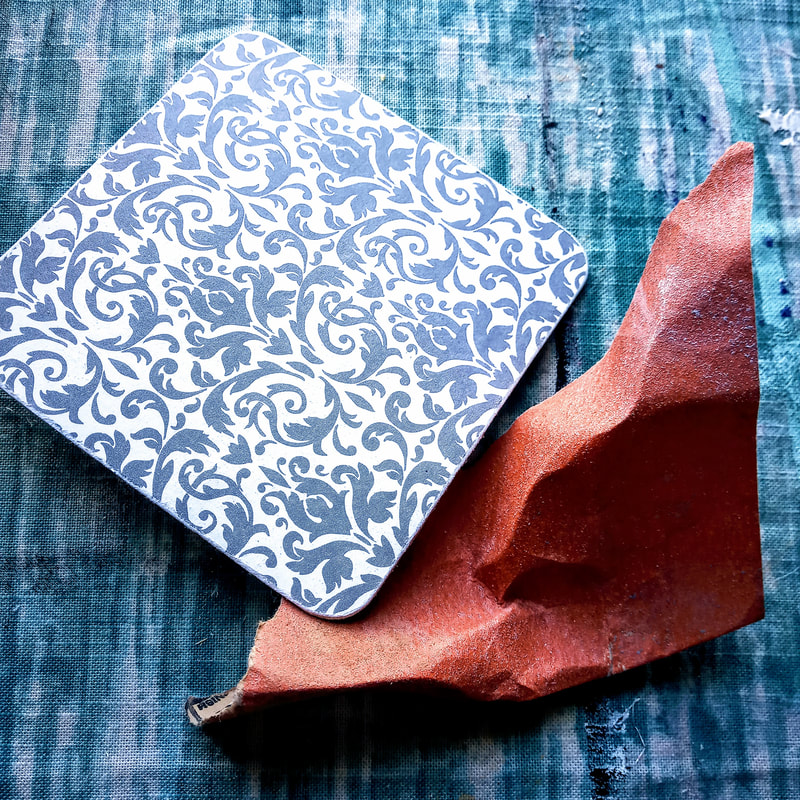
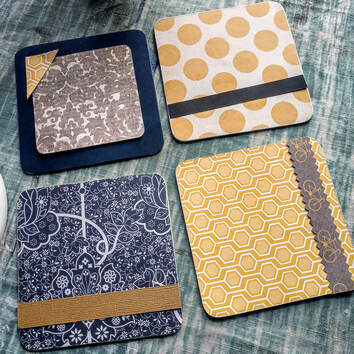
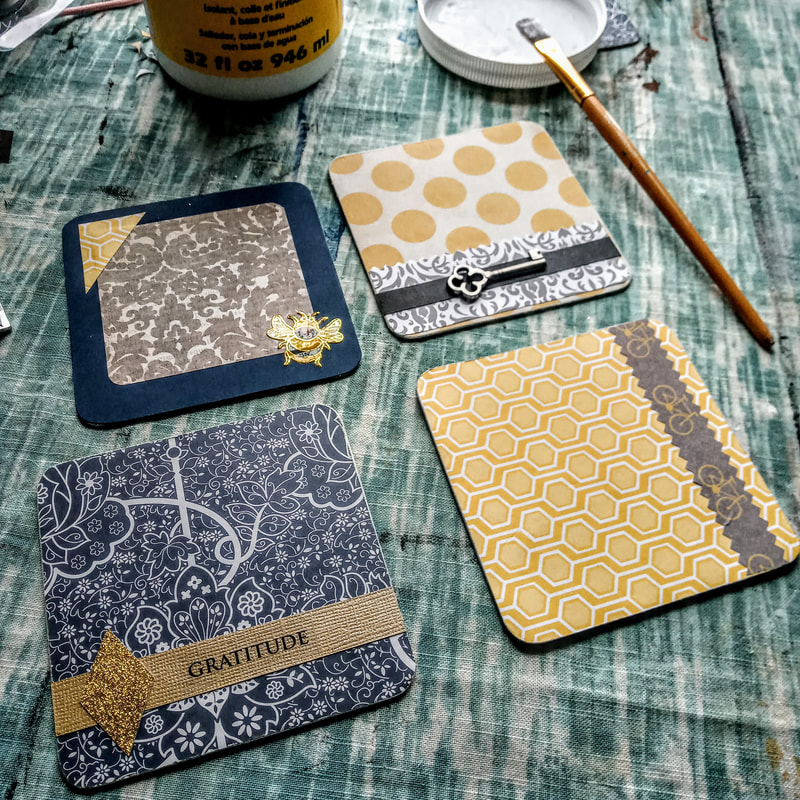
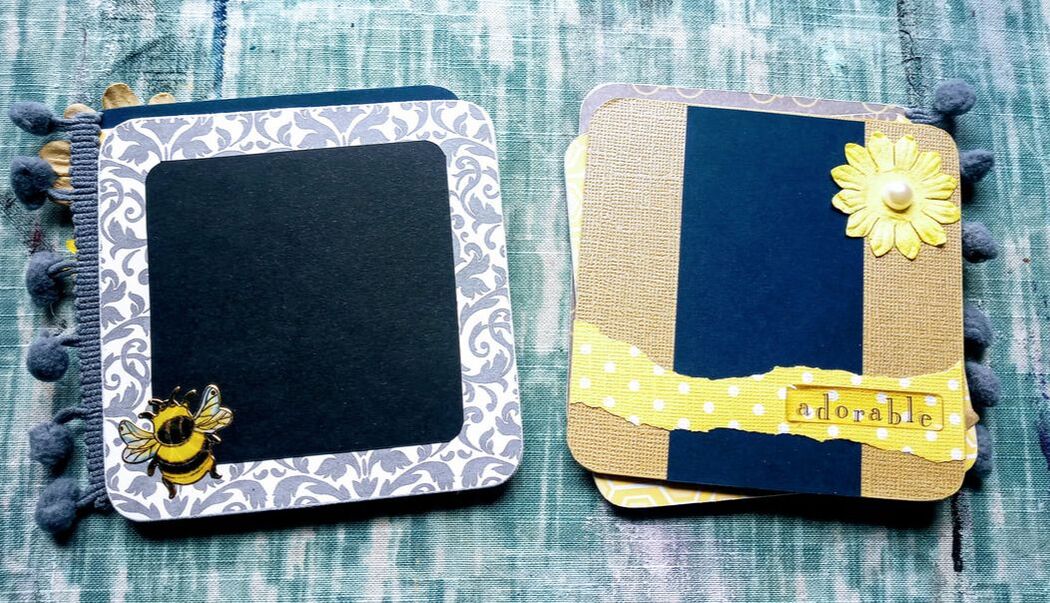
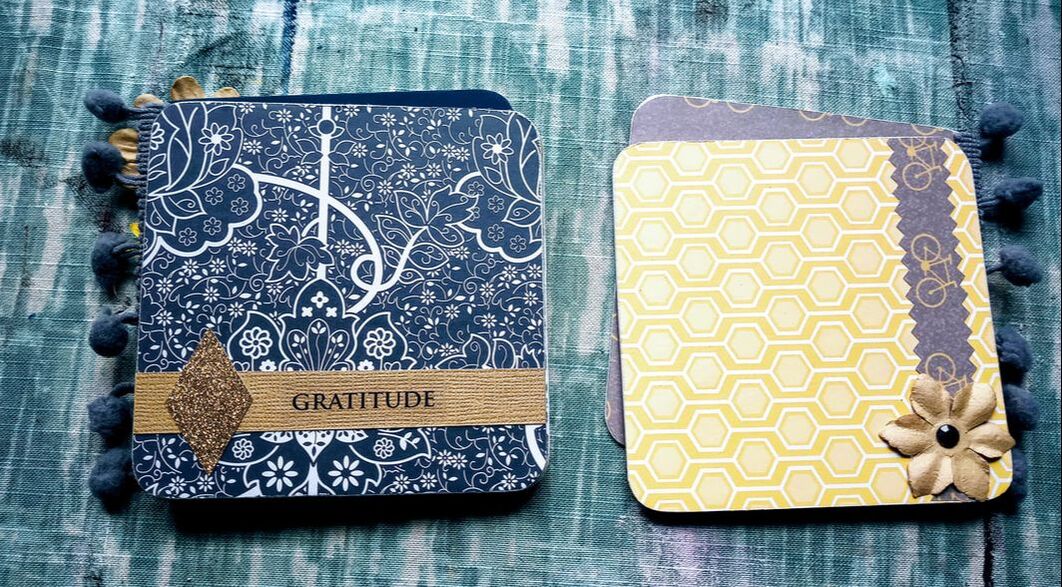
1. The first step for this itty bitty project is gathering all your supplies because there's a lot of potential components. I like to gather everything up that way I have all the supplies necessary near me and ready to go. This is where I picked my color scheme for my scrapbook (I used scraps from my scrap bag) and came up with yellow, grey, and navy. Pretty! I also gathered a pile of random stickers and other embellishments (I had no idea what I would use!).
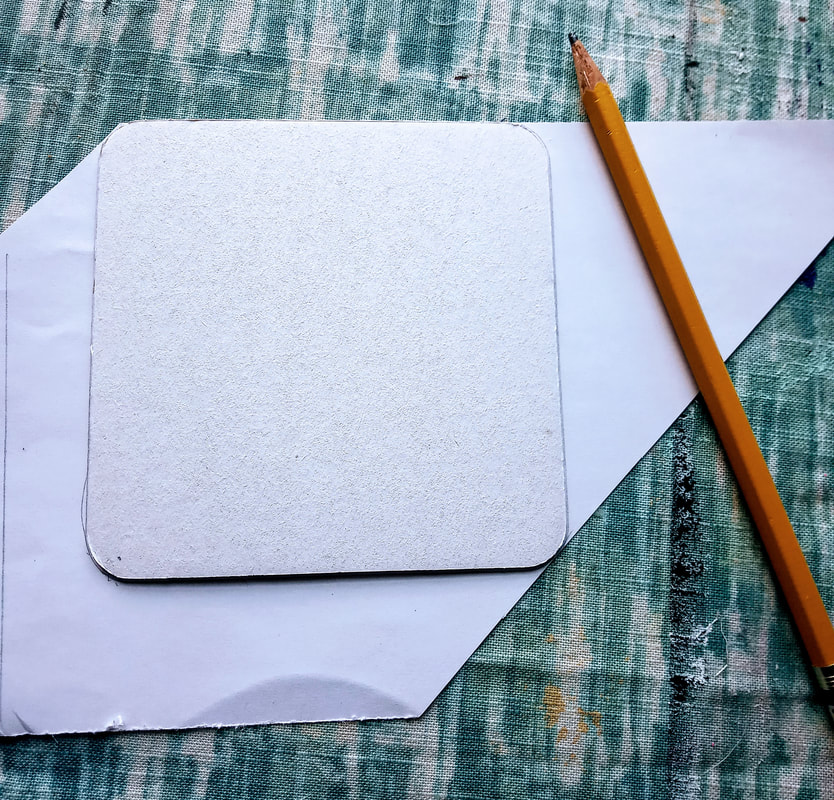
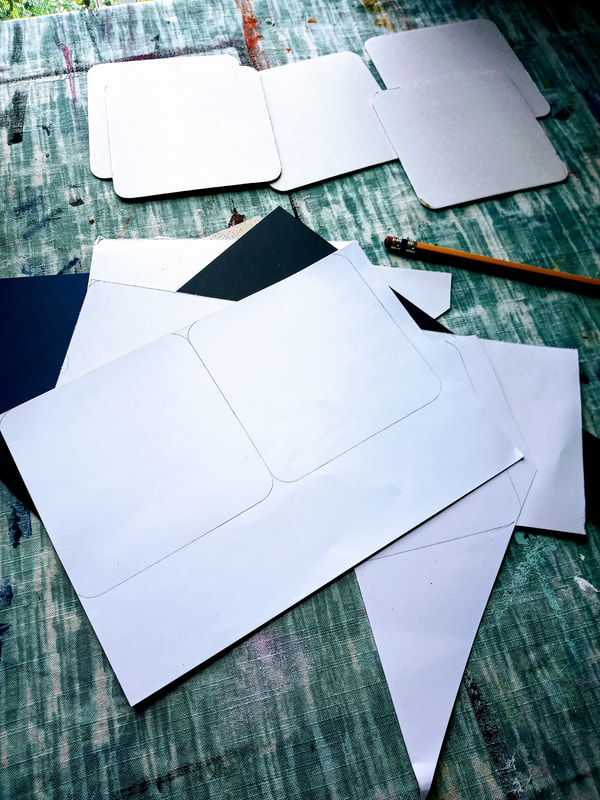
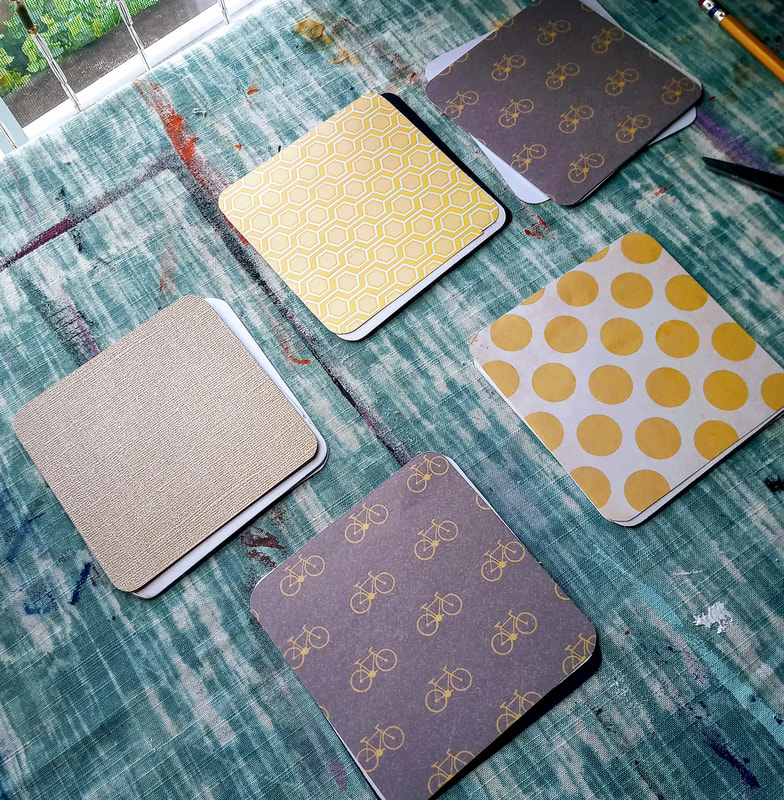
2. I then traced the coasters onto the backs of the scrapbook paper I would use for the main sheets so I could cut them out to size.
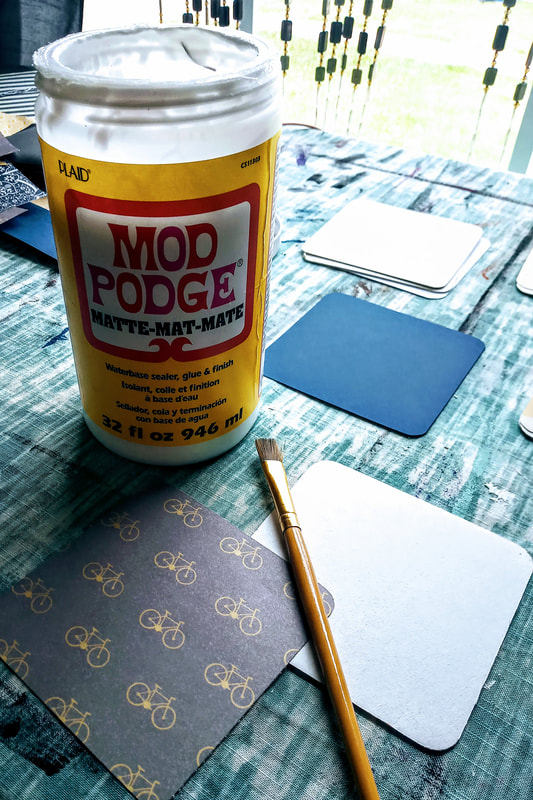
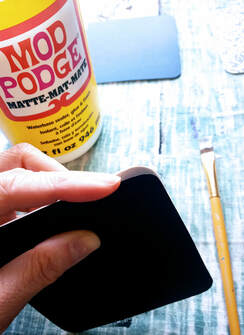
3. I decided the order of the pages that I wanted and laid them out on the coasters. Next, I glued the sheets onto the coasters using the Mod Podge and a paint brush. I did half at a time instead of trying to glue the whole sheet at once, that way I could be more aware of bubbles showing up.
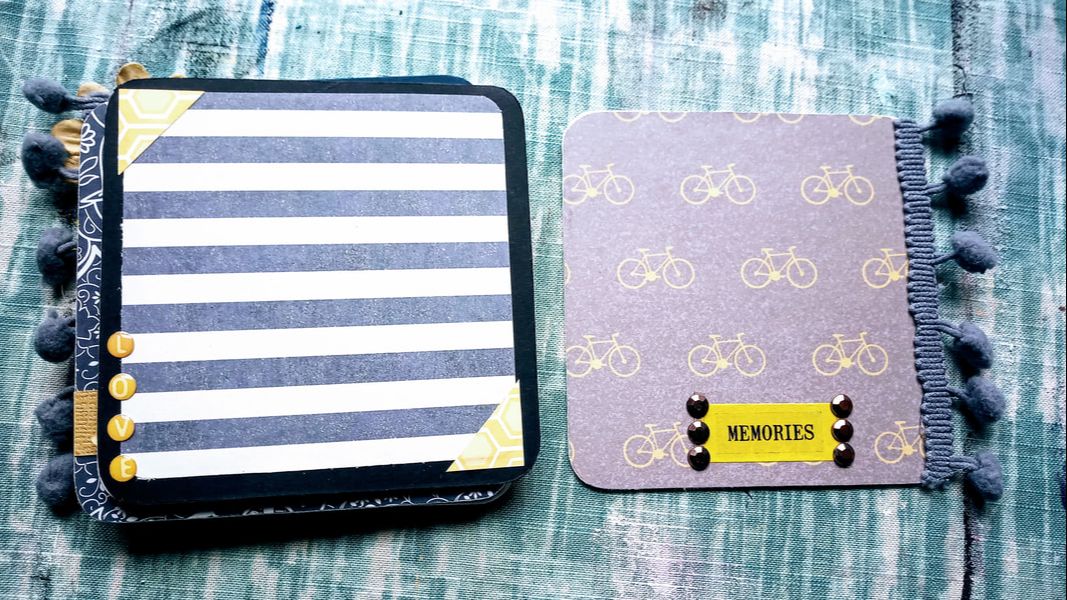
6. Start to plan out your pages by laying out the pieces and parts that you want to include before you officially glue anything down!
7. Mod Podge dries pretty quick so this part of the project will go fast. You can use a hot glue gun for heavier/awkward objects to secure them to the boards.
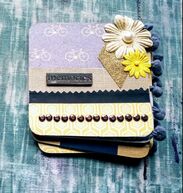
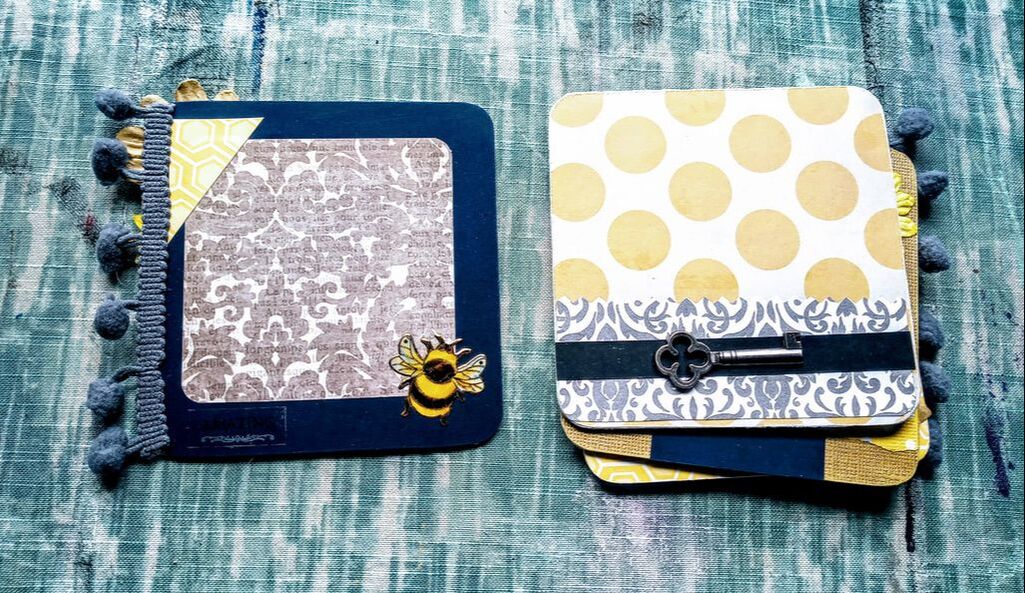
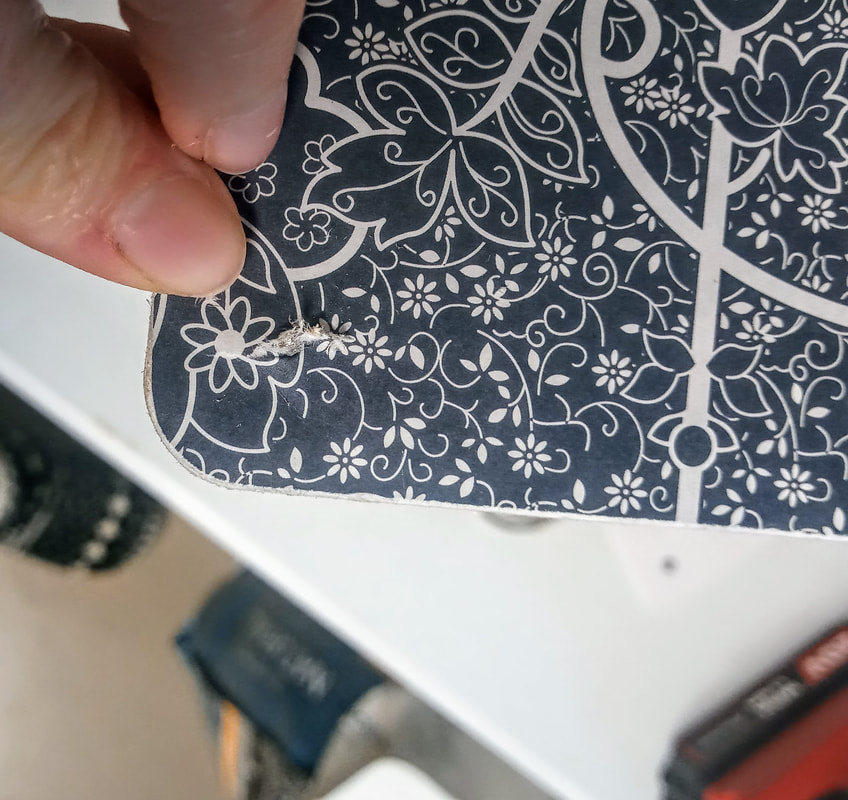
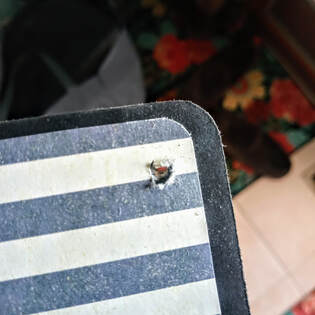
8. Looks super cute, right?! Well, this is where I realized... oh crap... how do I hold it together?! I looked up some ideas and liked the nonrestrictive binder ring option. But, this meant there needed to be holes for the ring to pass through. I decided to use a drill as this was the only option we had to my knowledge that could accomplish this. I think if I had some sort of press that would have been the way to go! I drilled through and it slightly tore up my paper! Ugg not cool!
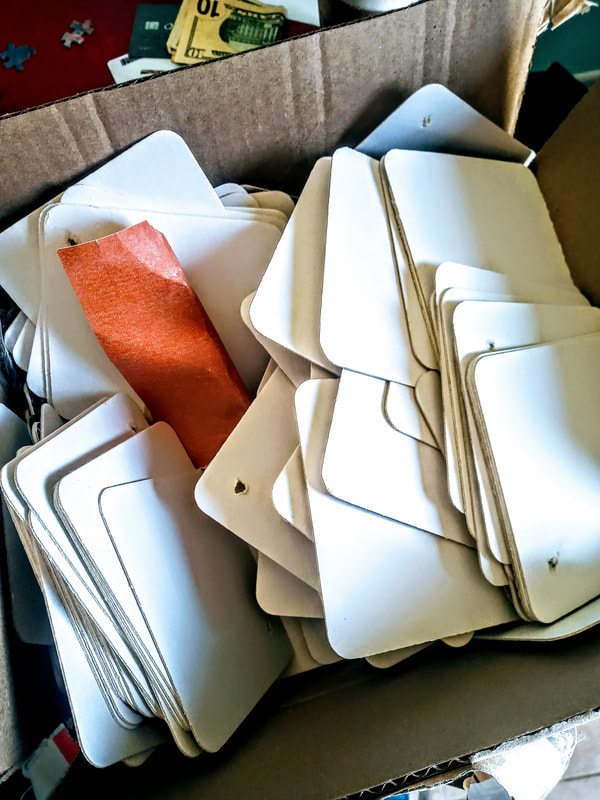
I am going to be doing this for an upcoming work program so decided to create holes in all 125 coasters... yay!... that way they are done ahead of time instead of afterwards. Still, I do not think this is the best option... it seems to tear through the chipboard (these are really flimsy chipboard!) and I encourage you to find a better way if possible :) It still turned out cute overall!
|

Rebecca MyersHey there, I'm Becca, or Rebecca, but not Becky, never Becky, unless you're my family from down south! I'm a simply modern librarian by day and an artist by night. My pursuit is for a simple, happy, healthy, and more fulfilling life! I hope I inspire you to get crafty! Archives
March 2022
Categories
All
|


 RSS Feed