
|
Do you remember that awesome spooky spell book I did back in October? Well, it started a whirlwind for Christmas gifts that I got completely lost in! Ahhh, the wonderful world of altered books! This is the main reason I haven't really posted too much because I was so enveloped in this realm, I didn't have time for anything else. Nothing! If you don't know what I'm talking about, do a general search on Pinterest for "altered books" or "altered book journal" and behold. It is endless. You will get lost in a rabbit hole that you might never get out of! Altered books can be created for any type of person, for any reason. The possibilities are endless and it is so incredibly creative. It is a very messy hobby but the results are beautiful. I also found it stress-relieving. I would go into my art room for hours and come out feeling calm and inspired. Anywho, here is one of the books I created. This one was for my mom who decorates in the vintage/americana type decor. You need to download the file in order to watch it as it is too large for the online restrictions. Enjoy, and Happy Holidays!
1 Comment
Here's a quick project for some easy decor/accent piece for just about any part of your life: window valance, curtain, overlay skirt, bohemian accent, holiday garland, the list could go on and on. I don't know what the official name of this is but let's call it "scrap-fabric garland" for the purpose of the blog! Supplies:
1. Gather your fabric. Do not waste your money by going to the fabric store and buying new fabric, yuck! Hit up the thrift store, garage sales, or your closet instead. You can use just about anything: sheets, curtains, bed spreads, shirts, skirts, tablecloths, etc. As long as you can cut it, you can use it. The best items to find are ones that have more than one color involved. For example, I got a layered skirt for the garland in the first finished image. The underside layer was a mauve-y grey and the top layer was a pink floral - 2 for the price of one! 2. Cut long strips of the fabric. We will be doubling the strands so make it double what you need in length. The fabric will most-likely shed allllll over the place! That's just how it goes unless you want to use pinking shears. 3. Cut a length of strong rope/string to use to tie your pieces onto. It's better to cut extra and trim it down later. You may think that you don't need anything hefty but trust me you do. Once all that fabric gets tied on there, it is much heavier than you think! I strung up my string and even tied the ends up so that it is nice and taught for you to tie the strands right on the string without any headache. 4. Begin tying fabric pieces onto the rope using the larks head knot technique. This is the best because you will get two strands for the price of one and will make the garland look super full and fluffy. 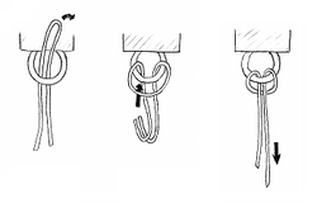 5. Literally just keep tying... and tying... and tying... oh yea, and tying. And then you are done! You can now hang it wherever you wish or wear for a spunky costume, anything your heart desires! Here are my 2 examples below: 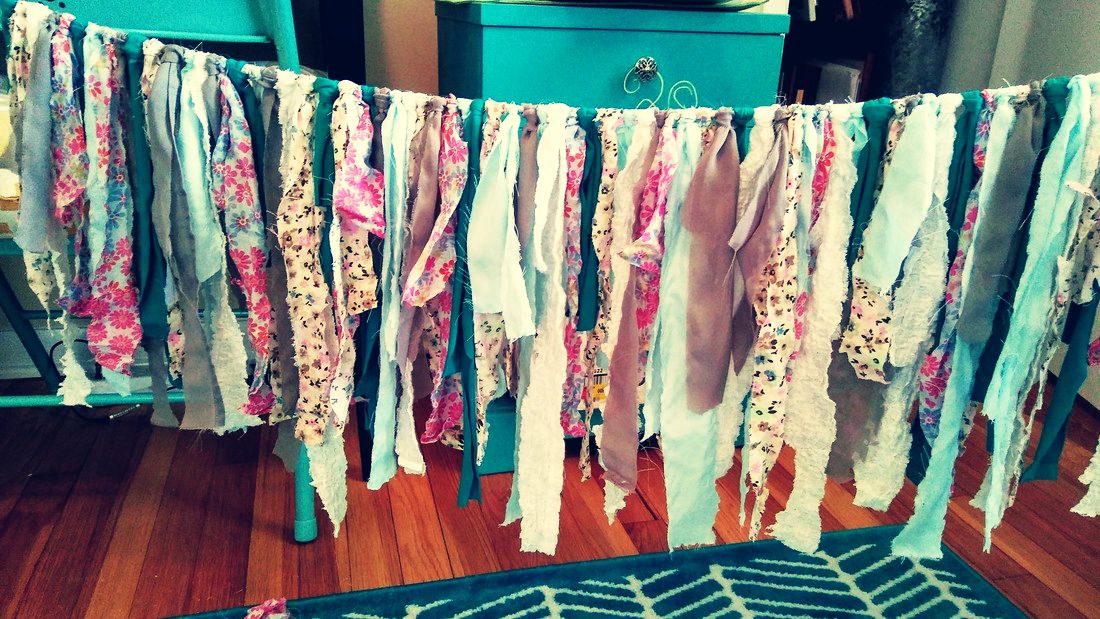
My second garland is a MEGA garland! It's heavy but it's so worth it. I use it to decorate my craft show booth whenever I have one outside. It's so pretty blowing in the wind and I get so many compliments on it! 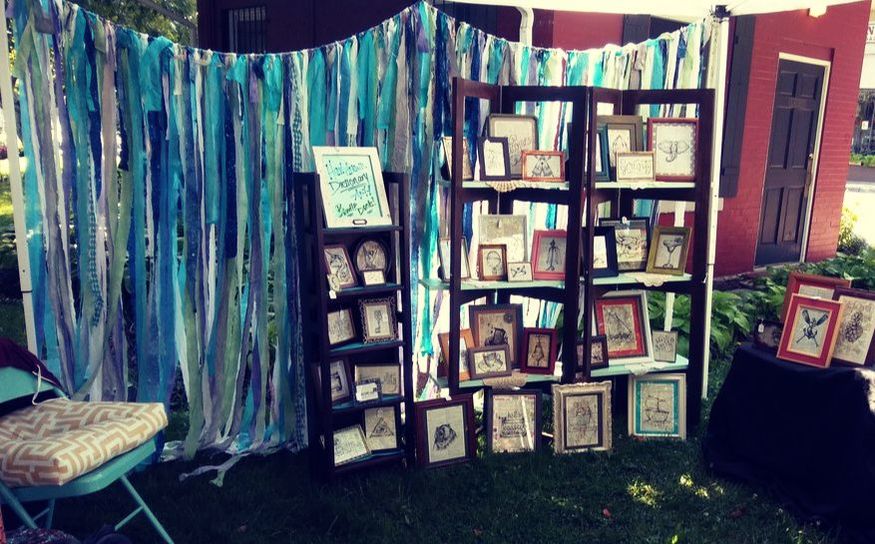 |

Rebecca MyersHey there, I'm Becca, or Rebecca, but not Becky, never Becky, unless you're my family from down south! I'm a simply modern librarian by day and an artist by night. My pursuit is for a simple, happy, healthy, and more fulfilling life! I hope I inspire you to get crafty! Archives
March 2022
Categories
All
|
||||

 RSS Feed