
 Do you have a bunch of scrap fabric that you don't know what to do with? This is the perfect craft to use 'em up! Supplies Needed:
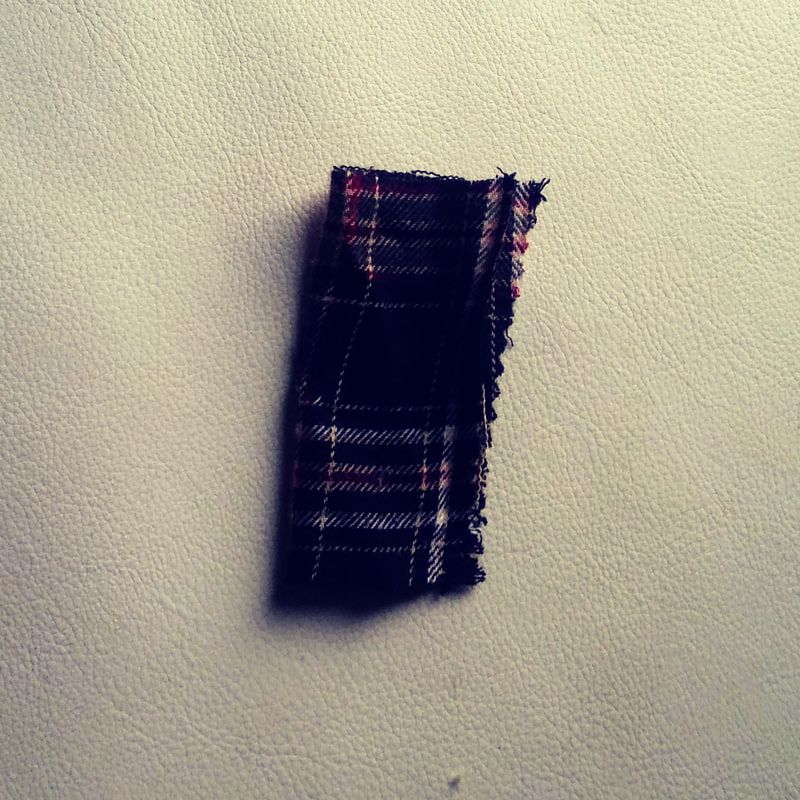
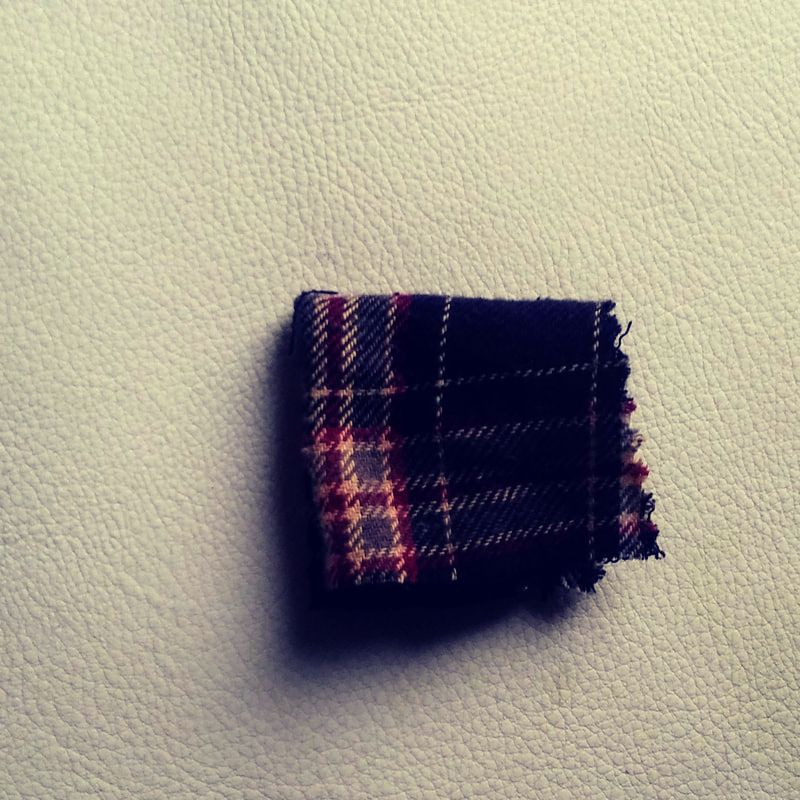
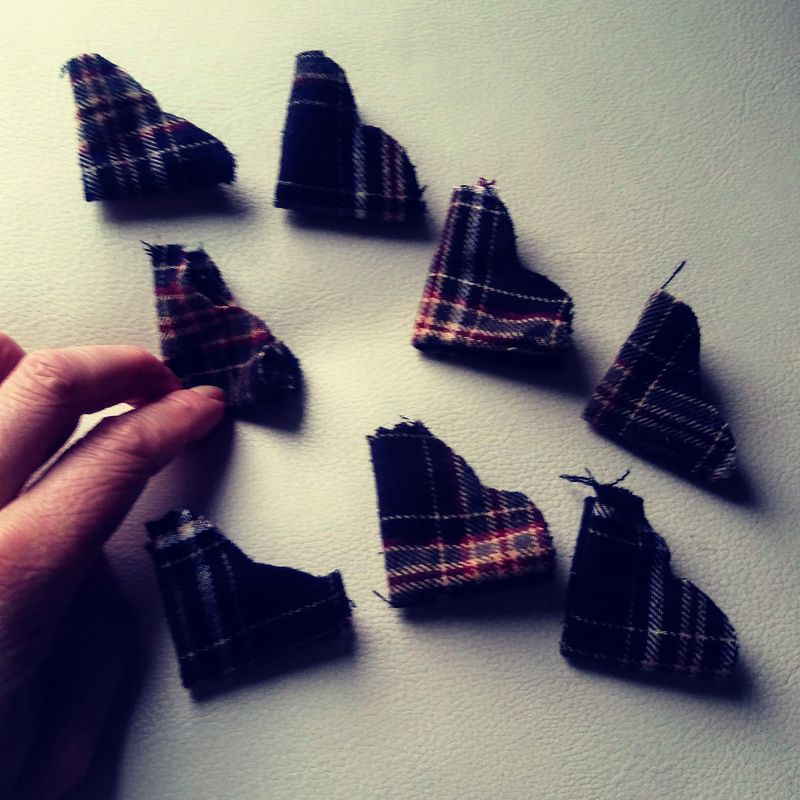
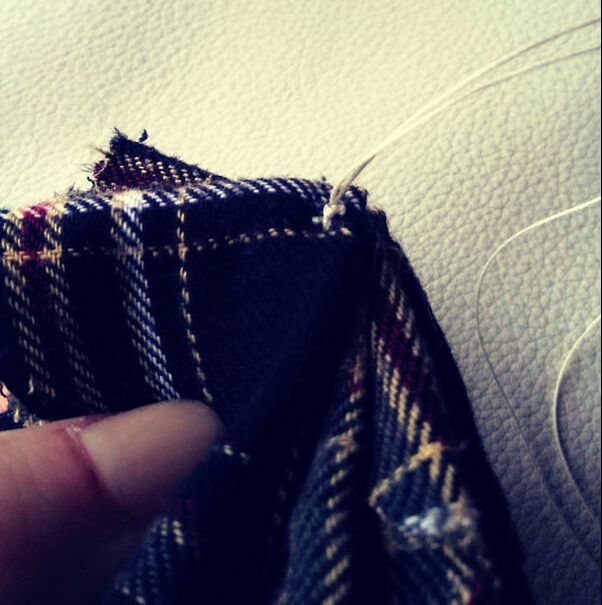
1. Cut 8 3"x3" pieces out of your fabric (or various fabrics) 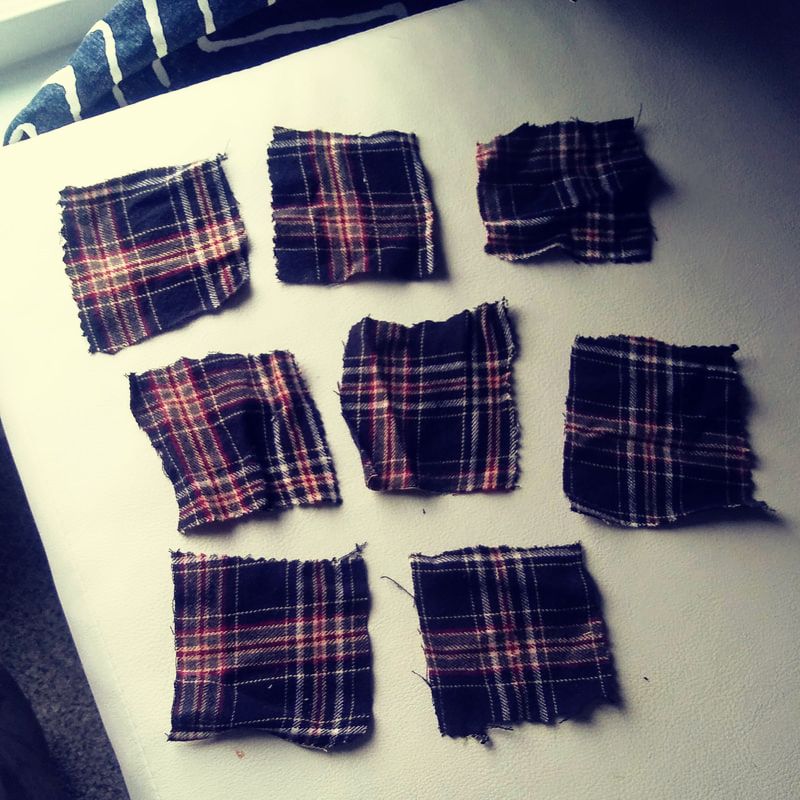 2. Fold each piece in half and then in half again...
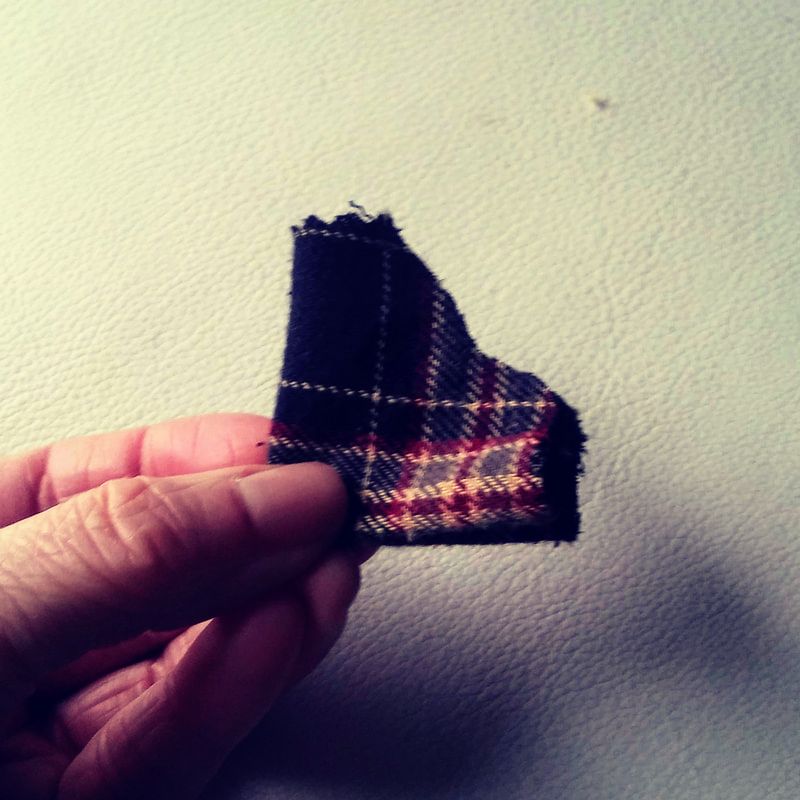
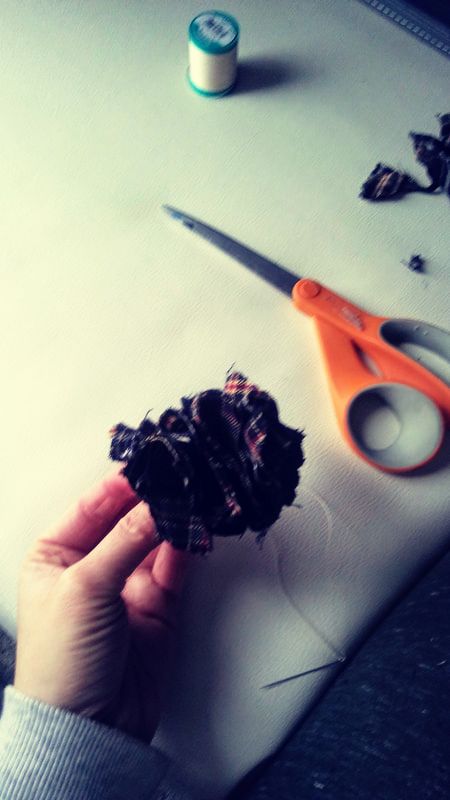
3. While holding the fold of each piece, cut the corner into a rough looking heart shape (I went ahead and did all 8 pieces so they were ready for me and I felt like that really sped the process along!)
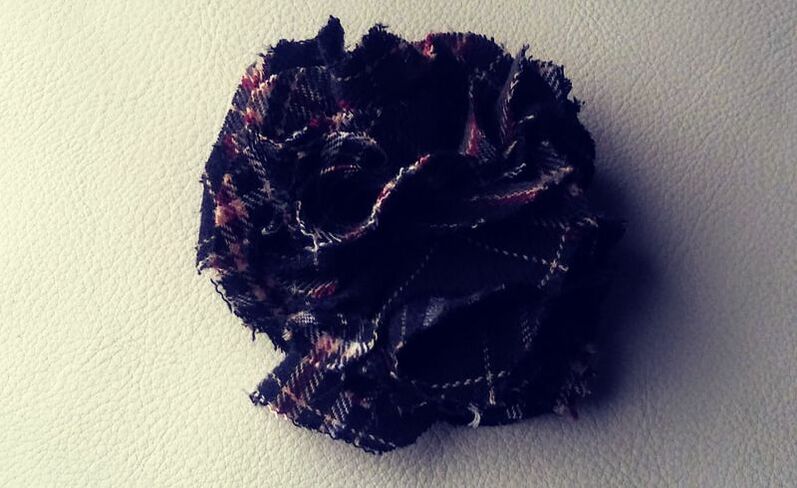
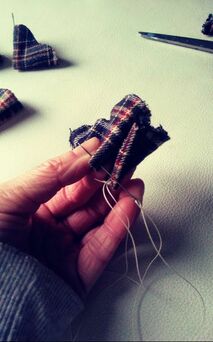
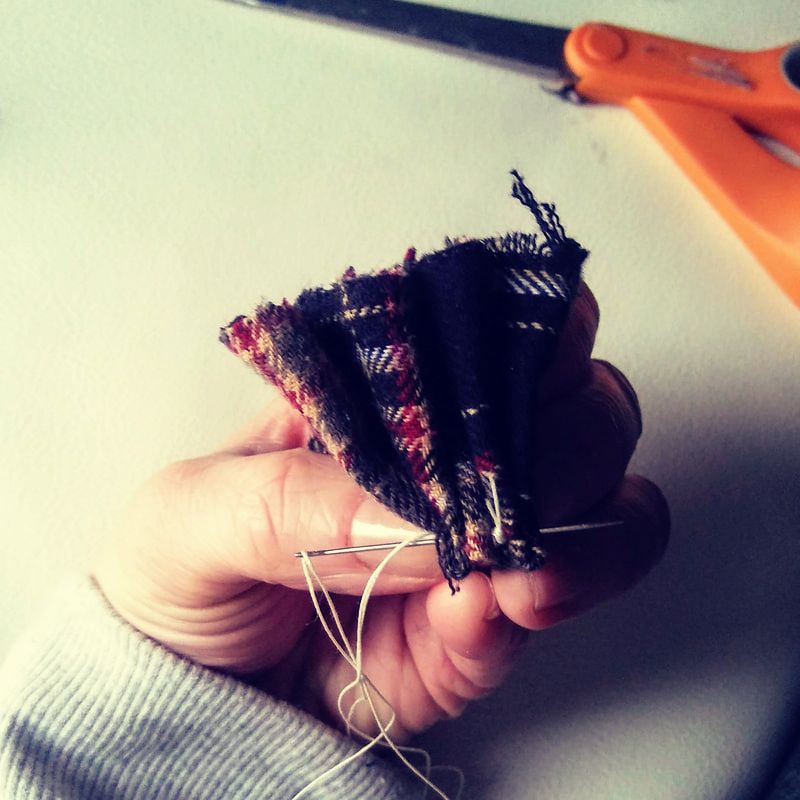
8. As you let go of the corners, you'll see how all of the pieces are now together, but... it needs a little help becoming a flower. Begin "fluffing" up your pieces and spreading them outward. Oooo look at that flower grow! And just like that, your flower is formed and ready for whatever you wish to use it for!
(Side note: the fabric I used are actually pieces of my Papaw's flannel shirts - he passed a couple of years ago. I plan to use my flowers for wedding decorations/bouquets whenever that happens... cough, cough! ...That way he'll be with us on our special day.)
0 Comments
Do you remember that awesome spooky spell book I did back in October? Well, it started a whirlwind for Christmas gifts that I got completely lost in! Ahhh, the wonderful world of altered books! This is the main reason I haven't really posted too much because I was so enveloped in this realm, I didn't have time for anything else. Nothing! If you don't know what I'm talking about, do a general search on Pinterest for "altered books" or "altered book journal" and behold. It is endless. You will get lost in a rabbit hole that you might never get out of! Altered books can be created for any type of person, for any reason. The possibilities are endless and it is so incredibly creative. It is a very messy hobby but the results are beautiful. I also found it stress-relieving. I would go into my art room for hours and come out feeling calm and inspired. Anywho, here is one of the books I created. This one was for my mom who decorates in the vintage/americana type decor. You need to download the file in order to watch it as it is too large for the online restrictions. Enjoy, and Happy Holidays!
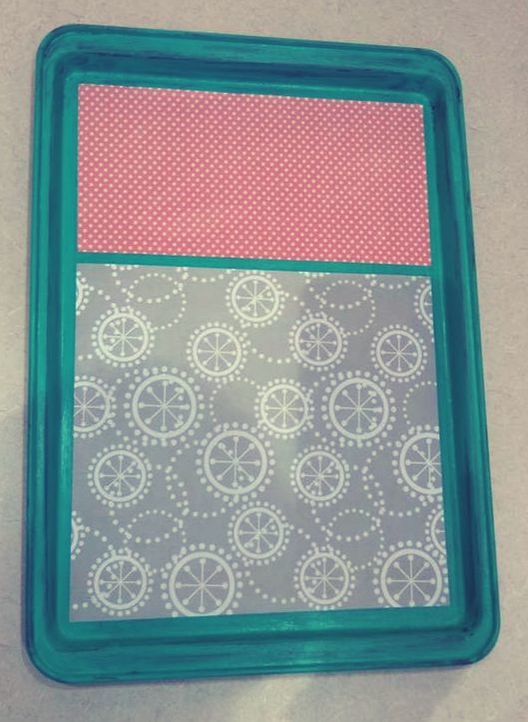
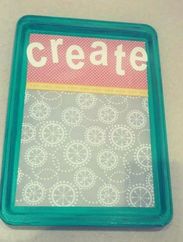
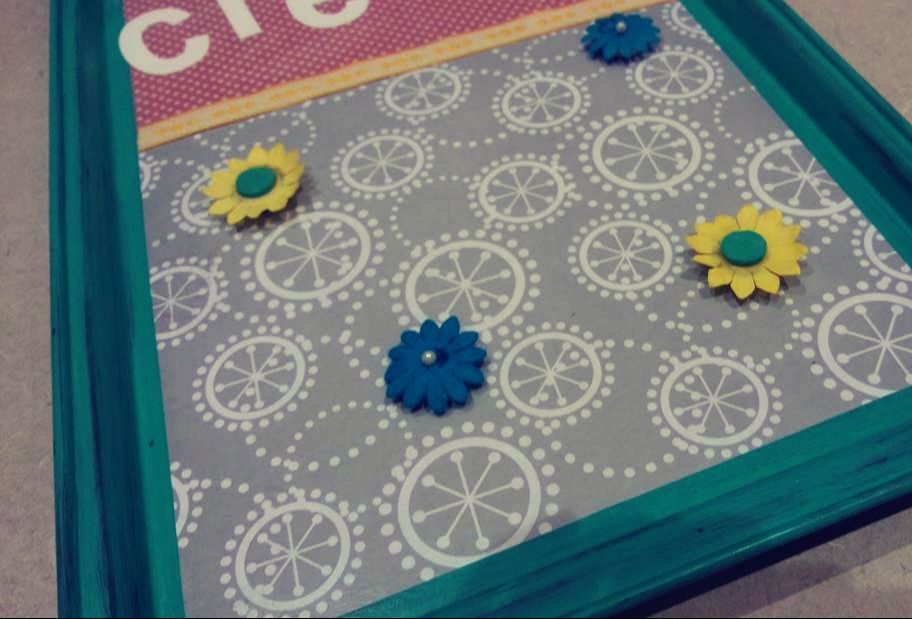
This is a really fun little craft to do with someone of any age. It's a great way to repurpose old icky cookie sheets as well. This would make a great addition to just about any room of your home or a great gift as you can mold it to fit anyone's personal style. Here I go with forgetting to take pictures of every... little... thing yet again, ug! But this one is pretty simple and should be easy to follow regardless. Supplies:
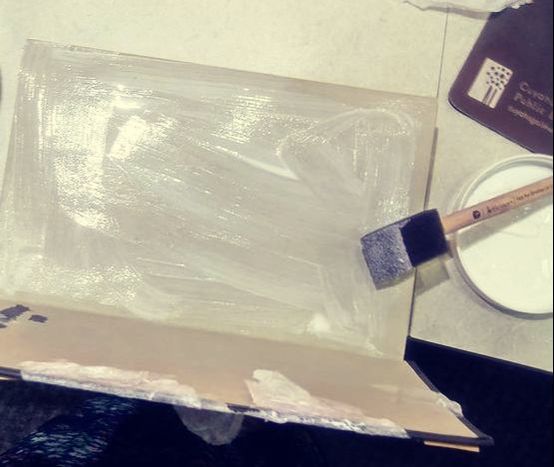
1. If desired, paint your cookie sheet. It seems best to use a spray paint as it will adhere well. I, however, used acrylic paint on an old non-stick cookie sheet. You know what that means right? The paint did not stick great. But, I ended up liking the look and making it "distressed". I also went over the entire paint job with a layer of Mod Podge. If you go this route, and don't use Mod Podge, the paint will scratch right off once dry so make sure you put a layer of some sort over the paint!
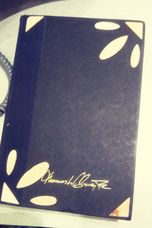
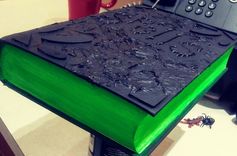
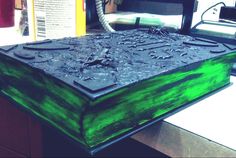
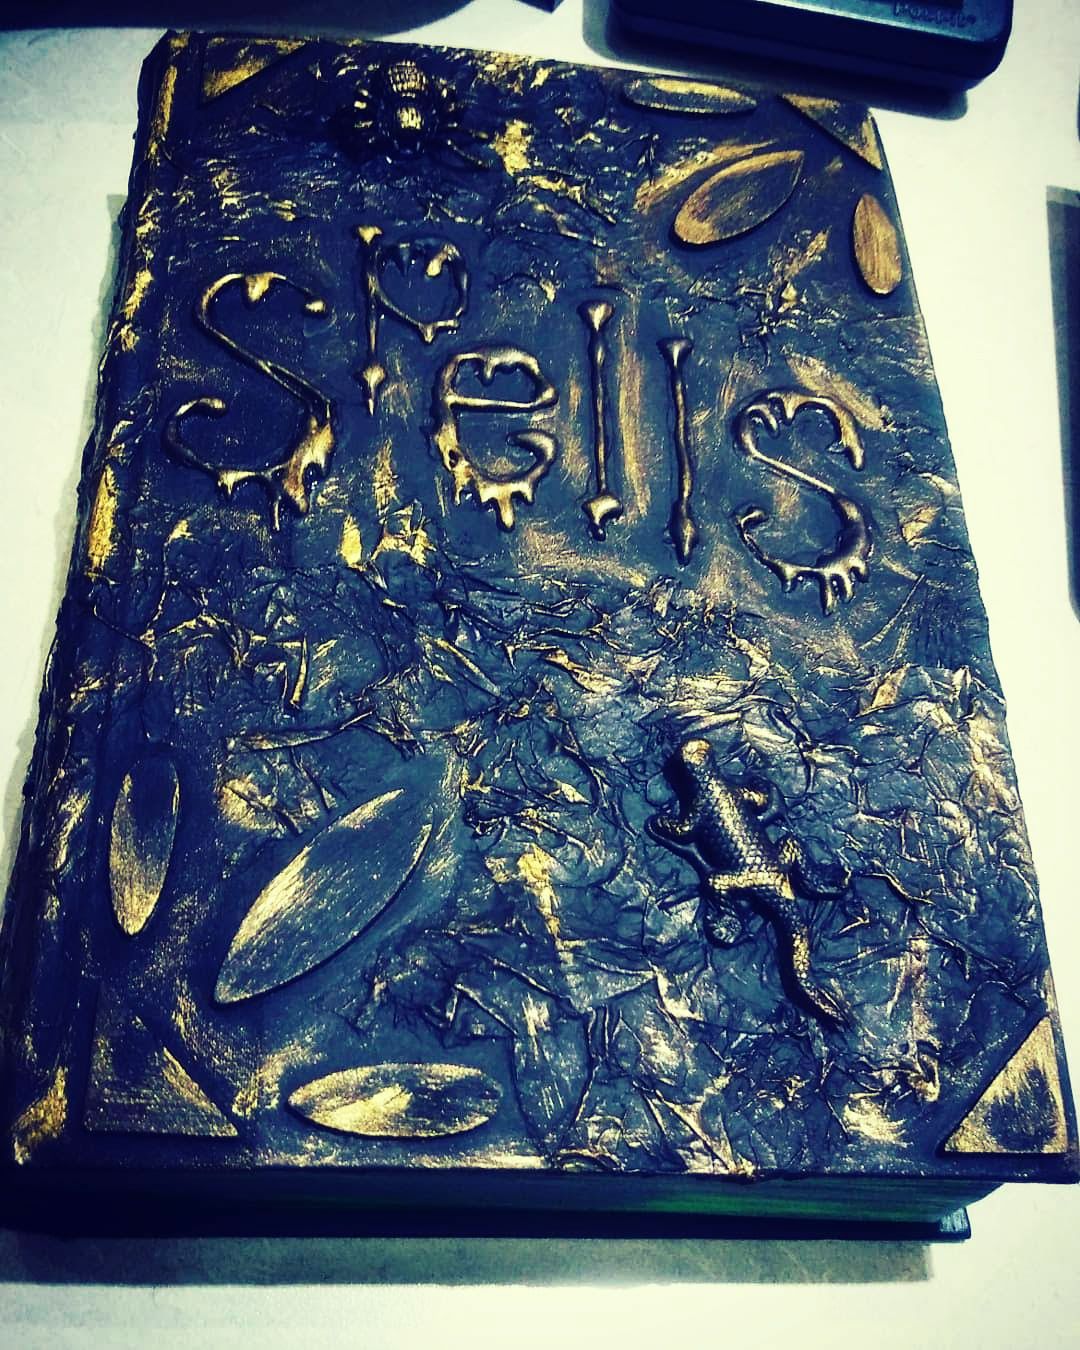
Can you believe it's September already? I love fall, definitely my favorite, but... seriously... where did summer go? In preparation for the coming comforting season what better craft to make than a Spooky Spell Book for your holiday decorating or gift giving!
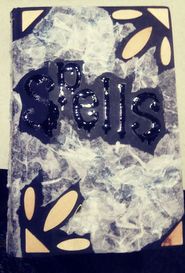
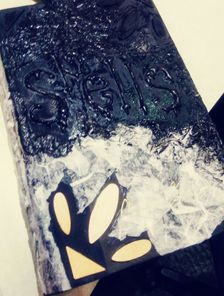
2. Once you like where they are, go ahead and glue them down. I used Elmer's glue for this but you can also use a glue gun of course... it would be much faster too! 3. Next we want to create our creepy title. I went simple and just went with "SPELLS" but you can switch it up and maybe do "HEXES", "CURSES", etc. I created my letters by just using the hot glue gun and "writing" the letters out. However, you could get wood letters and put them on the cover just like you did with the first pieces. Up to you. If you go with the glue technique, do NOT, use Elmer's glue..... awful! It will take forever to dry and will barely be raised - stick with the hot glue and work relatively fast. 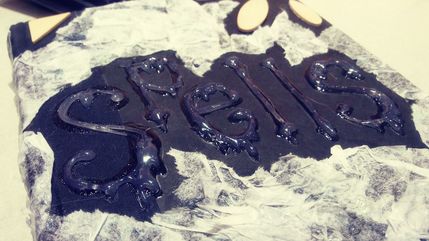
6. Next, you can add your creepy crawlies! Ooo! It took me a while to figure out what I wanted to do. I could not decide if I wanted to paint over them or not! Decisions, decisions. I decided the paint over option and was very happy I did. Glue your guys on with hot glue and they will stick great! Then just paint right over them as well. 
8. After the glue is dry, you can then paint over the exterior of the pages. I painted mine a neon green, super fun! But I think purple, red, and orange would also look awesome. I also took my brush from the black paint and lightly brushed over the green to give it a distressed look.
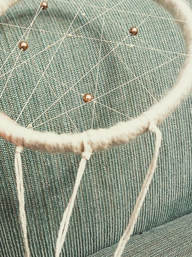
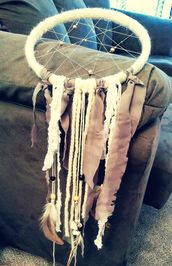
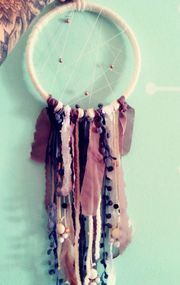 I have always loved dream catchers. I once had this mega one that was so awesome in my tye-dye pre-teen bedroom! I have had others throughout the years and have made a variety for programs or just for fun. The one I show here I made for my grandma who was suddenly having a ton of bad dreams that were keeping her up throughout the night. The same night after hanging the dream catcher up above her bed she had a much more positive dream rather than something scary and morbid. Hopefully your dream catcher can provide you some relief as well or just be an eye-catching decoration. Supplies Needed:
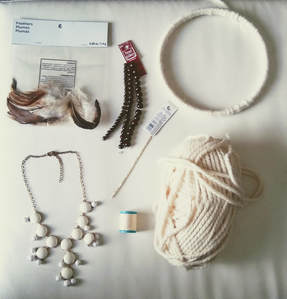 1. Start by tying an end of your material to the hoop securely. Then start wrapping your material around the hoop. This is where your first bout of patience will come in. Keep feeding your spool/skein in and out of the hoop until it is covered in its entirety. I think this took me a bout a half hour... 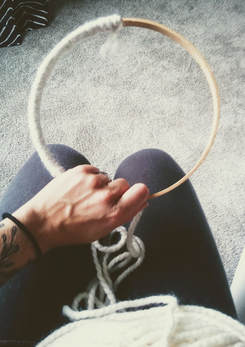 2. Finish it off by tying the end somehow to where you started.. I know, not the best description but that's all I got. I kind of looped mine around and tied it... and then tied again... and again. You definitely do not want it coming undone. (If you want extra security you could also glue the material as you wrap it) 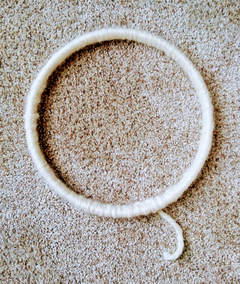 3. Here's where you want to add your webbing. If you don't want beads in your webbing then this is going to be super easy for you. However, If you do want beads, this will most-likely be a little more time consuming. a. Firstly, go ahead and act like you are forming your webbing so you can see how much of your yarn/thread you are going to use. Tie an end of the material you are using to the same area where you tied the yarn from step 2. Form the webbing by crossing back and forth from opposite ends of the hoop to start forming little triangular shapes. When you get to the amount you want, go ahead and cut the yarn so the rest of it doesn't get in your way and you can thread your beads on. b. If you are not using beads, you can just tie the webbing off wherever you started and you're ready to move on to step 4. If you are adding beads however, this is where patience round 2 appears. For the beads I used, the holes were much larger than the thread I was using and I knew they would not stay in place once they were strung on the web. So, to get around this, I tied little knots before and after each individual bead so that they would not move. Fun right? This took forever but I wanted the beads on there. I tied them on at random and started wrapping the webbing again until I was happy with where everything ended up and tied it off at the end. 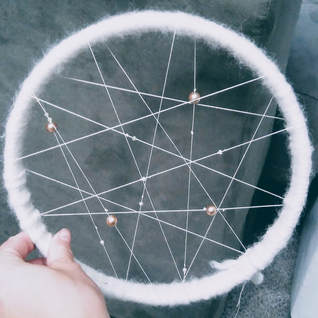 4. Now it's time to add the hanging components which, to me, is the fun part because I like to add "different" things to spruce it up/make it more interesting. You can add just about anything: ribbon, leather, feather, yarn, twine, jewelry pieces, beads, lace, etc. etc. a. Tie these pieces by using a larks head knot (this is how I always tie items on a dream catcher because you get two strings for the price of 1!) Just keep adding more and more of whatever you wish, tying in the same way. The more you add, the more texture/depth the dream catcher will have! 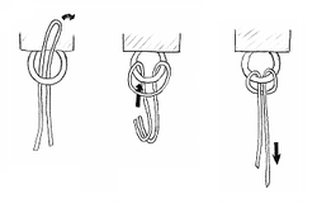 b. Once you get your strings/ribbons tied on you can then add beads, feathers, and other embellishments. Sometimes you have to finagle these items on and tie them in weird/random ways to make them work!
c. Keep adding and adding until you are happy with the amount of embellishments. You can see in the below image a better view of the items I added. The cream-colored charm pieces were from a broken necklace so they made for a perfect free addition! 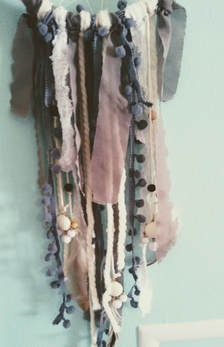 5. Lastly, if desired, add a hoop for hanging by doing another larks head knot and tying it off. This can now easily be hung on a nail head or hook. You can also leave it without this, as the hoop itself can also rest on a nail head on its own, it is up to you! 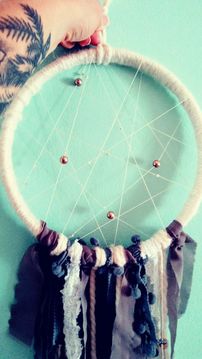 6. Hang your dream catcher up above your bed for a restful night's sleep!
Or use it to decorate just about any room of your home! Enjoy! 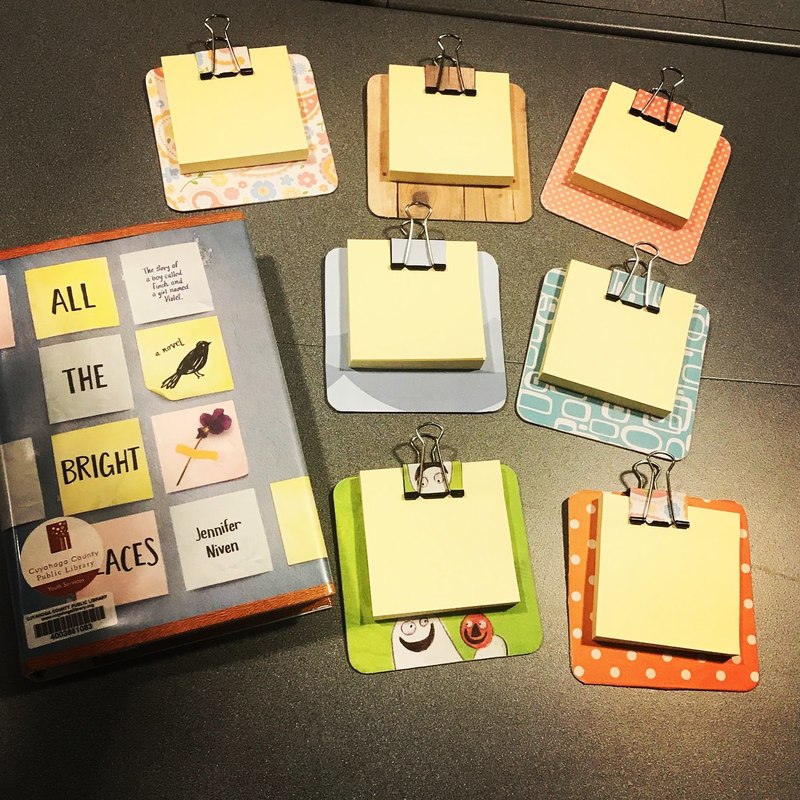 I'll keep my first posted craft short and sweet for y'all. I was planning on including the website link where I found this but, like many things on Pinterest, the site was faulty and is now blocked, great.
So, for whoever made this originally, I give you the credit, whoever you are. This is an adorable quick and easy craft that pretty much anyone can do. Thank you for sharing your creativity with us so we can spread it around. Supplies:
Real simple, are you ready?...
I created mine for my "Discuss & Design: Millennial Book Discussion" to go along with the cover of All the Bright Places by Jennifer Niven Hopefully the steps are easy to follow, I don't have step by step photos unfortunately but will strive to do that for future posts, don't you worry! |

Rebecca MyersHey there, I'm Becca, or Rebecca, but not Becky, never Becky, unless you're my family from down south! I'm a simply modern librarian by day and an artist by night. My pursuit is for a simple, happy, healthy, and more fulfilling life! I hope I inspire you to get crafty! Archives
March 2022
Categories
All
|
||||||||||||||||||||||||||||||||||||


 RSS Feed