THE ART ESCAPE
  • Home
  • About
  • Artwork
    • Book Page Art
    • Custom Portraits
  • Find Me
  • Order
  • Classes
Picture

Trinket Box

7/26/2021

0 Comments

 
Picture
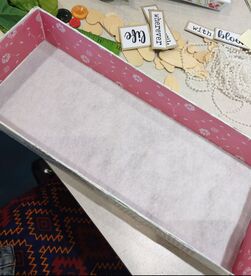
I don't know if you saw my post on making Harry Potter wands but they were pretty awesome sauce if I do say so myself! The box I used for them came from a gentleman at work who likes to give me random things to use for my crafts. Well, he gave me some of the same style of box but they were double the width (if that makes sense). So I had to come up with something to do with them! I have a lot, so it will take a few different crafts to use them up, but, to start, I came up with this simply pretty trinket box! 
Supplies I used:
  • Cardboard box
  • Book pages 
  • Mod Podge
  • Paint brush for glue
  • Scrapbook pages
  • Scissors
  • Printed quote
  • Vinyl/fabric piece
  • Various embellishments
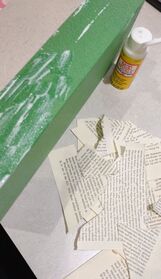
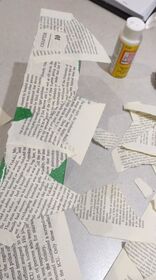
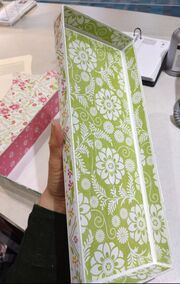
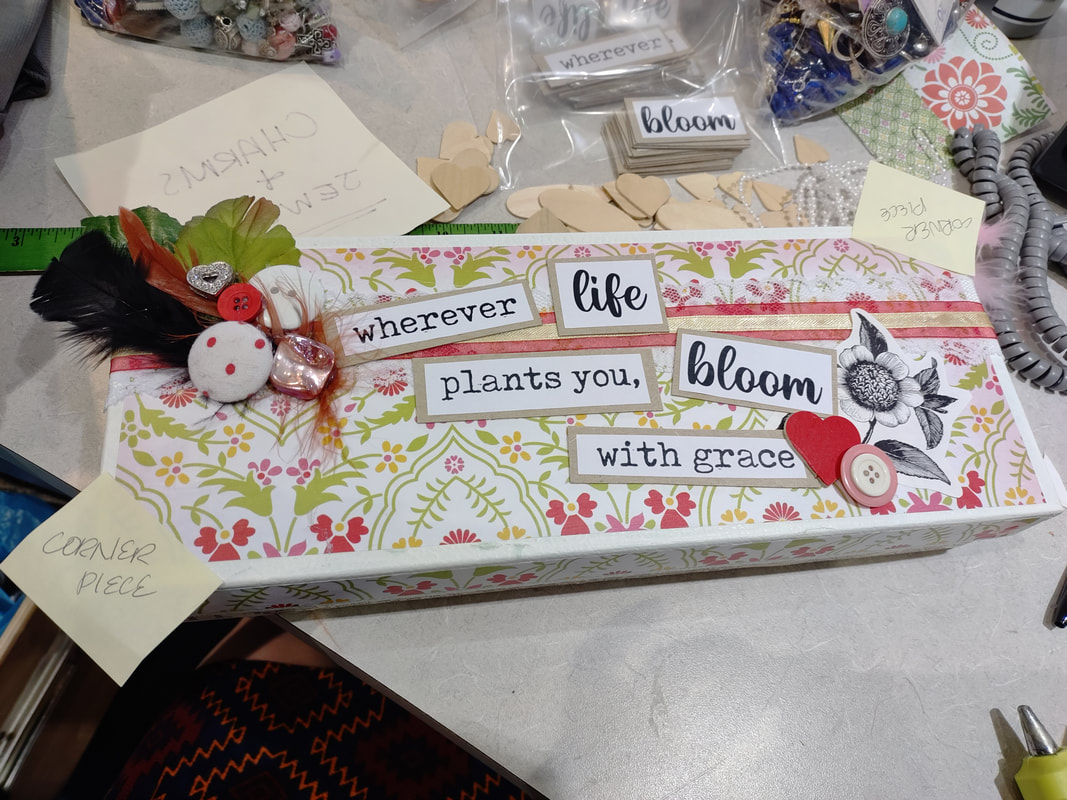
I had some of our staff at work help me with the prep for these. I had them paint the outside and inside of the lid as well as the inside of the box white. I did this because I knew the paper I was going to be using on the top wouldn't completely cover the green and I thought was a little too much to show through and thought white would be a softer choice. 
Picture
Picture
If you noticed, I didn't say the outside of the bottom part of the box. That is because I used a decoupage method with book paper to cover it instead! I ripped up pieces of old book pages that were nice and yellow looking! Then I put a think layer of mod podge on the box, section by section, and laid the pages into the glue. I brushed over the pages as well to make sure they stuck to to the box completely. I also covered the bottom of the box completely with book pages as well. 
Next, I chose a few different types of scrapbook paper that had fun and bright patterns. I measured and cut them into pieces that could be quickly glued onto the different areas. I started with the inside of the box, as I figured that'd be the easiest, and again, laid down some mod podge to glue the paper on. I had this cool vinyl fabric (also from my donating buddy) which on the back had a soft fluffy backing and decided I wanted that for the inside of my box. I glued this down with hot glue to make sure it stayed in place unless someone purposely rips it out! 
Picture
Picture
Picture
I decided to cover the outside and inside of the lid with two different types of paper which I thought was really fun. If you attempt this project or something similar, make sure when you glue paper down that you get the air bubbles out and really smooth it out with something! It will settle better when it dries verses what it looks like when wet!
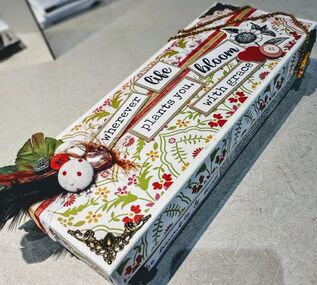
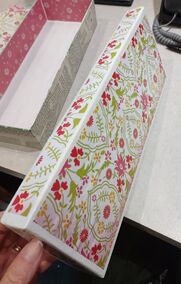
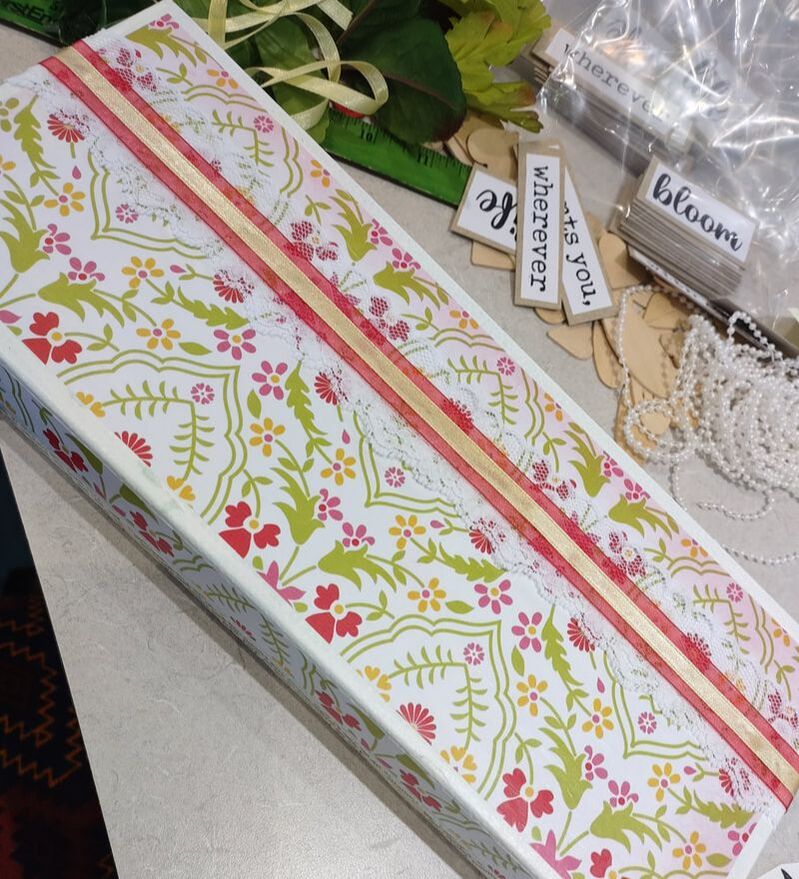
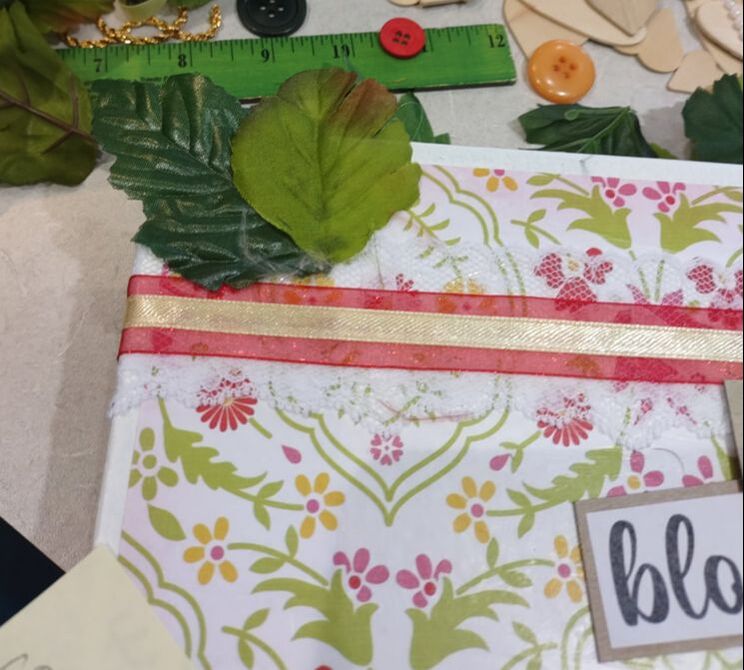
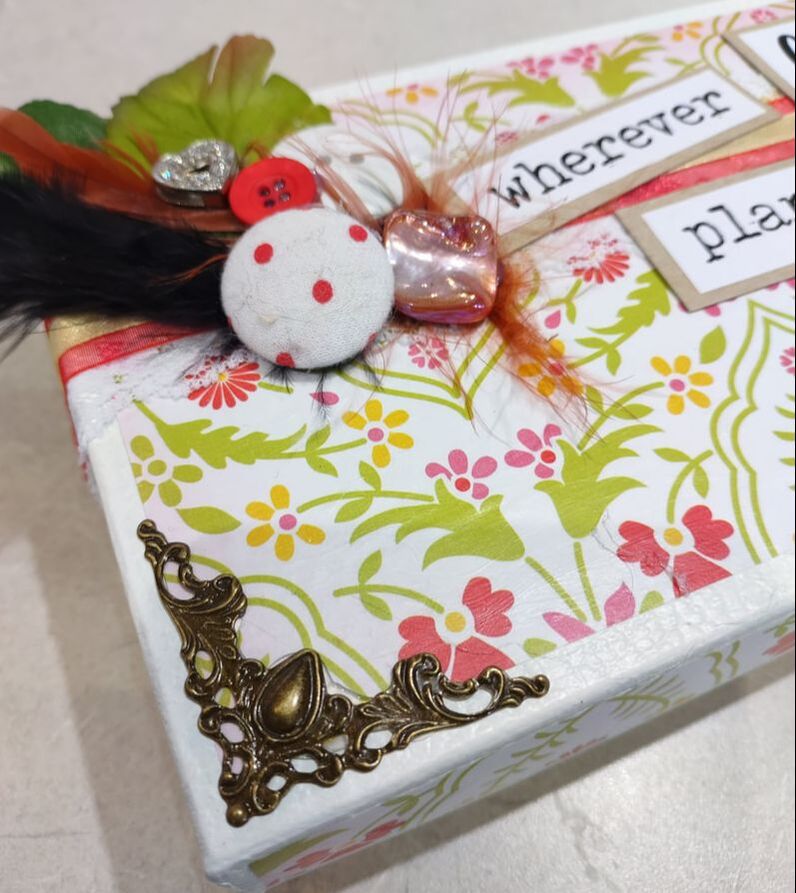
The next part is the really fun part! So, I did this for a virtual work program. This means that I made up prepacked "craft kits" that the participants picked up ahead of time. This included the box, soft vinyl, quote pieces, and embellishments. The quote I made for the box reads, "wherever life plants you, bloom with grace". I ended up adding another quote for the side of the box that read, "be humble and kind". I wanted these to be a little bit nicer than just gluing copy paper on the box, so I first glued them to a thin matt board and cut them out. Adding changes like this adds depth and texture to projects! The embellishments I included in the boxes ranged from all sorts of mismatched stuff such as: buttons, lace, ribbon, floral leaves, jewels, stickers, clip art, broken jewelry, feathers, etc. People are also always encouraged to add things they may have at home too. 
I laid out my quote pieces until I had them where I thought I liked them and glued them down with hot glue. I then started playing with my embellishment pieces. I have to say... this was shockingly hard! I could not decide where I wanted things and kept moving items back and forth and back again! Slowly, I started feeling happier with what I picked out for each item and began gluing them down, although apprehensively!
Picture
Picture
Picture
Picture
Essentially, to finish the box up, just keep fenagling with it until you feel happy! You can also always add more items later too, especially if you have something that is uniquely special in some way. Thanks for reading & crafting! 
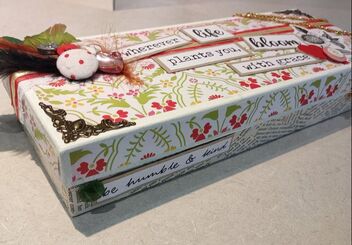
Picture
0 Comments

Realistic Pet Portrait

7/12/2021

0 Comments

 
Picture
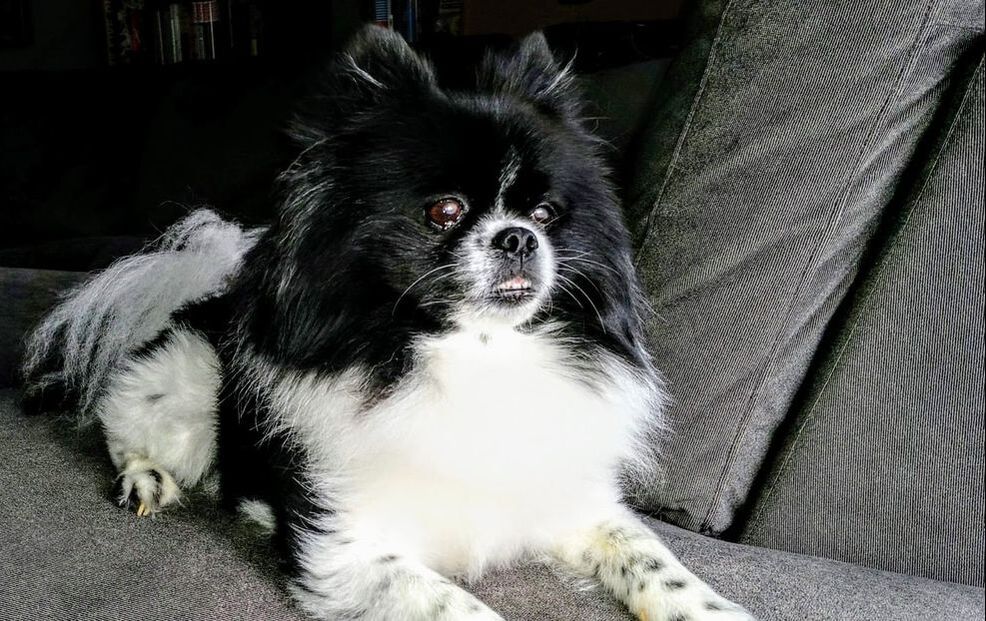
I was asked to work with another library branch at work and create a "Pop Pet" Portrait class where people would bring in pictures of their pets and we would rock the Andy Warhol style of bright colors and large images. I had never done one of those before but said "sure, why not!". I decided to practice a bit ahead of time with my childhood dog Ginger aka Pinge, Ginge Pinge, Pinger, etc. you get the picture. You can see the results in my previous post here. 

At the end of last year, I was asked to teach a class for The Little Birdie Wine Nest in Parma to help people "realistically" paint their pets. Again, I had never done that before, although I had a little experience with the "pop" style, but "realistic" would be a little bit different. Again, I decided to practice ahead of time! I watched a variety of YouTube videos on what other artists do and adapted to those techniques. Below I will walk you through those steps! 
Picture
So this here is the majestic and royal Simba. He is small but mighty in personality, just look at that mane! He deserved a pet portrait to show off his strength up close with power, am I right?!

​All I need to get started with these pet portraits is a photo. Preferably a good photo. I'm talking nice and clear, close up, and a good angle. This one was perfect! 
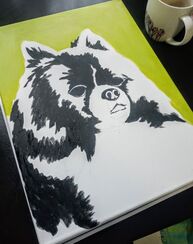
Yes, I can choose to just sketch this out freehand but... I have found the best way to get his basic shape down first and that is with a projector! I save the picture to a flash drive, plug it in to my projector, and project it onto a canvas in order to sketch out the animal. That way, all the features are the right size and shape and located where they're supposed to be! Because.. you know.. that's kind of important. 

I do want to address here something essential to painting a pet. So when we talk about our animals we might say "I have a black dog... a white cat.." but do you really? If you really study your animal's fur, you will see that your black dog has some copper brown hair in some spots, or your white cat has some grey undertones. Pay attention to these areas because they will come into play while painting your pet! We work from darkest to lightest colors and then go back and forth to create more detail towards the end. 
So, as most of the tutorials I watched, I start with black paint! No matter what color the animal is, I always start with black. I honestly think this terrifies people, but trust me! Black is used to address all the "dark" areas of the animal. If your animal is mostly black then, yes, you are going to end up covering a lot of the canvas in black but NOT all of it! But, we'll get to that in a bit. 
Picture
Picture
Now that we've addressed those dark areas, I choose my next darkest shade. With Simba, I went with a dark charcoal grey. As you start to add these layers, you can start painting in the direction of the fur too. This could be wavy, curly, straight, short, long, "whispy", etc. When I use the next darkest color, I slightly go over the black areas with this color to start overlapping and filling in more surface area. 
Following this same pattern, I then choose my next lightest shade which in Simba's case was a lighter grey color. Again, I work in the direction of his fur and overlap the previous color. Adding these various layers represents the variety of colors, shades, and shadows in your pets make up. 
Picture
Picture
Keep in mind, that every pet is different, so in turn, painting every pet is different too. You will most likely never use the exact same colors as the person next to you painting a different animal and your animal may have 6 different colors verses just 3! With Simba, I felt like I had used the main colors I wanted, but he looked blocky and unnatural. So I went back in with some black paint again to thin up those blocks of color and begin to make it look more like hair.
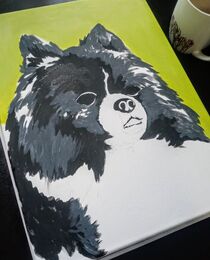
​After the basic colors are done, I kind of start hopping all over the place! I worked a bit on Simba's mighty chest which is all white but using a bit of black, then grey, then white. Next, I focused on his snout which is a bit tricky! The key here is just to make sure they don't end up looking like pigs! Which seems to happen a lot :)
At some point, I address the eyes. I never do this at the beginning and always wait until closer to the end. The animal always comes alive once you take care of the eyes! So take a look at your animal's eyes, what colors are in there? It's probably not much but using that color to slightly add into the eyes, brown in this instance, does wonders! Paint in the pupil with black. And the final touch is highlight with white. Use the white to lightly mark where light is shining on the pupil and where there might be some lighter hair around the eyes as well. 
Picture
Picture
To finish Simba up, I went around with a bit more black again and then finally with white to highlight his crazy fur! I used it to address his "whispy" (I use this scientific term in all my classes too) pieces of hair, his whiskers, and his ear hair too of course. I like to add a little white to the noses too so it highlights the "wet" nose look. 
Oh, lastly, you can choose to paint your background before or after you paint your animal but I find it best to do it at the beginning and get it out of the way!
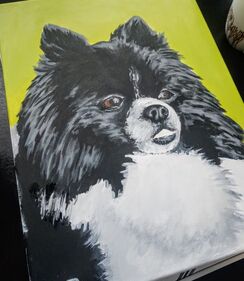
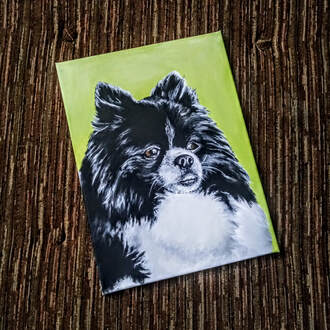
I hope this helps break down the steps of painting your own pet realistically! It takes a little bit of getting used to at first but you will get the hang of it, practice practice practice, right?! If you try this out share it below so I can see what you create! 
0 Comments
    Picture

    Rebecca Myers 

    Hey there, I'm Becca, or Rebecca, but not Becky, never Becky, unless you're my family from down south! I'm a simply modern librarian by day and an artist by night. My pursuit is for a simple, happy, healthy, and more fulfilling life! I hope I inspire you to get crafty!

    Archives

    March 2022
    February 2022
    January 2022
    September 2021
    August 2021
    July 2021
    June 2021
    May 2021
    November 2020
    September 2020
    July 2020
    April 2020
    March 2020
    February 2020
    January 2020
    December 2019
    October 2019
    September 2019
    August 2019
    July 2019
    June 2019
    May 2019
    April 2019
    March 2019
    February 2019
    January 2019
    December 2018
    November 2018
    October 2018
    September 2018
    August 2018

    Categories

    All
    45
    Acorn
    Acrylic
    Adults
    Altered
    Altered Book
    Animal
    Anniversary
    Apple
    Art
    Artificial
    Autumn
    Bag
    Banner
    Beach
    Beads
    Bike
    Black
    Blackbird
    Blog
    Bohemian
    Book
    Book Pages
    Bow
    Box
    Butterflies
    Buttons
    Can
    Candle
    Cardboard
    Cards
    Cat
    Change
    Christmas
    Clipboard
    Clothespin
    Clover
    Coasters
    Coffee Can
    Cold
    Cookie Sheet
    Cork
    Corks
    Coronavirus
    Craft
    Crafts
    Creepy
    CriCut
    Crow
    Daisy
    Decal
    Decor
    Decorate
    Decoration
    Decorations
    Decoupage
    Dictionary
    Diy
    Dog
    Dream Catcher
    Dreams
    Embellishment
    Embellishments
    Etching Cream
    Fabric
    Fabric Paint
    Fairy
    Fake Flowers
    Fall
    Feather
    Floral
    Flower
    Flowers
    Fluff
    Frame
    Fringe
    Future
    Galaxy
    Game
    Garland
    Gift
    Glitter
    Glow
    Glue
    Gnome
    Gold
    Grass
    Grow
    Halloween
    Handmade
    Hanging
    Harry Potter
    Hat
    Hippie
    Holiday
    Hot Glue
    Iron
    Jar
    Jean
    Jeans
    Jewelry
    Jewels
    Journal
    Junk
    Keepsake
    Keys
    Kids
    Knob
    Lantern
    Librarian
    Life
    Lights
    Light Up
    Luminary
    Magnets
    Mason Jar
    Matt
    Memo
    Memories
    Mermaid
    Mini
    Mirror
    ModPodge
    Mod Podge
    Moon
    Moss
    Music
    Native American
    Netting
    Nightlight
    Notes
    Ollivander's
    Ornament
    Outdoor
    Paint
    Paper
    Party
    Peanut Butter
    Pet Portrait
    Photo
    Pieces
    Pine
    Pins
    Pointsettia
    Pom Pom
    Pop
    Portrait
    Postcard
    Post It
    Posts
    Pumpkin
    Quick
    Quote
    Raven
    Realistic
    Record
    Recycled
    Repurposed
    Reuse
    Reused
    Ribbon
    Rice
    Runner
    Scrap
    Scrapbook
    Scraps
    Seashells
    Seeds
    Seniors
    Sheet Music
    Sheets
    Shirt
    Sleep
    Slice
    Small
    Smash Book
    Snow
    Snowman
    Sock
    Soul
    Soup
    Space
    Sparkly
    Spell Book
    Spells
    Splatter
    Spooky
    Starfish
    Stars
    Stencil
    Sticker
    Stickers
    Stitch
    Strawberry
    Stuffing
    Summer
    Surprise
    Tea
    Tealight
    Template
    Thread
    Thrift Store
    Tin Can
    Toole
    Tophat
    Tote
    Towel
    Tree
    Trinket
    Tshirt
    Twine
    Upcycled
    Update
    Vase
    Velvet
    Vino
    Vintage
    Vinyl
    Wand
    Wedding
    Wildflowers
    Wine
    Winter
    Wood
    Wreath
    Yarn

    RSS Feed

Proudly powered by Weebly
  • Home
  • About
  • Artwork
    • Book Page Art
    • Custom Portraits
  • Find Me
  • Order
  • Classes