|
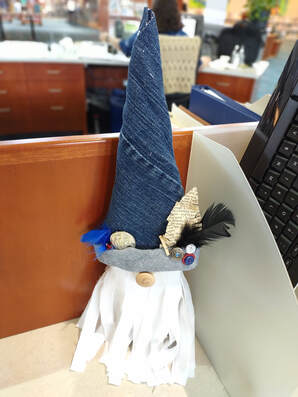
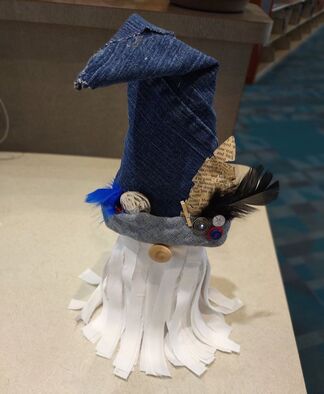
I loveddddd creating this gnome! I reproduced this from another craft site because I thought it was so cute and creative! The supplies can be altered to fit other items but here is what I used for mine! Supplies:
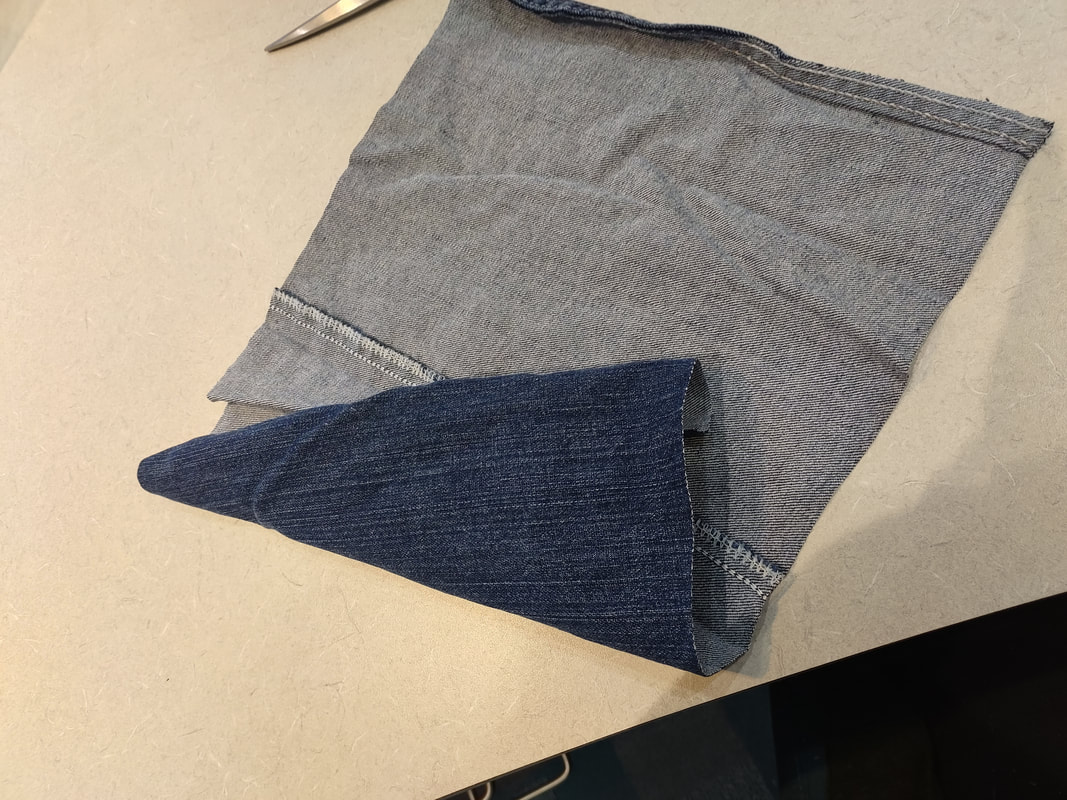
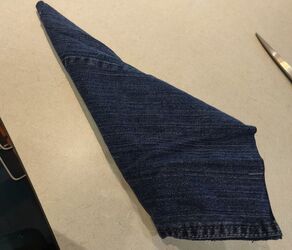
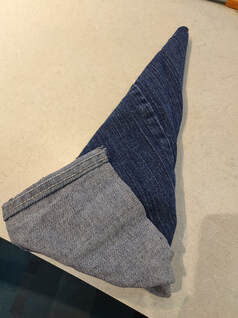
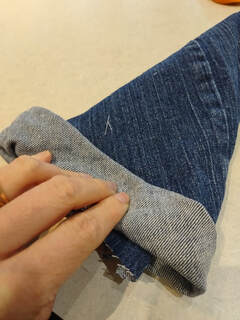
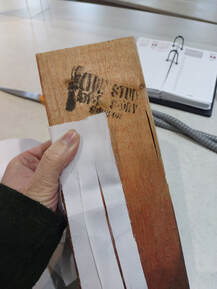
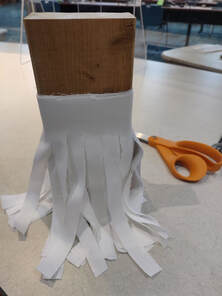
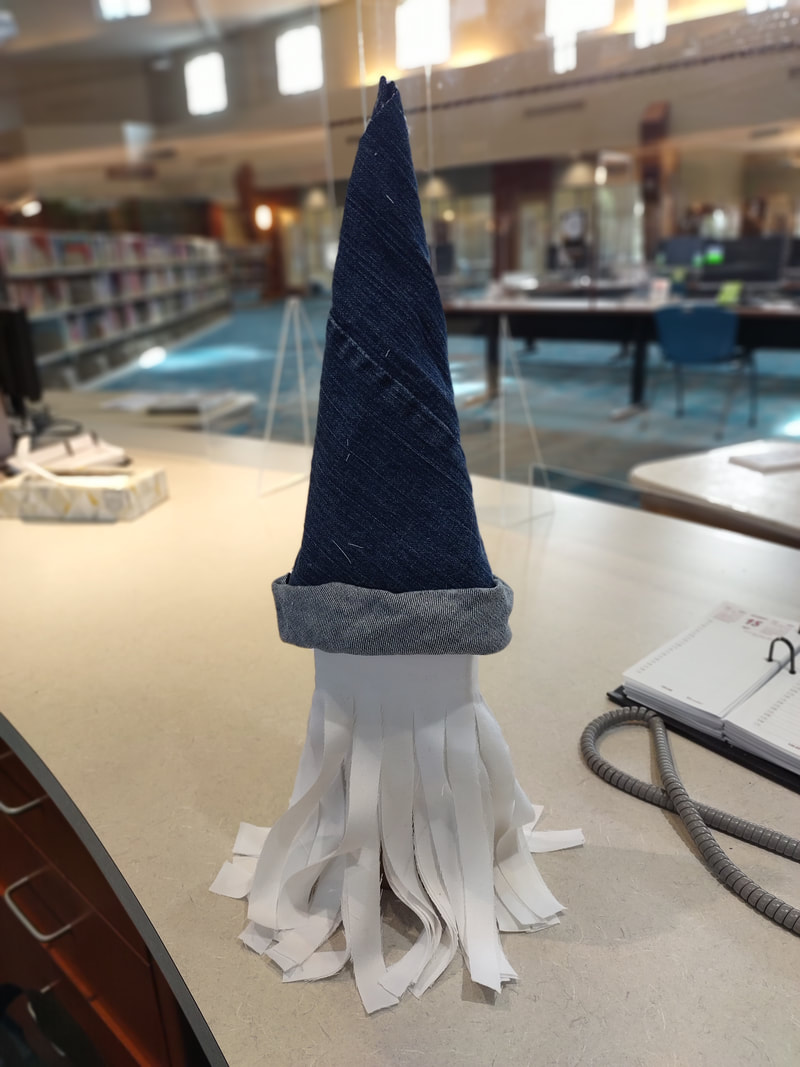
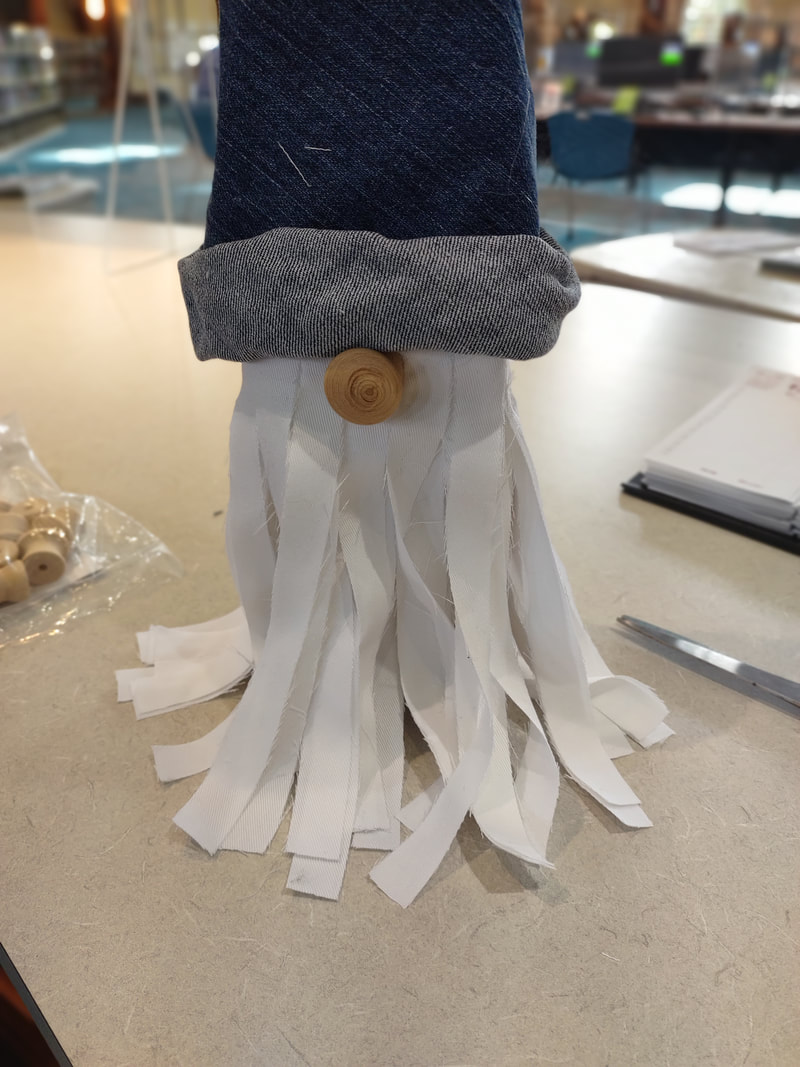
1. Since the block of wood is being pretty much covered up by everything else, you don't need to do anything to it! I started with making the hat. I cut a 10x10 section off the leg of a mans size pair of jeans and then cut it down the center to open it up to be roughly 20x10. I then took multiple tries to form a cone shape by rolling the piece of jean in a diagonal direction, being sure that the bottom opening would fit the width of the wood board. 2. You end up with an oblong piece for the hat. You can either just cut off the piece hanging out of the cone shape, or, like me, fold it up and form it into a "cuff" around the bottom of the hat. 3. Be sure to actually secure these pieces with a bit of hot glue. I added some at the point, under the overlap, and under the cuff as well. 5. Secure one end of the white fabric to the wood board, starting about 4in down from the top. I wrapped it around multiple times so that the beard would look more full and secured it every once in a while with hot glue.
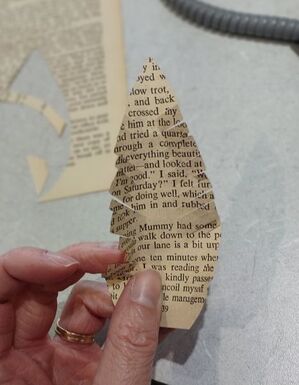
8. The next step is adding all your "junk". I made a feather out of scrap book pages by cutting out a basic shape and "fringing" the sides of it like a feather. I then glued on other do-dads and he was already for a night on the town!
0 Comments
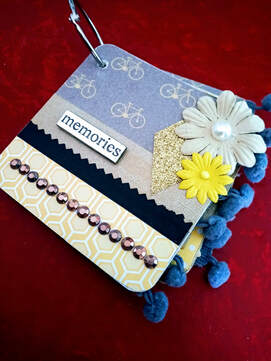
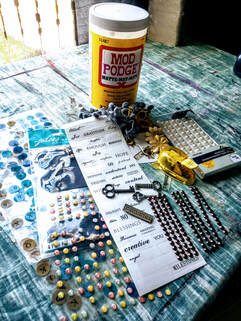
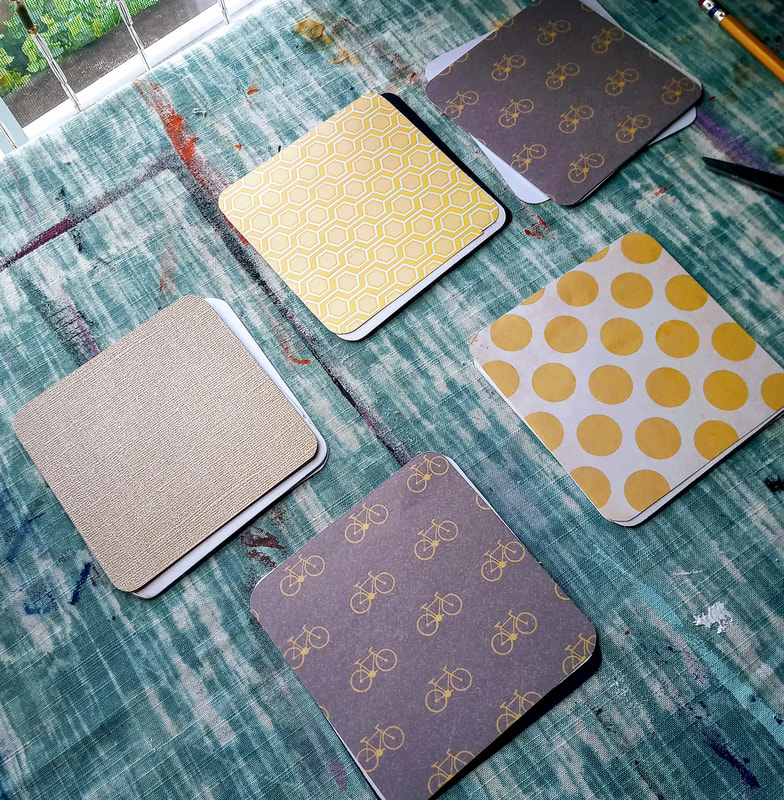
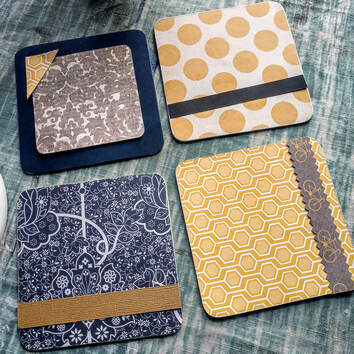
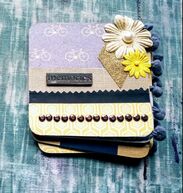
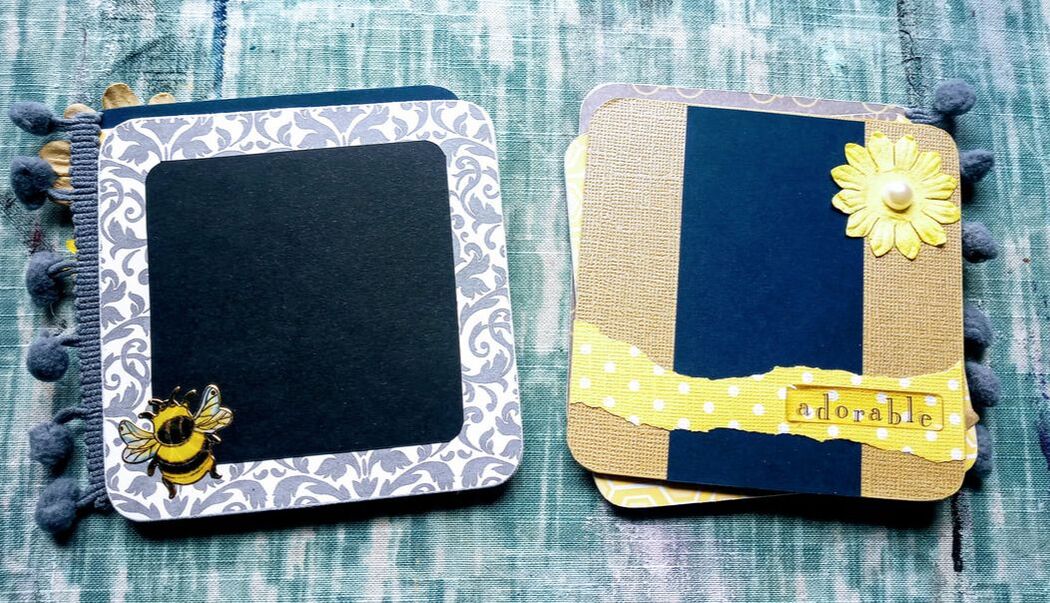
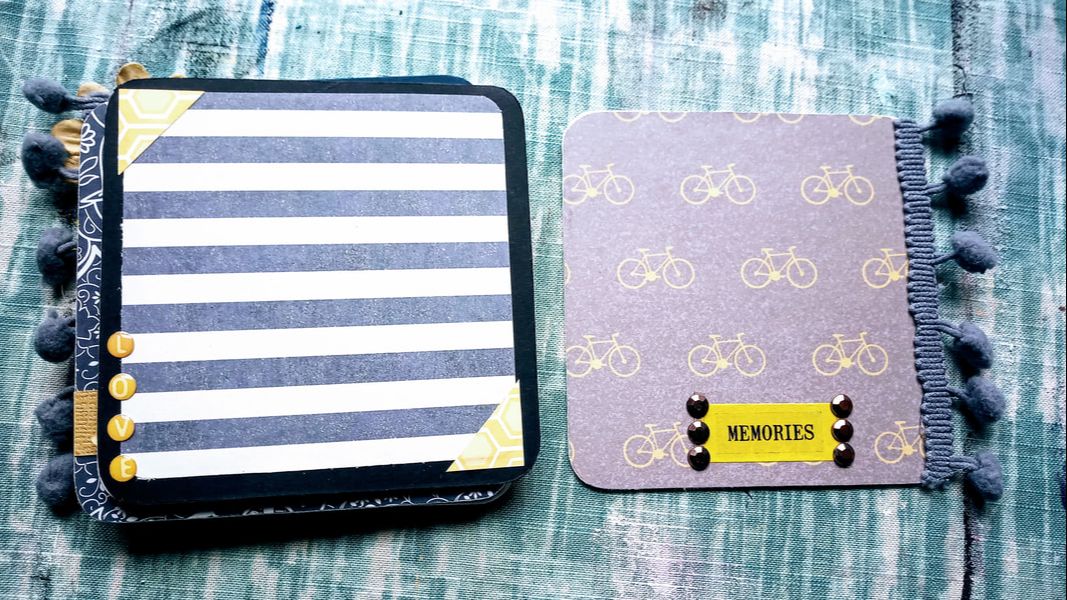
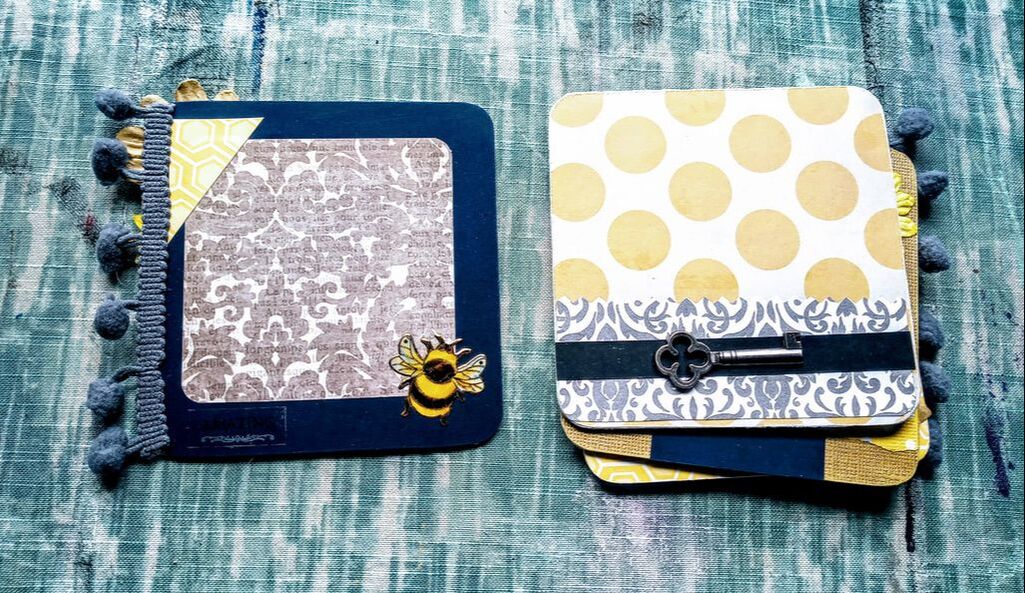
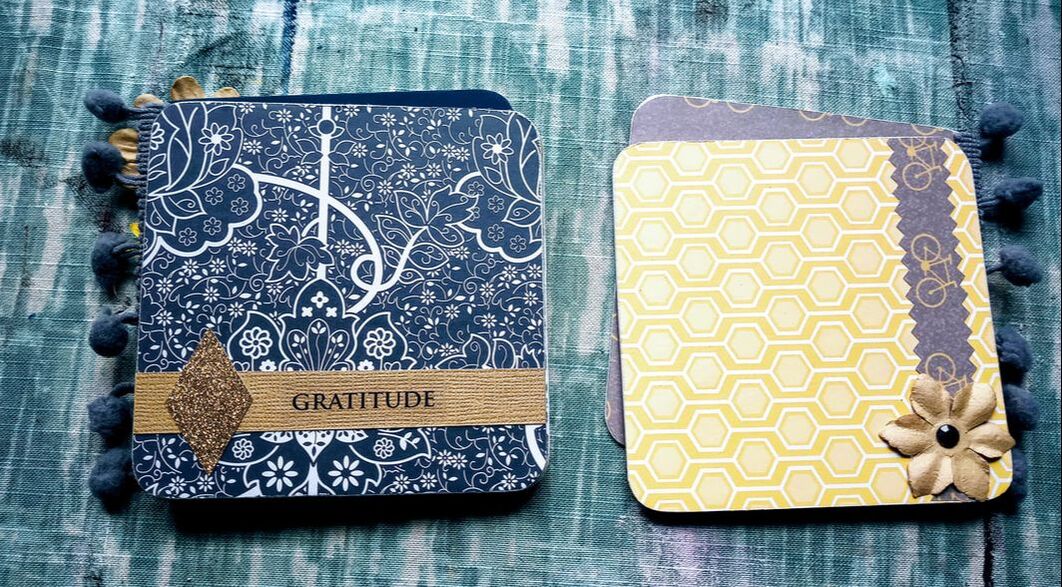
This is a quick project that you can give as a gift with pictures already in it or left empty for the person to fill. They're super cute and itty bitty! Something fun and different to brighten up any day. Supplies:
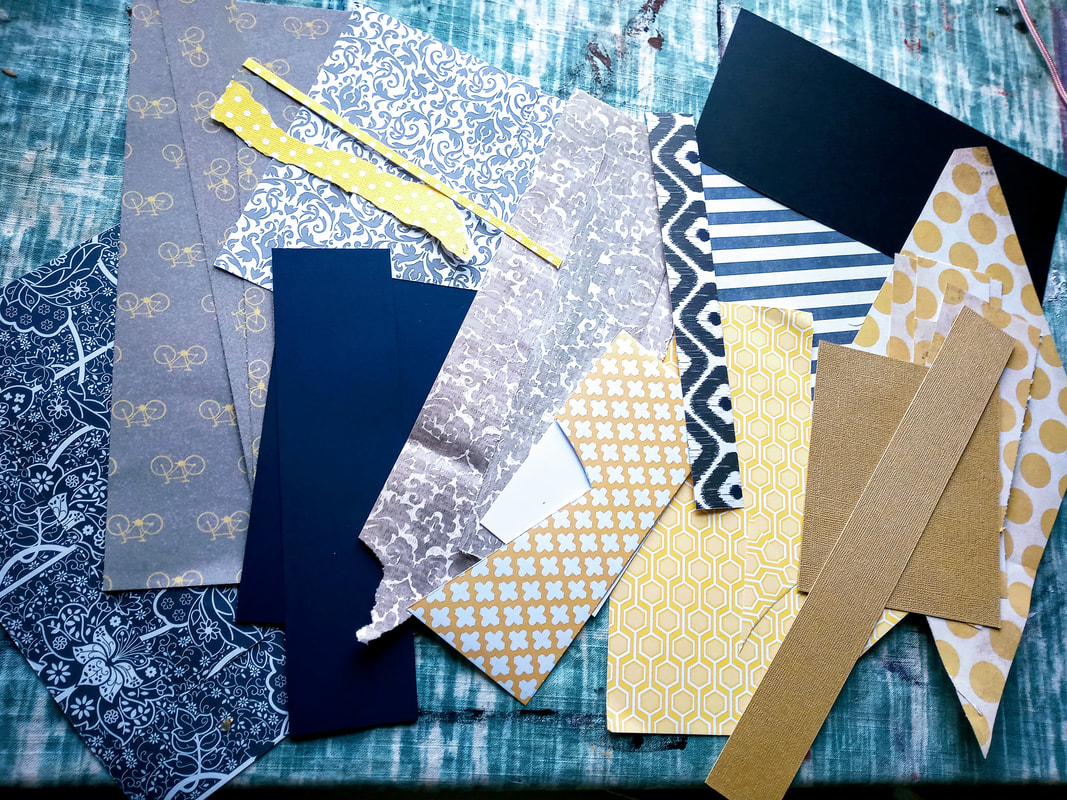
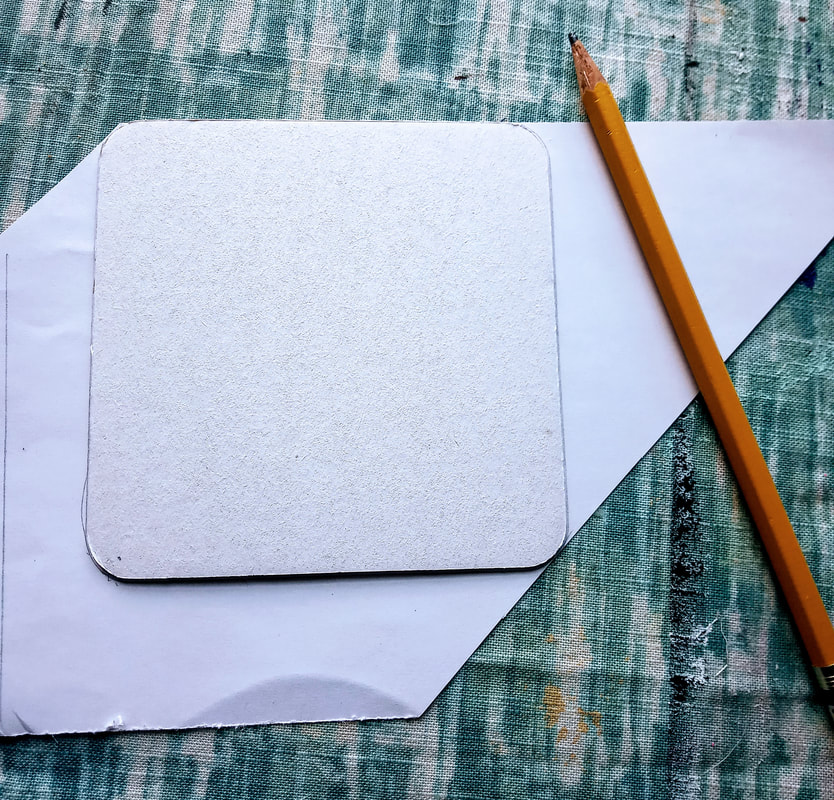
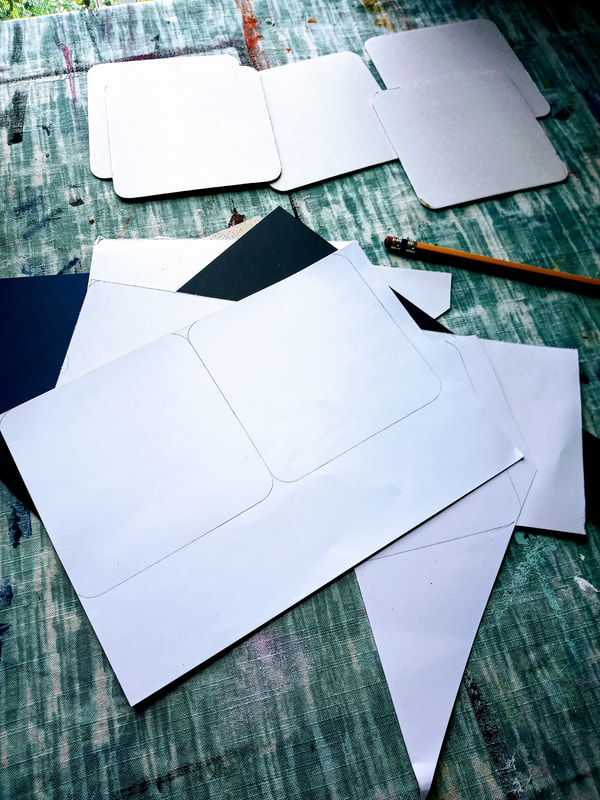
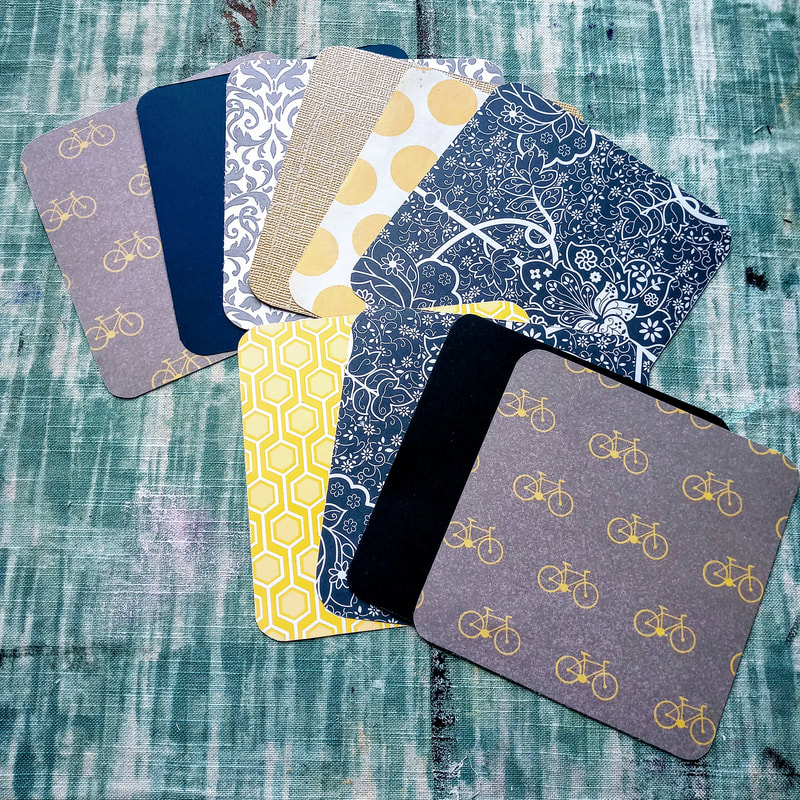
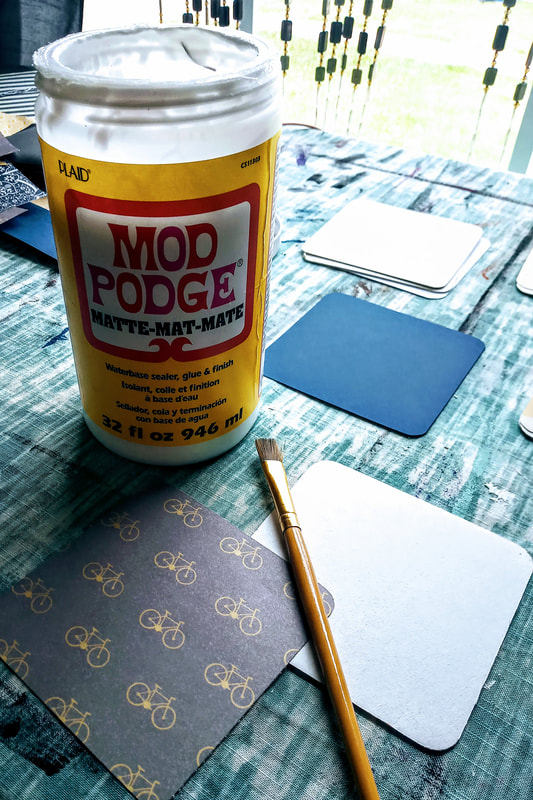
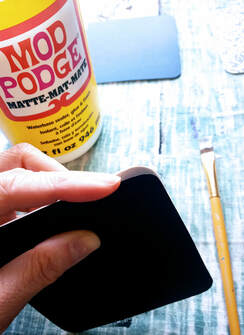
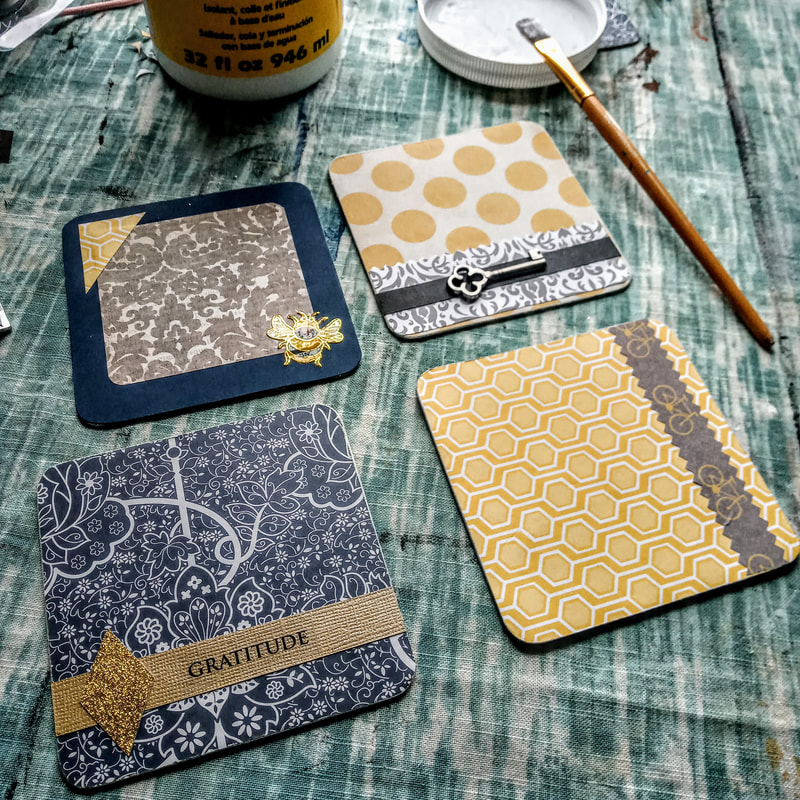
1. The first step for this itty bitty project is gathering all your supplies because there's a lot of potential components. I like to gather everything up that way I have all the supplies necessary near me and ready to go. This is where I picked my color scheme for my scrapbook (I used scraps from my scrap bag) and came up with yellow, grey, and navy. Pretty! I also gathered a pile of random stickers and other embellishments (I had no idea what I would use!). 2. I then traced the coasters onto the backs of the scrapbook paper I would use for the main sheets so I could cut them out to size. 3. I decided the order of the pages that I wanted and laid them out on the coasters. Next, I glued the sheets onto the coasters using the Mod Podge and a paint brush. I did half at a time instead of trying to glue the whole sheet at once, that way I could be more aware of bubbles showing up.
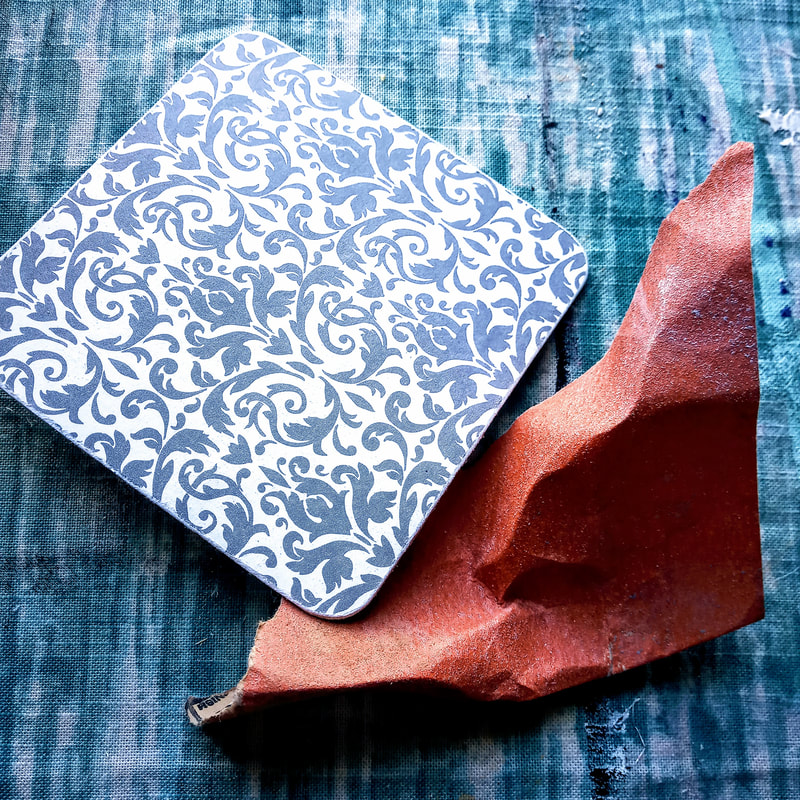
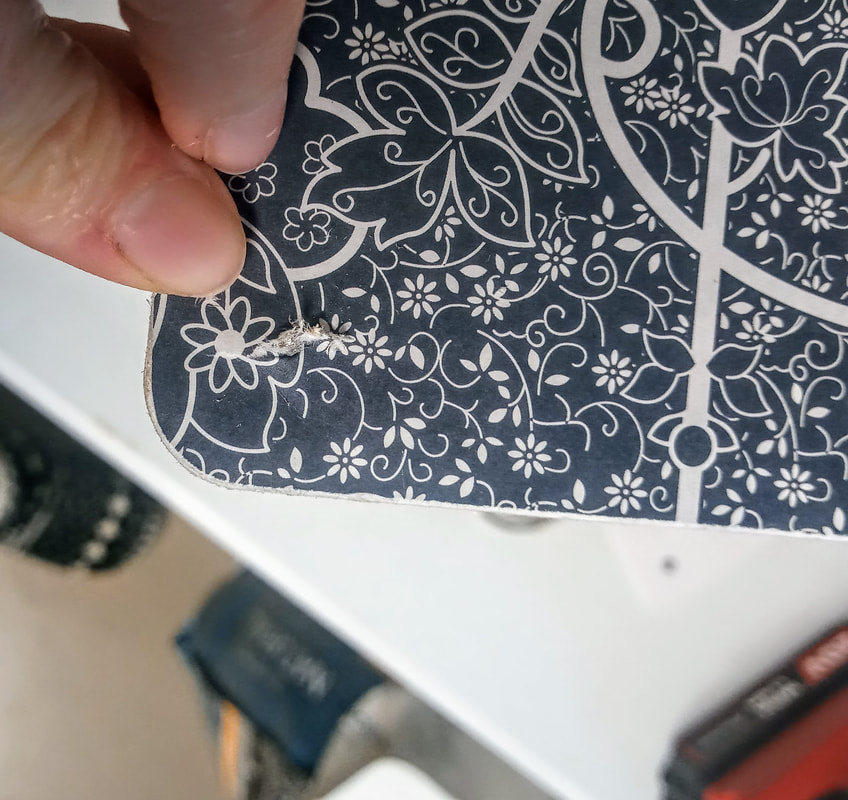
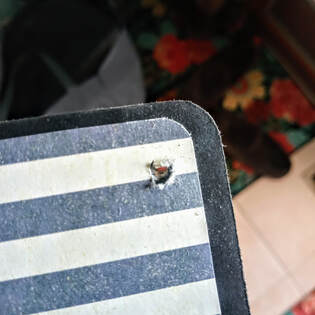
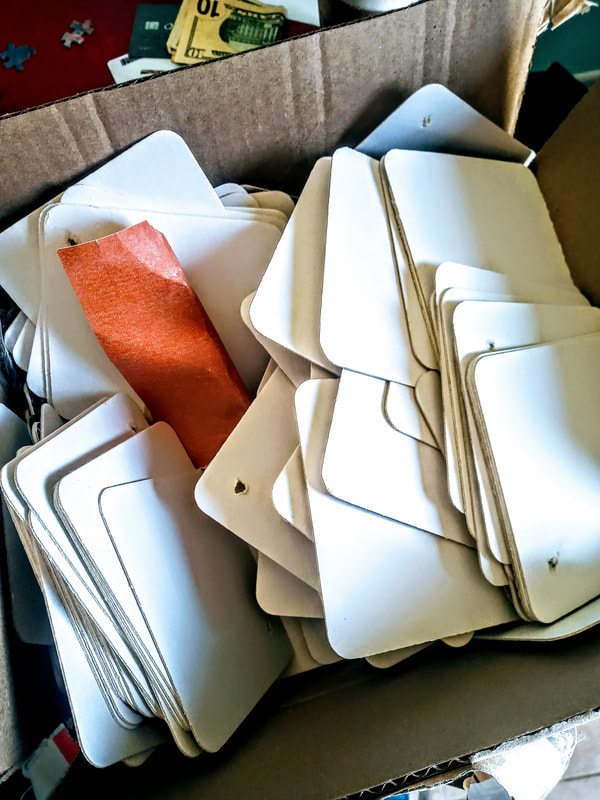
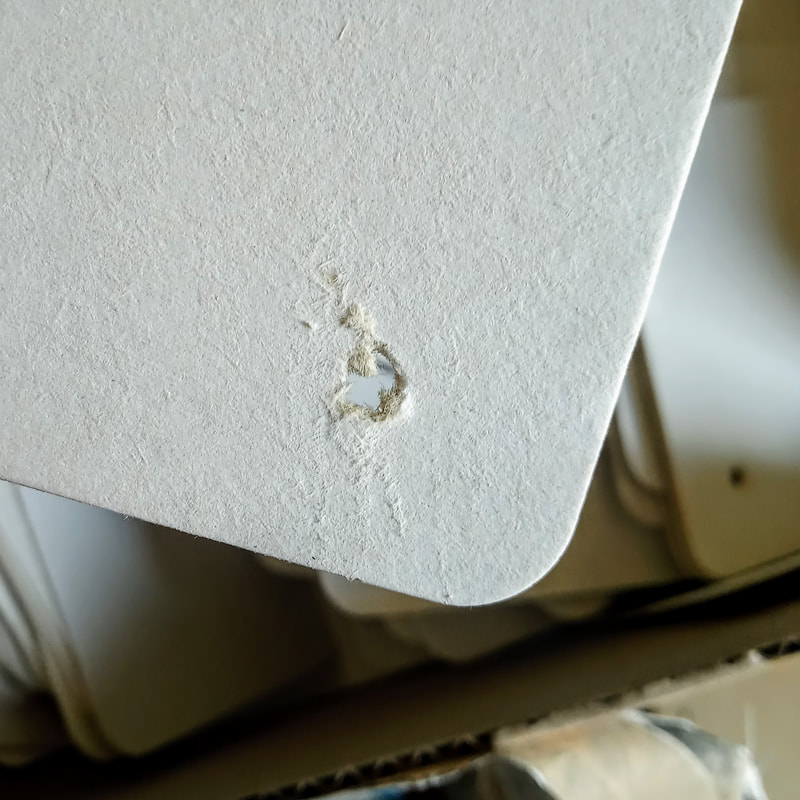
6. Start to plan out your pages by laying out the pieces and parts that you want to include before you officially glue anything down! 7. Mod Podge dries pretty quick so this part of the project will go fast. You can use a hot glue gun for heavier/awkward objects to secure them to the boards. 8. Looks super cute, right?! Well, this is where I realized... oh crap... how do I hold it together?! I looked up some ideas and liked the nonrestrictive binder ring option. But, this meant there needed to be holes for the ring to pass through. I decided to use a drill as this was the only option we had to my knowledge that could accomplish this. I think if I had some sort of press that would have been the way to go! I drilled through and it slightly tore up my paper! Ugg not cool! I am going to be doing this for an upcoming work program so decided to create holes in all 125 coasters... yay!... that way they are done ahead of time instead of afterwards. Still, I do not think this is the best option... it seems to tear through the chipboard (these are really flimsy chipboard!) and I encourage you to find a better way if possible :) It still turned out cute overall!
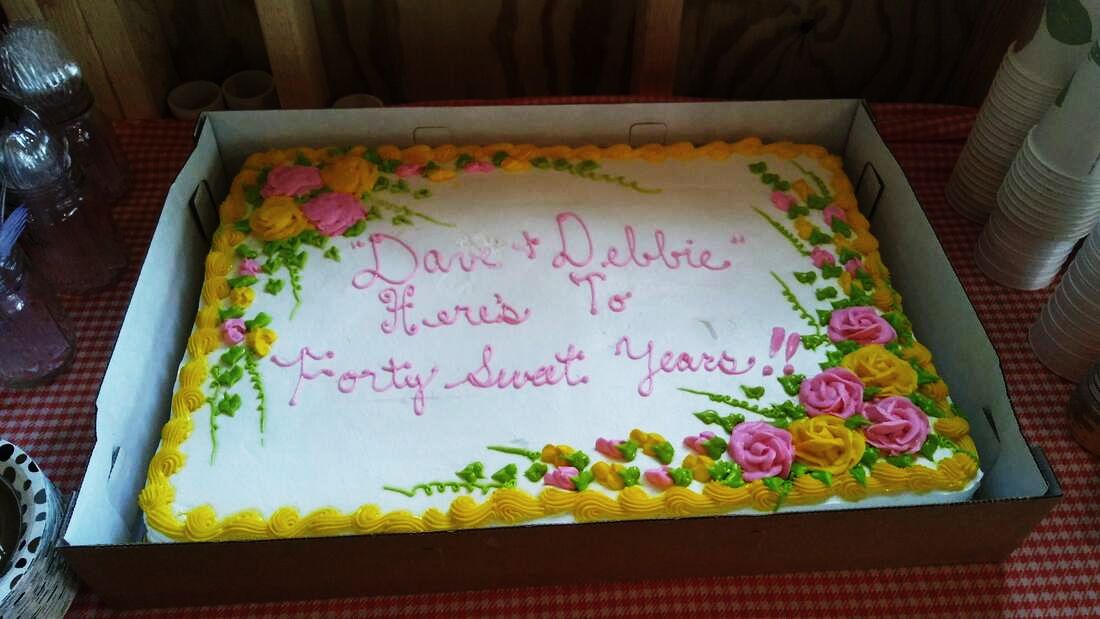
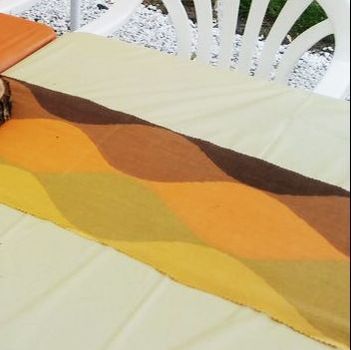
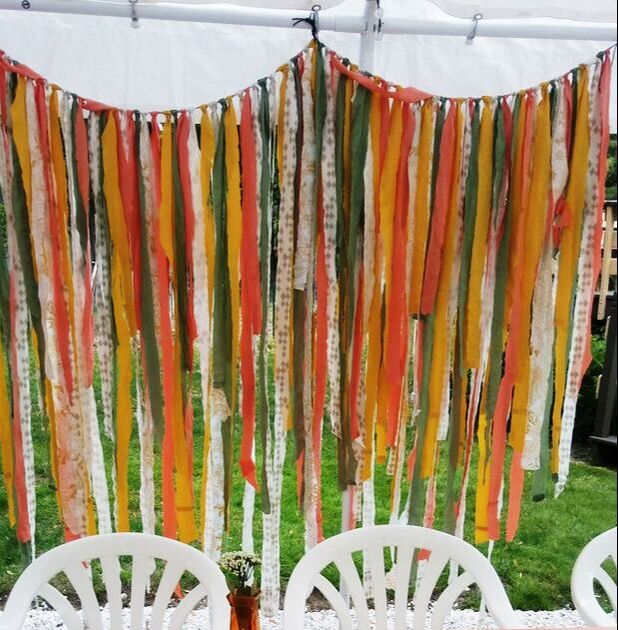
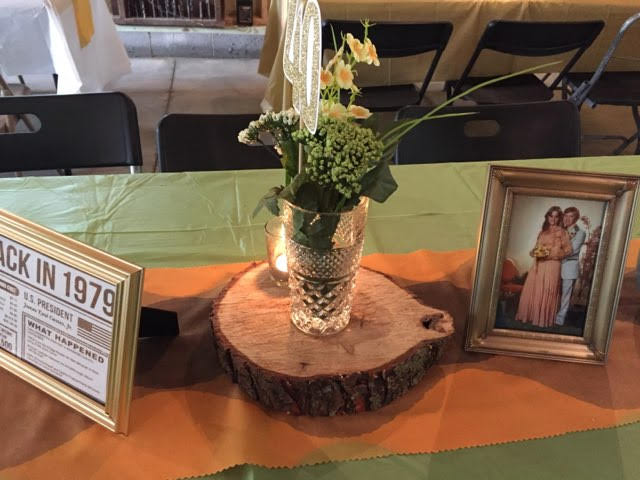
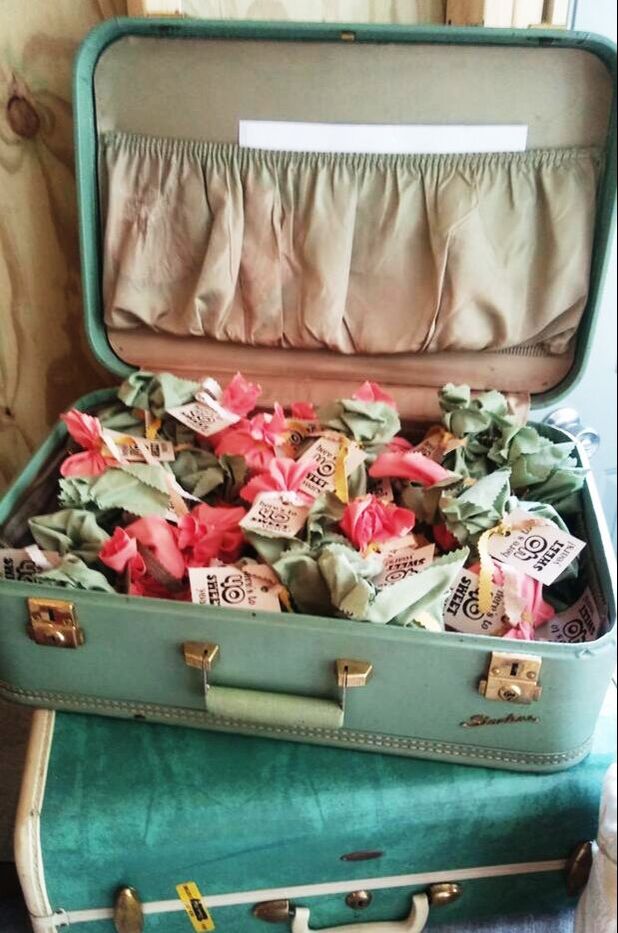
It feels like it has been ages since I have last posted! But it has not quite been 2 months yet so I think I'm still in the clear. The reason for my absence was mostly due to the fact that I was in charge of throwing my parents a surprise 40th anniversary party! And it's no simple feat - especially when you want to do it up like me (Momma taught me best!). Planning a party of any type has so many components! It starts with when to have it, where to have it, and rolls into the confusing guest list of who and who not to invite - hoy, so many decisions! Luckily, a wonderful aunt offered to host the party for us, which means... no cost! (I tried to give her money guys, I swear). Once you decide on a guest list, you can make/order invites. So much fun! 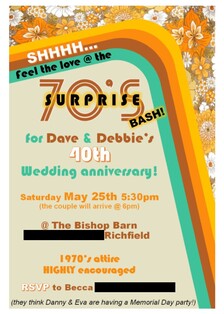 We put a twist on the party since it was for my parents anniversary and made it a 1970's party to honor 1979. I love having a theme. It makes it more fun in my opinion! But, I also think just doing a general color scheme is fun too! So, once you get those invites out you can start thinking about the details: food, decorations, etc. Luckily, my parents have amazing friends, everyone offered to bring something. My aunt and I provided the main dishes and everyone else brought sides and desserts. Someone else even offered to get the cake for us - thank you, thank you! I was left to decorate, which I love more than anything. Since we went with the 1970s, I tried to stick with the beautiful hues of that era - yellow, olive green, peach, brown, etc. and it was beautifully vintage when it all came together.
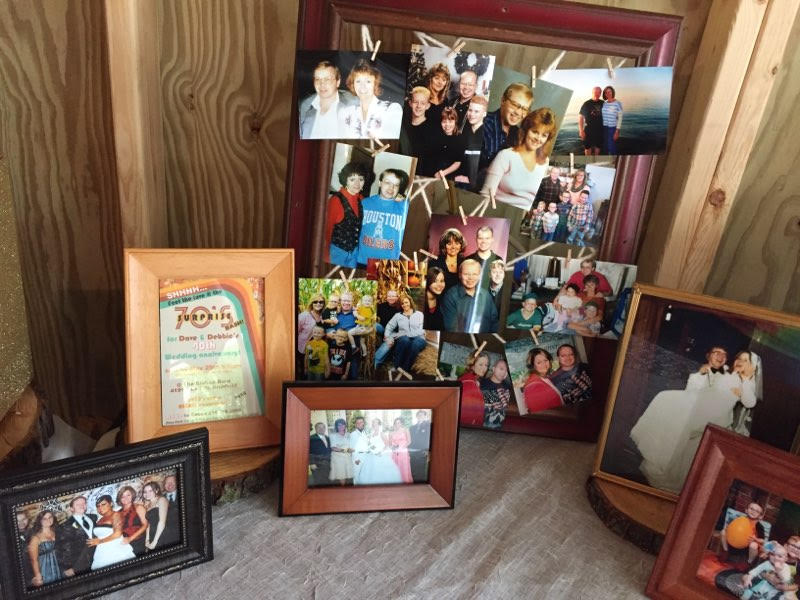
To see how to make the fabric garland, read my post here: https://www.the-art-escape.com/blog/scrap-fabric-garland I put together a small photo collage (didn't want it to be too overwhelming) to show the progression of our family over the last 40 years and also put their 1970 style photos in frames to use as decorations on the tables - and conversation starters of course! 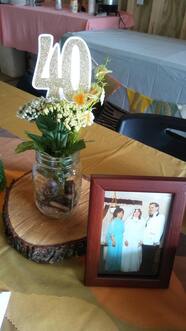 I used mason jars for center pieces, filled them with stones so they wouldn't blow over, and put a simple mixture of fake flowers with pin wheels or "40" stakes in them. I purchased the pin wheels for dirt cheep at a craft store and made the "40" stakes myself by cutting out "40" on glitter paper with the CriCut, gluing them to a white background, and taping them to the stakes. I trimmed everything down to fit into the glasses at varying heights. My aunt also had tree slices left from previous parties that we used under the mason jars! This provides some extra pazaz to the table for sure! To be completely honest, I didn't really know how many tables we would have. I also didn't know where I would be hanging all the stuff I was making but I just kept making away! Everything was able to be used and it all came together perfectly!
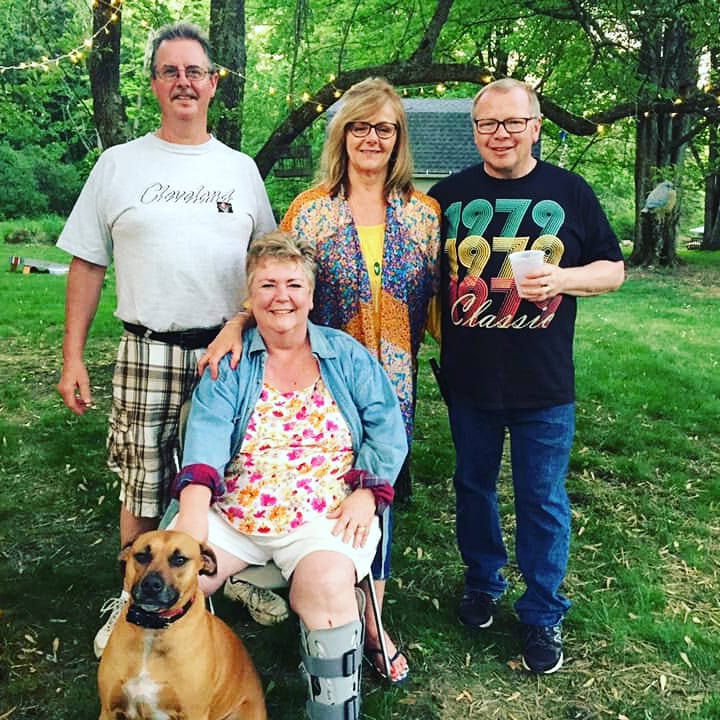
Although it was supposed to be a surprise party... my parents totally knew! They said no one talked to them all week and people were being too weird - woops! That's ok - it was a perfect 70's bash none-the-less. Now, for one thing that was not so perfect.... there always seems to be something that happens at events: strange family drama, weird occurrences, something doesn't work, something breaks, you forget the cake, etc.... this particular event resulted in my aunt (yes the same aunt who hosted) acquiring a broken leg!!!! It was awful, there's just no other way to put it. I felt/feel absolutely terrible that it happened because, in my mind, if I wouldn't have had it there, she wouldn't have broken her leg! Now she will be laid up in a cast for weeks and weeks, right in the middle of summer (she's a camper, this is a big deal people!) and right before her grandbaby is due! Terrible, terrible, terrible! It happened while we were setting up for the party, we tried to make her sit the rest of the day/night but the woman wants to move, move, move! Thankfully, she had a boot from when she broke her other leg another time and wore it all night... but, the next day, x-rays revealed it was most certainly broken. Picture below to prove how amazing my aunt is for sticking around the whole night! So, in conclusion, there are so many different pieces and parts for planning a party. You can go in so many different directions and do just about anything, making it personal for whoever the guest-of-honor is!
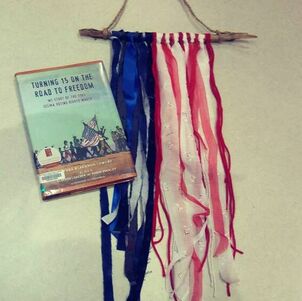
Need ideas for planning your next party?? Just ask me, I'd love to help! I created this quick craft project to tie into a book discussion at work. But this so easy, anyone can do it and it's very quick as long as you are making a smaller size. I also think this would be awesome in an extra large size as well! Supplies:
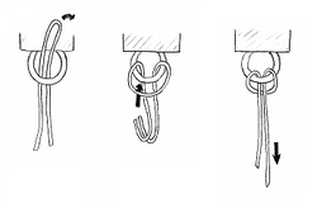
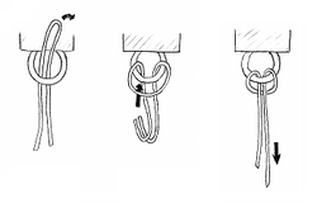
1. Gather your supplies all in one space so you are ready to go! a. If you are using fabric, I would cut your strips at this time as well 2. Use blue pieces to represent the blue star part of the flag (I saw some online that used white beads throughout to represent the stars!) and alternate your red and white for the stripes. 3. Tie your strips on using the Larkshead Knot technique below. This is a great way to add your elements because you get two components out of one. a. You can also tie them however you wish. Try tying little pieces together of different types/textures to give your flag more variety. 4. Create a piece for hanging. I did this by wrapping 3 pieces of twine around the one end, braiding it, and tying it off on the other side.
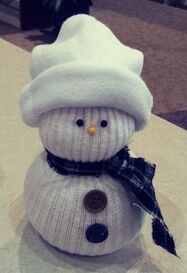
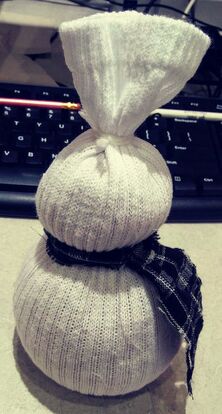
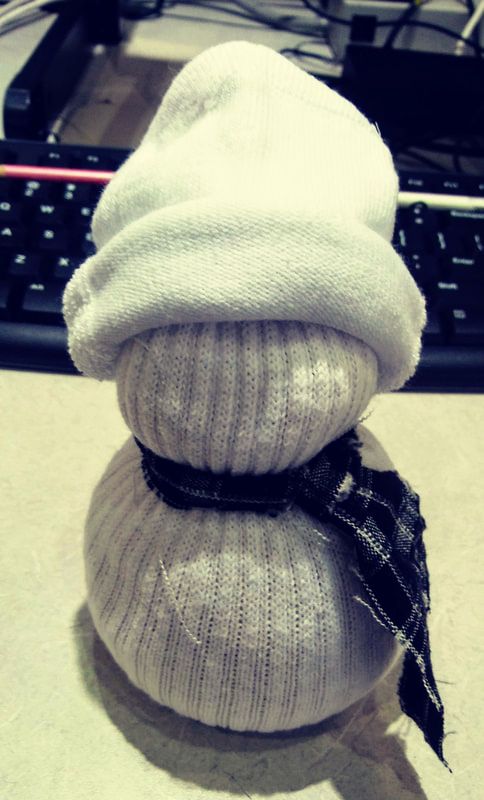
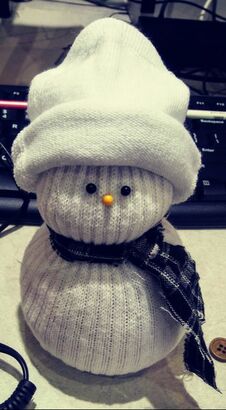
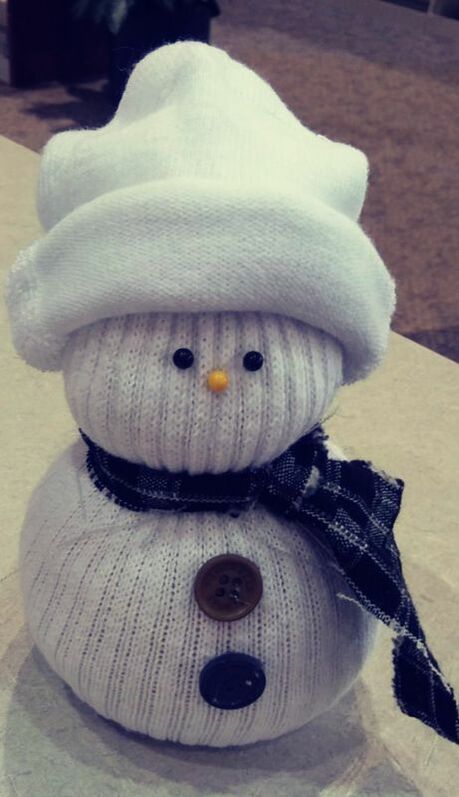
5. That's it! Feel free to add whatever types of elements you have lying around! Perfect decoration for the most rustic folks you know! This little guy, or gal, is a super easy craft for young and old alike! Great for a chilly winter day to take up some down time and occupy little ones. Supplies:
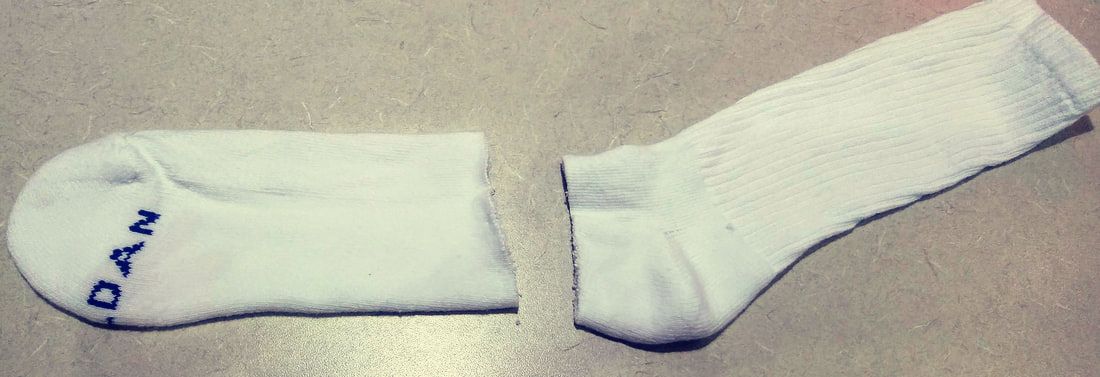
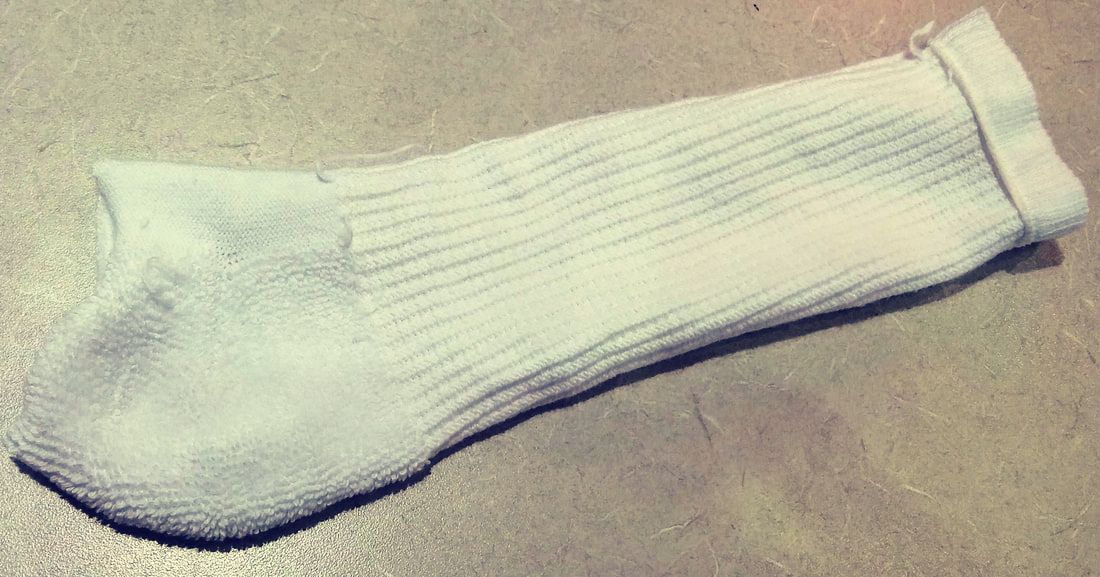
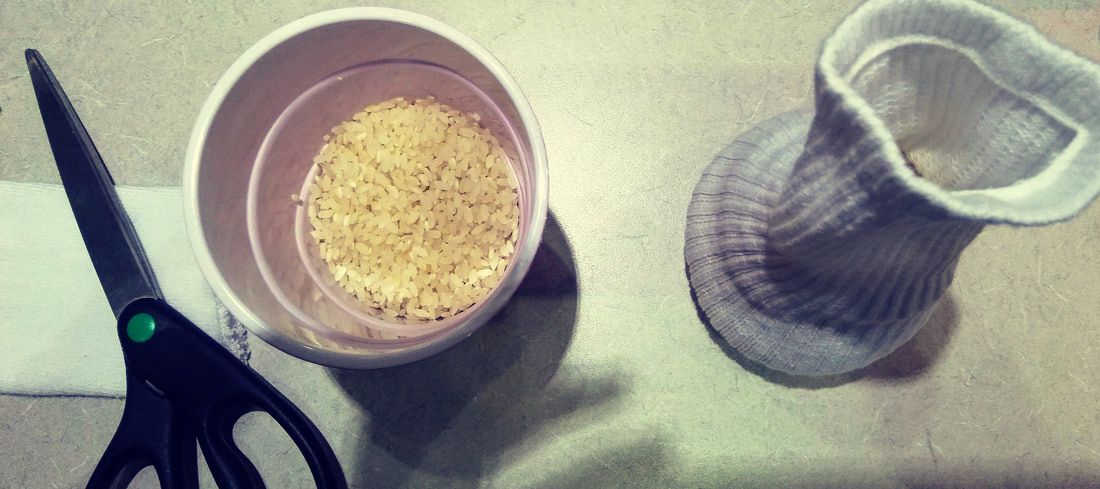
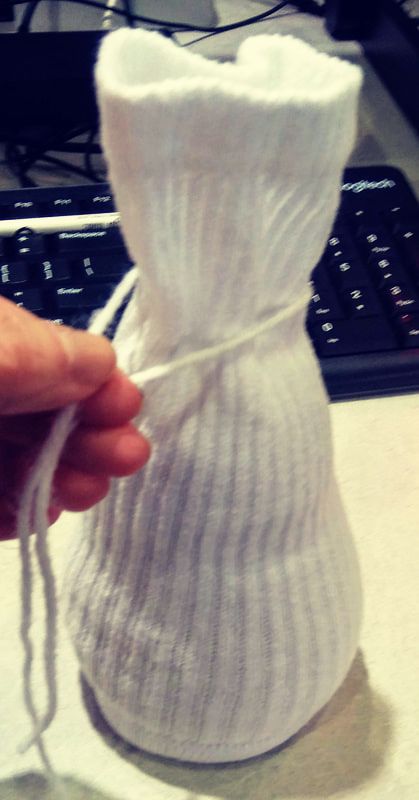
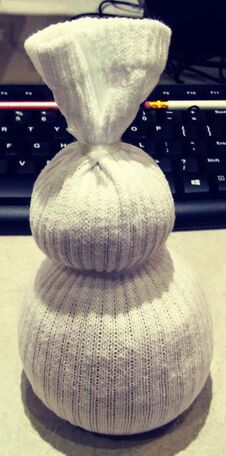
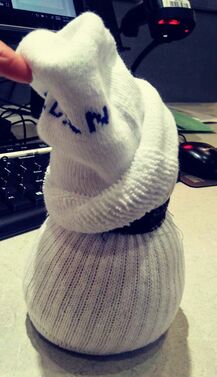
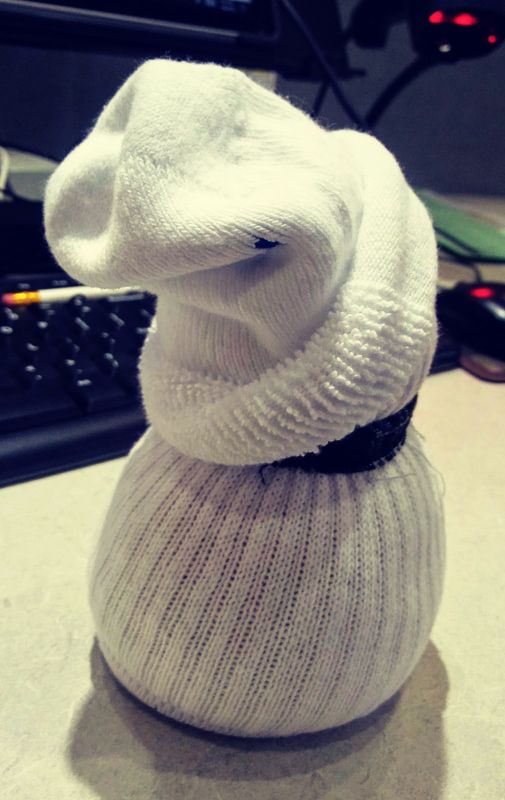
1. Cut your sock in half at the location in the photo 2. Take the top half and turn it inside out 3. Tie off the cut end with string (make sure to tie it tight!) and flip it back right side out 4. Start filling your sock with the rice (a funnel will help make it easier or just take your time with pouring) Fill the sock as much as you’d like – there is no right or wrong way *I wanted to mention here, if you have text on your sock, it may show on the hat. I, luckily, covered mine up by folding the hat over "hipster" style as shown below.
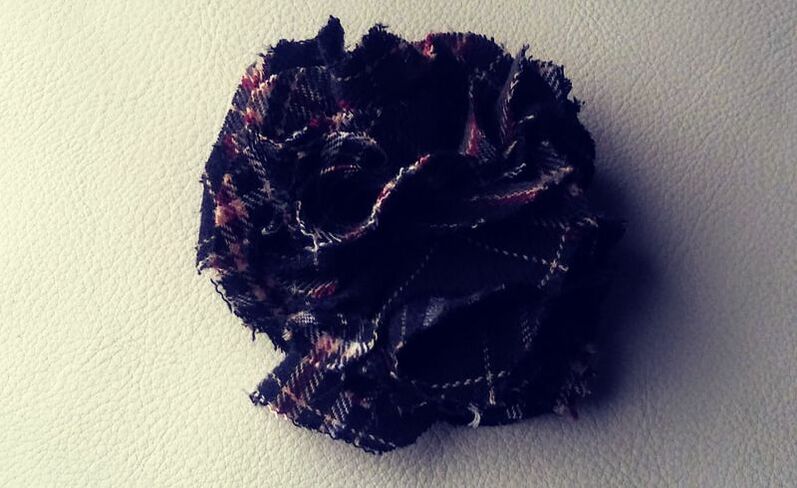
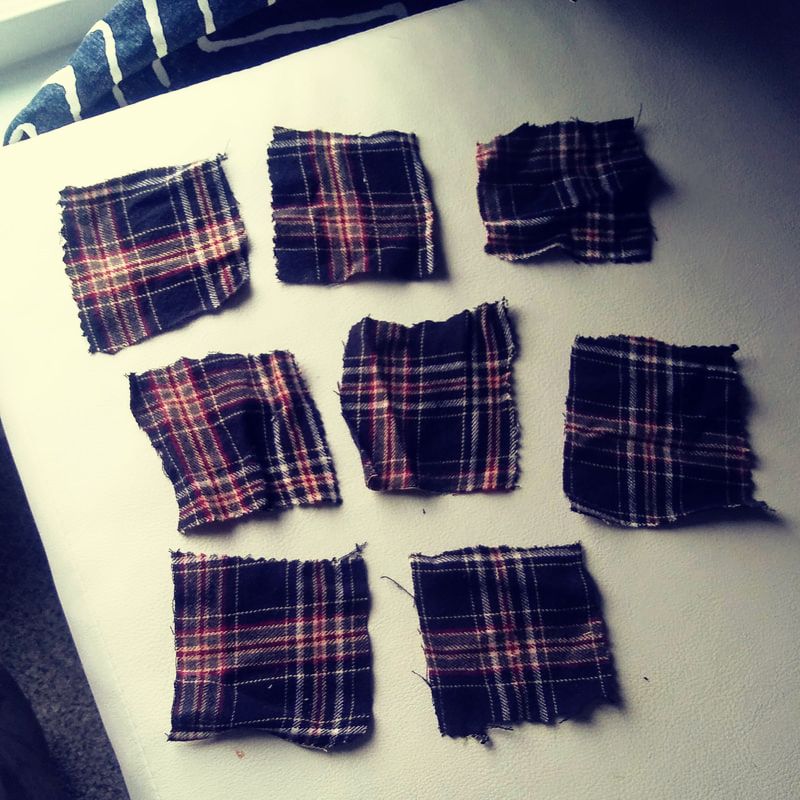
Do you have a bunch of scrap fabric that you don't know what to do with? This is the perfect craft to use 'em up! Supplies Needed:
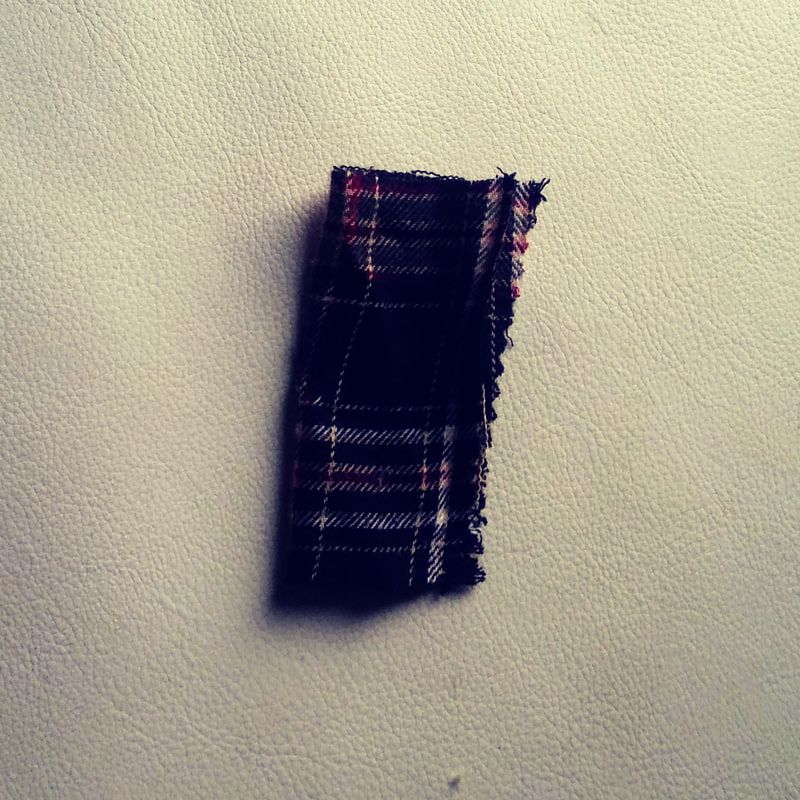
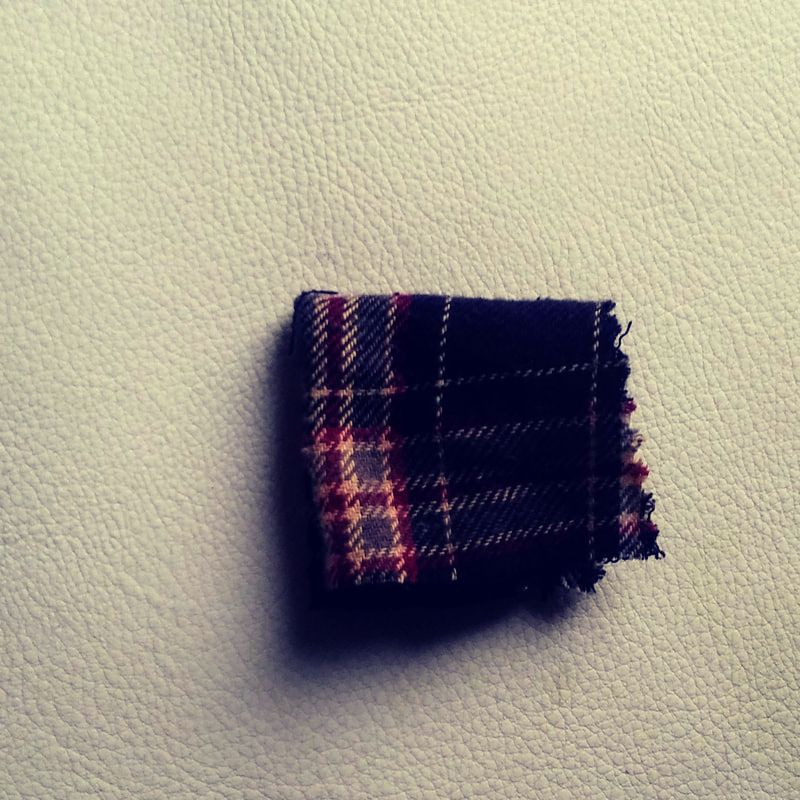
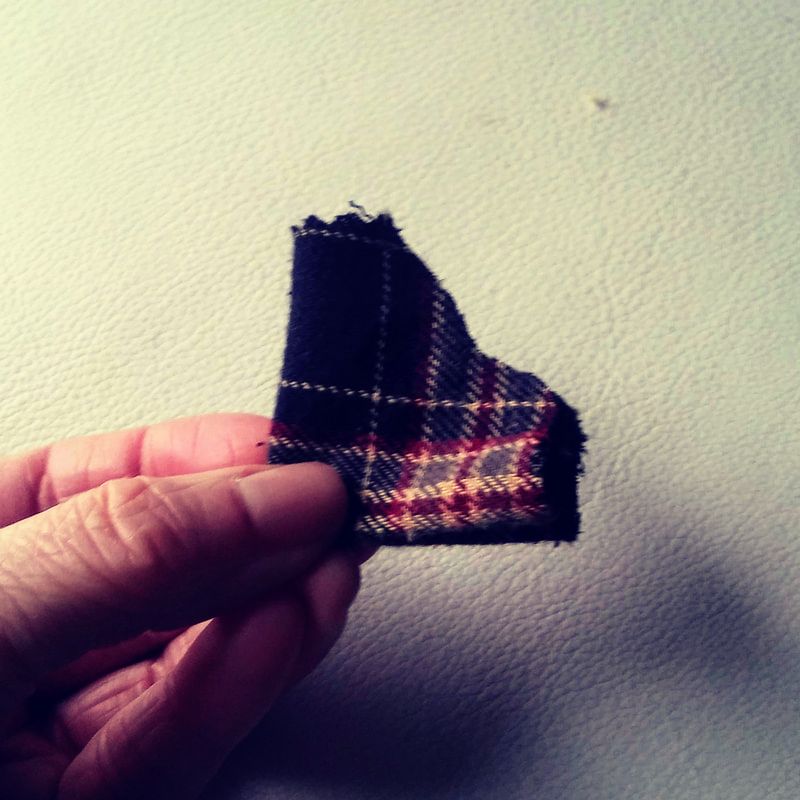
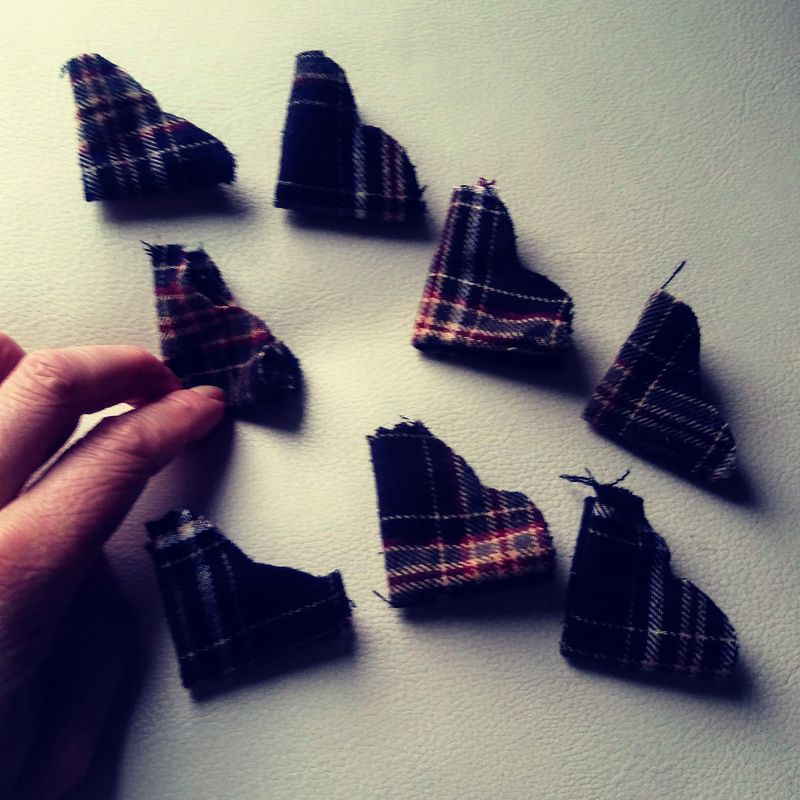
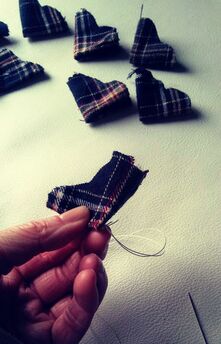
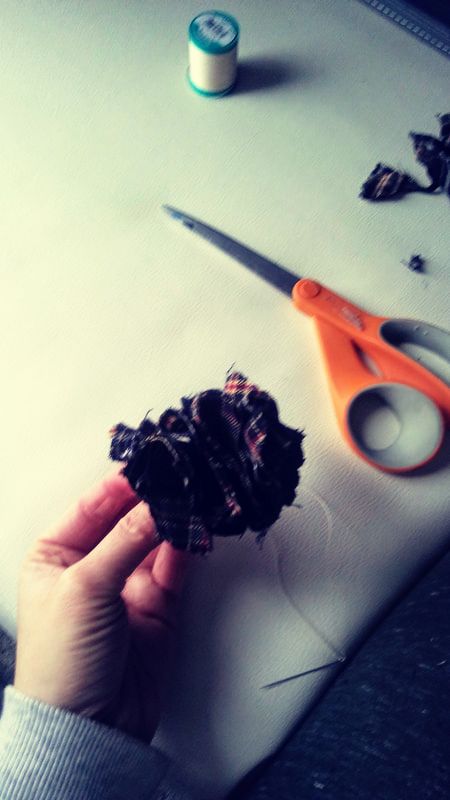
1. Cut 8 3"x3" pieces out of your fabric (or various fabrics) 2. Fold each piece in half and then in half again... 3. While holding the fold of each piece, cut the corner into a rough looking heart shape (I went ahead and did all 8 pieces so they were ready for me and I felt like that really sped the process along!)
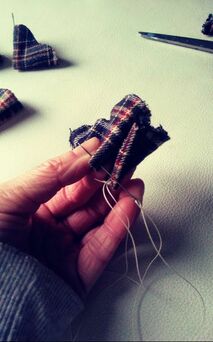
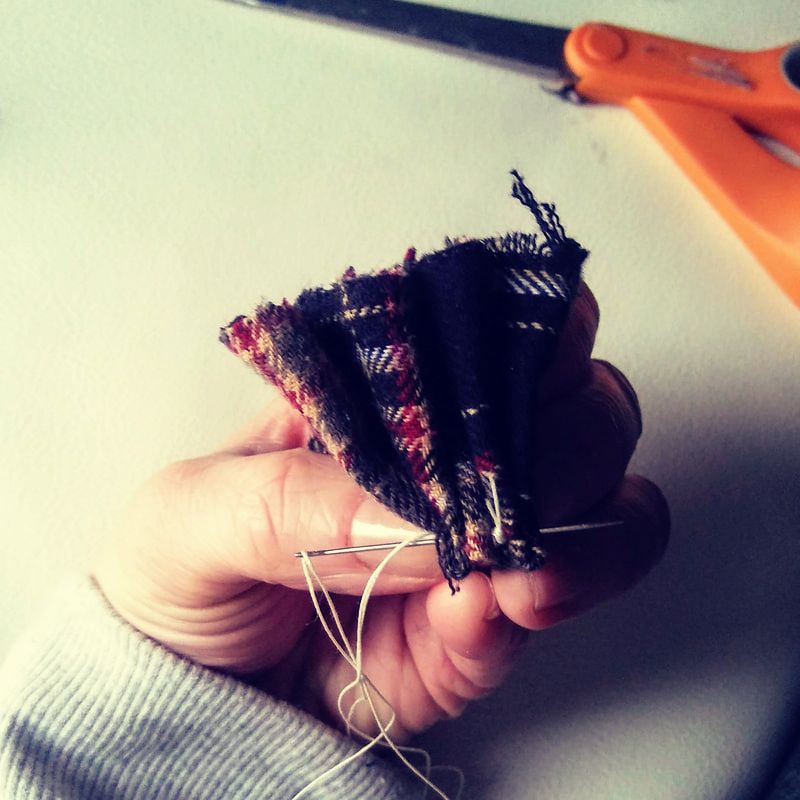
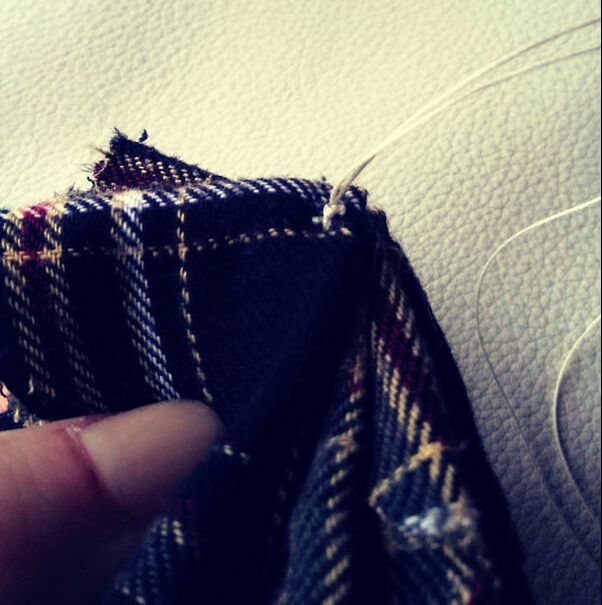
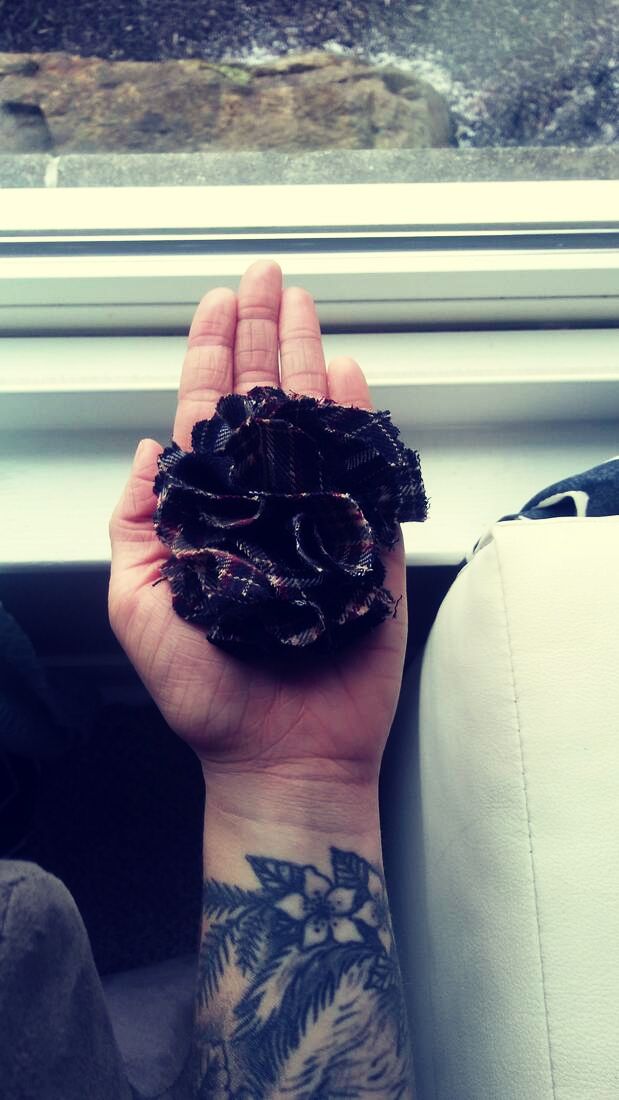
8. As you let go of the corners, you'll see how all of the pieces are now together, but... it needs a little help becoming a flower. Begin "fluffing" up your pieces and spreading them outward. Oooo look at that flower grow! And just like that, your flower is formed and ready for whatever you wish to use it for! (Side note: the fabric I used are actually pieces of my Papaw's flannel shirts - he passed a couple of years ago. I plan to use my flowers for wedding decorations/bouquets whenever that happens... cough, cough! ...That way he'll be with us on our special day.)
Do you remember that awesome spooky spell book I did back in October? Well, it started a whirlwind for Christmas gifts that I got completely lost in! Ahhh, the wonderful world of altered books! This is the main reason I haven't really posted too much because I was so enveloped in this realm, I didn't have time for anything else. Nothing! If you don't know what I'm talking about, do a general search on Pinterest for "altered books" or "altered book journal" and behold. It is endless. You will get lost in a rabbit hole that you might never get out of! Altered books can be created for any type of person, for any reason. The possibilities are endless and it is so incredibly creative. It is a very messy hobby but the results are beautiful. I also found it stress-relieving. I would go into my art room for hours and come out feeling calm and inspired. Anywho, here is one of the books I created. This one was for my mom who decorates in the vintage/americana type decor. You need to download the file in order to watch it as it is too large for the online restrictions. Enjoy, and Happy Holidays!
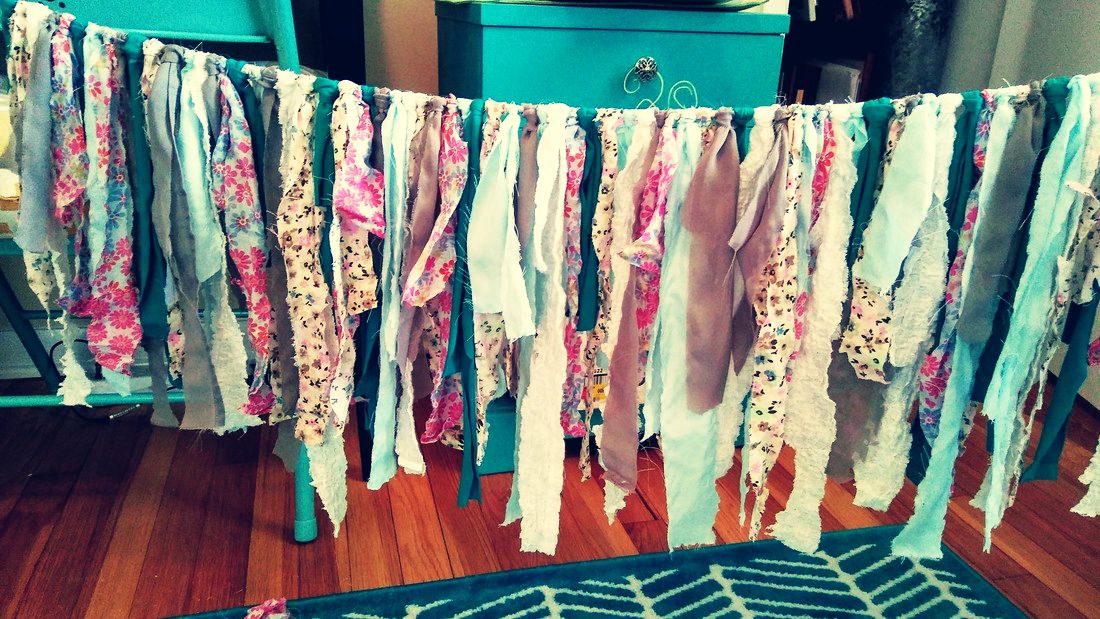
Here's a quick project for some easy decor/accent piece for just about any part of your life: window valance, curtain, overlay skirt, bohemian accent, holiday garland, the list could go on and on. I don't know what the official name of this is but let's call it "scrap-fabric garland" for the purpose of the blog! Supplies:
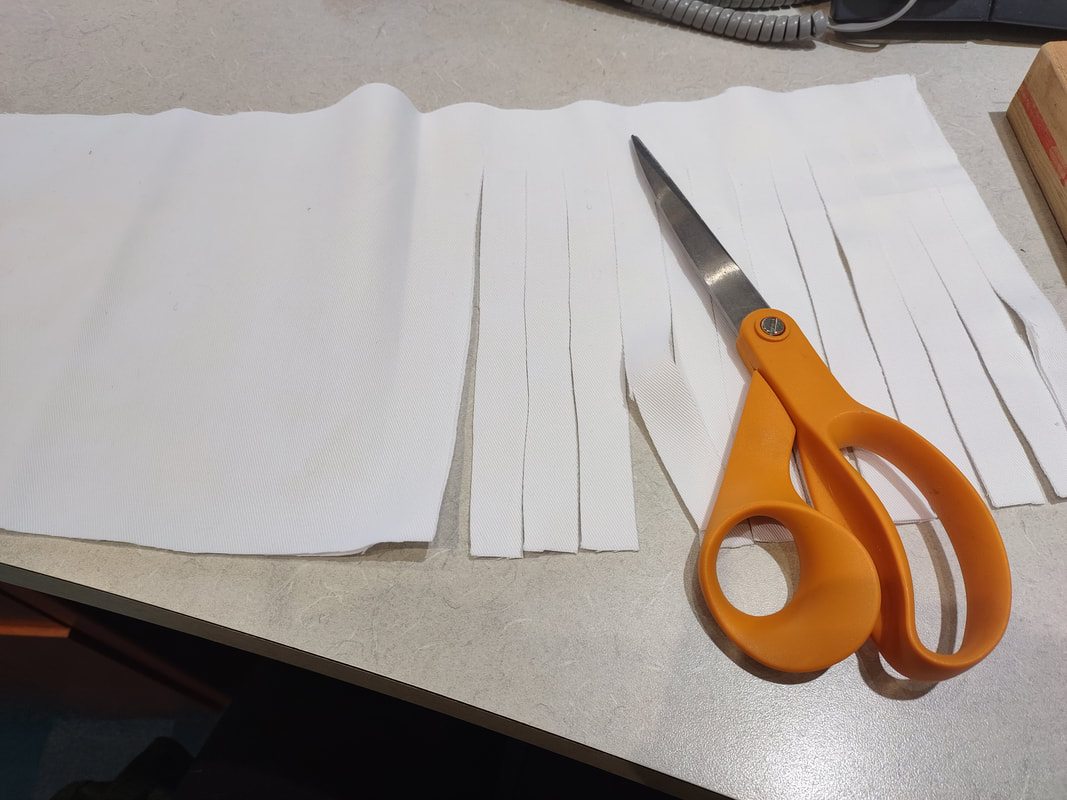
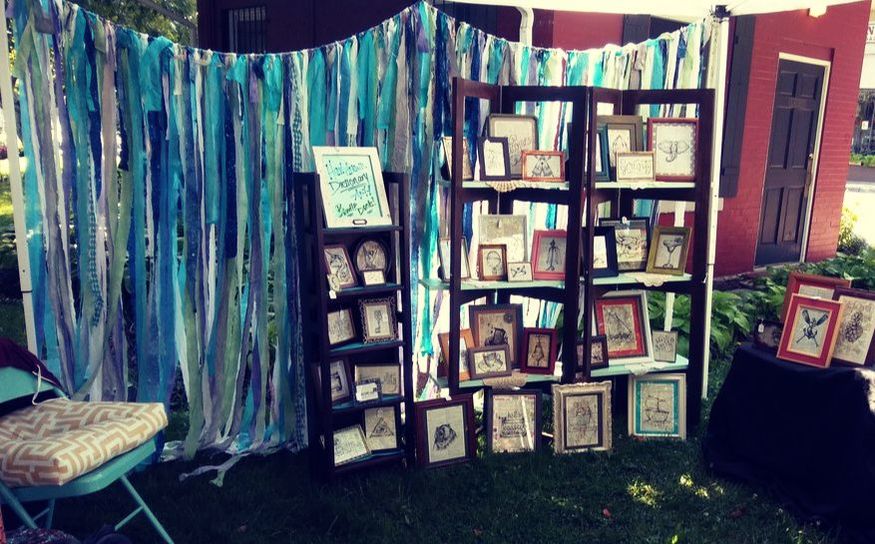
1. Gather your fabric. Do not waste your money by going to the fabric store and buying new fabric, yuck! Hit up the thrift store, garage sales, or your closet instead. You can use just about anything: sheets, curtains, bed spreads, shirts, skirts, tablecloths, etc. As long as you can cut it, you can use it. The best items to find are ones that have more than one color involved. For example, I got a layered skirt for the garland in the first finished image. The underside layer was a mauve-y grey and the top layer was a pink floral - 2 for the price of one! 2. Cut long strips of the fabric. We will be doubling the strands so make it double what you need in length. The fabric will most-likely shed allllll over the place! That's just how it goes unless you want to use pinking shears. 3. Cut a length of strong rope/string to use to tie your pieces onto. It's better to cut extra and trim it down later. You may think that you don't need anything hefty but trust me you do. Once all that fabric gets tied on there, it is much heavier than you think! I strung up my string and even tied the ends up so that it is nice and taught for you to tie the strands right on the string without any headache. 4. Begin tying fabric pieces onto the rope using the larks head knot technique. This is the best because you will get two strands for the price of one and will make the garland look super full and fluffy. 5. Literally just keep tying... and tying... and tying... oh yea, and tying. And then you are done! You can now hang it wherever you wish or wear for a spunky costume, anything your heart desires! Here are my 2 examples below: My second garland is a MEGA garland! It's heavy but it's so worth it. I use it to decorate my craft show booth whenever I have one outside. It's so pretty blowing in the wind and I get so many compliments on it!
|
Rebecca MyersHey there, I'm Becca, or Rebecca, but not Becky, never Becky, unless you're my family from down south! I'm a simply modern librarian by day and an artist by night. My pursuit is for a simple, happy, healthy, and more fulfilling life! I hope I inspire you to get crafty! Archives
March 2022
Categories
All
|
||||||||||||||||||||




 RSS Feed