
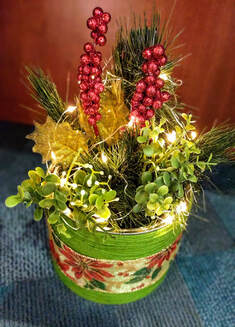
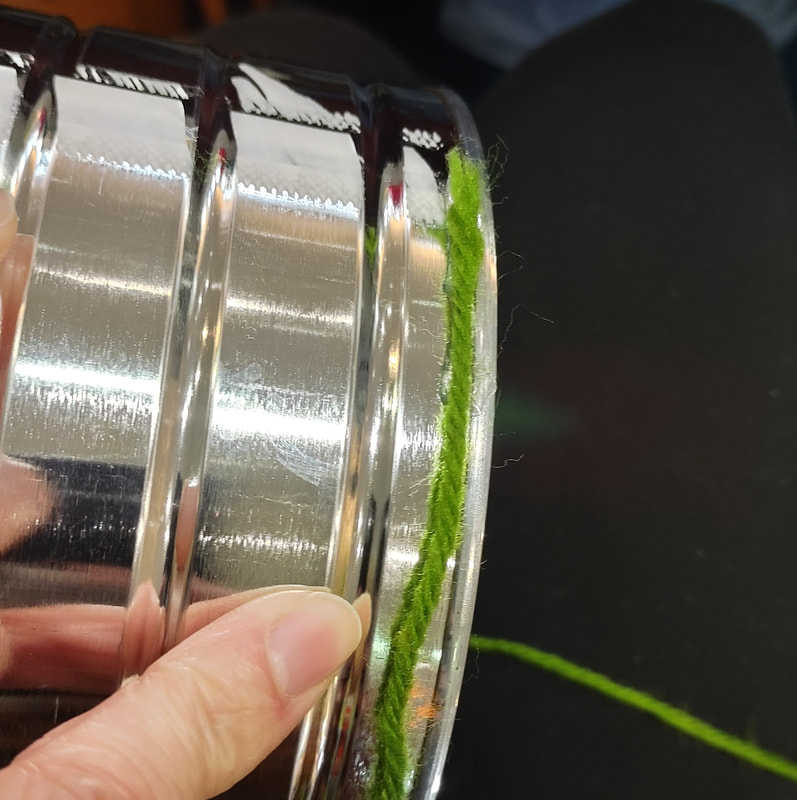
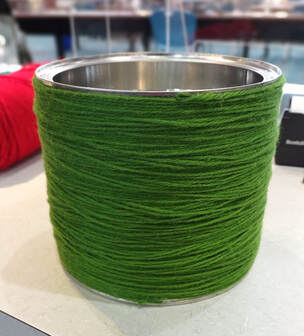
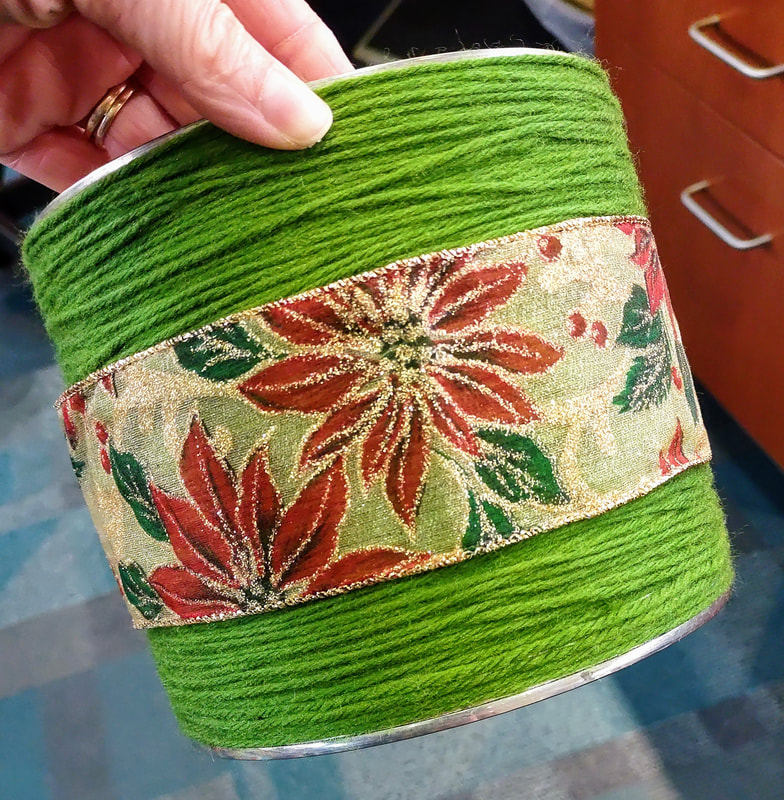
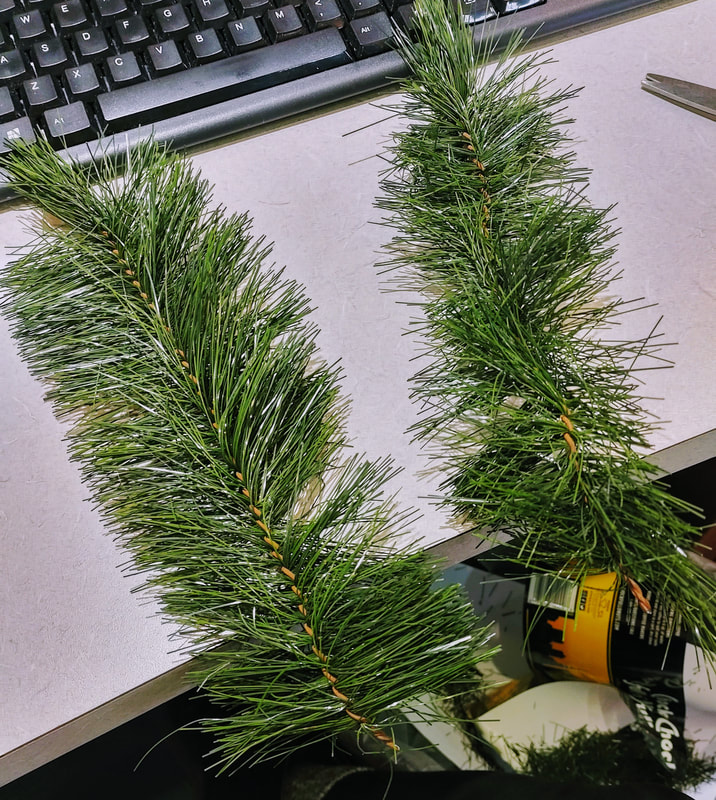
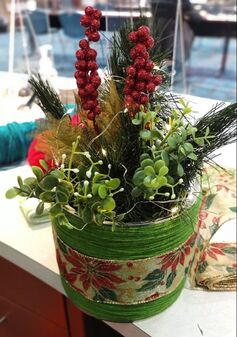
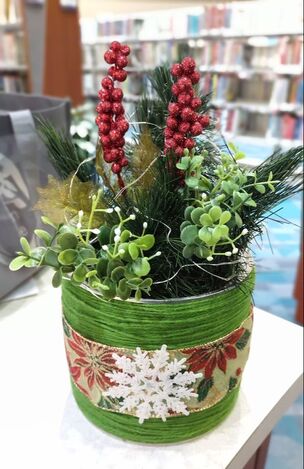
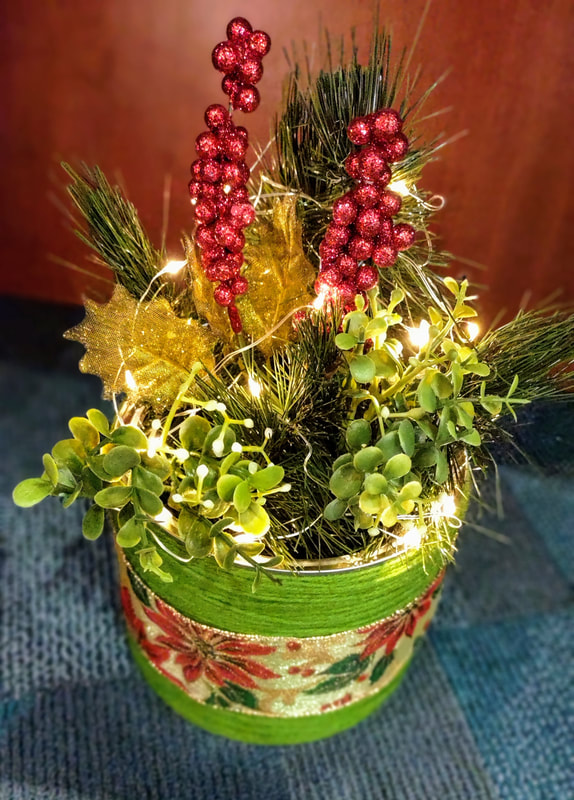
 One of the last projects I did before changing jobs at the library, was this floral coffee can! I had been saving coffee cans like crazy for not specific purpose other than the fact that I knew I could use them somehow! I had also received a donation of artificial pine branches from an old Christmas tree and had a tonnnnnn to use! It was my goal to use some of these up before I left and I think I barely made a dent even though I had 20 people and each person got 5 branches! Wow! I also used up some random Christmas/winter floral decorations that I found in a box for this because, why not! It really jazzed up the cans! 1. Wrap the can with whatever you would like. I chose yarn because we had a bunch! And it would give it a nice soft look! I added some hot glue at the beginning to make it stick and began wrapping around and around and added glue every so often to make sure it would all stay secure!
5. Lastly, I added a small strand of battery operated fairy lights and a white sparkly snowflake to the front to finish it off!
0 Comments
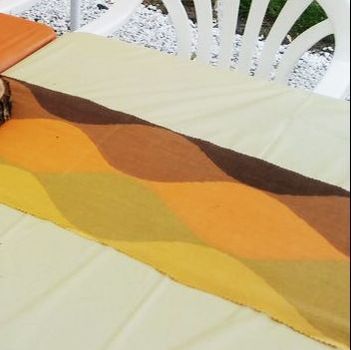
It feels like it has been ages since I have last posted! But it has not quite been 2 months yet so I think I'm still in the clear. The reason for my absence was mostly due to the fact that I was in charge of throwing my parents a surprise 40th anniversary party! And it's no simple feat - especially when you want to do it up like me (Momma taught me best!). Planning a party of any type has so many components! It starts with when to have it, where to have it, and rolls into the confusing guest list of who and who not to invite - hoy, so many decisions! Luckily, a wonderful aunt offered to host the party for us, which means... no cost! (I tried to give her money guys, I swear). Once you decide on a guest list, you can make/order invites. So much fun!  We put a twist on the party since it was for my parents anniversary and made it a 1970's party to honor 1979. I love having a theme. It makes it more fun in my opinion! But, I also think just doing a general color scheme is fun too! So, once you get those invites out you can start thinking about the details: food, decorations, etc. Luckily, my parents have amazing friends, everyone offered to bring something. My aunt and I provided the main dishes and everyone else brought sides and desserts. Someone else even offered to get the cake for us - thank you, thank you! 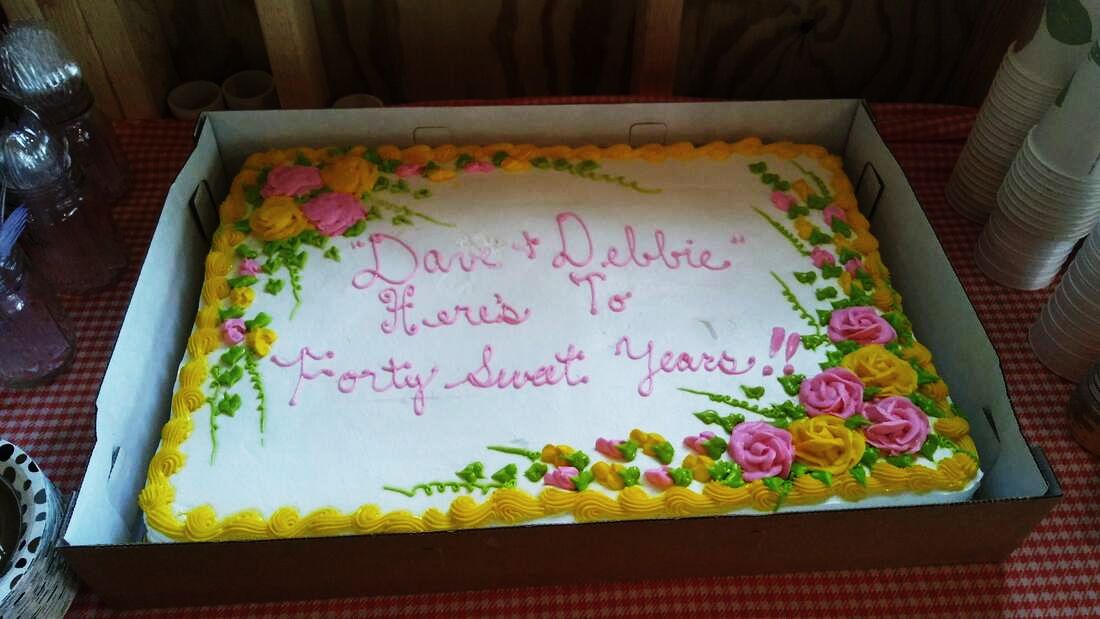 I was left to decorate, which I love more than anything. Since we went with the 1970s, I tried to stick with the beautiful hues of that era - yellow, olive green, peach, brown, etc. and it was beautifully vintage when it all came together.
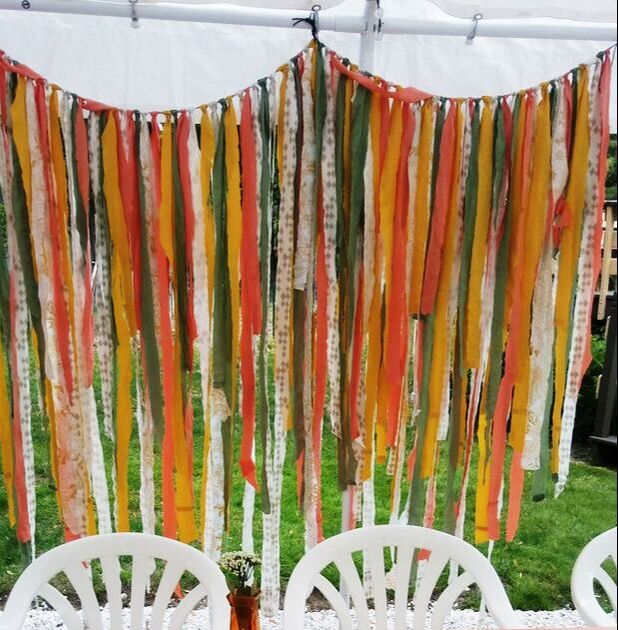
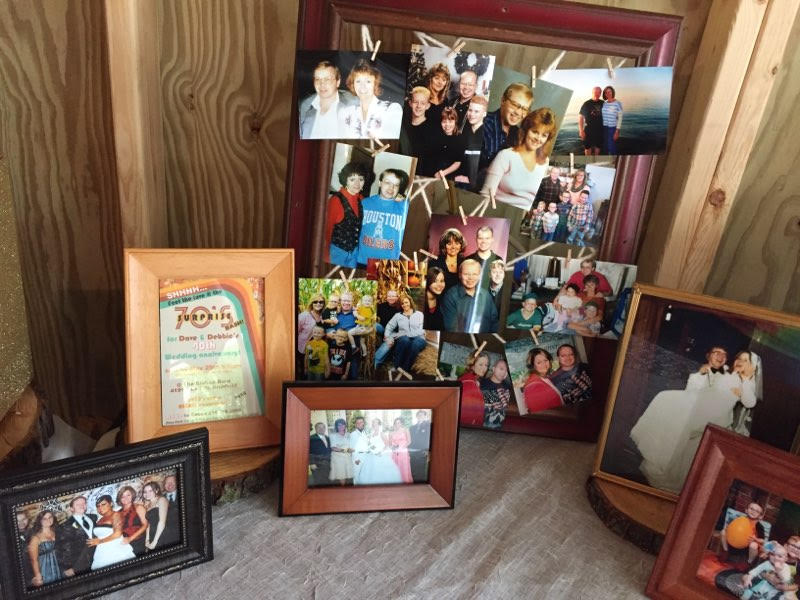
To see how to make the fabric garland, read my post here: https://www.the-art-escape.com/blog/scrap-fabric-garland I put together a small photo collage (didn't want it to be too overwhelming) to show the progression of our family over the last 40 years and also put their 1970 style photos in frames to use as decorations on the tables - and conversation starters of course!
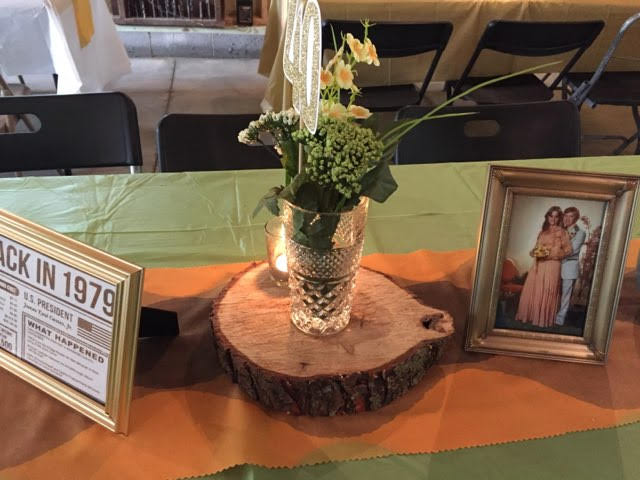
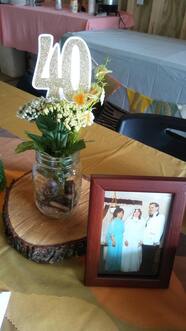 I used mason jars for center pieces, filled them with stones so they wouldn't blow over, and put a simple mixture of fake flowers with pin wheels or "40" stakes in them. I purchased the pin wheels for dirt cheep at a craft store and made the "40" stakes myself by cutting out "40" on glitter paper with the CriCut, gluing them to a white background, and taping them to the stakes. I trimmed everything down to fit into the glasses at varying heights. My aunt also had tree slices left from previous parties that we used under the mason jars! This provides some extra pazaz to the table for sure! To be completely honest, I didn't really know how many tables we would have. I also didn't know where I would be hanging all the stuff I was making but I just kept making away! Everything was able to be used and it all came together perfectly!
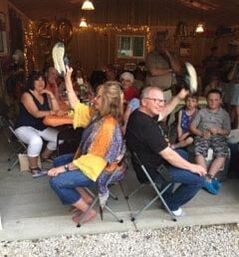
Although it was supposed to be a surprise party... my parents totally knew! They said no one talked to them all week and people were being too weird - woops! That's ok - it was a perfect 70's bash none-the-less. Now, for one thing that was not so perfect.... there always seems to be something that happens at events: strange family drama, weird occurrences, something doesn't work, something breaks, you forget the cake, etc.... this particular event resulted in my aunt (yes the same aunt who hosted) acquiring a broken leg!!!! It was awful, there's just no other way to put it. I felt/feel absolutely terrible that it happened because, in my mind, if I wouldn't have had it there, she wouldn't have broken her leg! Now she will be laid up in a cast for weeks and weeks, right in the middle of summer (she's a camper, this is a big deal people!) and right before her grandbaby is due! Terrible, terrible, terrible! It happened while we were setting up for the party, we tried to make her sit the rest of the day/night but the woman wants to move, move, move! Thankfully, she had a boot from when she broke her other leg another time and wore it all night... but, the next day, x-rays revealed it was most certainly broken. Picture below to prove how amazing my aunt is for sticking around the whole night! 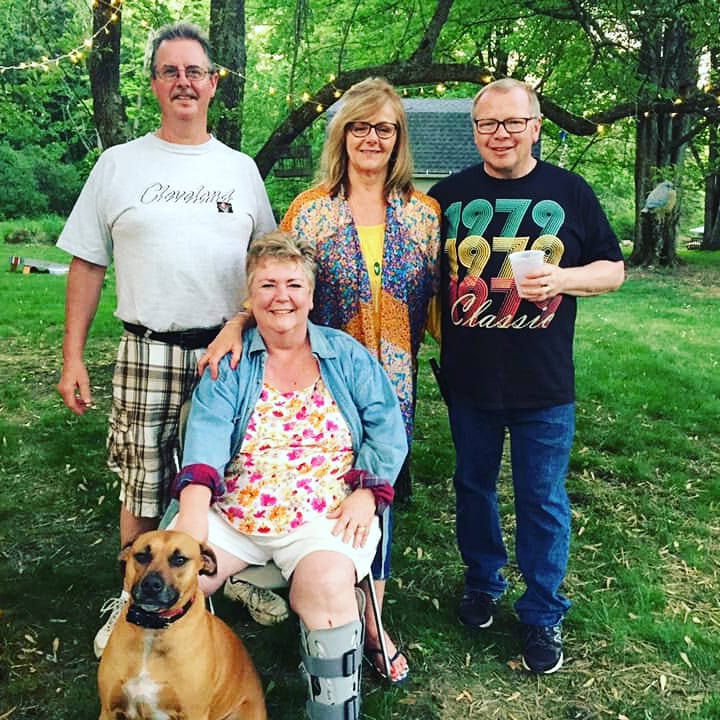 So, in conclusion, there are so many different pieces and parts for planning a party. You can go in so many different directions and do just about anything, making it personal for whoever the guest-of-honor is!
Need ideas for planning your next party?? Just ask me, I'd love to help! 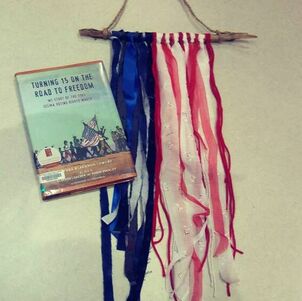 I created this quick craft project to tie into a book discussion at work. But this so easy, anyone can do it and it's very quick as long as you are making a smaller size. I also think this would be awesome in an extra large size as well! Supplies:
1. Gather your supplies all in one space so you are ready to go! a. If you are using fabric, I would cut your strips at this time as well 2. Use blue pieces to represent the blue star part of the flag (I saw some online that used white beads throughout to represent the stars!) and alternate your red and white for the stripes. 3. Tie your strips on using the Larkshead Knot technique below. This is a great way to add your elements because you get two components out of one. a. You can also tie them however you wish. Try tying little pieces together of different types/textures to give your flag more variety.  4. Create a piece for hanging. I did this by wrapping 3 pieces of twine around the one end, braiding it, and tying it off on the other side.
5. That's it! Feel free to add whatever types of elements you have lying around! Perfect decoration for the most rustic folks you know! Here's a quick project for some easy decor/accent piece for just about any part of your life: window valance, curtain, overlay skirt, bohemian accent, holiday garland, the list could go on and on. I don't know what the official name of this is but let's call it "scrap-fabric garland" for the purpose of the blog! Supplies:
1. Gather your fabric. Do not waste your money by going to the fabric store and buying new fabric, yuck! Hit up the thrift store, garage sales, or your closet instead. You can use just about anything: sheets, curtains, bed spreads, shirts, skirts, tablecloths, etc. As long as you can cut it, you can use it. The best items to find are ones that have more than one color involved. For example, I got a layered skirt for the garland in the first finished image. The underside layer was a mauve-y grey and the top layer was a pink floral - 2 for the price of one! 2. Cut long strips of the fabric. We will be doubling the strands so make it double what you need in length. The fabric will most-likely shed allllll over the place! That's just how it goes unless you want to use pinking shears. 3. Cut a length of strong rope/string to use to tie your pieces onto. It's better to cut extra and trim it down later. You may think that you don't need anything hefty but trust me you do. Once all that fabric gets tied on there, it is much heavier than you think! I strung up my string and even tied the ends up so that it is nice and taught for you to tie the strands right on the string without any headache. 4. Begin tying fabric pieces onto the rope using the larks head knot technique. This is the best because you will get two strands for the price of one and will make the garland look super full and fluffy. 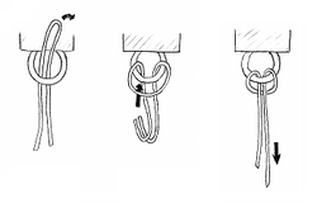 5. Literally just keep tying... and tying... and tying... oh yea, and tying. And then you are done! You can now hang it wherever you wish or wear for a spunky costume, anything your heart desires! Here are my 2 examples below: 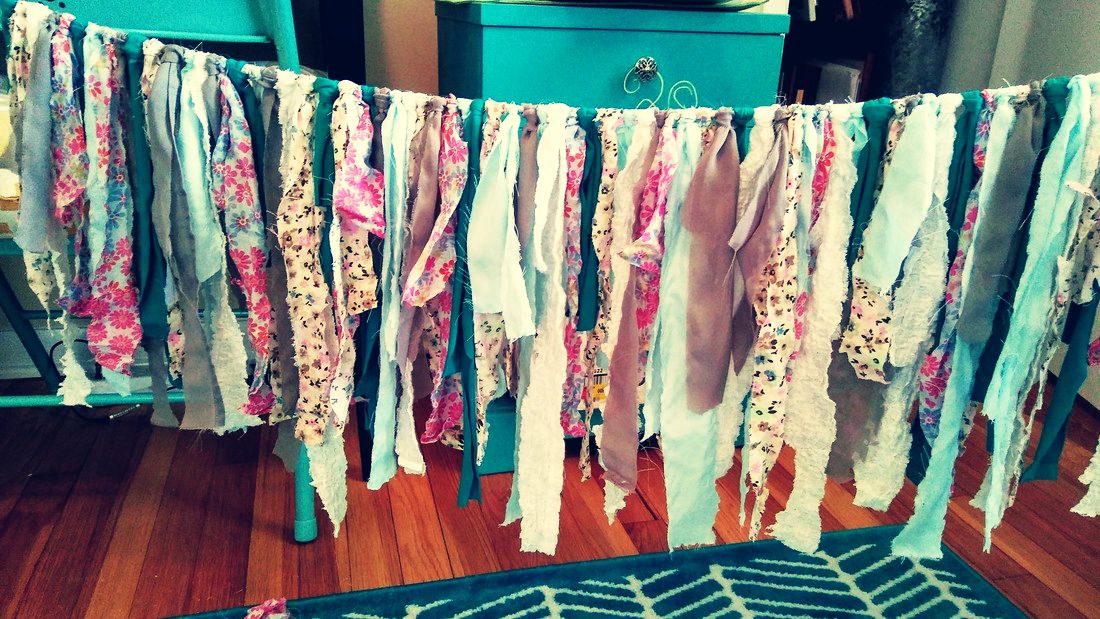
My second garland is a MEGA garland! It's heavy but it's so worth it. I use it to decorate my craft show booth whenever I have one outside. It's so pretty blowing in the wind and I get so many compliments on it! 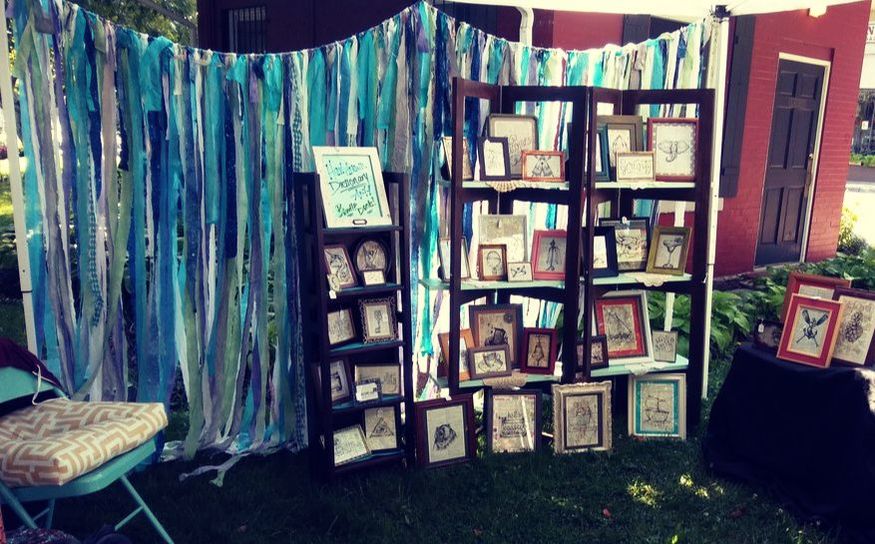 |

Rebecca MyersHey there, I'm Becca, or Rebecca, but not Becky, never Becky, unless you're my family from down south! I'm a simply modern librarian by day and an artist by night. My pursuit is for a simple, happy, healthy, and more fulfilling life! I hope I inspire you to get crafty! Archives
March 2022
Categories
All
|

 RSS Feed