
|
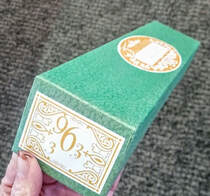
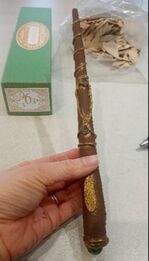
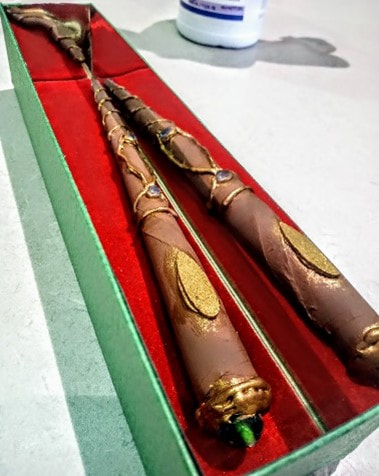
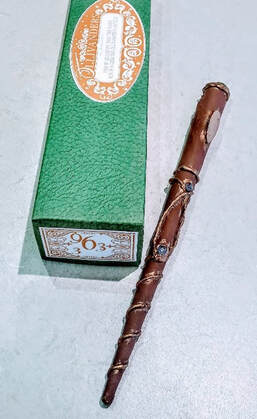
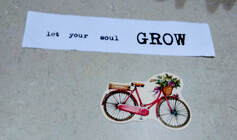
I have a confession to make... I didn't read Harry Potter when I was a kid (enter shocked faces)! I know, I know, how could I not have?! To be honest, I remember my parents buying the first book for me and coming home with it. I remember one of them saying "Here, everyone's talking about this, kids supposedly are obsessed with it". Well, maybe that comment was what threw me off because I, for as long as I can remember, hate doing what everyone else does. I do remember trying to read it, however, but never made it past the first chapter. So, once I became a librarian, I decided that this shame was unacceptable, I MUST read HP and ASAP! Well, I don't know what changed, but I read them all within a a couple of weeks and was in love with them. So yes, I am an HP fan, but it just took me 20 years! With my job at the library I am constantly receiving strange and unusual things from customers and fellow staff members in the hopes that I will save the item from the dumpster. To be honest, I kind of love it! It's like... a "thing" now and I love the challenge. One of our patrons who I have grown to know quite well over the last couple of years, is a gentleman named Ralph. I first met him when he came into the library saying he worked at a warehouse that was closing and asked if we librarians would want anything for crafts or programs. Well on to his warehouse I went and ever since then he stops by and gives me more fun things to use, I love it. One item he gave me was 2 hugeeee boxes of long skinny green boxes. I had no idea what I'd use them for but as always I said, "Yep, I'll take 'em". So there I was staring at 200 of these narrow boxes and the only thing I could think of... wand box. These boxes were perfect, I mean perrrrrfect for a wand so that's what they became! Below are the steps I took to make a simple wand with easily found materials, hopefully you can find a similar box to use too or just make the wand itself! 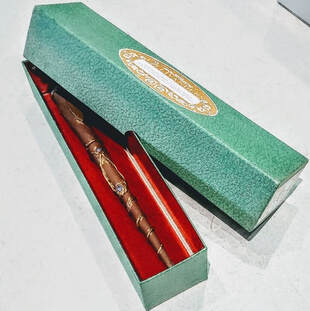 SUPPLIES:
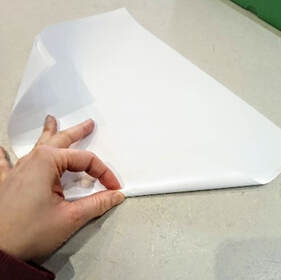
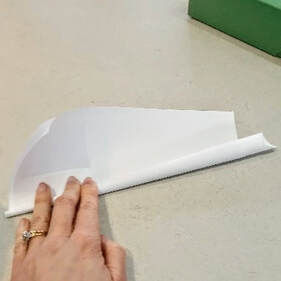
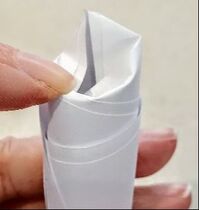
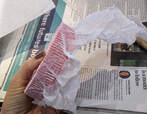
1. Layer 2 sheets of copy paper and begin rolling from one corner into a cone shape (it might take a few tries to get the right look/size).
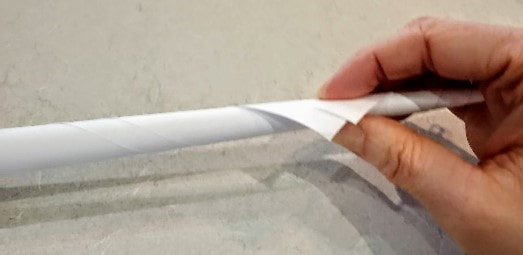
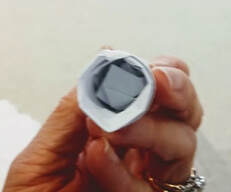
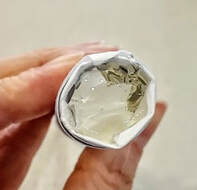
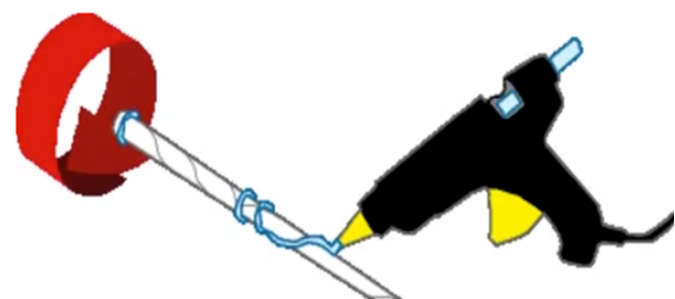
4. This will leave a hole at the end, fill this in with crumpled up paper so the wand becomes sturdier, and fill the end with hot glue to secure.
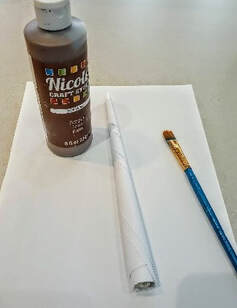
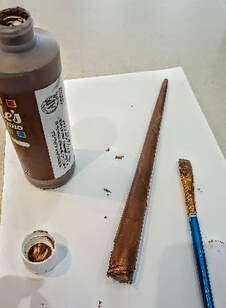
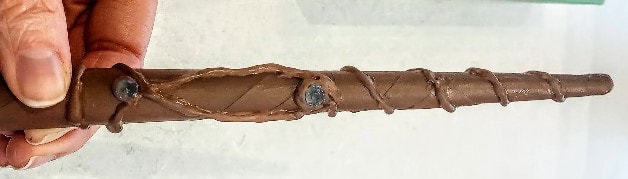
5. Paint your wand whatever color you would like. It may take a couple of coats to cover completely.
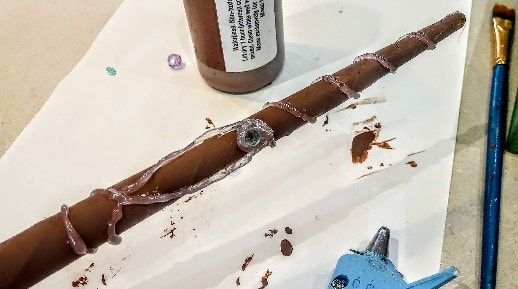
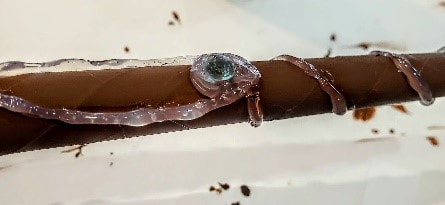
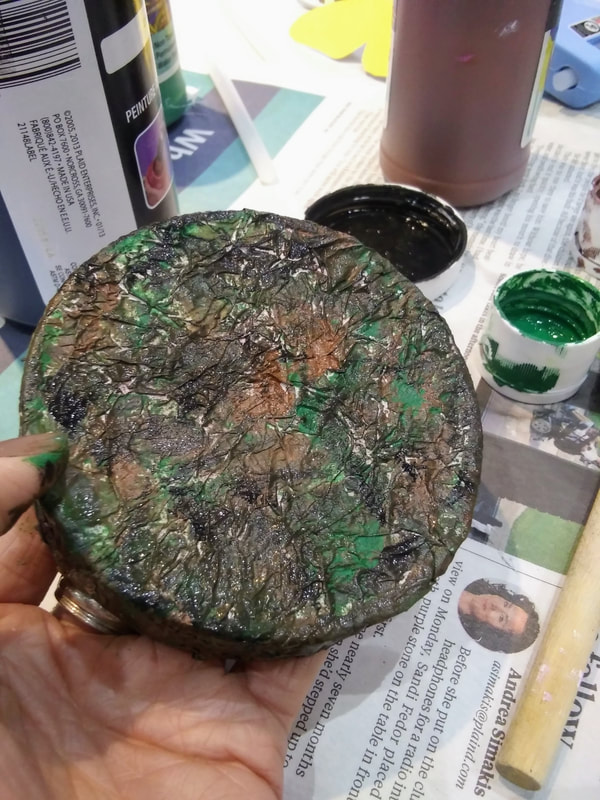
7. Use hot glue to create the character of your wand. While holding the wand, slowly rotate it as you create your lines and shapes with the glue and be careful with your fingers!
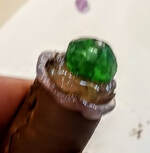
8. Place some of your beads into the hot glue for a “jeweled” effect. One at the end looks very authentic!
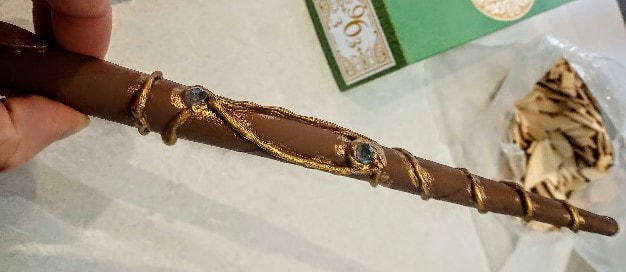
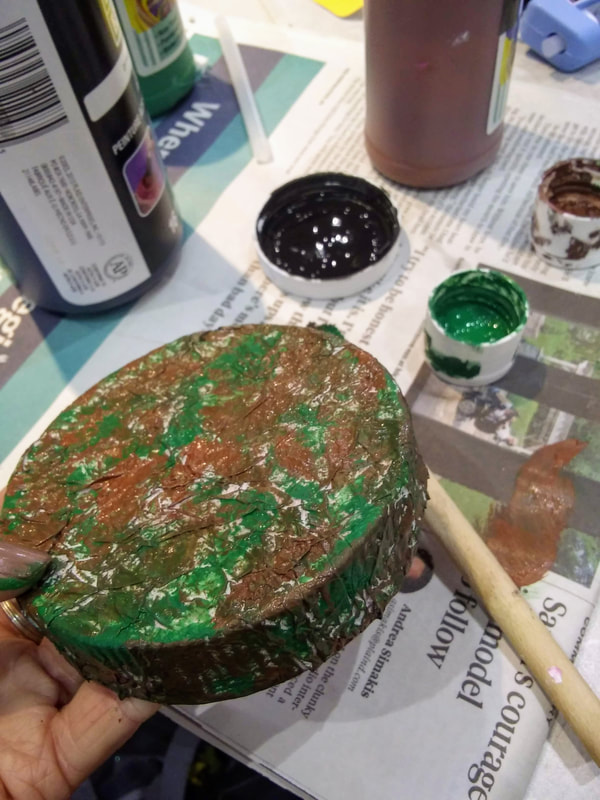
9. Paint over the hot glue with your base color and then again with the metallic paint.
11. Lastly, I wanted to make the box look more "legit". I found both velvet and adhesive mirror pieces to use. I measured and cut the pieces to fit the interior of each side and glued them in each spot. And ta-da! Just look at that beautiful wand! I think it'd be really cool to make a velvet pillow for the inside of the box for the wand to rest on as well!
0 Comments
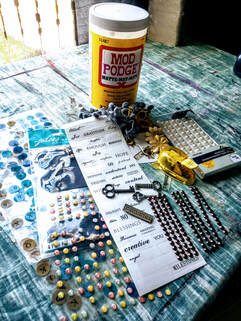
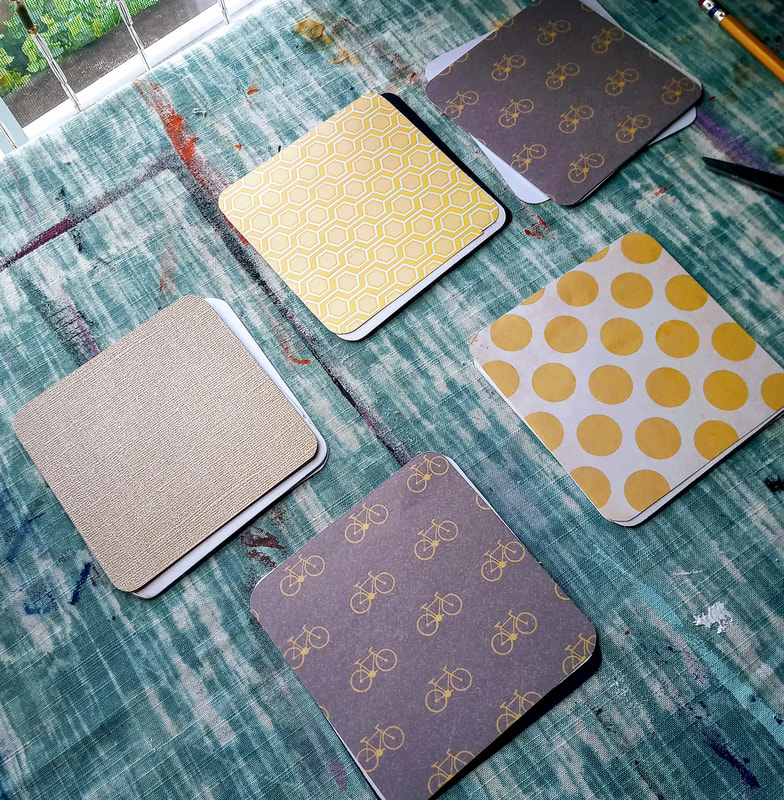
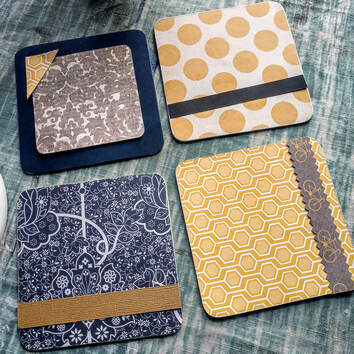
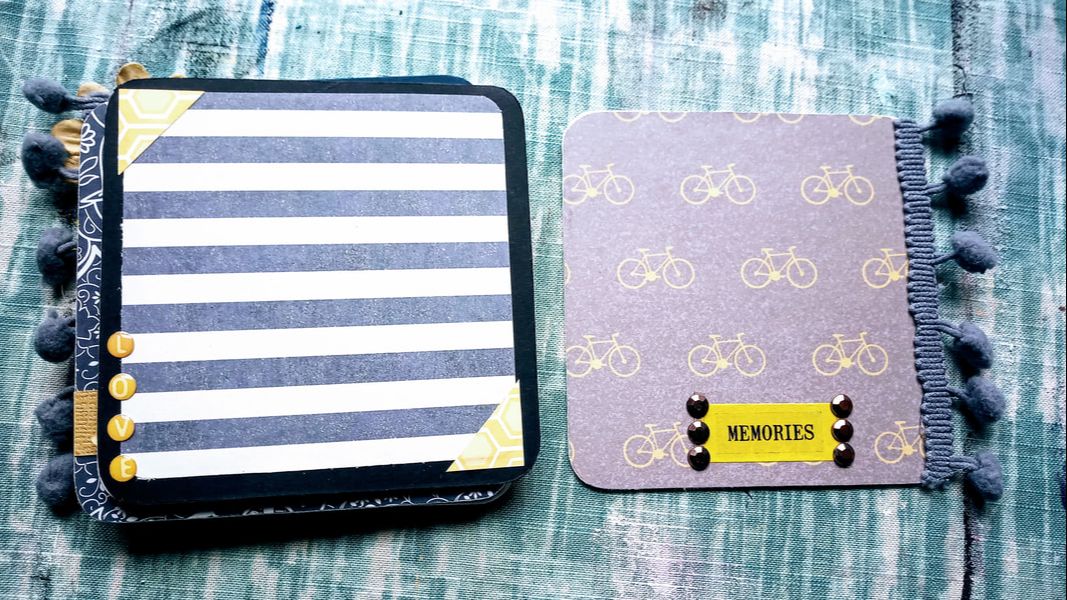
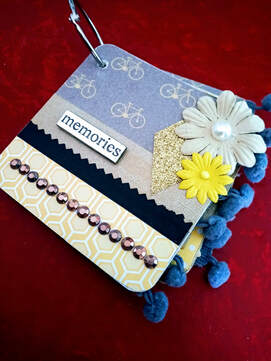 This is a quick project that you can give as a gift with pictures already in it or left empty for the person to fill. They're super cute and itty bitty! Something fun and different to brighten up any day. Supplies:
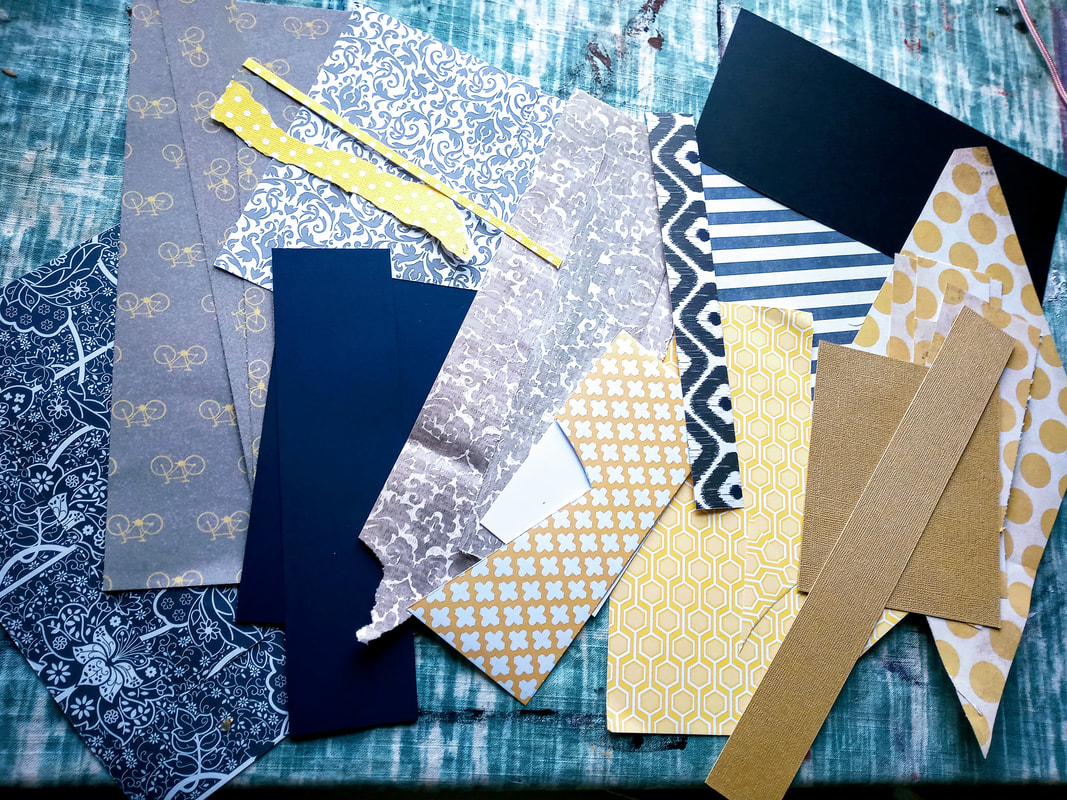
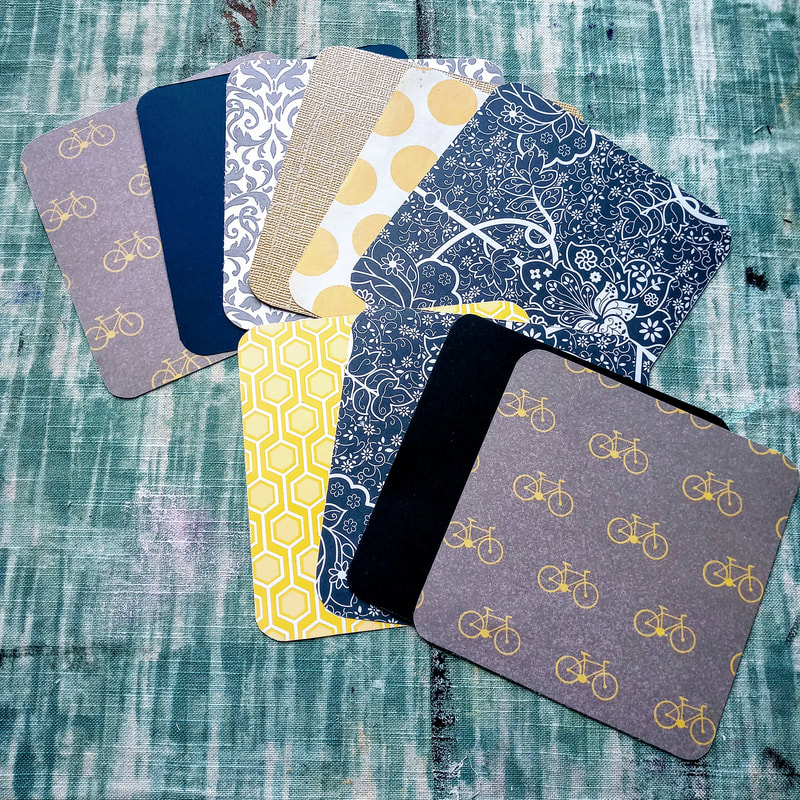
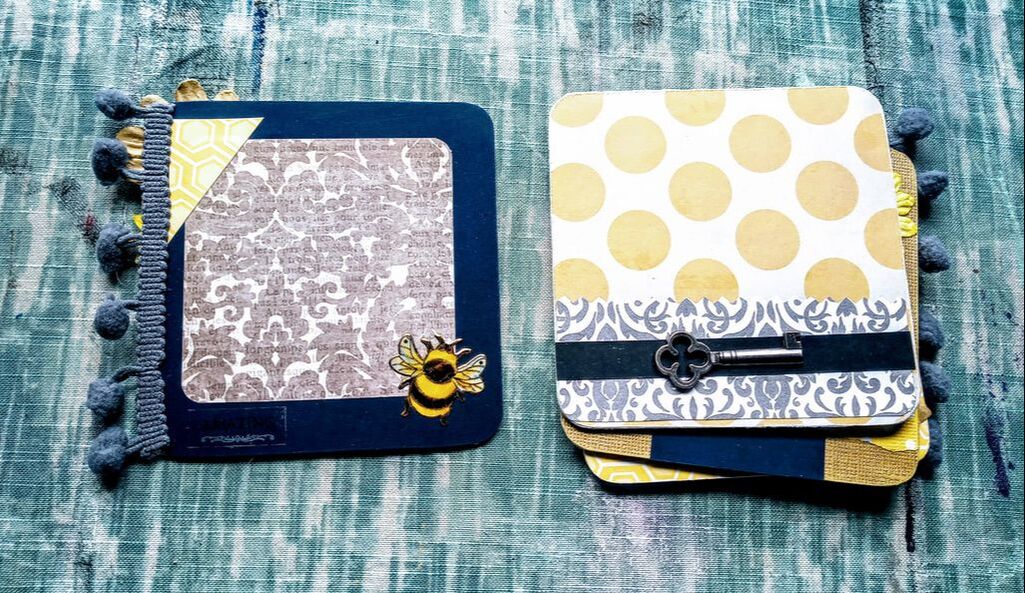
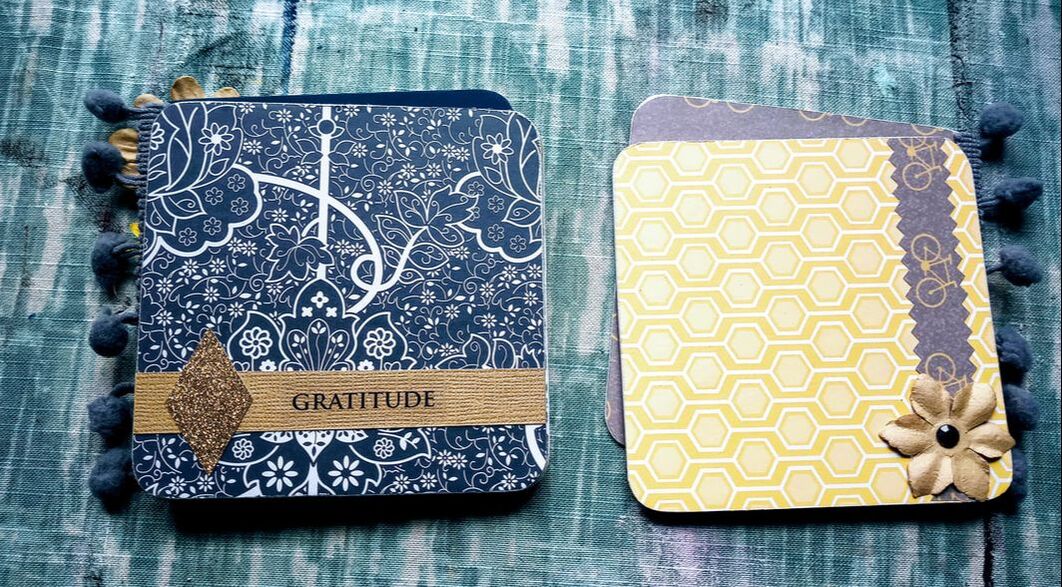
1. The first step for this itty bitty project is gathering all your supplies because there's a lot of potential components. I like to gather everything up that way I have all the supplies necessary near me and ready to go. This is where I picked my color scheme for my scrapbook (I used scraps from my scrap bag) and came up with yellow, grey, and navy. Pretty! I also gathered a pile of random stickers and other embellishments (I had no idea what I would use!).
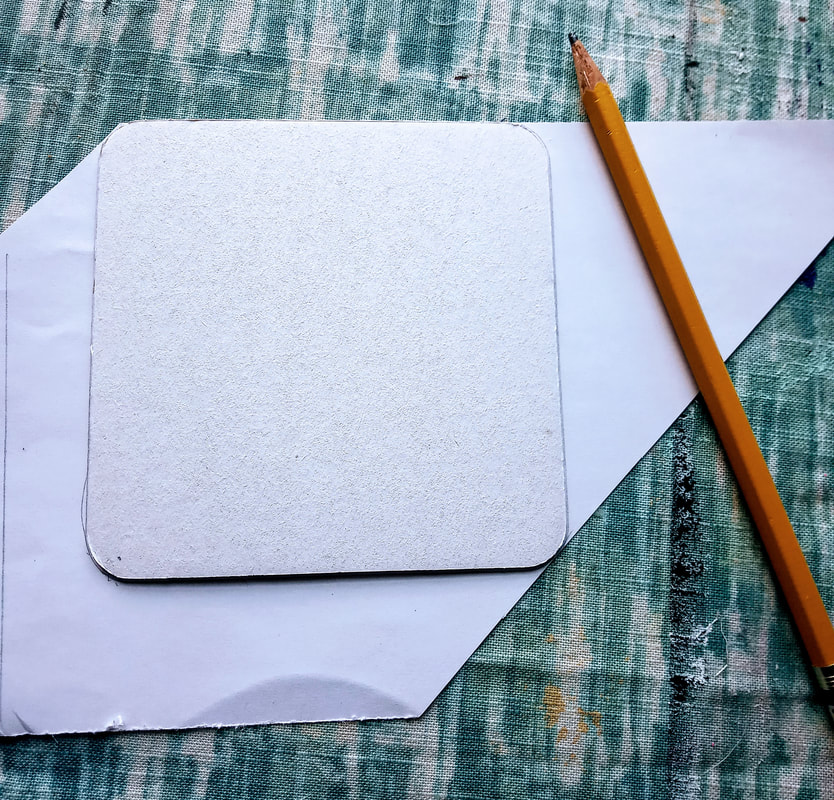
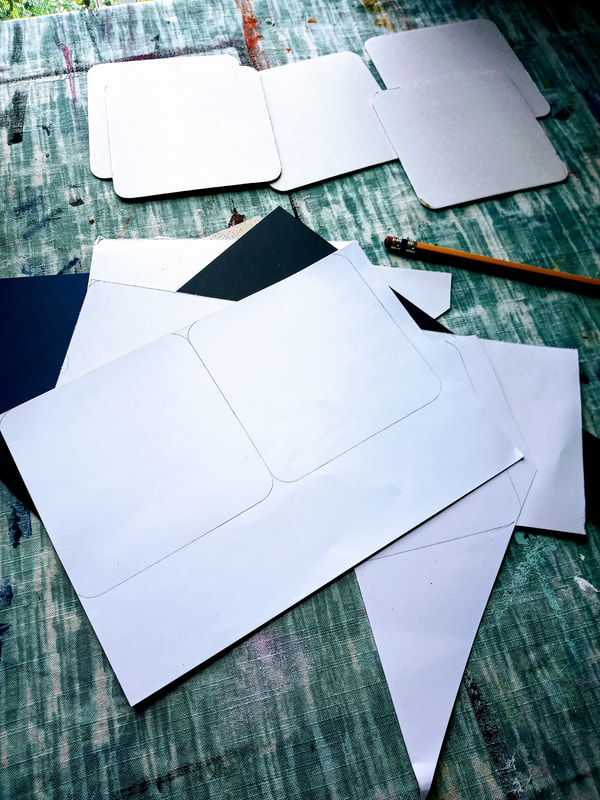
2. I then traced the coasters onto the backs of the scrapbook paper I would use for the main sheets so I could cut them out to size.
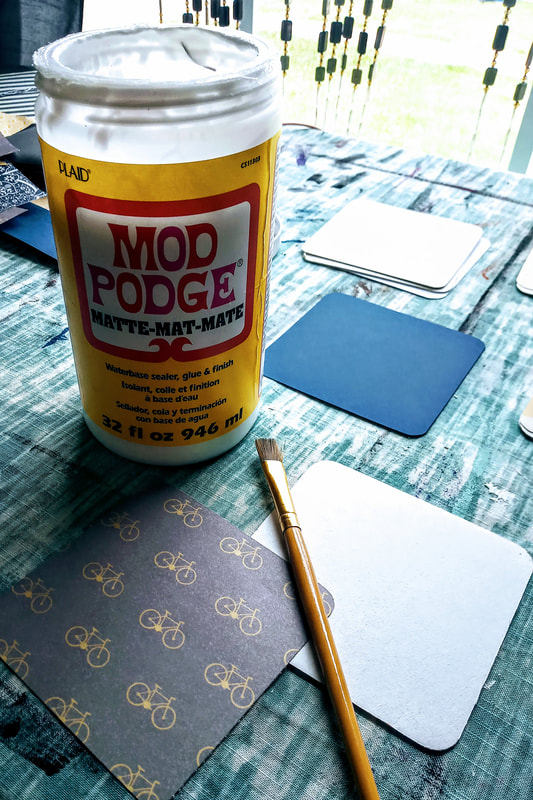
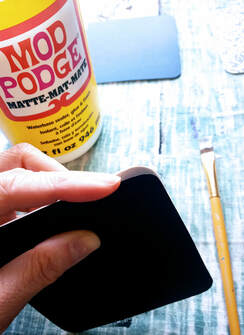
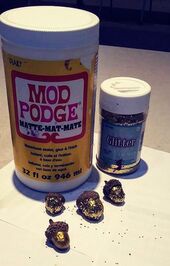
3. I decided the order of the pages that I wanted and laid them out on the coasters. Next, I glued the sheets onto the coasters using the Mod Podge and a paint brush. I did half at a time instead of trying to glue the whole sheet at once, that way I could be more aware of bubbles showing up.
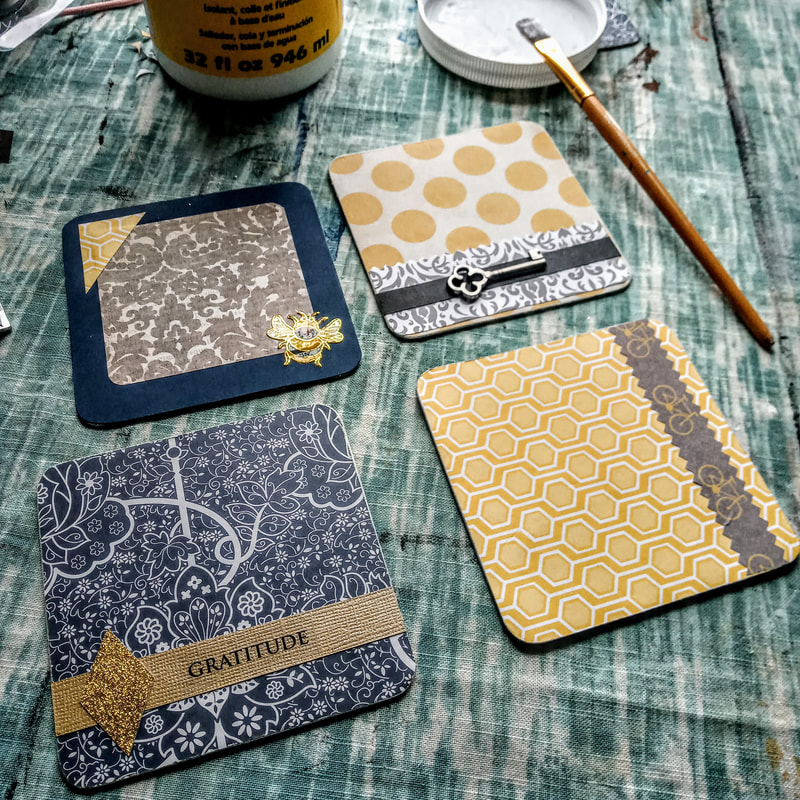
6. Start to plan out your pages by laying out the pieces and parts that you want to include before you officially glue anything down!
7. Mod Podge dries pretty quick so this part of the project will go fast. You can use a hot glue gun for heavier/awkward objects to secure them to the boards.
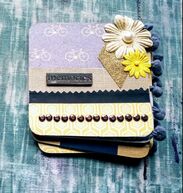
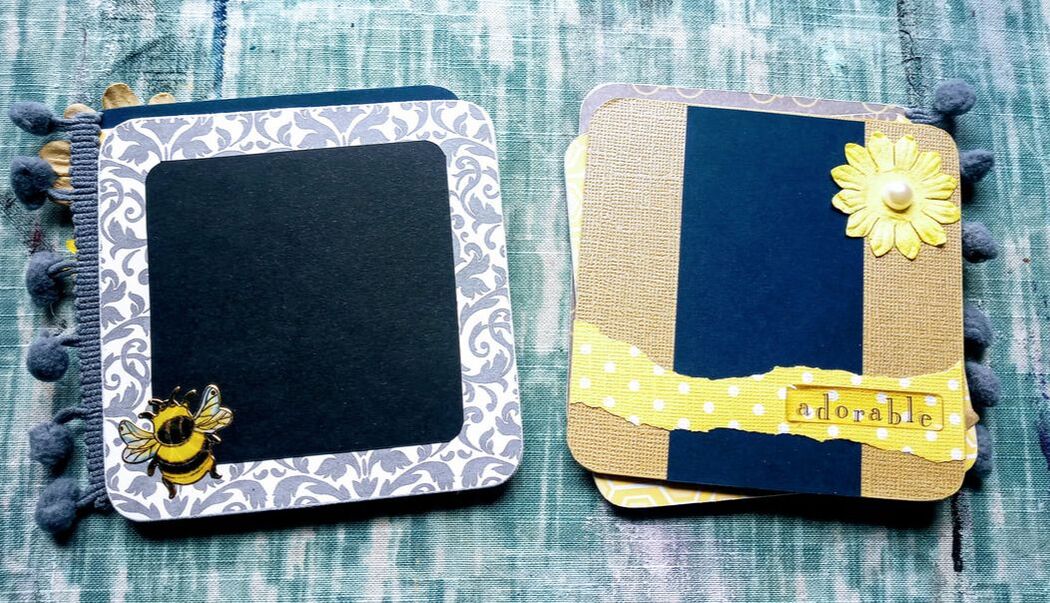
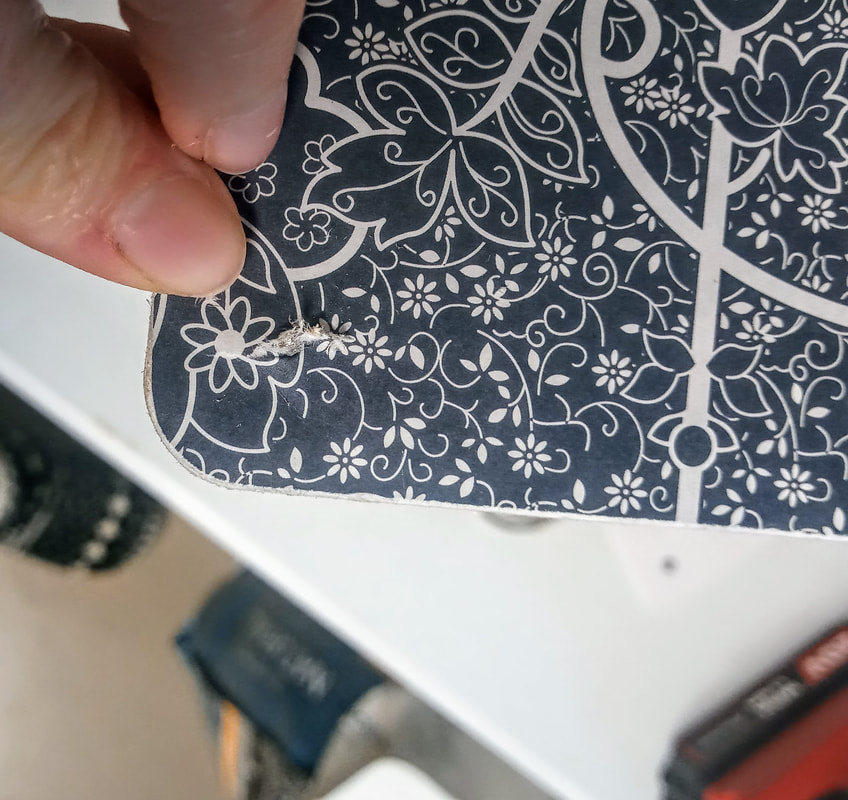
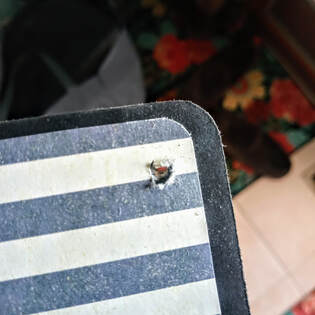
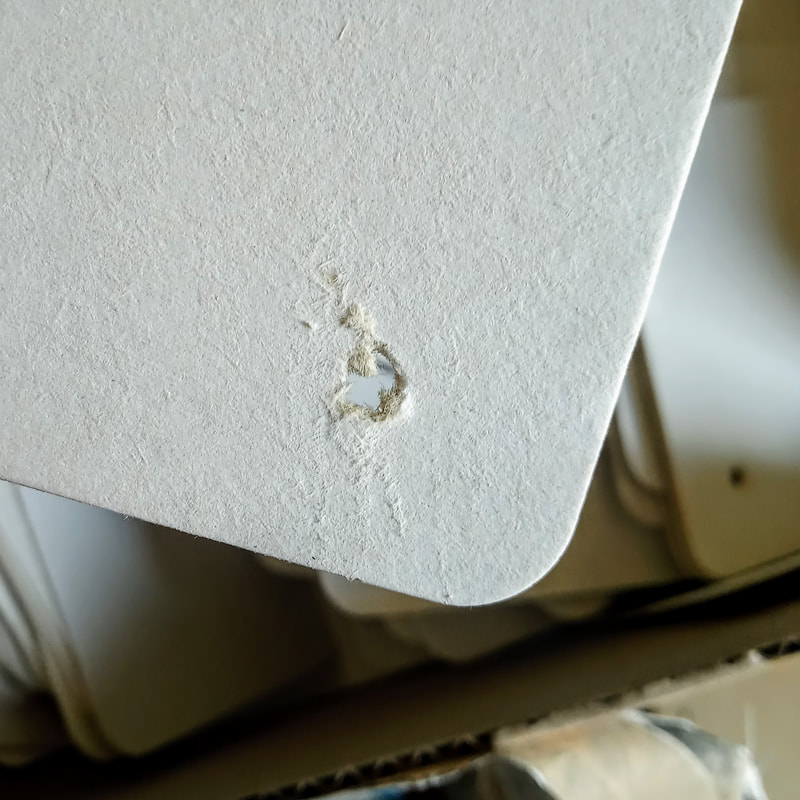
8. Looks super cute, right?! Well, this is where I realized... oh crap... how do I hold it together?! I looked up some ideas and liked the nonrestrictive binder ring option. But, this meant there needed to be holes for the ring to pass through. I decided to use a drill as this was the only option we had to my knowledge that could accomplish this. I think if I had some sort of press that would have been the way to go! I drilled through and it slightly tore up my paper! Ugg not cool!
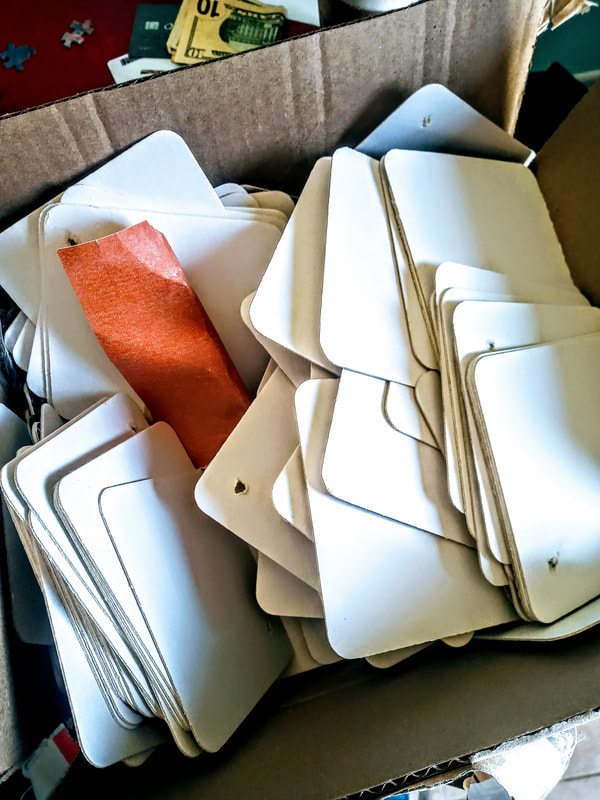
I am going to be doing this for an upcoming work program so decided to create holes in all 125 coasters... yay!... that way they are done ahead of time instead of afterwards. Still, I do not think this is the best option... it seems to tear through the chipboard (these are really flimsy chipboard!) and I encourage you to find a better way if possible :) It still turned out cute overall!
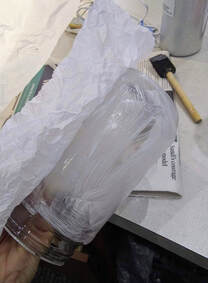
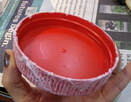
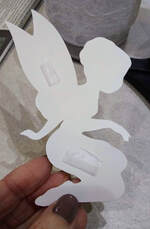
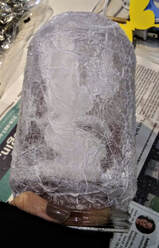
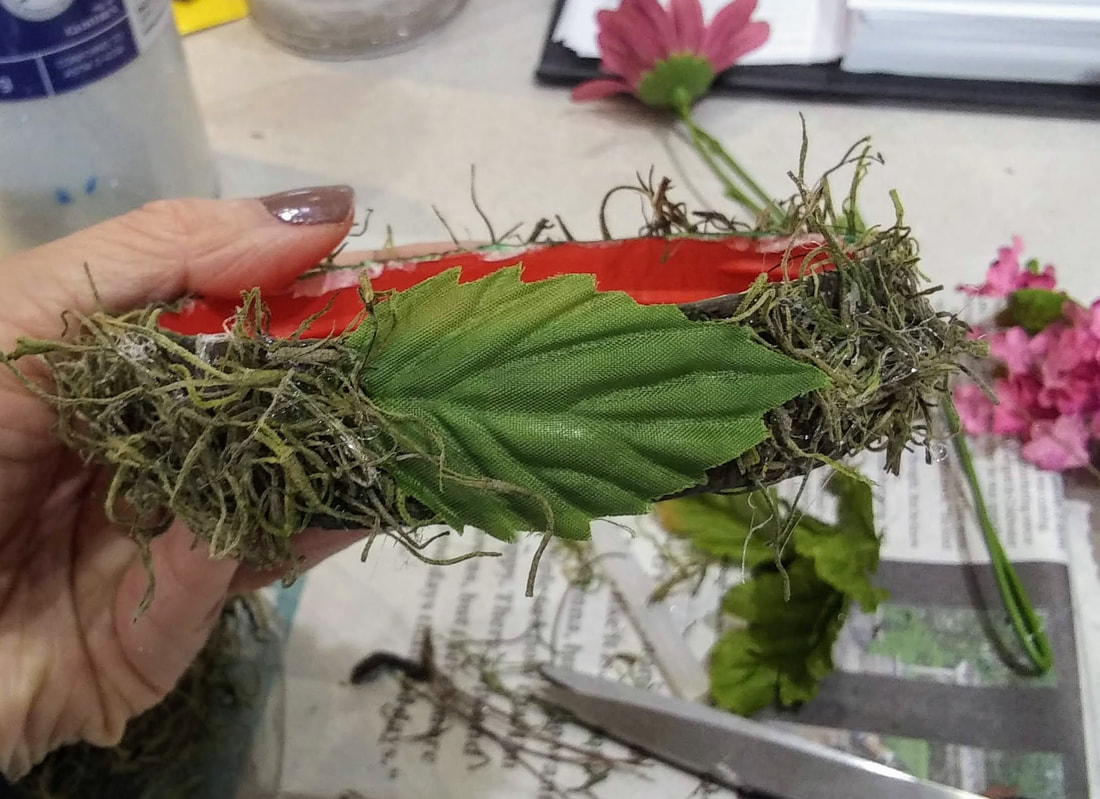
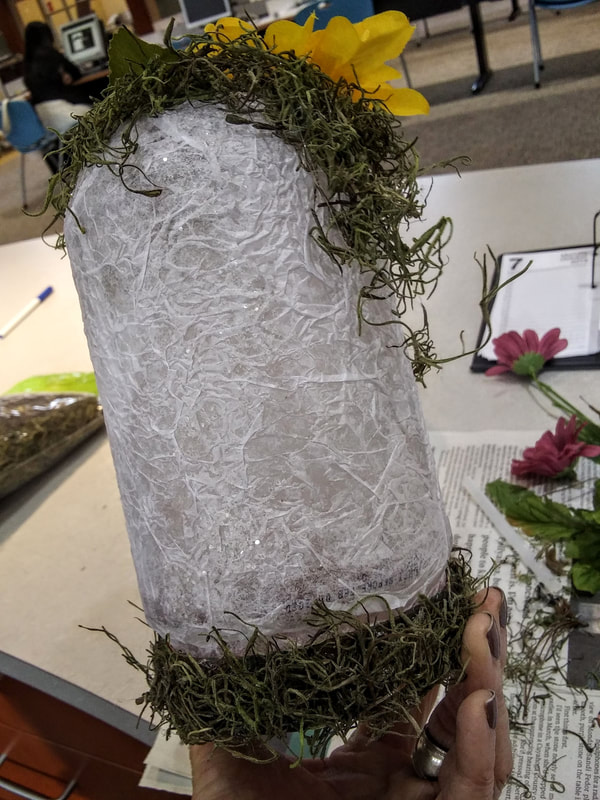
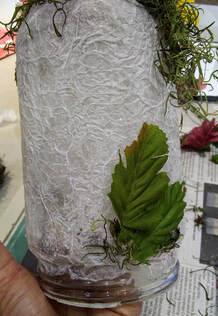
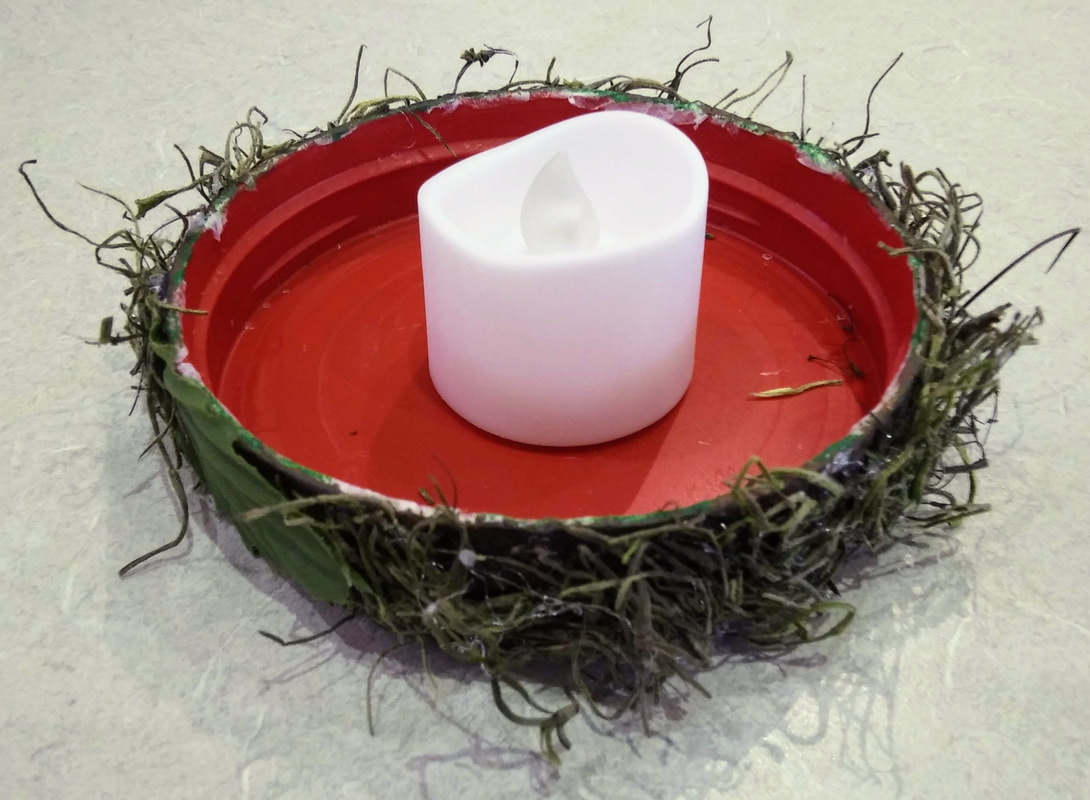
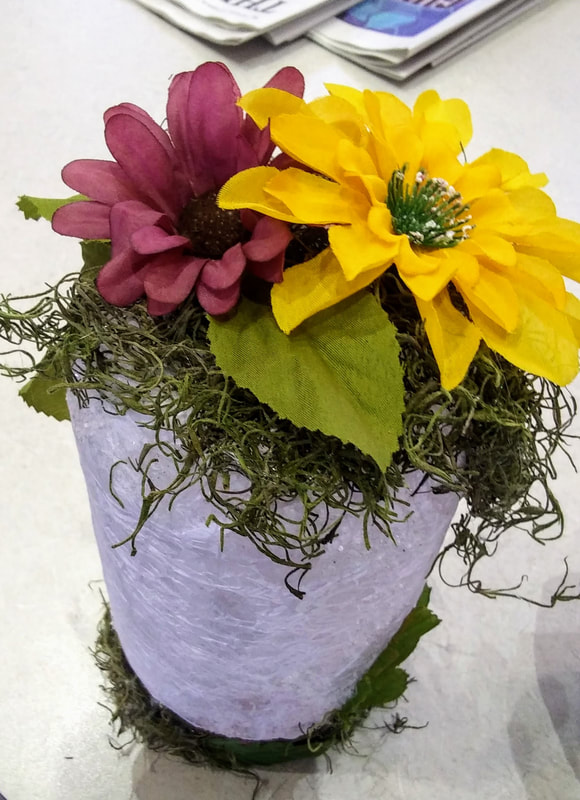
 I've done this fairy lantern craft before with glass jars and people loved it! They couldn't wait to take it home, show it off, and replicate it with kids/grandkids/friends. I left that night feeling really great about the program and that I helped people create something they fell in love with. Time for some self-shaming. David, my boyfriend, and I eat a tonnnnn of peanut butter. Like, a tonnnnn, probably way more than we should to be honest. We've actually recently cut down on it but, boy oh boy, do we love us some PB. On that note, I was getting anxiety over using up so many plastic containers. There had to be something I could use them for! With no plan in mind, I started soaking them, washing them, and de-labeling them meticulously one at a time with no purpose at the end of the tunnel. Then, the fairy lanterns came into mind. I had done it before with glass and thought, well, why not give it a try... I have plenty more to use if it doesn't work! I gotta say it turned out pretty darn cute. I think it's decently disguised but if I were doing it for myself, or for a gift, I think I would choose to add a lot more moss and other items to disguise it even more. Anywho, the instructions are as follows, happy crafting! Supplies:
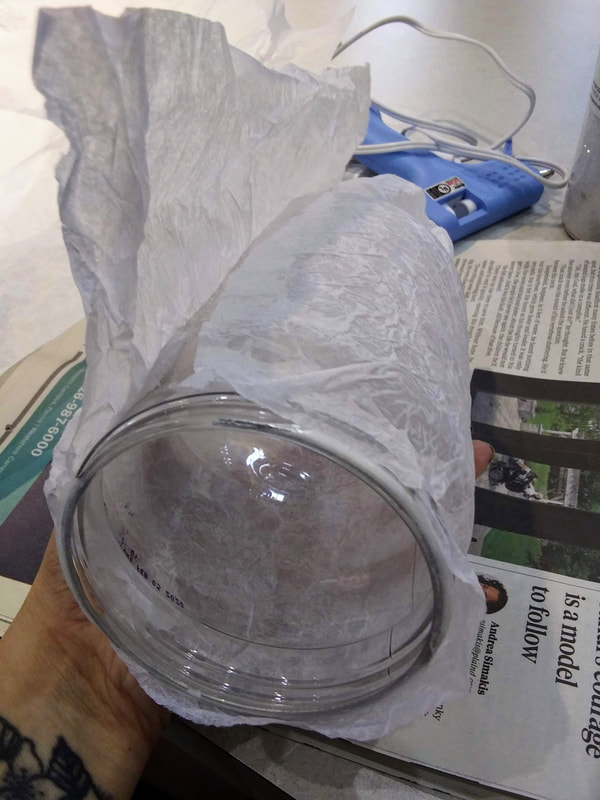
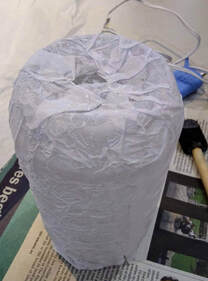
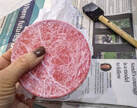
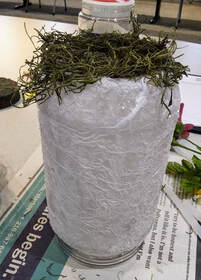
Note: I did not cover the entire lip of the jar so that it can still be twisted shut if desired. 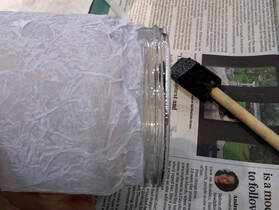 4. Next, I did the same thing with the lid of the jar. I knew I wanted to paint it and glue items to it so I thought covering it with tissue paper would create a nice textured layer for this purpose.
Note: I did not cover the inside of the lid and afterwards, I wish I had. I can, of course, do this at any time but I wanted to point this out. I feel if you do not cover the inside, you can see the red of the lid on the outside. It isn't super noticeable, but I notice it.
7. Here is where I painted my lid to camouflage it. I knew I would be adding moss later, but I didn't want any of the white tissue paper coming through! I sponged on a layer of green, then brown, then black with the foam brush, just enough to cover most of the white.
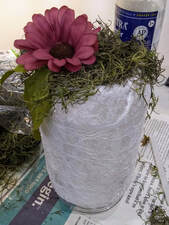
Note: I wanted to point out that I noticed the expiration date and other numbers was printed on the plastic and was totally showing through the tissue paper! Eww! I covered this up with yet another leaf and some more moss.
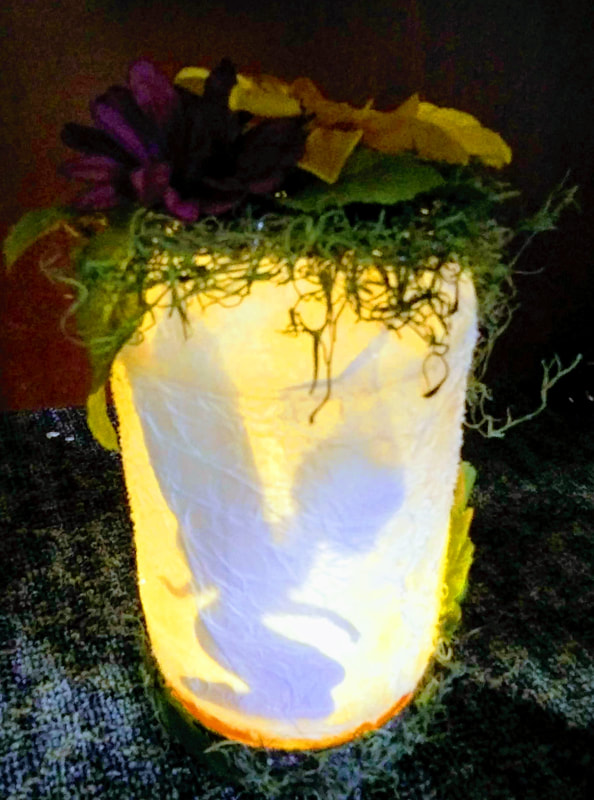
Turn that beauty on and look at her glow!
Were using the PB Jar method at work for a mother-daughter craft program. This makes it even better that we are using plastic jars instead of glass in case we have any little ones attend! We are also including in the description that these are actually Peanut Butter jars and that if you have a peanut allergy we do not recommend attending just in case any residue is leftover.
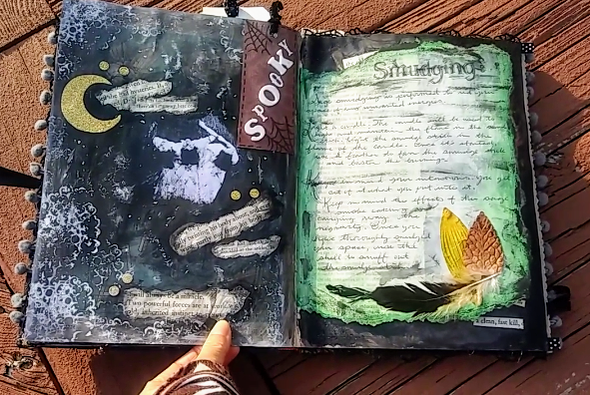
Let me know if you have any questions! 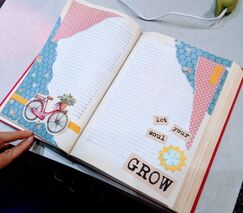 Let me start by saying anything... and I mean anything can be used for an altered book journal! This is what makes this project so much fun and so versatile. Every book is different, every page is different, and every material is different. The purpose of an "altered book" is making an old book into a new piece of art. There are many types of altered books, but for this project, we are beginning an altered book "journal". A journal can be used as a "smash book" for travel or random memories or can be used for a literal journal to write in. There are many possibilities. I did this journal page spread for one of my classes. This was a little tricky as I had to come up with something that we could all do together in our own books but something that could get everyone started and get those creative gears moving! The page above is what I came up with. It is something very simple and uses minimal supplies. We could've gone crazy and used paints, textures, inks, stamps, stickers, etc. but I kept it simple for an easy clean up and to also show that you don't need anything fancy for this type of project! Supplies:
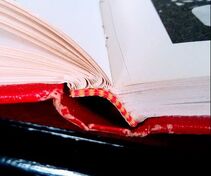
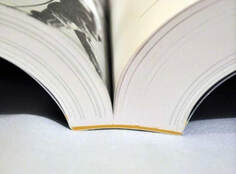
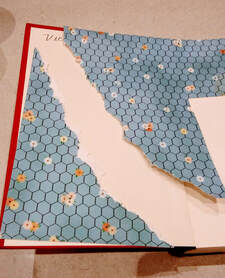
1. First off, let's talk about picking our book. If you can find something with "sewn" pages, that's the way to go! The modern glued pages are terrible for an altered book project! They are too flimsy and as you cut away more pages it loses its stability and could fall apart! These photos show what a sewn spine looks like verses a glued spine.
3. Once you are done cutting out pages throughout the book, you are ready to start gluing. As mentioned above, glue the pages to the left and right of the cut together, hiding that cut line. I use Mod Podge for this, putting it on in an even, thin layer. You can always come back and add more if the corners aren't glued down after it dries. 
6. All I did to finish this page spread up was glue! First, I arranged everything on the pages to figure out where I wanted it all to go. Once I was good with it all I glued everything down with a thin layer of Elmer's Glue, you could use Mod Podge instead. I also used the hot glue gun to glue the ribbon and the flowers down. But that was it! 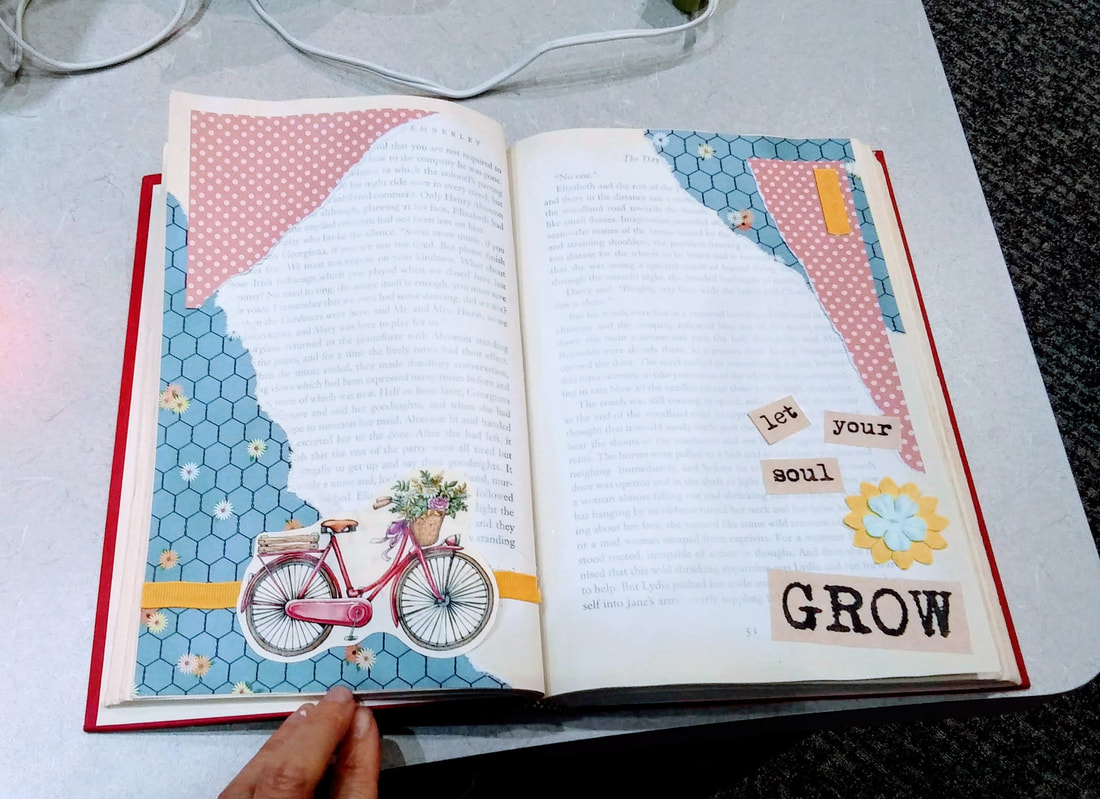 This was a pretty simple page. But you could really get crazy and do pages like the examples below! Happy Journaling!
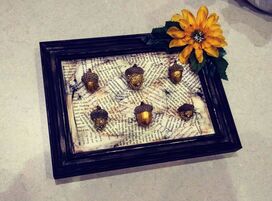 This is a pretty quick fall craft to spruce up your shelf space for the autumn weather or maybe a gift idea! The one I originally saw on Pinterest was very cute with bright fall colors. There are so many options with this type of craft, it's almost overwhelming. I thought about going with a subtle brown, tan, and white color combination at first. I thought it would be very elegant for Thanksgiving but somehow I ended up switching to more of a Halloween based theme with a distressed frame and distressed pages. The possibilities are endless but I hope you find one that you love! Supplies:
1. Gather up all of your supplies so that you have them near and dear to your project space. 2. If you're like me, I had a few frames to choose from and was very stressed with all the options! Finally, I decided on something medium-sized and relatively simple in structure. I forgot to take a picture ahead of time, but I "distressed" my frame a bit by very lightly adding black in light strokes to make it seem old/give it some more depth to the frame. 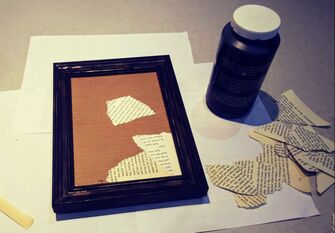 3. The original post I saw for this project involved using cute polka dot scrapbook paper as a background. I was going to do this as well, but saw I had some old book pages lying around and thought that would be a much cooler effect! If you're using a piece of scrapbook paper make sure you glue/tape it on carefully, making sure there are no air bubbles forming on your background! For me, I added torn strips of book pages by gluing each piece one by one to the background. Keep adding and adding until your background is full. 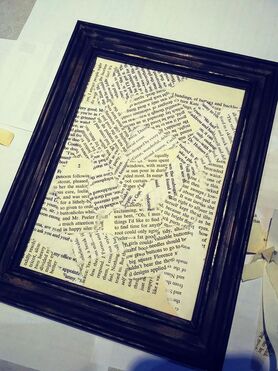 4. While your background is setting/drying, this is a good time to decide what you're going to do with your acorns. I decided to paint mine a metallic gold. I used 3 "craft" acorns and 3 real acorns that I found in the woods just to try out the different types to see if there were any differences... there aren't (but if you use real ones make sure you "bake" them to get rid of all the little buggies in there!) You'll want to do a couple of coats. 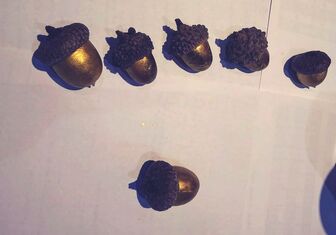 There are many ways to do this. You could leave the acorns in their natural state, paint them, decorate them, wrap them with thread/yarn/twine, oooo!
6. While my acorns were drying I also made the glued book pages look more distressed/eerie for a more Halloween look. I lightly brushed very little black and brown paint over the pages giving them that look which you can see in the following photo. 7. Lay out your acorns and see how you like them before you glue them. I used hot glue. Make sure you put enough on there and hold the acorn while it sets. 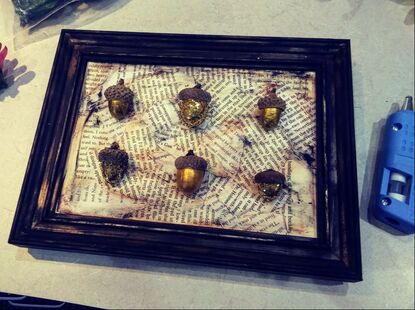 8. Lastly, I decided to add a little extra somethin' somethin' to the frame and hot glued a flower to the upper corner. That's it, we're all done!  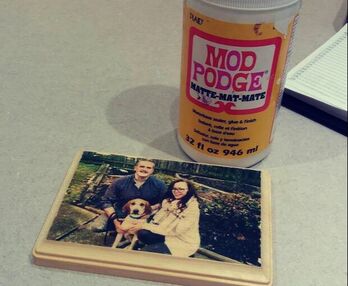 I had always wanted to do this but all the methods I looked at seemed unrealistic and lengthy. Thanks to CreativeBug (which is offered through the Cuyahoga County Library system for free) I was able to discover a quick, super easy way to complete this craft! I only have the end result photos and not the progress photos but, seriously, I don't think you'll need them because it's sooooo easy! Supplies:
1. Print your photo out on regular ol' copy paper on a LAZER printer. It can be in black and white or color. Cut away any excess paper. 2. Paint on a nice solid layer of Mod Podge on your wood piece (You don't want too much that it's goopy and sliding off the sides but enough to see a white layer). 3. Flip your printed photo into the Mod Podge, ink side down and smooth out to remove any air bubbles. 4. Take your burnisher/flat edge and rub the paper with some effort. This helps get rid of any extra air pockets and gets the ink nice and set into the Mod Podge. 5. Wait for the Mod Podge to COMPLETELY dry. 6. Fill a cup with warm water or just let the faucet lightly run (feels pretty wasteful though!). Wet either your fingers, or a sponge, and begin to lightly saturate the photo. DO NOT soak the photo! 7. Start lightly rubbing the paper in circular motions. The paper will begin to turn into a pulp and will slowly roll off the wood surface. 8. As the wood dries you may see some paper areas you missed. Just go back over these in the same fashion by wetting your fingers and rubbing the area in a circular motion. 9. After you're done, you can coat the wood with a finishing agent, paint the sides, decorate with embellishments, etc. Really cute gift idea, especially for family photos! Note: "They" do make photo transfer solutions specifically for this type of project. Even Mod Podge makes a specific Mod Podge for it as well. You can also use a gel medium technique but that takes days to set! I don't see the point in buying extra (expensive) supplies when beautiful, simple Mod Podge works just as good! Here are my 3 transfers below: 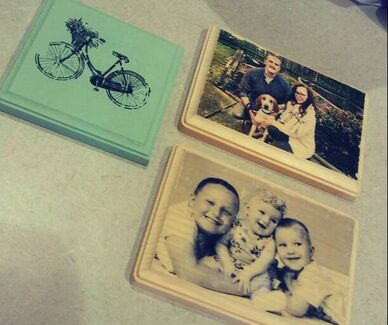 |

Rebecca MyersHey there, I'm Becca, or Rebecca, but not Becky, never Becky, unless you're my family from down south! I'm a simply modern librarian by day and an artist by night. My pursuit is for a simple, happy, healthy, and more fulfilling life! I hope I inspire you to get crafty! Archives
March 2022
Categories
All
|


 RSS Feed