THE ART ESCAPE
  • Home
  • About
  • Artwork
    • Dictionary Art
    • Custom Portraits
    • Drawings
    • Paintings >
      • Old Paintings
  • Contact
  • Find Me
  • Blog
  • Order
Picture

Card Keepsake

11/27/2020

0 Comments

 
Picture
I GOT MARRIEDDDDDD!!!!! I'm a little excited, can you tell?!

​Wedding planning in general can be stressful but add COVID to the mix and it's just down right exhausting! We went back and forth for so long about what the heck we were even doing and basically started outlining two different wedding possibilities for our day. We ended up still having it at our venue and just had to limit our list down.

Despite all the stress over every little detail, dresses, decor, the weather, and covid, it turned out to be the most perfect and beautiful day! I still can't believe just how perfect everything was and felt. To have those closest to us there to celebrate with us and enjoy a happy evening during all the craziness in the world was so incredibly heartwarming! 
With any big life event, we received plenty of cards! Not just any cards, wedding cards of course. They were just so beautiful, sparkly, meaningful, etc. and I just could not throw them away. I saw the idea people have been making where they punch shapes out of them and put them in a frame but I thought, what if I get tired of having it on my wall, or want to move it around? Then I'm stuck with a big frame to put somewhere else! And I mean that in the best way possible obviously!
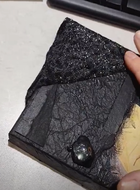
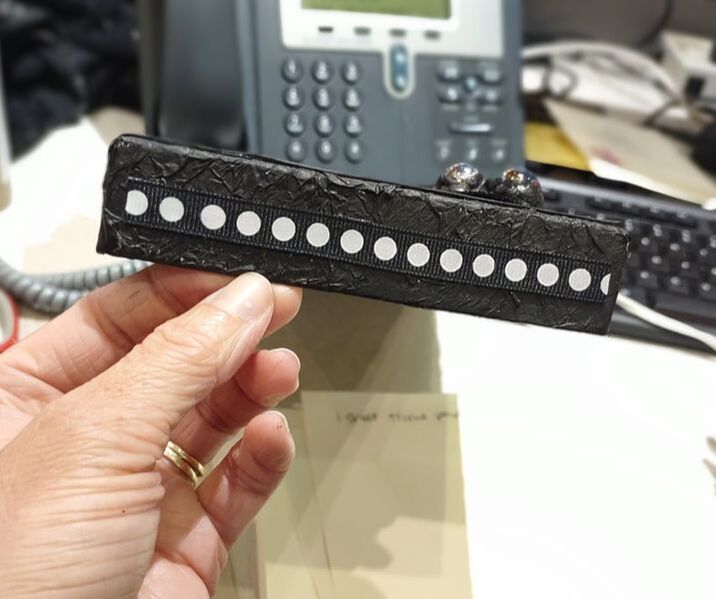
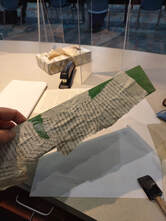
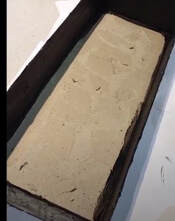
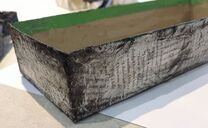
So instead, I thought, how could I make these into a book or album of some sort and tried looking up ideas on that. Some people take this very seriously and sew sections together just like you would a real handcrafted book but that was a little too much for me! When I began my "dictionary art" I had one singular dictionary and my goal was to use up every bit of that dictionary. After using all the pages and feeling so accomplished I then decided to hoard the cover and backing of the dictionary like a crazy person. Well, well well! Did those come in handy or what?! This became my front and back of our new wedding card book! I did not take step-by-step photos but I'll attempt to explain my process!
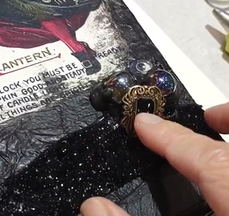
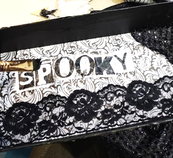
*Optional: I first decorated both the cover and the backs to spruce up the book. I used scrapbook paper, copies of our wedding invite, and stickers. 

1. I found my smallest card and lined them up centered with the cover of the book so that I could mark off roughly where 2 holes would go into the cover, card, and back of the book. 

2. I used an electric drill to drill through both the cover and back. 

3. Next, I marked every card with matching holes to the cover and hole punched all of them. 

4. Optional. I also cut every card in half with an E-xacto knife so that they would flip more easily. 

5. I used 2 large binder rings (3in to fit the amount of cards we had), and fed the rings through each card!
  
Picture
Picture
Picture
Picture
Note: This was the amount of cards from about 60 people, so if you have a larger event you might want to/need to make multiple books! 
And that was it! Now we have a gorgeous keepsake!
0 Comments

Line Art Buildings

9/17/2020

0 Comments

 
Picture
I'm still here I promise, just haven't posted in a while... yet again. Getting back into the swing of things at work has been difficult. The days are long and strange with our new Coronavirus world. By now we are all so used it though, I feel like it will be weird to see everyone's faces again whenever that happens.

I was lucky enough to participate in a local flea this summer at Heritage Farms in Peninsula, Ohio. It's my most favorite show of the year and was the only one that didn't get cancelled. I am thankful for their dedication to the arts and offering a safe show during this time. I think being able to do this show kept me sane for the summer because now I feel like I am in such a funk!

Thankfully, I have been getting many art requests from old friends and new! These range from logo designs, dictionary art, and this new found art... "Line Art Buildings" (not really sure if this is the actual name but that's what I'm call it!). This all started with a friend wanting to order an anniversary gift for her husband. She was specifically looking for an interpreted drawing of their first apartment together. She showed me some examples and asked if I thought I could do it. I decided to give it a try and the results were adorable! 
She sent me some photos to go off of for reference and I also utilized Street View in Google Maps!
Picture
Picture
I started with a pencil sketch of course. It looked super messy but received confirmation that I was on the right path!
I went over the drawing with my Micron Pens. These are a great pen set to use for something like this!
Picture
Picture
Next, I darkened up the building with some thicker lines. I knew I would be scanning this in for printing so I wanted to make sure the lines were nice and clear. I wanted some print copies because she requested some color highlights and we weren't positive where to put them so I had a few copies to work with. We also added the address in a fun modern font!
Picture
Picture
The completed result is gorgeous! I love it!
Picture
0 Comments

Quarantine Time

7/13/2020

3 Comments

 
It's safe to say I have officially failed at blogging! But let's be real, Corona happened, is that a valid excuse? I think it is. Being a librarian, we were shut down during the Ohio quarantine back in March. When it first happened I said "We won't be closed longer than a few days". Then the days turned into weeks, "No way we'll be closed a month" and the month went by, then another, and another. I was baffled! I started off quarantine strong with lots of projects and goals in mind. I completed major ones fast, almost too fast for the amount of time I unknowingly had on my hands. I thought I'd share some of the projects I have done during this very weird time to get me back on the blogging ball.
My first order of business with oodles of time off, was to get home projects done! You know, the things you keep thinking about needing to do but don't do them, yea those. With owning a home there is always something to get done and I could've gotten more done but I definitely fizzled out my house-reno flame at some point! I finallyyyy fixed our 1980's basement bar and loved how it turned out. We're not big drinkers but wanted to get this done as a selling point for whenever that happens. We also had a company rip out our old deck and put in a patio! What a mess that project was, but so happy it's done and we love hanging out in our backyard now! After the patio was done we also added taller fencing around the patio to get our privacy back. I also did random other projects like painting the stairwell and hallway but that's boring stuff. 
Picture
Picture
Picture
Picture
Being a librarian and being away from our community, we were asked to start filming ourselves doing book recommendations, kindergarten help, maker activities etc. I jumped on the maker train and started creating a variety of hands-on activities mostly for kids but can also be done by any age. Here are some of what I created (in order from left to right - fairy hut, "less mess" finger painting, paper mountainscape, and a scrap fabric octopus!). You can find some of the instructional videos at https://www.youtube.com/user/cuyahogalibrary. 
Picture
Picture
Picture
Picture
Another category that took up some of my time was wedding planning. That's right, I'm a #coronabride! We're getting married still on our original date in October, but what that looks like right now I really have no idea. We are still waiting to hear of any changes and as we all know, that happens daily. So, I kept myself busy with wedding projects. The very first weekend I was off I finalized my hand-drawn wedding invites and printed them all so they were ready to go (hopefully I still get to use them!). I created my own bouquet and love it more than anything. It's made from book pages, my papaw's old flannels, and includes fake antlers and even my great-grandmother's old broach. I also put together my bridesmaid's bouquets, and the mother/grandmother corsages (Amazon has a great arm band for this!).  I have more to do but taking a break for the time being!
Picture
Picture
Picture
Lastly, I continued with my art projects, I'm always doing something! I tried getting ahead with my dictionary pages but didn't do as many as I'd hope. I created a hand-drawn card set for a couple of friends and loved packaging them up even more. I also worked on a couple of commissioned pieces for father's day and sketched a cemetery angel just because. 
Picture
Picture
Picture
Picture
Picture
It looks like I stayed busy during quarantine but I feel like I should've and could've done more. Although I am back to work, things are quiet and calm during this unusual time. Now that I am back settled into my new-old routine I'll be getting back to doing more projects and sharing my processes with you!

​Stay happy, healthy, and safe!
3 Comments

Chipboard Coaster Scrapbook

4/15/2020

0 Comments

 
Picture
This is a quick project that you can give as a gift with pictures already in it or left empty for the person to fill. They're super cute and itty bitty! Something fun and different to brighten up any day. 
Supplies:
  • Scrapbook paper
  • Scissors 
  • Pencil
  • Mod Podge and various glues
  • Ruler 
  • Embellishments
  • Chipboard Coasters (available in bulk on Amazon)
  • Old paintbrush
  • Binder ring or other option 
  • Sand paper
  • (I also used a drill but we'll get to why later)
1. The first step for this itty bitty project is gathering all your supplies because there's a lot of potential components. I like to gather everything up that way I have all the supplies necessary near me and ready to go. This is where I picked my color scheme for my scrapbook (I used scraps from my scrap bag) and came up with yellow, grey, and navy. Pretty! I also gathered a pile of random stickers and other embellishments (I had no idea what I would use!). 
Picture
Picture
2. I then traced the coasters onto the backs of the scrapbook paper I would use for the main sheets so I could cut them out to size. 
Picture
Picture
Picture
3. I decided the order of the pages that I wanted and laid them out on the coasters. Next, I glued the sheets onto the coasters using the Mod Podge and a paint brush. I did half at a time instead of trying to glue the whole sheet at once, that way I could be more aware of bubbles showing up. 
Picture
Picture
4. Once you glue them all down, go back through and reinforce any loose corners that may be sticking up. 
5. Trim any paper that is hanging over the edges and lightly sand the edges so that it molds to the coaster base. 
Picture
Picture
6. Start to plan out your pages by laying out the pieces and parts that you want to include before you officially glue anything down!
Picture
Picture
7. Mod Podge dries pretty quick so this part of the project will go fast. You can use a hot glue gun for heavier/awkward objects to secure them to the boards. 
Picture
Picture
Picture
Picture
Picture
Picture
8. Looks super cute, right?! Well, this is where I realized... oh crap... how do I hold it together?! I looked up some ideas and liked the nonrestrictive binder ring option. But, this meant there needed to be holes for the ring to pass through. I decided to use a drill as this was the only option we had to my knowledge that could accomplish this. I think if I had some sort of press that would have been the way to go! I drilled through and it slightly tore up my paper! Ugg not cool!  
Picture
Picture
I am going to be doing this for an upcoming work program so decided to create holes in all 125 coasters... yay!... that way they are done ahead of time instead of afterwards. Still, I do not think this is the best option... it seems to tear through the chipboard (these are really flimsy chipboard!) and I encourage you to find a better way if possible :) It still turned out cute overall!
Picture
Picture
0 Comments

T-Shirt Tote Bag

3/23/2020

0 Comments

 
Picture
With this crazy Coronavirus lockdown I've been going through and cleaning things like crazy! This includes my lovely art room where I often shove things in corners and add it to my mental "to-do" list yet they continue to sit there for months on end. Well, this is the perfect time to get these projects done!

I had an old t-shirt of my Papaw's that I had tye-dyed with my Grandma. I have 2 so I thought it'd be cool to actually make something with one of them. I thought this would be a great opportunity to share with you all a perfect quick project that can be done with any age!

This would be great for all those kiddos at home if you need something to fill up some time! Have your kiddos pick out an old shirt they no longer like to wear or if you have adult sized shirts that would be even better (ya know, more room for all the stuffs!). 
Supplies:
-Old t-shirt (the bigger the better unless you have itty bitties doing this project!)
-Good pair of scissors 
(that's it, crazy!)
1. Lay your t-shirt on the floor or a flat surface (actually make sure it's laid out evenly unlike me!)
Picture
2. Cut off the sleeves of your shirt in a half U-shape (you're creating the handles of the bag with this step). You can draw this out if you prefer but I just went ahead and cut away!
Picture
Picture
3. Next, cut the neckline into a complete U-shape (you are creating the bag opening here).
Picture
4. Next, cut "fringe" strips at the bottom of the shirt (exactly like you were making a fleece tie blanket!). You are cutting through both the front and back layers here. Note: I should have cut off the hem strip on the bottom of the shirt because I, personally, do not like that extra chunk of fabric. I ended up having to cut this off each piece afterwards! 
Picture
Picture
5. Tie the front and back fringes together in a knot and continue all the way across the bottom of the shirt.
Picture
6. And just like that, you have a new tote bag! ...But let me show you the cool thing about this bag... 

If you're into the hippie vibe and dig those fringes, you can totally rock it that way! BUT, if fringe just ain't your thing then go ahead and flip the whole bag inside out! Those fringes will be hidden on the inside and no one will know! Check it...

Note: you can even add some embellishments like these cute bows made out of scrap fabric! 
Picture
Picture
Picture
0 Comments

Paper Beading

2/4/2020

0 Comments

 
Supplies:
  • Paper
    • (scrapbook, scraps, newsprint, magazines, book pages, etc.)
  • Glue (good ol' Elmer's)
  • Elastic jewelry string
  • Ruler
  • Pencil
  • Scissors
  • Skewer
  • Sealer 
  • Beads
Picture
1. Decide what type (size/shape) beads you would like to create. This will determine how to cut your paper. You can find many templates online for various paper beads. I went with very simple designs. 
Picture
2. I recommend looking at the templates to find one you like. Once you do, you can trace it or mimic it onto your paper using a ruler and a pencil lightly. These 2 types of beads ended up being what I preferred as they were the most simple. 
Picture
3. Cut out your strips of paper and get ready to roll! Literally.
Picture
4. Wrap the end of your paper around the skewer. With the tail of the paper sticking out, put a light line of glue on the paper facing up towards you and begin to roll the skewer forward into the glue, wrapping the paper around at the same time, smoothing the glue with your finger as you roll. Keep rolling until you have used all of your strand that you want to use (add more glue when necessary).
Picture
Picture
Picture
5. My second set of beads I made were more cylindrical by cutting parallel strips of paper and using the same rolling technique with the skewer. 
Picture
6. Coat your paper beads with a clear sealer. I used DecoArt High Gloss Varnish. Paint it on with a paintbrush, be sure to coat every side. Make sure to wash out your paintbrush with soap and water afterwards so the sealer does not ruin the brush. Let the beads dry and that's it! You are good to use them in a beading project! 
Picture
7. I used these to make bracelets with for a future program. I used elastic beading string so I wouldn't have to deal with any clasps or rings. I strung the beads onto the string, tied it off, and used the same sealer to coat the knot so that it (hopefully) stays together.
Picture
The first bracelet I made, I failed at. Although it had colors I liked, it was just too much for my taste. I also made it way too small. It should have had another handful of beads on it. You can see the gap in the photo. 
Picture
Picture
Here's some images of my final bracelet that I actually like.
Picture
Picture
0 Comments

Apple Printed Tea Towel

1/6/2020

0 Comments

 
Picture
Supplies:
  • Tea towel
  • Apple of preferred size
  • Fabric paint
  • Paintbrushes
  • Newspaper
  • Iron
  • Scrap fabric
Picture
1. Wash and dry your tea towel. (At first I thought "nahhh, I don't need to do that but boy am I glad I did! It was soooo linty! My dryer vent was pure white fluff!)

​2. Put something underneath where you will be work so that the paint doesn't go through the towel onto something important! I used newspaper for this. (You can also iron your towel first to make it flatter but.. who wants to do that?!)
Picture
3. Slice up your apple into quarters. You can do a slice for every color you want to use but I was lazy and reused the same slice each time, I kind of liked the red-green haze of colors. Paint your slice with the desired color fabric paint and plop it down wherever you want to stamp, make sure you apply pressure if you want a heavier print. If you want it more distressed, press it on lightly. 
Picture
Picture
4. Keep printing as much as you'd like. Then add little "seeds" in the center of each slice with the black paint. I also painted a stem and a leaf on some of them but not all. 
Picture
Picture
5. The fabric paint I used said to allow the paint to dry for 24 hours and then heat set it with an iron. To do this, cover the prints with a scrap piece of fabric and place a heated iron with no steam on the design. Make sure to go across the whole thing. That's it!
Picture
I think this is a fun craft for pretty much any age! And would also be fun to make as gifts too! 
Picture
0 Comments

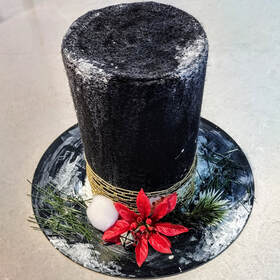
Snowman Top Hat

12/9/2019

0 Comments

 
Picture
Supplies:
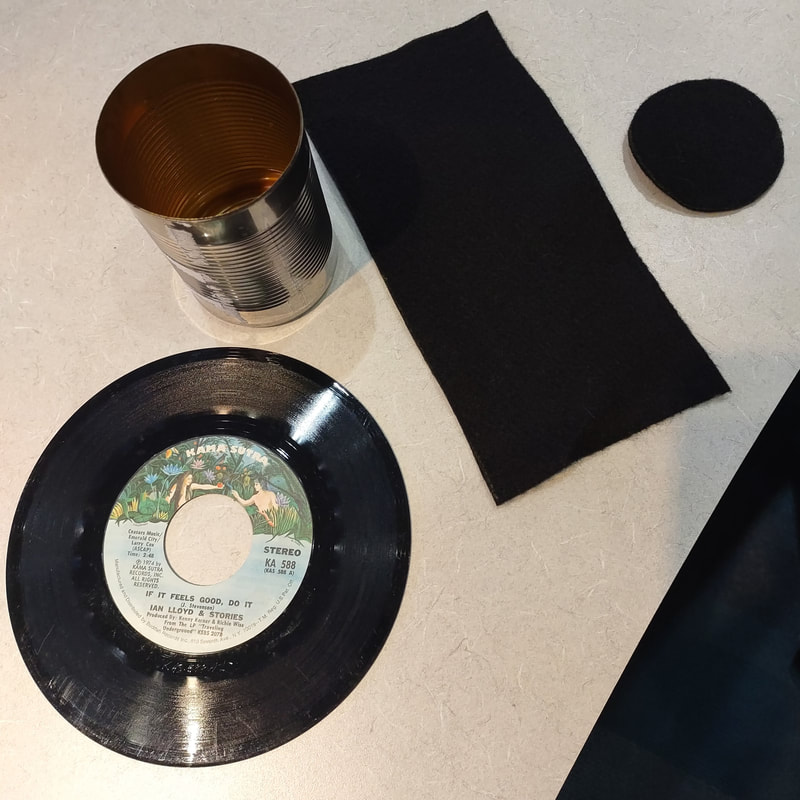
  • coffee can
  • record
  • hot glue gun 
  • embellishments
  • felt/paper/foam/fabric
  • ruler
  • scissors 
  • pencil
  • paint
  • glitter
  • mod podge
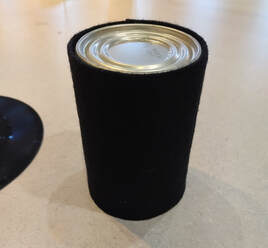
1. I couldn't decide what I wanted to use to cover the coffee can and make it look like a Frosty hat! I finally made the decision on adhesive jewelry box liner. This is a very thin material but also very soft and very sticky! Measure out how much you need to cover the can and the top of the hat (covering the top is optional, you could leave the top open so you can put items inside! such as candy or a poinsettia!)
Picture
Picture
2. Slowly cover the coffee can with the material you are using. I did this slowly with the adhesive felt because it left air bubbles if it wasn't completely flush. Then cover the top if you chose to do so.
Picture
Picture
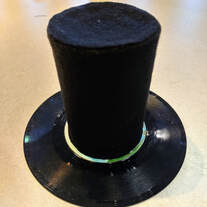
3. Adhere your coffee can to the record. I chose the side with the lid to glue to the record as I felt it was closer to the surface of the record vs. using the bottom of the can that has an indentation. Make sure you use enough glue here so that it really sticks (you don't want it falling off later!). You may choose to use a super glue here or something stronger.
Picture
Picture
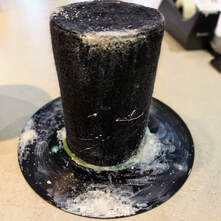
4. I used white acrylic paint to make snow "bursts" around the hat and rim. I did this by lightly dabbing an area in layers with a paint brush. I then used a toothbrush to "flick" paint on the hat, creating a snowy appearance. I went over each of these areas with some glue and sprinkled glitter on top!
Picture
Picture
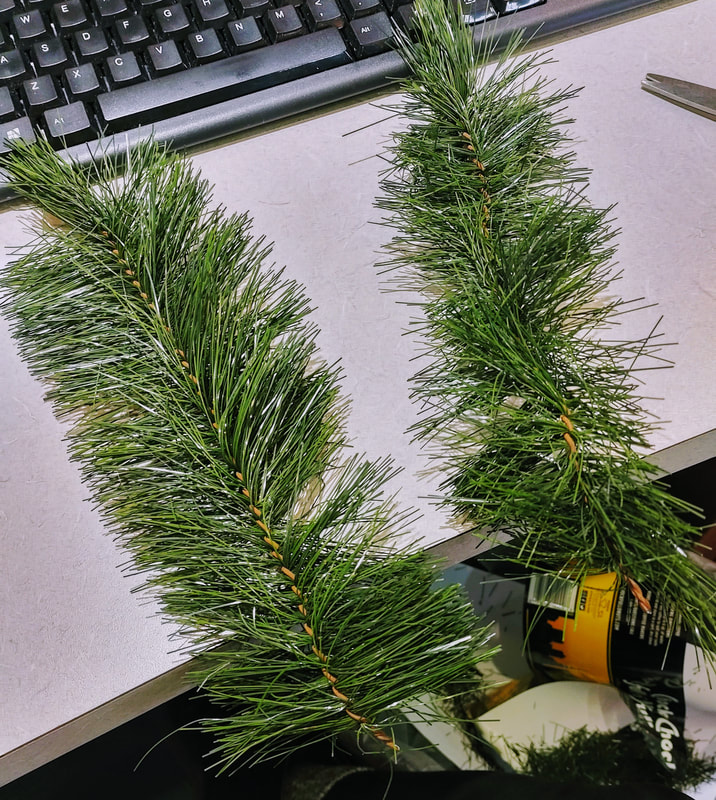
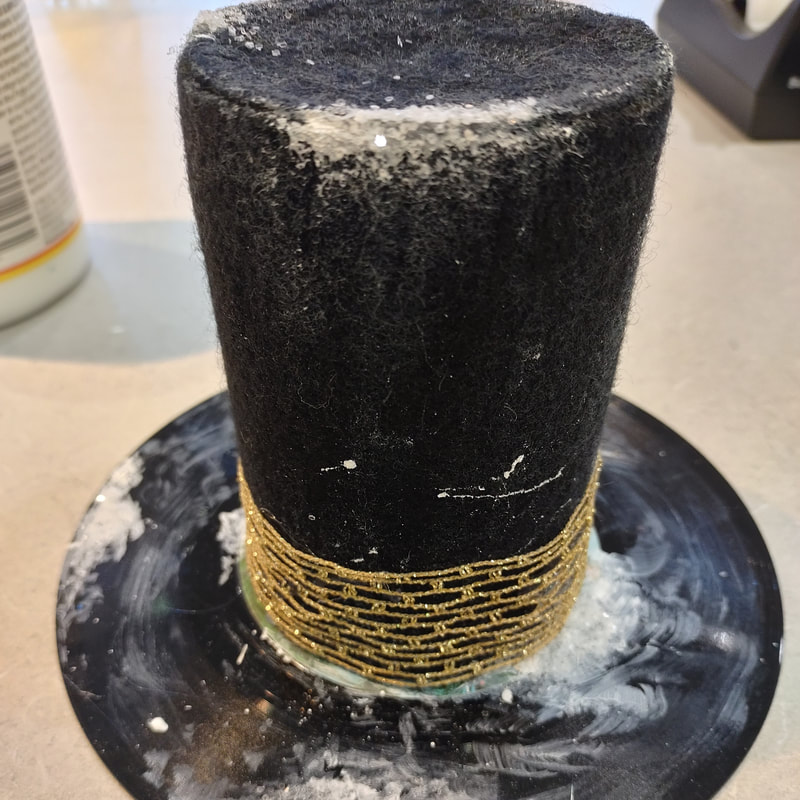
5. I added a thick ribbon around the bottom of the hat, adhering it with hot glue. This is where the embellishing comes in! Someone gave me a whole tree's worth of pine branches that I cut with wire cutters. I made sure to use a lot of glue here so that they would stick to create a nice foundation for whatever else I would add!
Picture
Picture
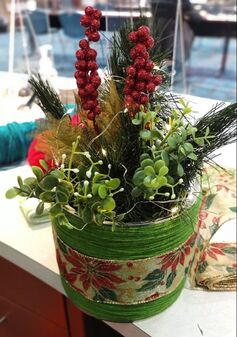
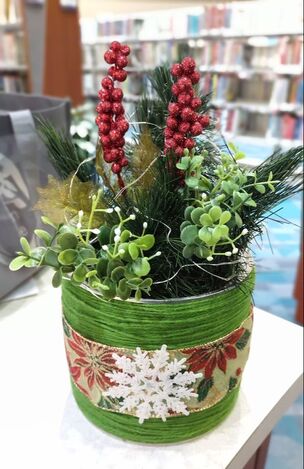
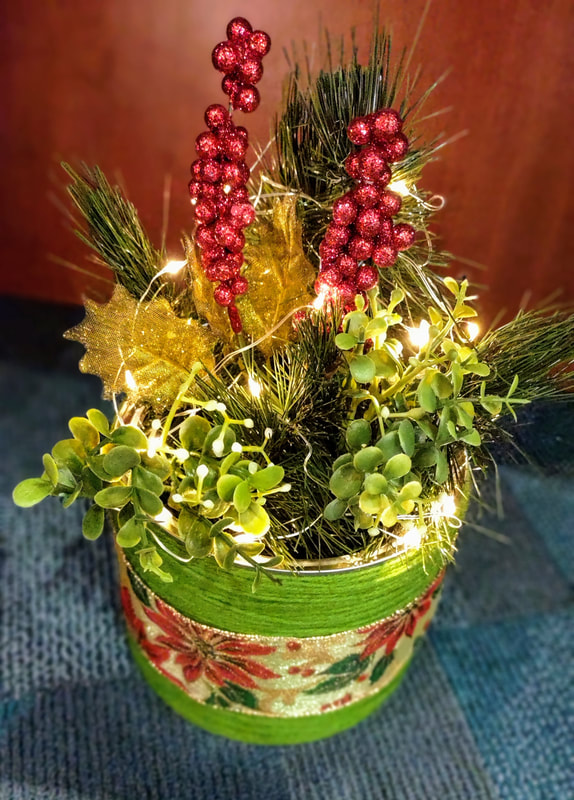
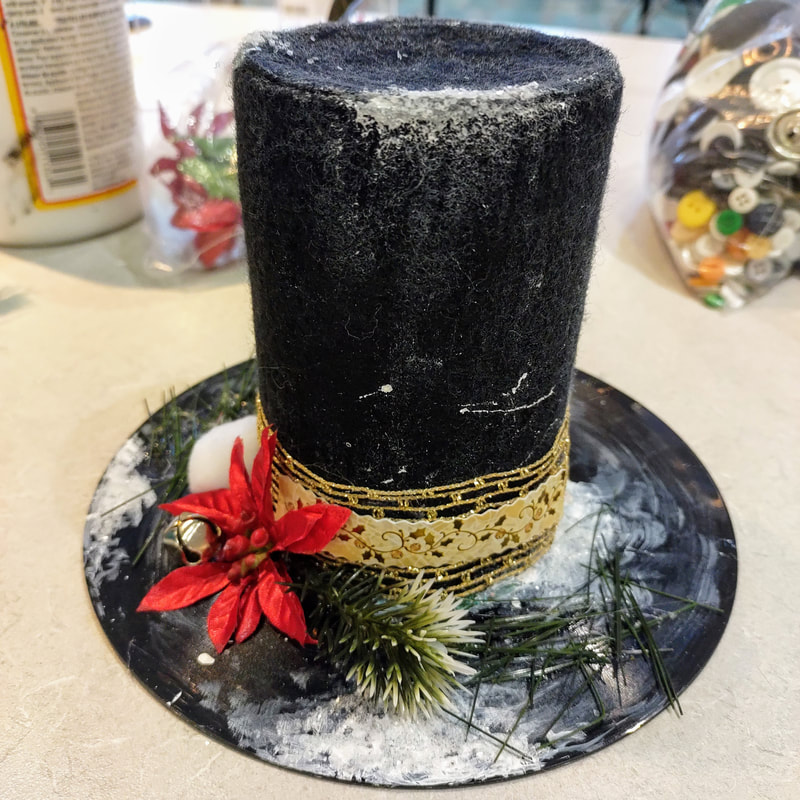
6. Continue gluing other embellishments until you are satisfied! Just check out all the possible options you might have - sleigh bells, felt snowflakes, holographs, flowers, acorns, jewels, the list can go on and on!
Picture

Picture
7. Once you are done gluing everything, you have created a beautiful winter decoration! 
Picture
0 Comments

Halloween Raven Painting

10/18/2019

4 Comments

 
Picture
This painting is what I chose to mimic for my October Painted Canvas program at work. I run a "Painted Canvas" program once every quarter along with other monthly craft programs, but the Painted Canvas is, by far, people's favorite. With my other craft programs I usually always have empty seats even if the class had a full registration list but that is definitely not the case with Painted Canvas! The seats are always full! 

I wanted to do something "spooky" for this quarter's painting program especially since it's October. I had something else in mind originally but ended up picking this one! I followed the tutorial from "Painting with Jane" on Youtube, she's amazing! I didn't go about it exactly as she did. She used a gold metallic canvas (have never seen those before!!) and a paint/gel medium mixture to create translucent paint. I changed mine to just using a sponge on top of gold metallic paint. It's an "ok" effect, and one I think is easier for people in my class but maybe sometime I'll give the gel medium technique a shot!
Supplies:
  • Acrylic Paint: Gold, Silver, Brown, Orange, White, Black 
  • Paintbrushes - I used 3 different types
  • Sponge 
  • Canvas/Canvas Board 
  • Large circular object for tracing
  • Bird cutout for tracing if preferred 
  • Pencil
Picture
Picture
1. The first step is to trace your large circular object for your blood moon (I used a large plastic bowl). You want it to be nice and big to fill up your background. Paint this circle with your gold metallic paint (you should do 2 coats).
Picture
2. "Painting with Jane" recommended using translucent paint so that the colors do not get "muddy". I  understood what she meant when I started sponge painting the colors. It did seem to get muddy but I was ok with it overall once it was done. Like I said earlier, I would like to try the original artist's technique in the future. I used a dry sponge and dipped it slightly in the paint, do not saturated your sponge! I started with brown for the dark shadows on the moon, then went into orange, blending slightly, I went back through with more gold to still have the gold represented, it's too pretty not to!
Picture
Picture
Note: When you paint your moon, it is best that you go outside of the original circle. This is so you don't have an unnatural, harsh line showing through later. I did go over my line but I should have done even more because I feel I noticed where I didn't cover the areas well enough once it was finished. 
Picture
3. Before we are done with the moon, add some silver highlights with your sponge, you can add a dab of white too if you're feeling daring! 
Picture
Picture
4. Retrace the same object you used to reemphasize your circle. With a flat or angled brush, trace the outline of your moon with black paint. Take your time and be patient on this step. Paint the remaining white space black. I used two coats of black paint. As I put the second coat on, I also mixed in a bit of silver to make the background seem "shimmery". You don't have to do this part, it is a personal preference. You will notice this effect more in later photos. 
Picture
Picture
5. Trace your bird/branch template or free draw a bird if you feel comfortable. Paint this entire space black for a good base coat. I left a spot open for the raven's eye so that some of the gold shows through later. 
Picture
Picture
Picture
6. Now it's time for highlighting the raven's feathers. I mixed black with a little bit of white to get a charcoal grey. I used this color to lightly brush strokes of "feathers" throughout the bird, specifically accentuating the tail and wing. ​I did the same with the raven's face.
Picture
7.  In between painting feathers, I went in for the beak and tried to mimic the shape done in the video. 
Picture
8. I highlighted everything with white. I used my smallest/pointiest brush for this and went over the previous grey with light, quick strokes. 
Picture
9. The last step is to highlight the gnarly tree branch! To do this, I lightly added some silver in various spots then, again, lightly added some white to those same highlights in smaller strokes. 
Picture
Picture
That's really it! Sign your painting with your initials and you are good to go! Talk about an awesome addition to some holiday decor! (And let's all be honest here, this would look pretty good with some glitter too)
Picture
4 Comments

Fairy Lantern PB Jar

10/10/2019

0 Comments

 
Picture
I've done this fairy lantern craft before with glass jars and people loved it! They couldn't wait to take it home, show it off, and replicate it with kids/grandkids/friends. I left that night feeling really great about the program and that I helped people create something they fell in love with.

Time for some self-shaming. David, my boyfriend, and I eat a tonnnnn of peanut butter. Like, a tonnnnn, probably way more than we should to be honest. We've actually recently cut down on it but, boy oh boy, do we love us some PB.

On that note, I was getting anxiety over using up so many plastic containers. There had to be something I could use them for! With no plan in mind, I started soaking them, washing them, and de-labeling them meticulously one at a time with no purpose at the end of the tunnel.

Then, the fairy lanterns came into mind. I had done it before with glass and thought, well, why not give it a try... I have plenty more to use if it doesn't work! I gotta say it turned out pretty darn cute. I think it's decently disguised but if I were doing it for myself, or for a gift, I think I would choose to add a lot more moss and other items to disguise it even more. Anywho, the instructions are as follows, happy crafting! 
Supplies:
  • Peanut Butter Jar washed and de-labeled 
  • Tissue paper (I used white but I want to try pastels next)
  • Cut out fairy or other silhouette on thick paper
  • Mod Podge
  • Foam Brush
  • Glitter
  • Hot Glue Gun
  • Moss
  • Flowers
  • Paint - green, brown, black
  • Tape
  • Battery operated tealight
1. I used a half sheet of tissue paper to cover up the PB jar. Tear your piece off and crinkle it up into a ball. Coat a large area of your PB jar with Mod Podge using the foam brush. Carefully, unravel your tissue paper and lightly lay it into the glue. You don't want to flatten it out completely because you want the crinkle to stay in the paper. Continue to do this so the entire jar is covered in tissue paper. 
Picture
2. Cut or tear the rest of the tissue paper to get rid of any overlap. Keep in mind, to have this area at the back of your lantern so that you cannot see the "seam line".  
Picture
3. The bottom of your jar will become the top. Mod Podge the bottom and fold over the tissue paper at the end to cover this entire area. 
Picture
Note: I did not cover the entire lip of the jar so that it can still be twisted shut if desired.
Picture
4. Next, I did the same thing with the lid of the jar. I knew I wanted to paint it and glue items to it so I thought covering it with tissue paper would create a nice textured layer for this purpose. 
Picture
Picture
Picture
Note: I did not cover the inside of the lid and afterwards, I wish I had. I can, of course, do this at any time but I wanted to point this out. I feel if you do not cover the inside, you can see the red of the lid on the outside. It isn't super noticeable, but I notice it. 
Picture
5. While the lid is drying, I added my fairy on the inside of the jar. I adhered her with two pieces of rolled tape, one on her legs, and one on her wings. This is better than gluing her completely down. It creates a more natural shadow effect when the lantern is lit up at night!
6. Now that I know where my fairy is sitting, I added glitter to the outside of the jar. I didn't cover the entire thing, just enough to form a frame around where the fairy rests. I used a translucent glitter for this, brushing on Modpodge, then lightly adding the glitter. As the glitter dries, I tap it so that it sets into the glue more. 
Picture
7. Here is where I painted my lid to camouflage it. I knew I would be adding moss later, but I didn't want any of the white tissue paper coming through! I sponged on a layer of green, then brown, then black with the foam brush, just enough to cover most of the white. 
Picture
Picture
Picture
8. For the fun part! I used moss for a more stereotypical fairy lantern look and I am very glad I chose to do so. First, I added moss to the top of the jar. To do this, add a bit of hot glue, and tap in some moss. Careful with your fingers! This is high-finger-burning-time! Keep adding the glue and moss until you feel satisfied with the amount. I wanted to add enough to disguise the shape of the PB jar. 
Picture
Picture
9. Next, add some flowers, leaves, whatever you'd like to dress up the top! 
10. I did the same exact thing with the lid and even added a leaf here as well.  
Picture
Picture
Picture
Note: I wanted to point out that I noticed the expiration date and other numbers was printed on the plastic and was totally showing through the tissue paper! Eww! I covered this up with yet another leaf and some more moss. 
Picture
11. The last step is to add your battery operated candle! I purchased mine on Amazon. I chose a tea light that was a little taller than the typical light to accommodate the height on the lip of the jar.

​
​Turn that beauty on and look at her glow!
Picture
Picture
Were using the PB Jar method at work for a mother-daughter craft program. This makes it even better that we are using plastic jars instead of glass in case we have any little ones attend! We are also including in the description that these are actually Peanut Butter jars and that if you have a peanut allergy we do not recommend attending just in case any residue is leftover. 

​Let me know if you have any questions!
0 Comments
<<Previous
    Picture

    Rebecca Myers (Dickinson)

    Hey there, I'm Becca, or Rebecca, but not Becky, never Becky, unless you're my family from down south! I'm a simply modern librarian by day and an artist by night. My pursuit is for a simple, happy, healthy, and more fulfilling life! I hope I inspire you to get crafty!

    Archives

    November 2020
    September 2020
    July 2020
    April 2020
    March 2020
    February 2020
    January 2020
    December 2019
    October 2019
    September 2019
    August 2019
    July 2019
    June 2019
    May 2019
    April 2019
    March 2019
    February 2019
    January 2019
    December 2018
    November 2018
    October 2018
    September 2018
    August 2018

    Categories

    All
    Acorn
    Acrylic
    Adults
    Altered
    Altered Book
    Animal
    Anniversary
    Apple
    Art
    Autumn
    Bag
    Beach
    Bike
    Bohemian
    Book
    Buttons
    Cards
    Cat
    Christmas
    Clipboard
    Clover
    Coasters
    Cold
    Cookie Sheet
    Coronavirus
    Craft
    CriCut
    Daisy
    Decor
    Decorate
    Decoration
    Decorations
    Dictionary
    Diy
    Dog
    Dream Catcher
    Dreams
    Etching Cream
    Fabric
    Fabric Paint
    Fairy
    Fall
    Flower
    Flowers
    Frame
    Galaxy
    Game
    Garland
    Gift
    Glitter
    Glow
    Glue
    Gold
    Grass
    Grow
    Halloween
    Hippie
    Iron
    Jar
    Journal
    Keepsake
    Kids
    Magnets
    Mason Jar
    Memo
    Memories
    Mini
    ModPodge
    Mod Podge
    Moon
    Moss
    Native American
    Nightlight
    Notes
    Outdoor
    Paint
    Paper
    Party
    Peanut Butter
    Photo
    Pins
    Pop
    Post It
    Quick
    Quote
    Raven
    Recycled
    Reused
    Ribbon
    Rice
    Runner
    Scrap
    Scrapbook
    Scraps
    Seeds
    Seniors
    Sheets
    Shirt
    Sleep
    Slice
    Smash Book
    Snowman
    Sock
    Soul
    Space
    Spell Book
    Spells
    Splatter
    Spooky
    Stars
    Stencil
    Sticker
    Stickers
    Strawberry
    Summer
    Surprise
    Tea
    Tealight
    Thrift Store
    Tote
    Towel
    Tree
    Tshirt
    Upcycled
    Vinyl
    Wedding
    Wildflowers
    Winter
    Wood

    RSS Feed

Proudly powered by Weebly
  • Home
  • About
  • Artwork
    • Dictionary Art
    • Custom Portraits
    • Drawings
    • Paintings >
      • Old Paintings
  • Contact
  • Find Me
  • Blog
  • Order