
|
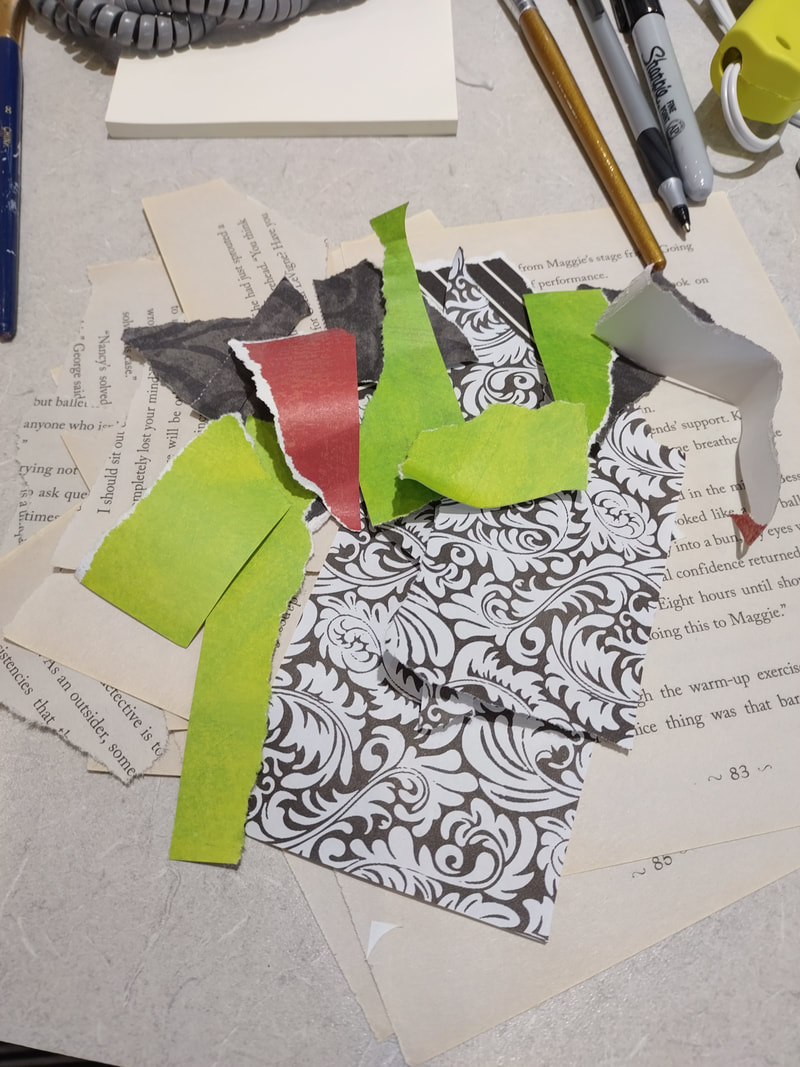
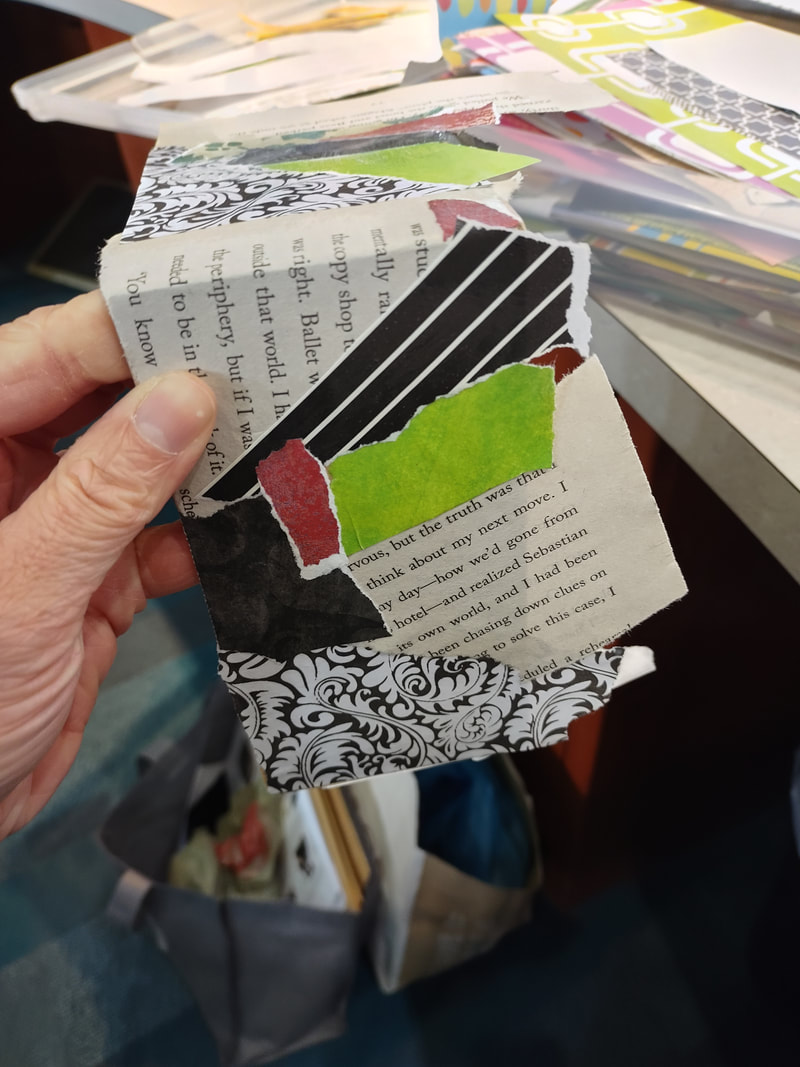
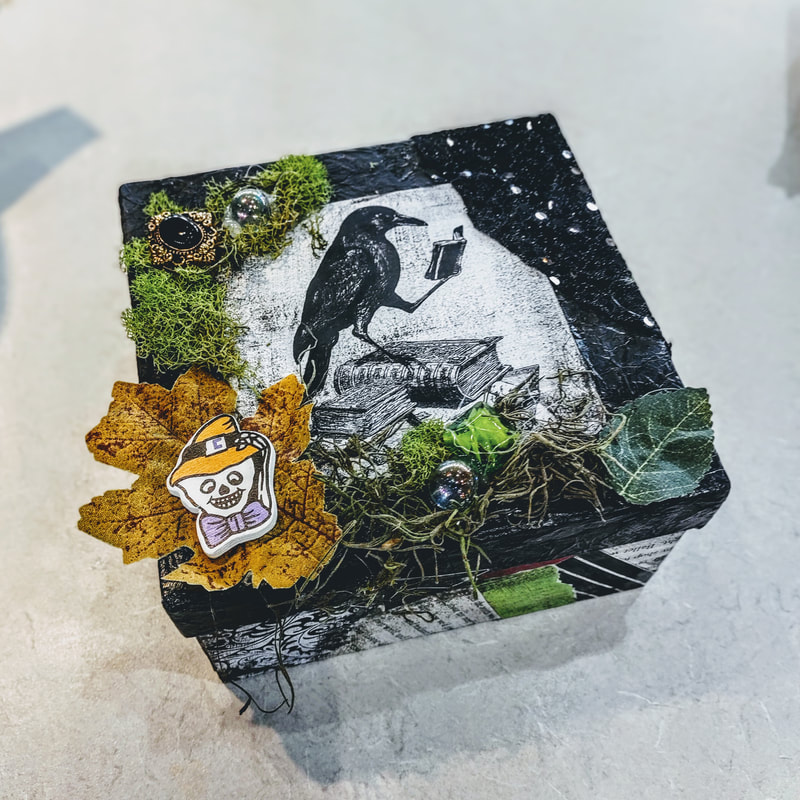
This craft was very similar to my spooky Halloween post from September but I still thought I'd share because, why not! This craft was to go along with the book "The Witch of Blackbird Pond" for our millennial book discussion where we do a craft to match the book! We had a stash of these cardboard craft boxes and, as usual, I wanted to do something that didn't cost us anything and this is what I came up with! I started by grabbing random scrapbook paper scraps (yes, I keep those!) and began piecing them together with mod podge to create this cool, almost Sally-looking pattern on the bottom half of the box. I kept going until the whole thing was covered, including the bottom. Around the top edge you may have to trim some pieces away so the box can still shut or us a piece of sand paper to smooth out the edges.
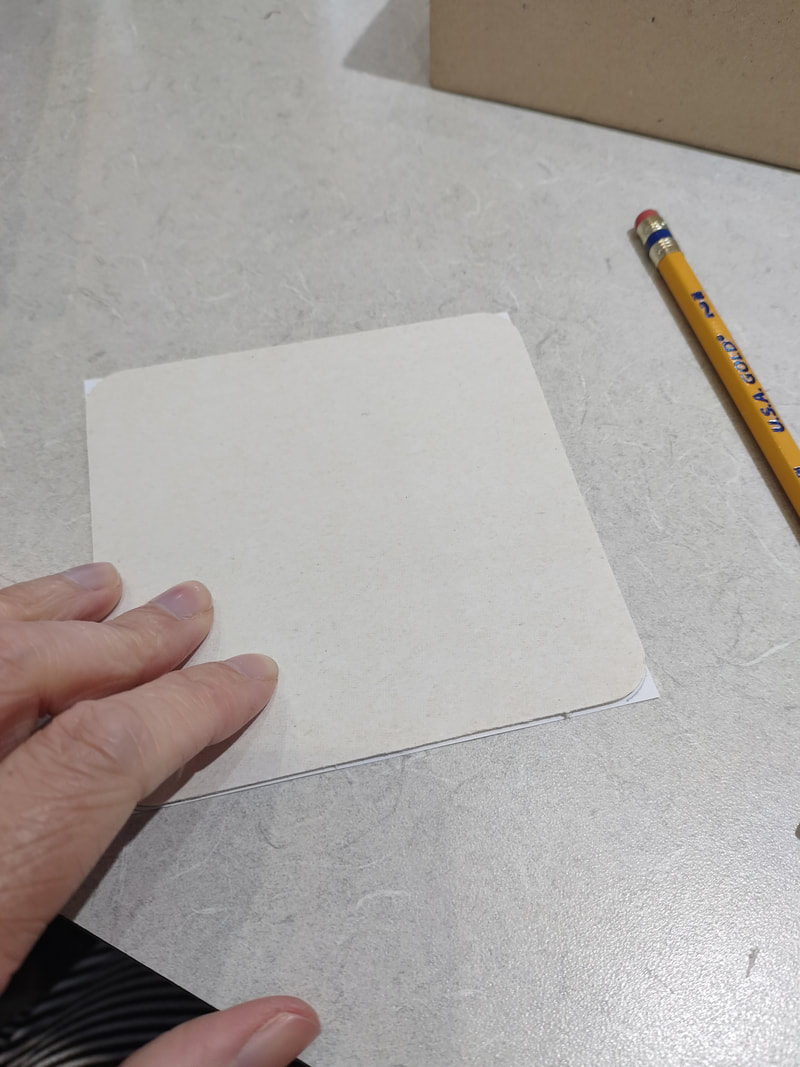
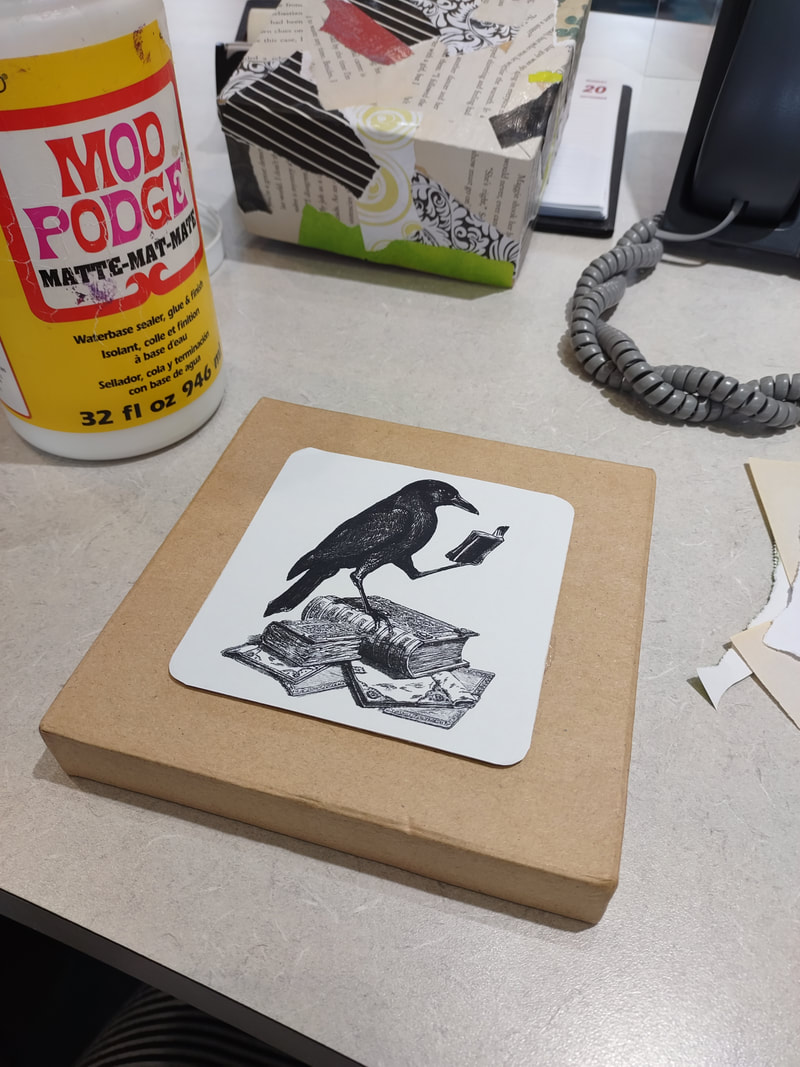
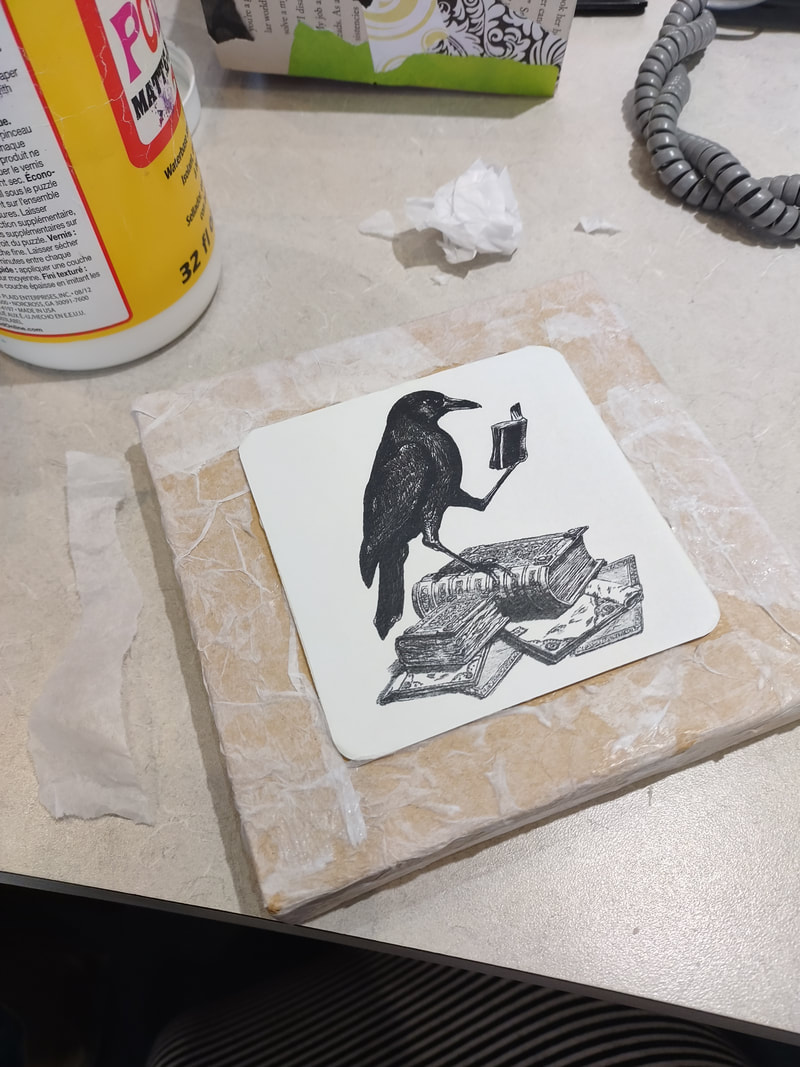
Next, I printed out a black and white vintage clipart image of a blackbird and mod podged that to a white chipboard coaster I had from a previous craft. Then I hot-glued this to the center of the lid.
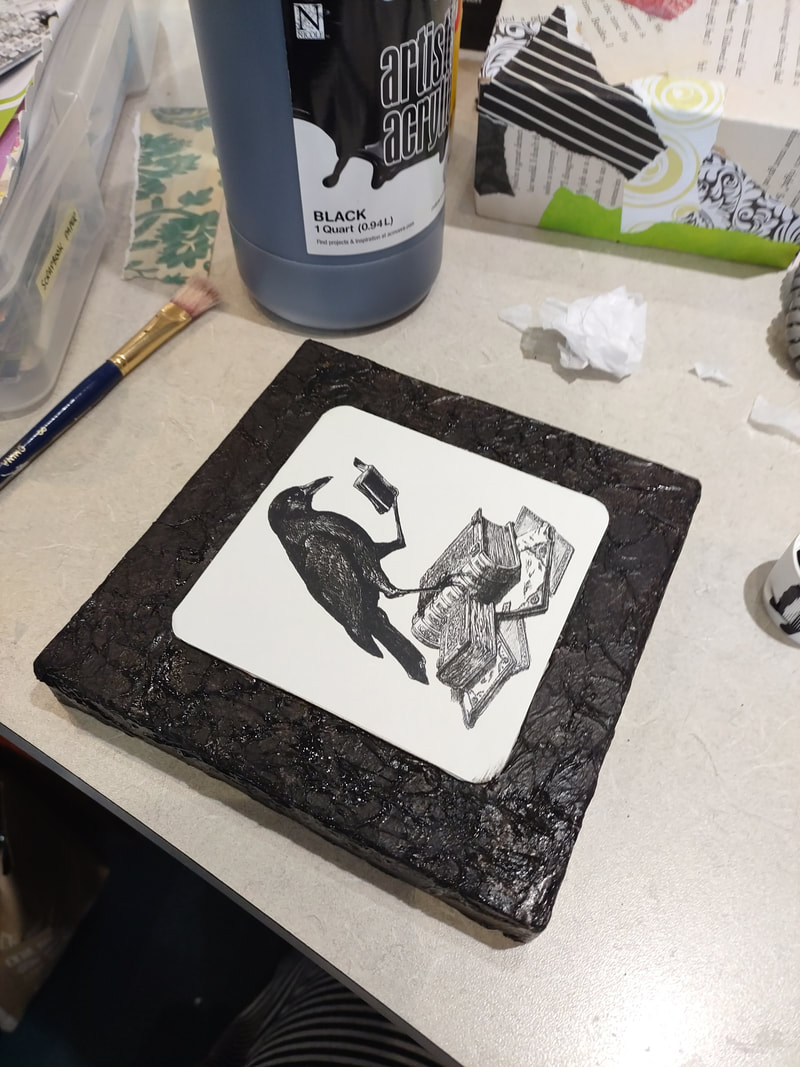
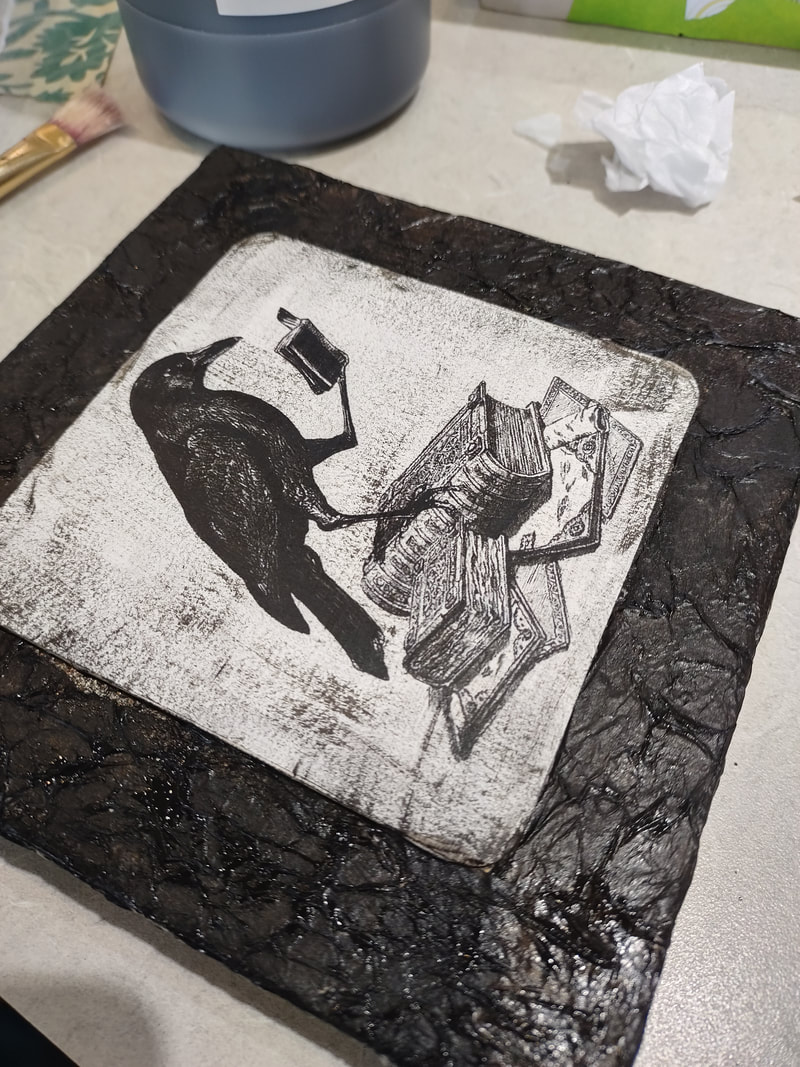
I crumbled up pieces of tissue paper and glued that around the center image. Once dry, I then painted all of the tissue paper black and distressed the white blackbird image by lightly brushing my paintbrush across the coaster (putting a little more pressure around the sides. I ended up doing the same to the scrapbook paper on the bottom of the box, not pictured).
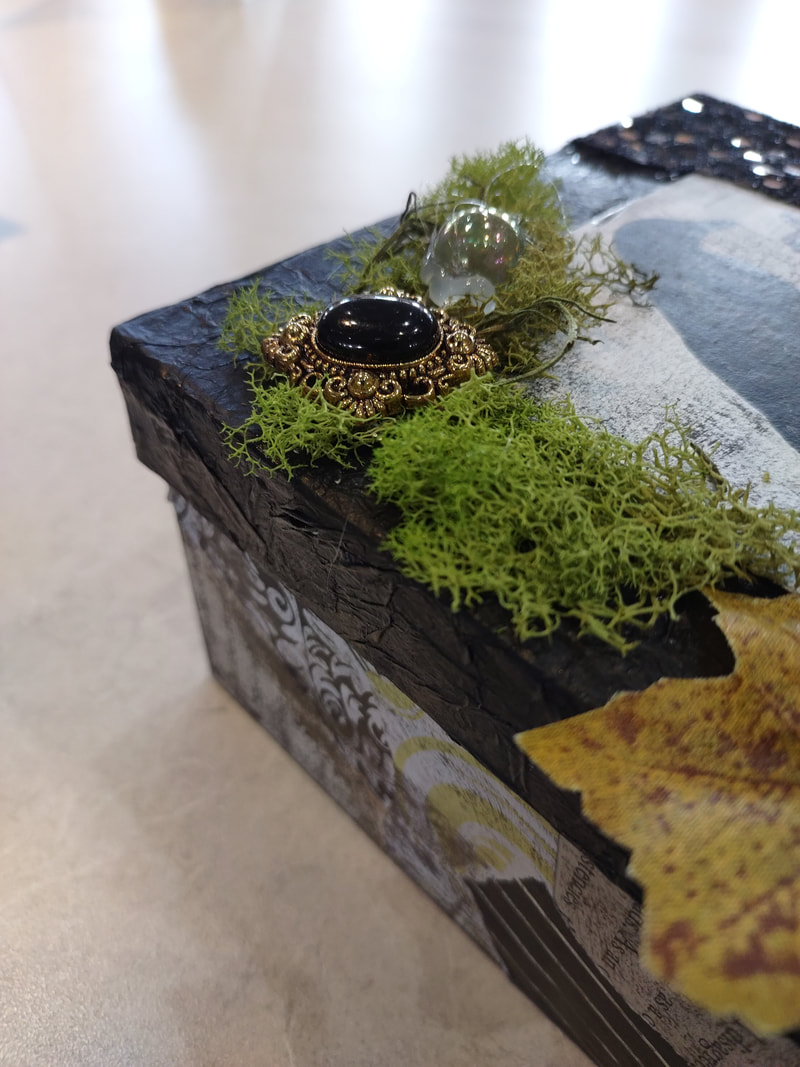
Lastly, I finished up the box by adding fun "things" to the top! I used moss (leftover from our wedding!), old jewelry, buttons, beads, marbles, Halloween pieces, etc. to make a really interesting top! For this program we left the inside of the box blank but you could really do a lot to it!
0 Comments
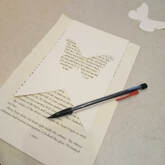
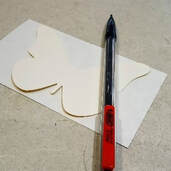
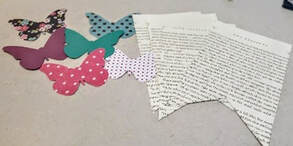
I have always, always loved butterflies. I became particularly attached to them when my elderly babysitter passed away when I was little. I remember.. or at least this is the story that's in my head.. that when she passed I made a wish for her to come back to me as a butterfly. And, lo and behold, the next day I was outside playing and a butterfly landed right next to me. Now, do I think it was quite a coincidence with it being spring and all that a butterfly would be flying around on a bright, sunny, April day, maybe. But to my little eyes and heart, it was her. I was looking for a simple craft that booklovers would (hopefully) love to make and came up with this sweet craft involving book pages, butterflies, and bright fabric scraps. Below are my step by step instructions to make it, enjoy! 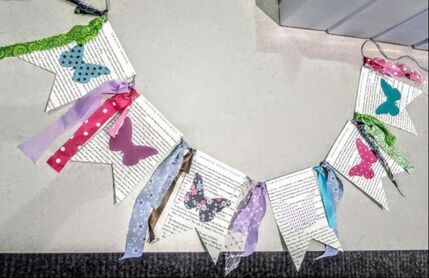 Supplies:
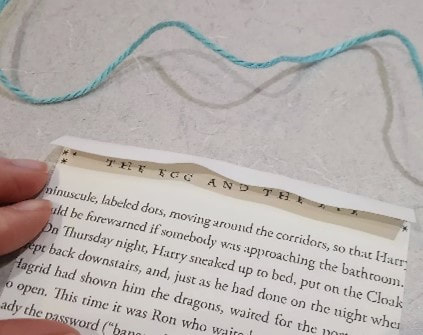
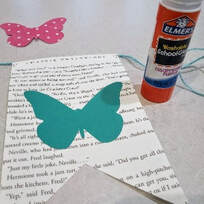
1. Lay out all your supplies to get organized 😊 I made a template for both the pennant and the butterflies so that they'd all be the same size. Trace your book page banner shapes and the butterflies. Then cut them all out.
2. Glue your banner book pages onto the twine by first folding the top over for a crease. Then, lay a line of glue (I used a glue stick) across the crease. While holding the twine in place, fold over the smaller top piece and press it into the glue.
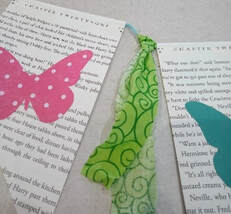
4. Lastly, add your scrap fabric, ribbon, etc. in between each banner. You can tie it with a loop or a regular knot. That’s it 😊
Look how cute! 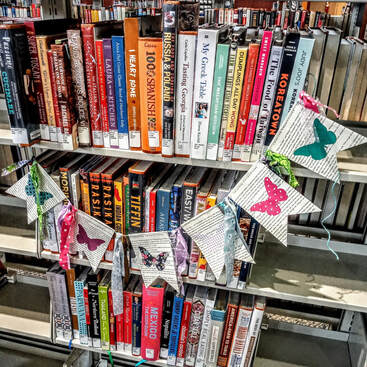 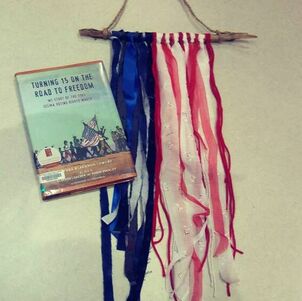 I created this quick craft project to tie into a book discussion at work. But this so easy, anyone can do it and it's very quick as long as you are making a smaller size. I also think this would be awesome in an extra large size as well! Supplies:
1. Gather your supplies all in one space so you are ready to go! a. If you are using fabric, I would cut your strips at this time as well 2. Use blue pieces to represent the blue star part of the flag (I saw some online that used white beads throughout to represent the stars!) and alternate your red and white for the stripes. 3. Tie your strips on using the Larkshead Knot technique below. This is a great way to add your elements because you get two components out of one. a. You can also tie them however you wish. Try tying little pieces together of different types/textures to give your flag more variety.  4. Create a piece for hanging. I did this by wrapping 3 pieces of twine around the one end, braiding it, and tying it off on the other side.
5. That's it! Feel free to add whatever types of elements you have lying around! Perfect decoration for the most rustic folks you know! 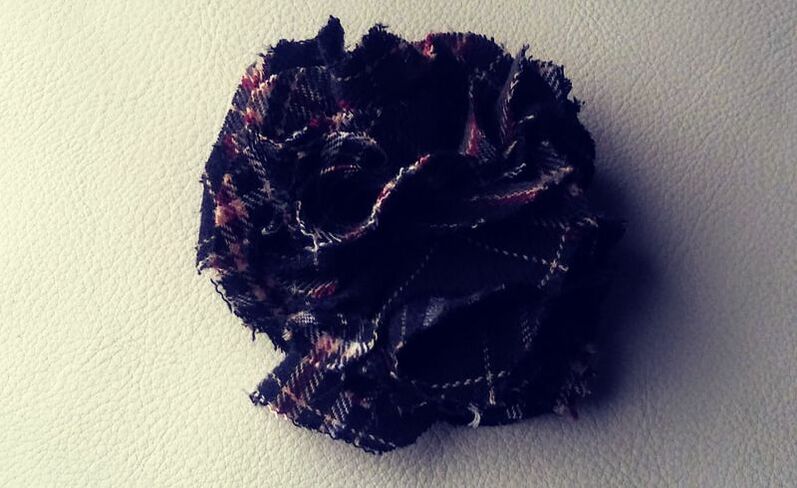 Do you have a bunch of scrap fabric that you don't know what to do with? This is the perfect craft to use 'em up! Supplies Needed:
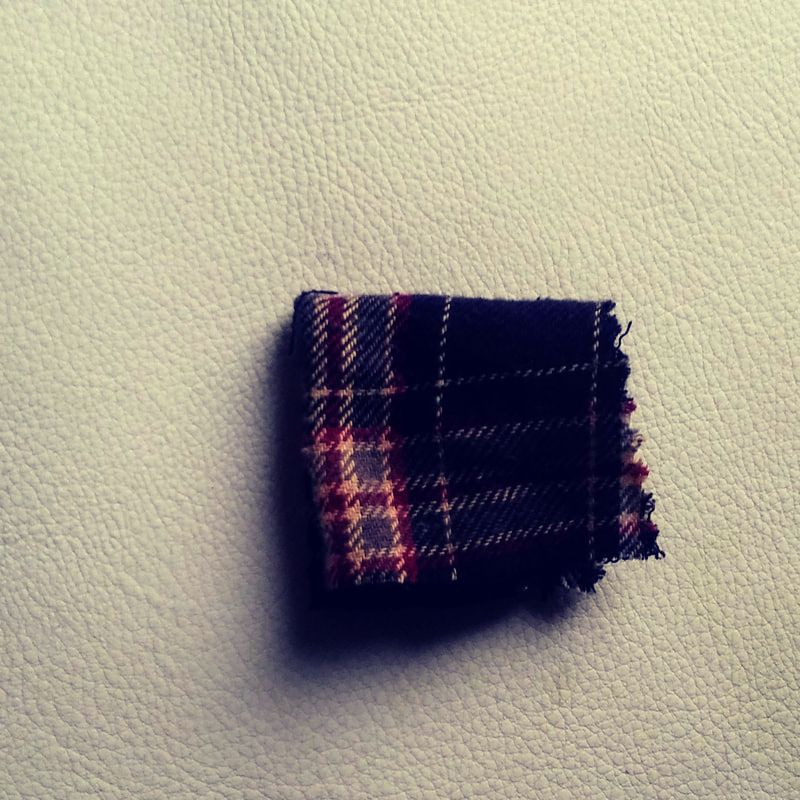
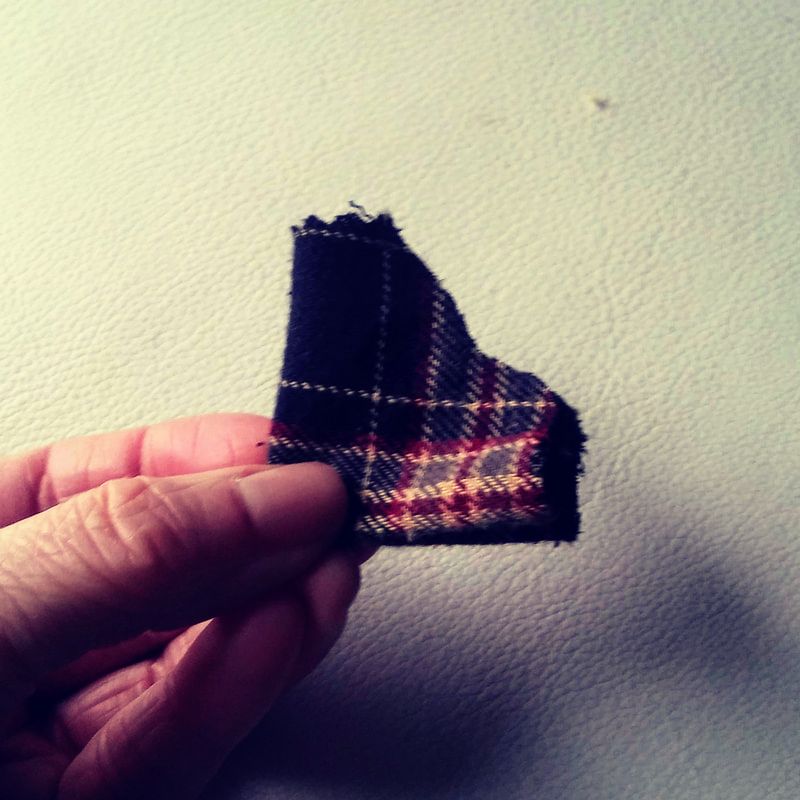
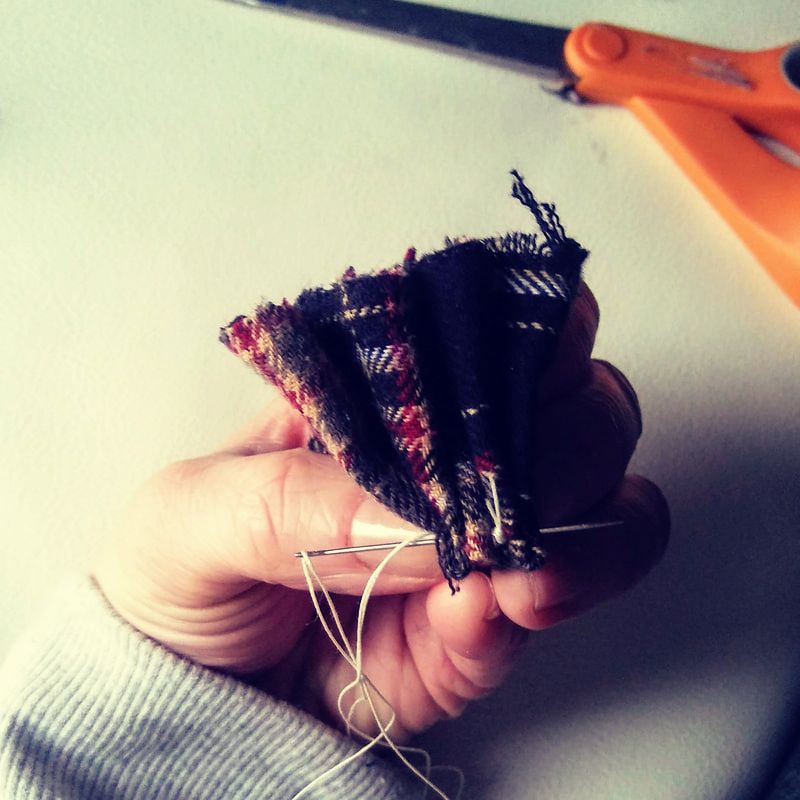
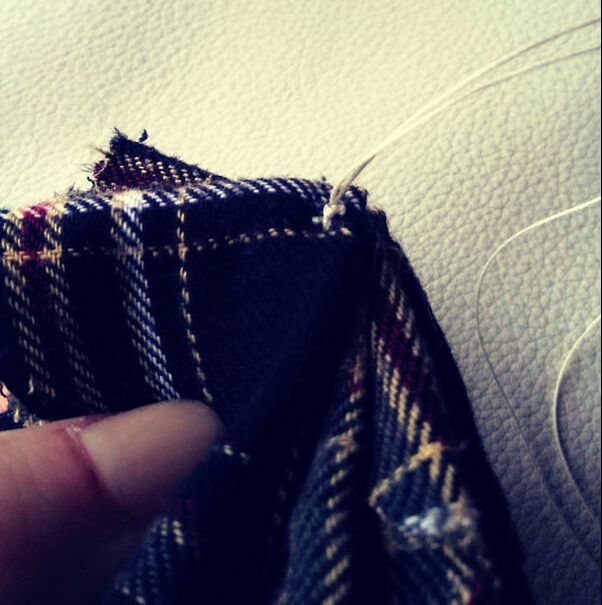
1. Cut 8 3"x3" pieces out of your fabric (or various fabrics) 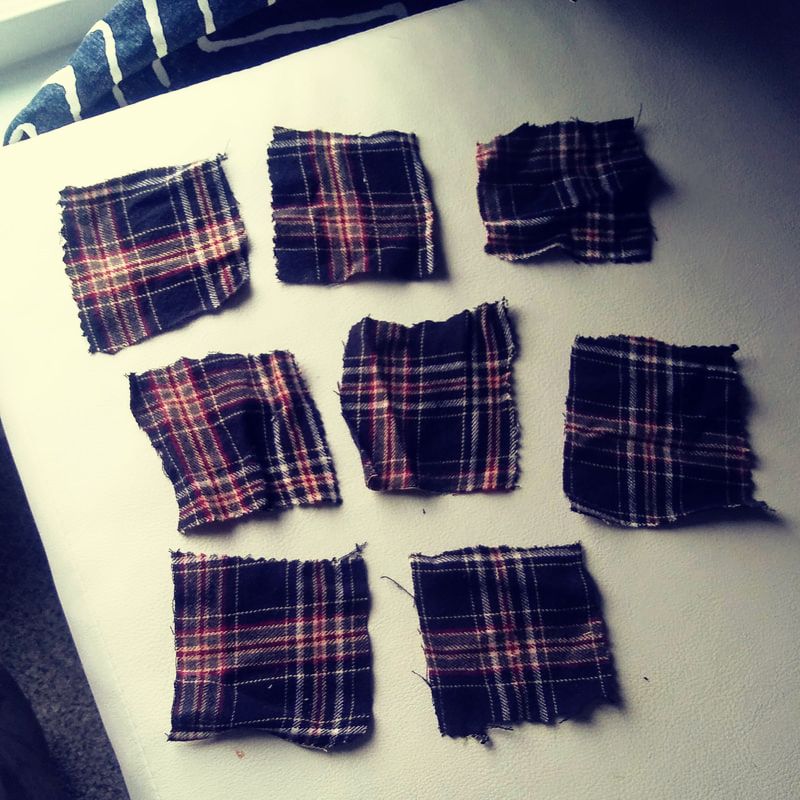 2. Fold each piece in half and then in half again...
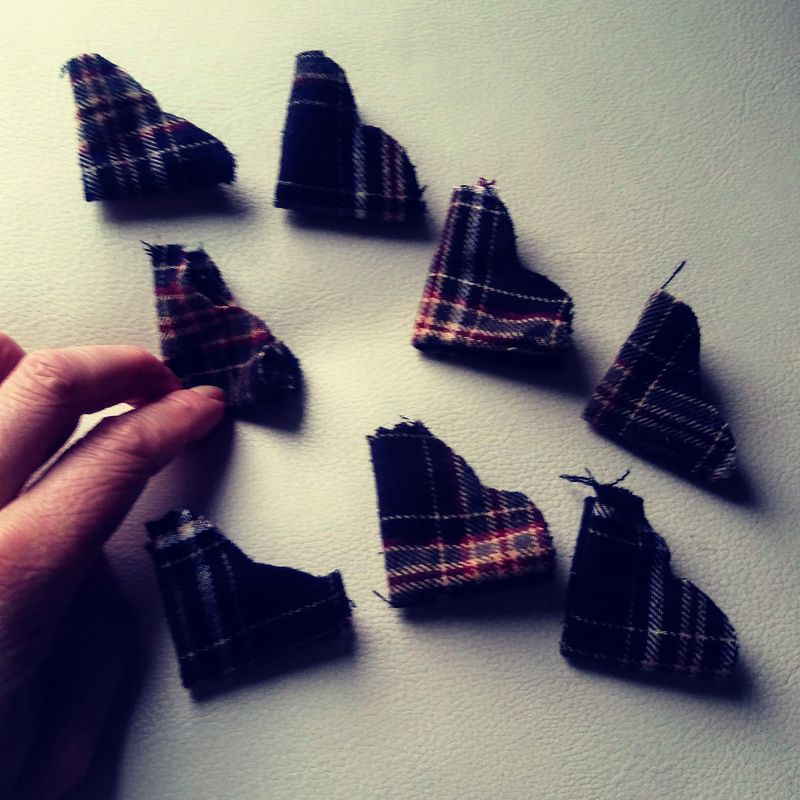
3. While holding the fold of each piece, cut the corner into a rough looking heart shape (I went ahead and did all 8 pieces so they were ready for me and I felt like that really sped the process along!)
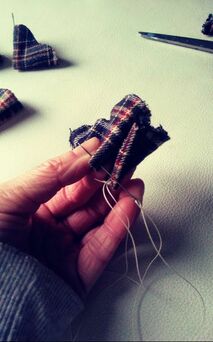
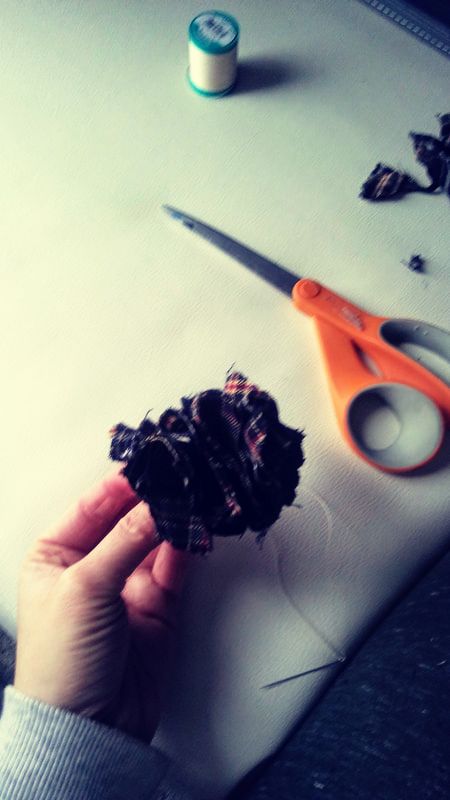
8. As you let go of the corners, you'll see how all of the pieces are now together, but... it needs a little help becoming a flower. Begin "fluffing" up your pieces and spreading them outward. Oooo look at that flower grow! And just like that, your flower is formed and ready for whatever you wish to use it for!
(Side note: the fabric I used are actually pieces of my Papaw's flannel shirts - he passed a couple of years ago. I plan to use my flowers for wedding decorations/bouquets whenever that happens... cough, cough! ...That way he'll be with us on our special day.)
Here's a quick project for some easy decor/accent piece for just about any part of your life: window valance, curtain, overlay skirt, bohemian accent, holiday garland, the list could go on and on. I don't know what the official name of this is but let's call it "scrap-fabric garland" for the purpose of the blog! Supplies:
1. Gather your fabric. Do not waste your money by going to the fabric store and buying new fabric, yuck! Hit up the thrift store, garage sales, or your closet instead. You can use just about anything: sheets, curtains, bed spreads, shirts, skirts, tablecloths, etc. As long as you can cut it, you can use it. The best items to find are ones that have more than one color involved. For example, I got a layered skirt for the garland in the first finished image. The underside layer was a mauve-y grey and the top layer was a pink floral - 2 for the price of one! 2. Cut long strips of the fabric. We will be doubling the strands so make it double what you need in length. The fabric will most-likely shed allllll over the place! That's just how it goes unless you want to use pinking shears. 3. Cut a length of strong rope/string to use to tie your pieces onto. It's better to cut extra and trim it down later. You may think that you don't need anything hefty but trust me you do. Once all that fabric gets tied on there, it is much heavier than you think! I strung up my string and even tied the ends up so that it is nice and taught for you to tie the strands right on the string without any headache. 4. Begin tying fabric pieces onto the rope using the larks head knot technique. This is the best because you will get two strands for the price of one and will make the garland look super full and fluffy. 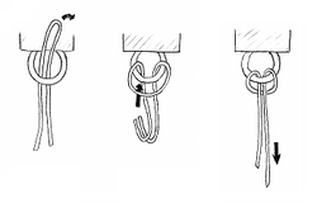 5. Literally just keep tying... and tying... and tying... oh yea, and tying. And then you are done! You can now hang it wherever you wish or wear for a spunky costume, anything your heart desires! Here are my 2 examples below: 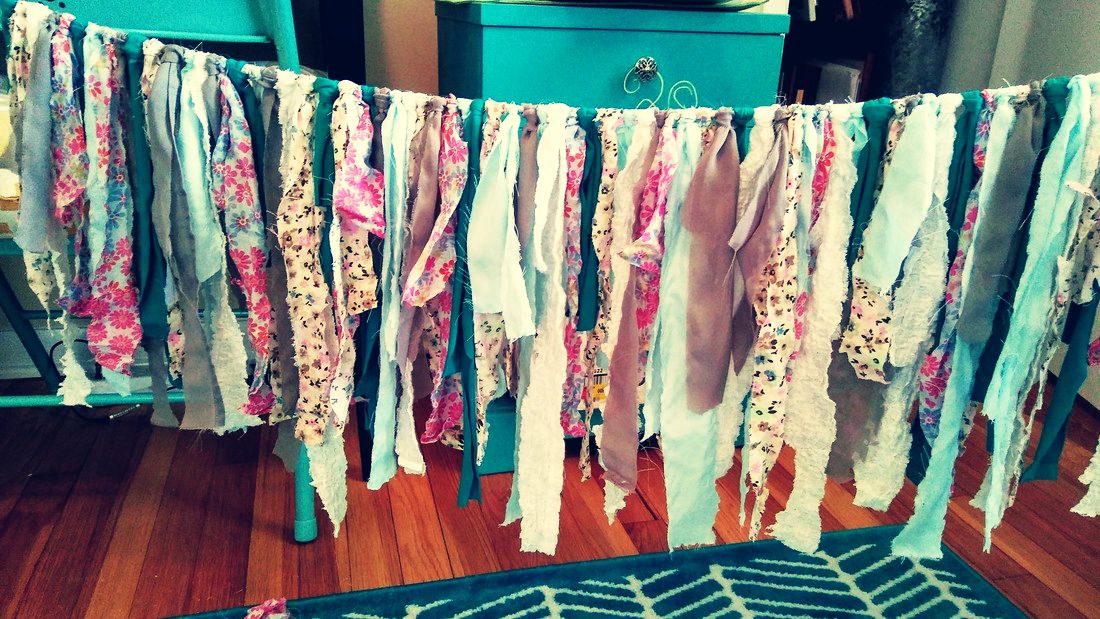
My second garland is a MEGA garland! It's heavy but it's so worth it. I use it to decorate my craft show booth whenever I have one outside. It's so pretty blowing in the wind and I get so many compliments on it! 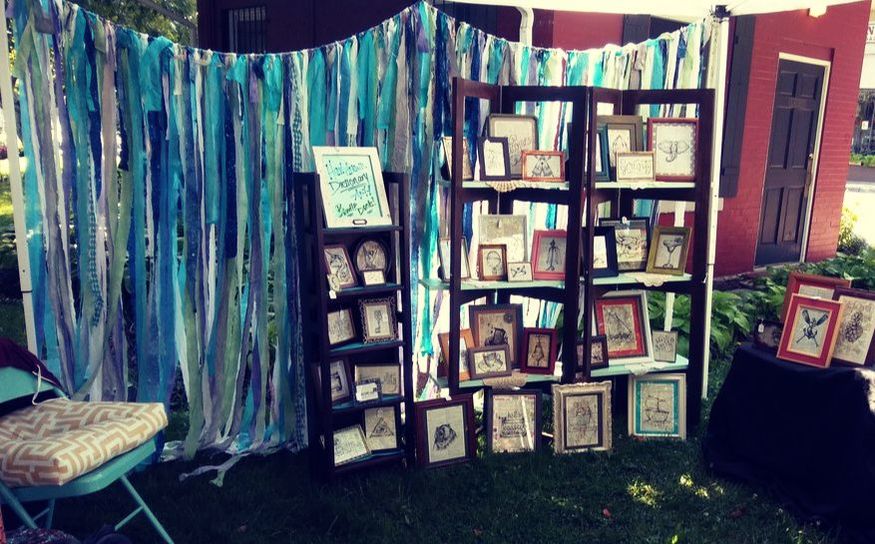 |

Rebecca MyersHey there, I'm Becca, or Rebecca, but not Becky, never Becky, unless you're my family from down south! I'm a simply modern librarian by day and an artist by night. My pursuit is for a simple, happy, healthy, and more fulfilling life! I hope I inspire you to get crafty! Archives
March 2022
Categories
All
|


 RSS Feed