
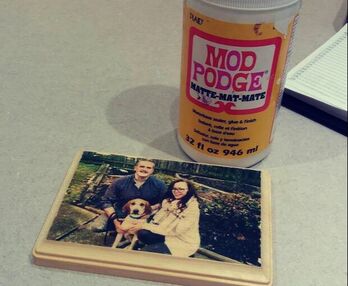
 I had always wanted to do this but all the methods I looked at seemed unrealistic and lengthy. Thanks to CreativeBug (which is offered through the Cuyahoga County Library system for free) I was able to discover a quick, super easy way to complete this craft! I only have the end result photos and not the progress photos but, seriously, I don't think you'll need them because it's sooooo easy! Supplies:
1. Print your photo out on regular ol' copy paper on a LAZER printer. It can be in black and white or color. Cut away any excess paper. 2. Paint on a nice solid layer of Mod Podge on your wood piece (You don't want too much that it's goopy and sliding off the sides but enough to see a white layer). 3. Flip your printed photo into the Mod Podge, ink side down and smooth out to remove any air bubbles. 4. Take your burnisher/flat edge and rub the paper with some effort. This helps get rid of any extra air pockets and gets the ink nice and set into the Mod Podge. 5. Wait for the Mod Podge to COMPLETELY dry. 6. Fill a cup with warm water or just let the faucet lightly run (feels pretty wasteful though!). Wet either your fingers, or a sponge, and begin to lightly saturate the photo. DO NOT soak the photo! 7. Start lightly rubbing the paper in circular motions. The paper will begin to turn into a pulp and will slowly roll off the wood surface. 8. As the wood dries you may see some paper areas you missed. Just go back over these in the same fashion by wetting your fingers and rubbing the area in a circular motion. 9. After you're done, you can coat the wood with a finishing agent, paint the sides, decorate with embellishments, etc. Really cute gift idea, especially for family photos! Note: "They" do make photo transfer solutions specifically for this type of project. Even Mod Podge makes a specific Mod Podge for it as well. You can also use a gel medium technique but that takes days to set! I don't see the point in buying extra (expensive) supplies when beautiful, simple Mod Podge works just as good! Here are my 3 transfers below: 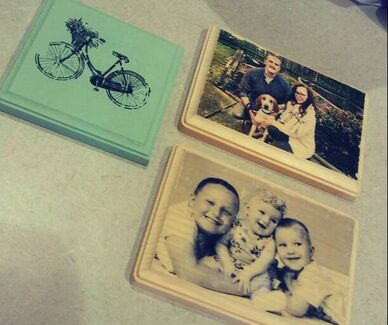
0 Comments
Do you remember that awesome spooky spell book I did back in October? Well, it started a whirlwind for Christmas gifts that I got completely lost in! Ahhh, the wonderful world of altered books! This is the main reason I haven't really posted too much because I was so enveloped in this realm, I didn't have time for anything else. Nothing! If you don't know what I'm talking about, do a general search on Pinterest for "altered books" or "altered book journal" and behold. It is endless. You will get lost in a rabbit hole that you might never get out of! Altered books can be created for any type of person, for any reason. The possibilities are endless and it is so incredibly creative. It is a very messy hobby but the results are beautiful. I also found it stress-relieving. I would go into my art room for hours and come out feeling calm and inspired. Anywho, here is one of the books I created. This one was for my mom who decorates in the vintage/americana type decor. You need to download the file in order to watch it as it is too large for the online restrictions. Enjoy, and Happy Holidays!
Hoy! I haven't posted anything in a month! I can't believe it's winter and I can't believe Christmas is already less than a month away. Time goes by too fast as you get older, I'm not a fan. Let's talk about a quick and easy craft you can do in practically no time at all! (Makes for some awesome gifts too) Supplies:
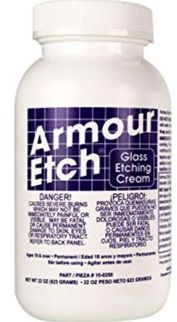
1. Start by cleaning your glass item. Run it through the dishwasher or hand wash so it's nice and clean for our project. 2. Prep your area with newspaper or a plastic tablecloth and set up all of your necessary materials so you are ready to go!
(You can use transfer tape or contact paper on top of your stencil to easily transfer it to your glass item. This will prevent the stencil from getting out of place and will keep the components in the correct spot)
5. Let the cream sit for no more than 20 minutes. 6. While still wearing the rubber gloves, wash your glass under the faucet and gently rub the cream away under the water. 7. Dry off your glass with a paper towel or hand towel, and wa-lah! A beautiful gift! (The small glass on the left is a pile of books just fyi) 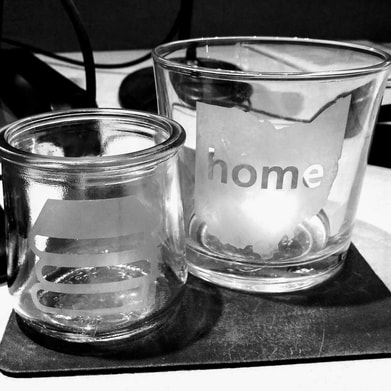 |

Rebecca MyersHey there, I'm Becca, or Rebecca, but not Becky, never Becky, unless you're my family from down south! I'm a simply modern librarian by day and an artist by night. My pursuit is for a simple, happy, healthy, and more fulfilling life! I hope I inspire you to get crafty! Archives
March 2022
Categories
All
|
||||||
 RSS Feed