
|
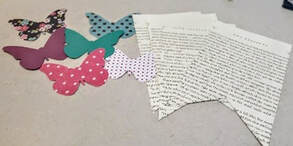
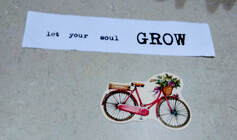
I have always, always loved butterflies. I became particularly attached to them when my elderly babysitter passed away when I was little. I remember.. or at least this is the story that's in my head.. that when she passed I made a wish for her to come back to me as a butterfly. And, lo and behold, the next day I was outside playing and a butterfly landed right next to me. Now, do I think it was quite a coincidence with it being spring and all that a butterfly would be flying around on a bright, sunny, April day, maybe. But to my little eyes and heart, it was her. I was looking for a simple craft that booklovers would (hopefully) love to make and came up with this sweet craft involving book pages, butterflies, and bright fabric scraps. Below are my step by step instructions to make it, enjoy! 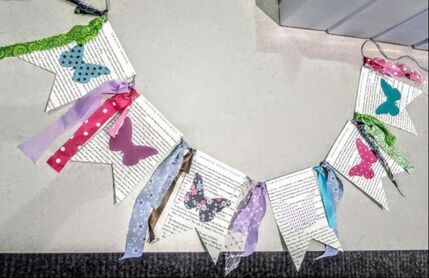 Supplies:
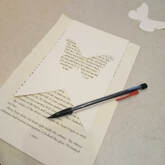
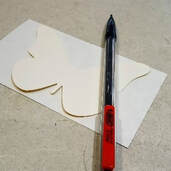
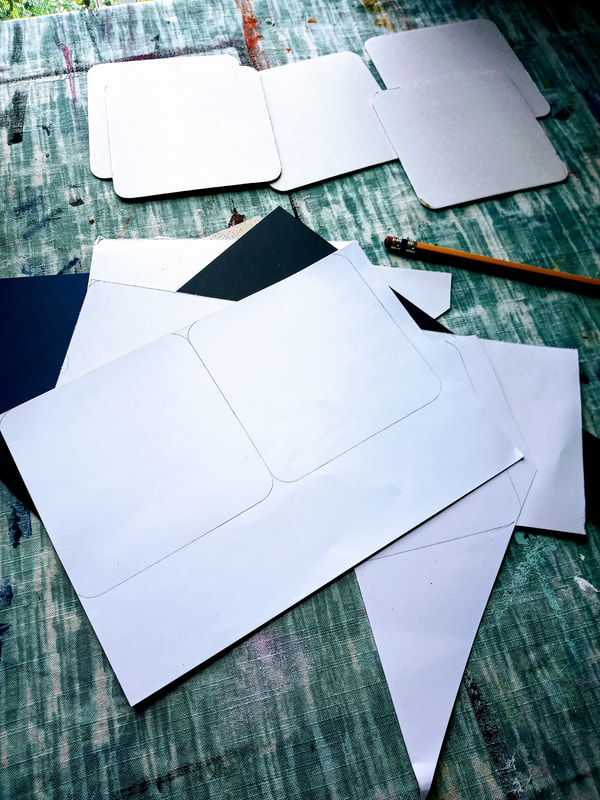
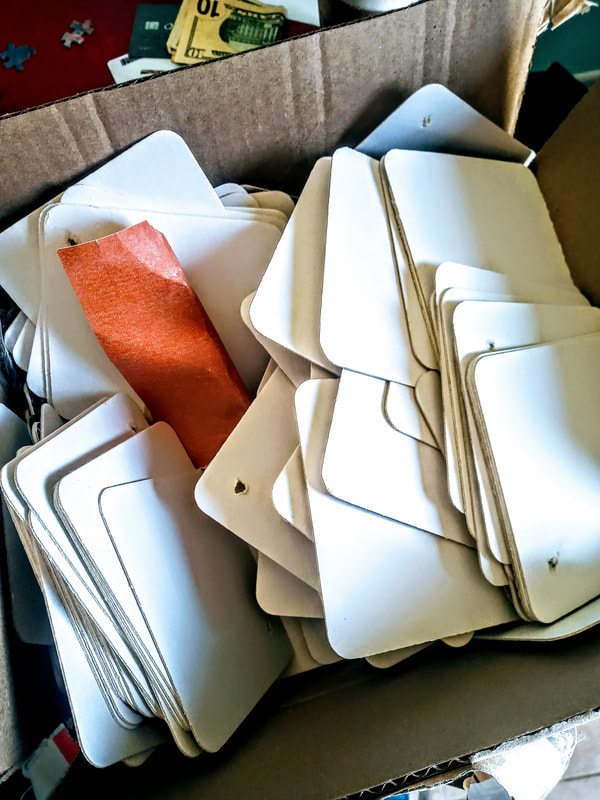
1. Lay out all your supplies to get organized 😊 I made a template for both the pennant and the butterflies so that they'd all be the same size. Trace your book page banner shapes and the butterflies. Then cut them all out.
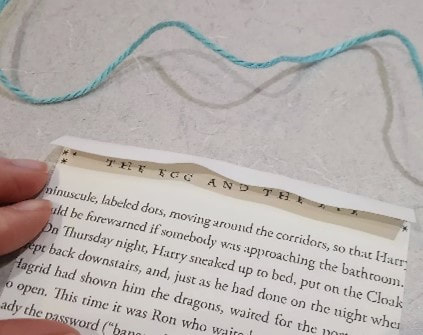
2. Glue your banner book pages onto the twine by first folding the top over for a crease. Then, lay a line of glue (I used a glue stick) across the crease. While holding the twine in place, fold over the smaller top piece and press it into the glue.
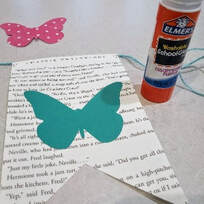
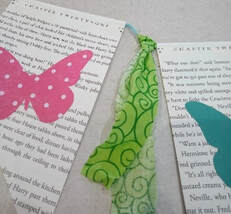
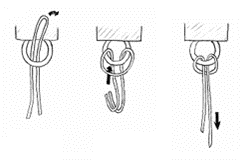
4. Lastly, add your scrap fabric, ribbon, etc. in between each banner. You can tie it with a loop or a regular knot. That’s it 😊
Look how cute! 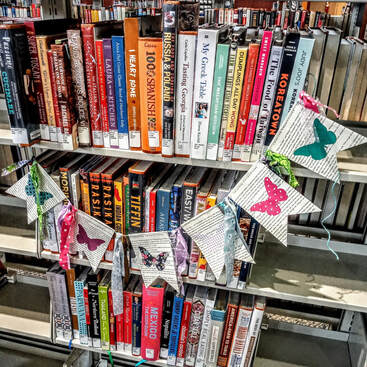
0 Comments
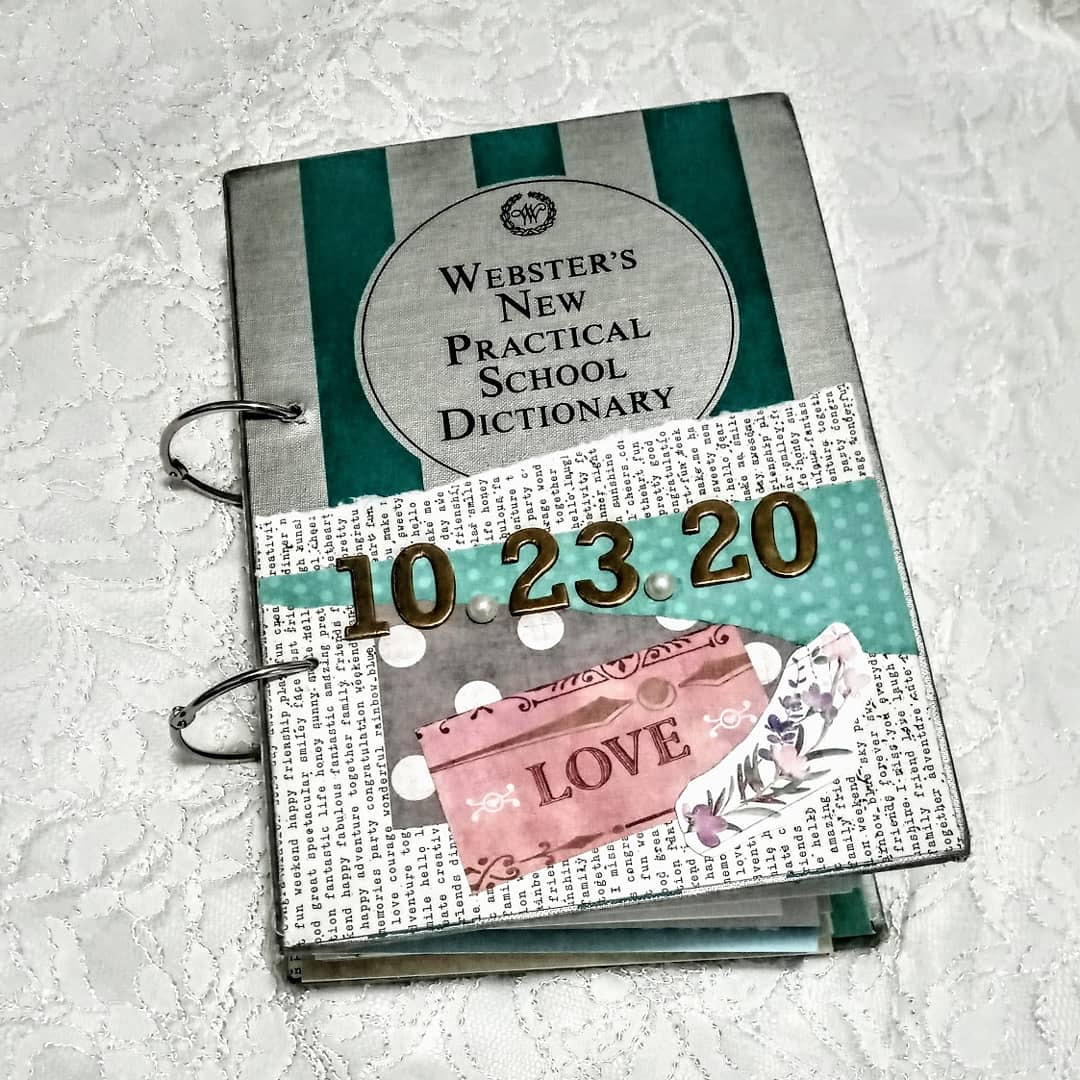
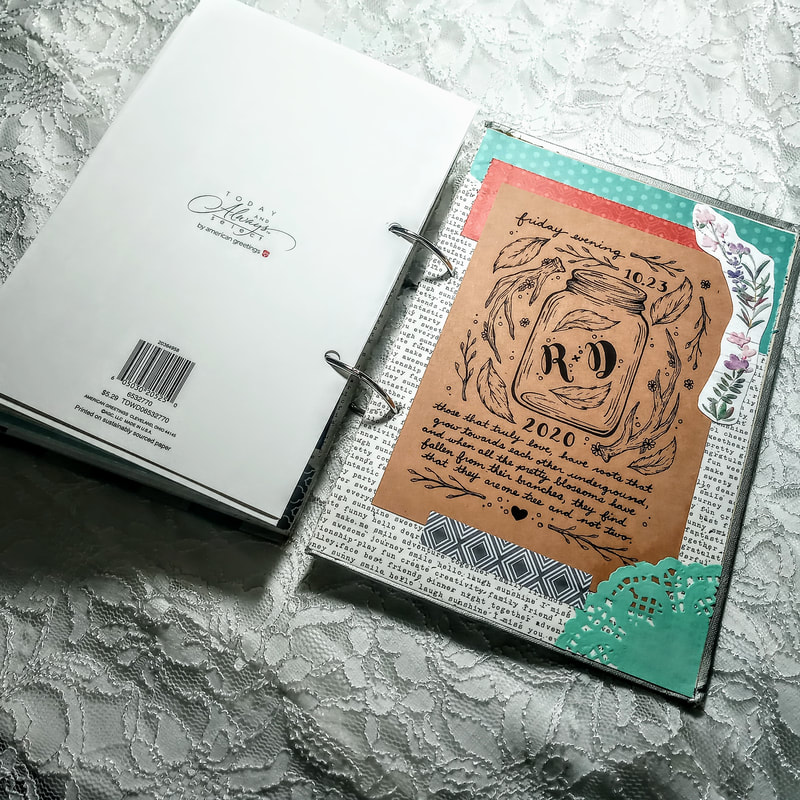
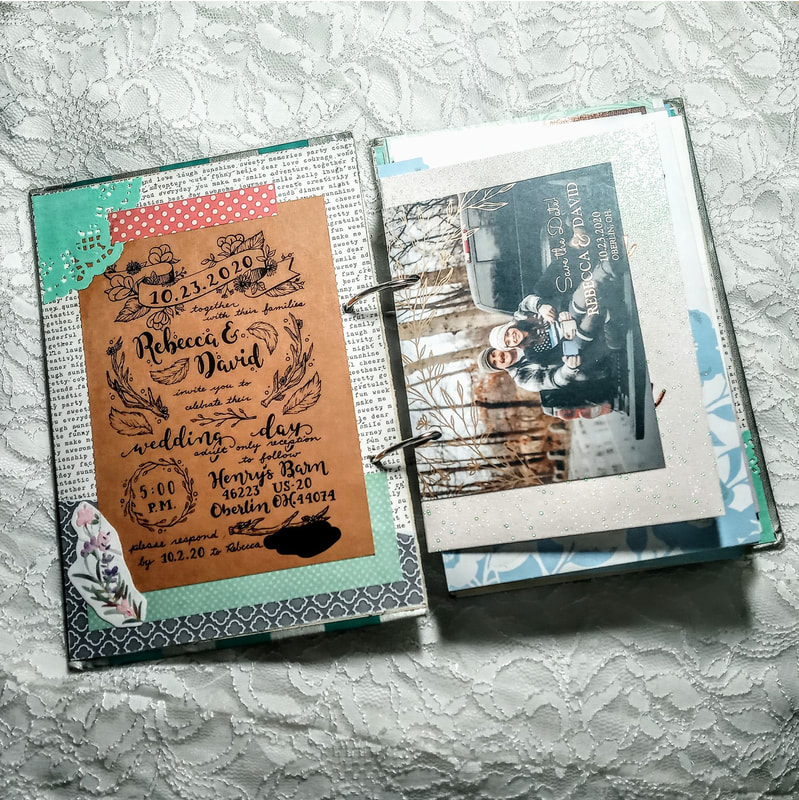
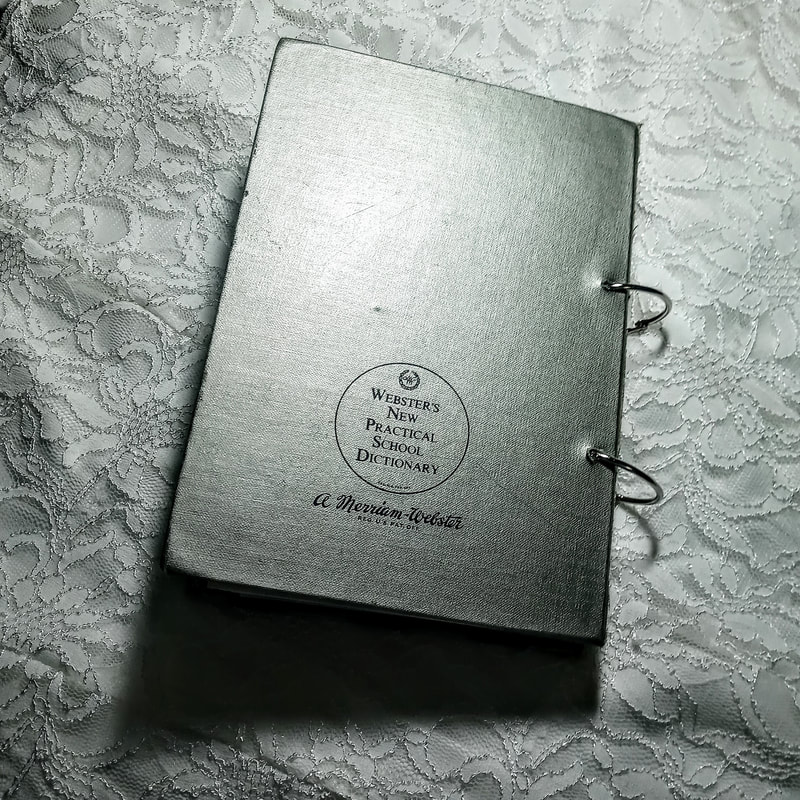
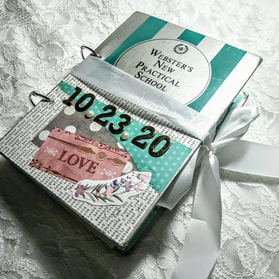 I GOT MARRIEDDDDDD!!!!! I'm a little excited, can you tell?! Wedding planning in general can be stressful but add COVID to the mix and it's just down right exhausting! We went back and forth for so long about what the heck we were even doing and basically started outlining two different wedding possibilities for our day. We ended up still having it at our venue and just had to limit our list down. Despite all the stress over every little detail, dresses, decor, the weather, and covid, it turned out to be the most perfect and beautiful day! I still can't believe just how perfect everything was and felt. To have those closest to us there to celebrate with us and enjoy a happy evening during all the craziness in the world was so incredibly heartwarming! With any big life event, we received plenty of cards! Not just any cards, wedding cards of course. They were just so beautiful, sparkly, meaningful, etc. and I just could not throw them away. I saw the idea people have been making where they punch shapes out of them and put them in a frame but I thought, what if I get tired of having it on my wall, or want to move it around? Then I'm stuck with a big frame to put somewhere else! And I mean that in the best way possible obviously! So instead, I thought, how could I make these into a book or album of some sort and tried looking up ideas on that. Some people take this very seriously and sew sections together just like you would a real handcrafted book but that was a little too much for me! When I began my "dictionary art" I had one singular dictionary and my goal was to use up every bit of that dictionary. After using all the pages and feeling so accomplished I then decided to hoard the cover and backing of the dictionary like a crazy person. Well, well well! Did those come in handy or what?! This became my front and back of our new wedding card book! I did not take step-by-step photos but I'll attempt to explain my process! *Optional: I first decorated both the cover and the backs to spruce up the book. I used scrapbook paper, copies of our wedding invite, and stickers. 1. I found my smallest card and lined them up centered with the cover of the book so that I could mark off roughly where 2 holes would go into the cover, card, and back of the book. 2. I used an electric drill to drill through both the cover and back. 3. Next, I marked every card with matching holes to the cover and hole punched all of them. 4. Optional. I also cut every card in half with an E-xacto knife so that they would flip more easily. 5. I used 2 large binder rings (3in to fit the amount of cards we had), and fed the rings through each card!
Note: This was the amount of cards from about 60 people, so if you have a larger event you might want to/need to make multiple books! And that was it! Now we have a gorgeous keepsake!
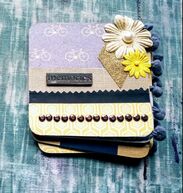
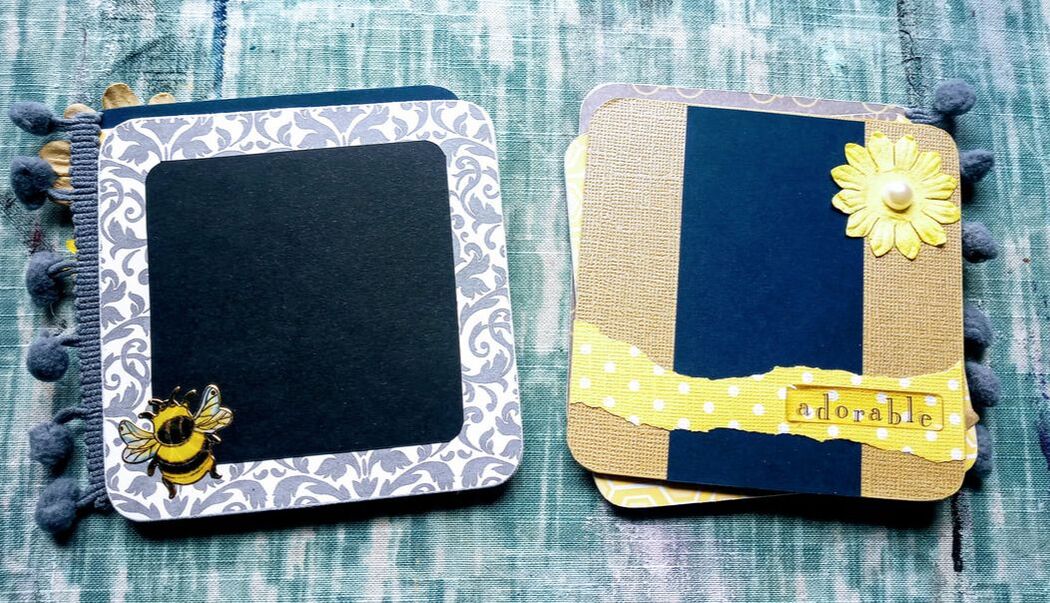
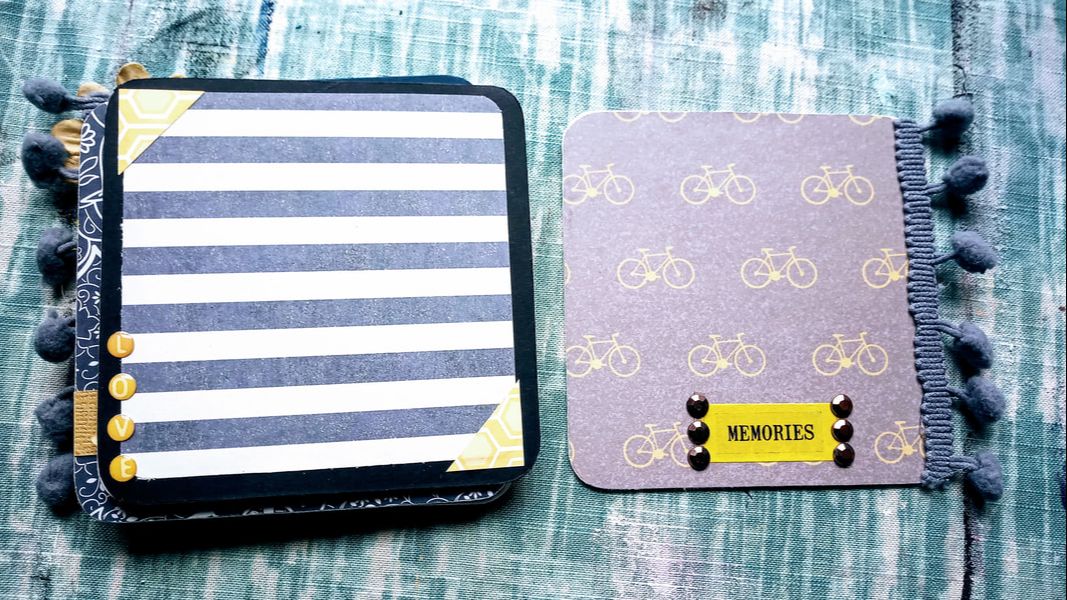
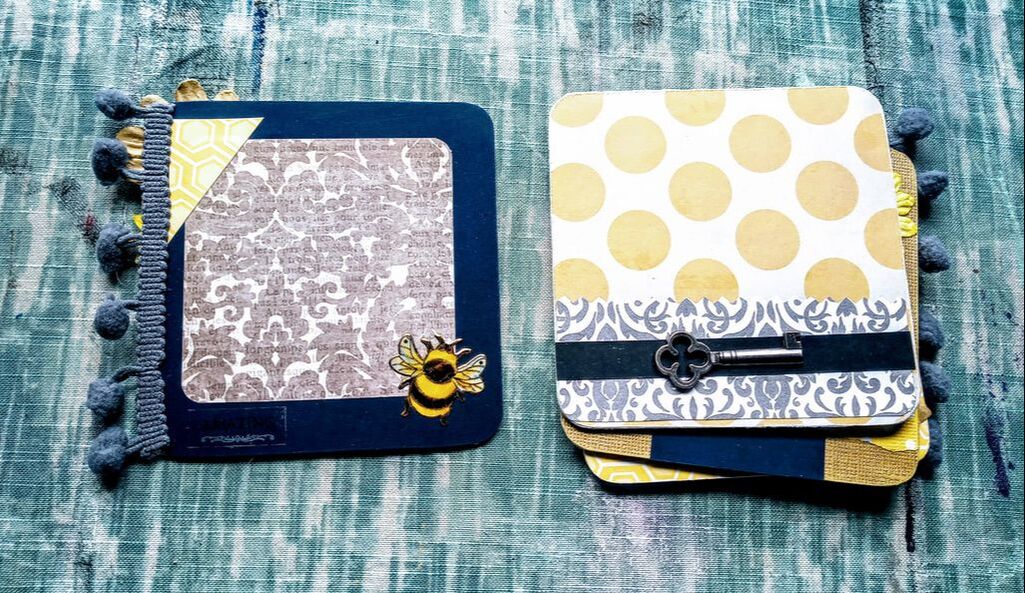
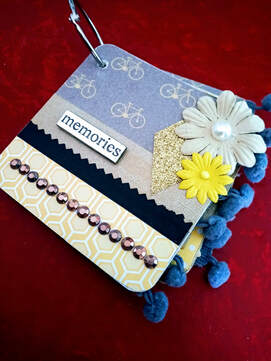 This is a quick project that you can give as a gift with pictures already in it or left empty for the person to fill. They're super cute and itty bitty! Something fun and different to brighten up any day. Supplies:
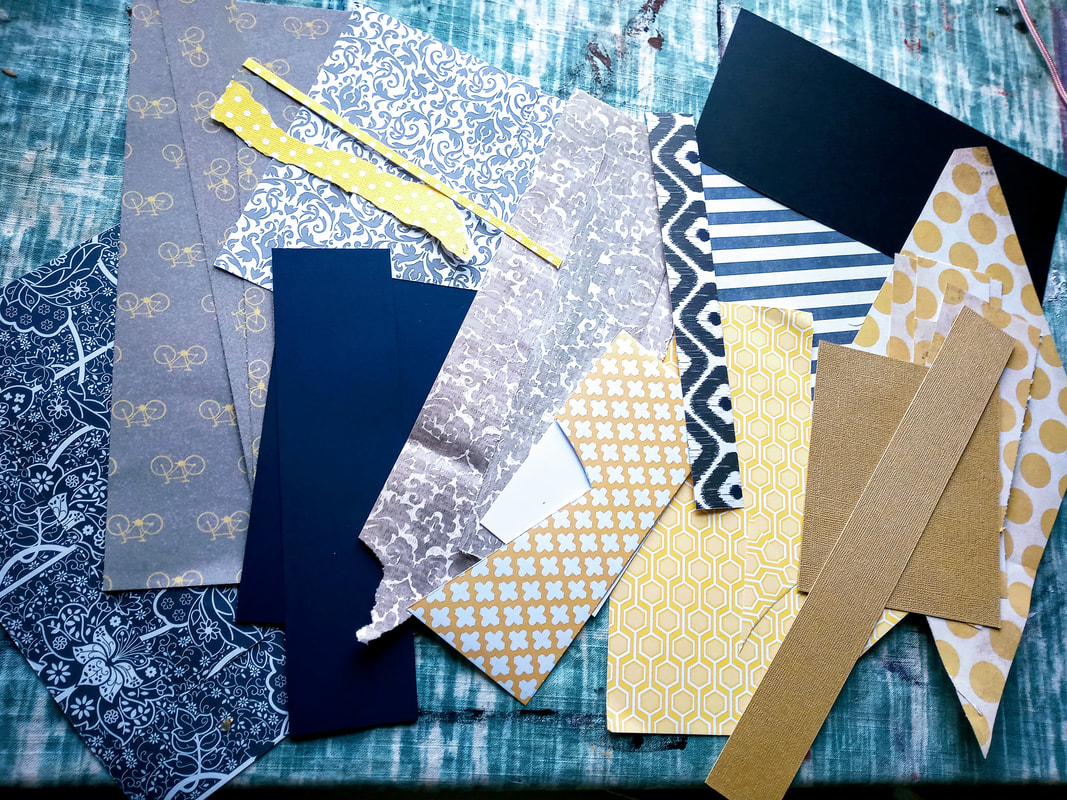
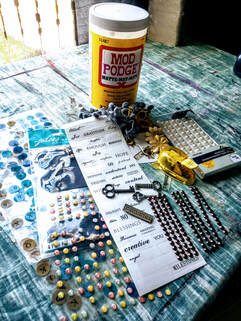
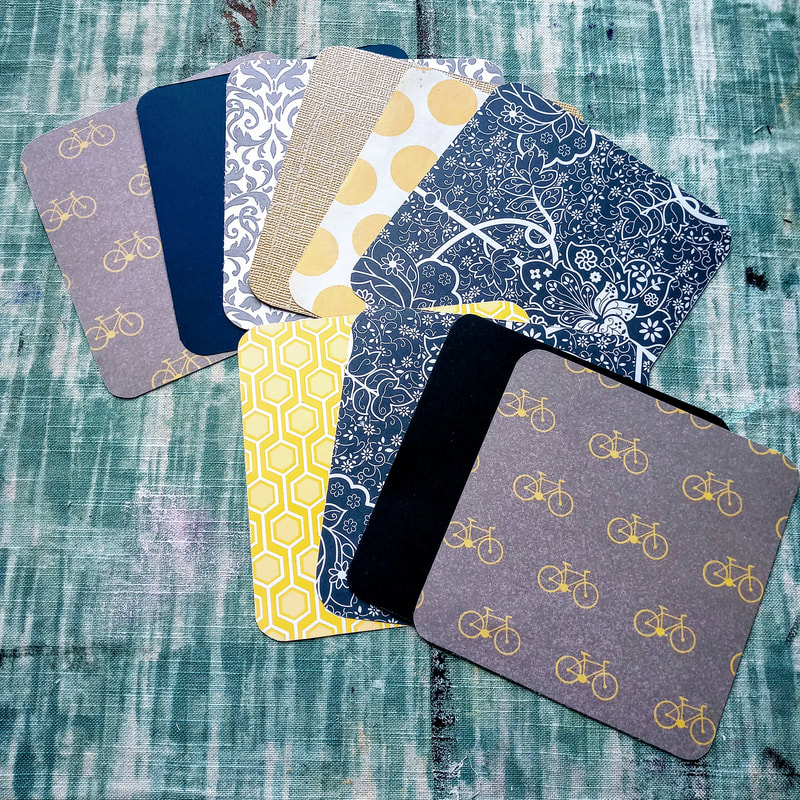
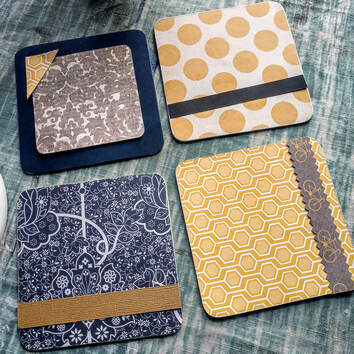
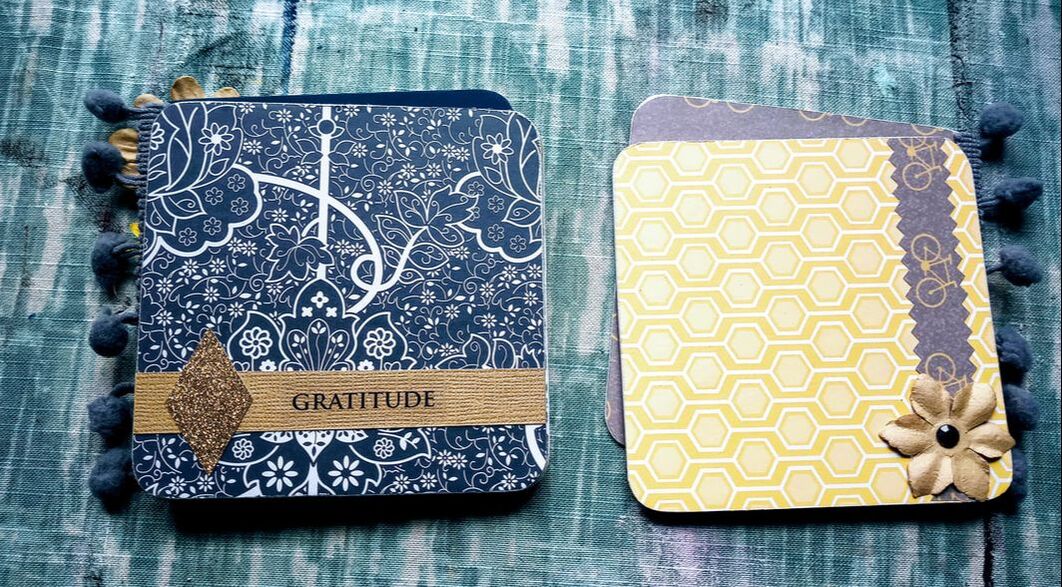
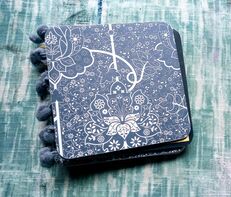
1. The first step for this itty bitty project is gathering all your supplies because there's a lot of potential components. I like to gather everything up that way I have all the supplies necessary near me and ready to go. This is where I picked my color scheme for my scrapbook (I used scraps from my scrap bag) and came up with yellow, grey, and navy. Pretty! I also gathered a pile of random stickers and other embellishments (I had no idea what I would use!).
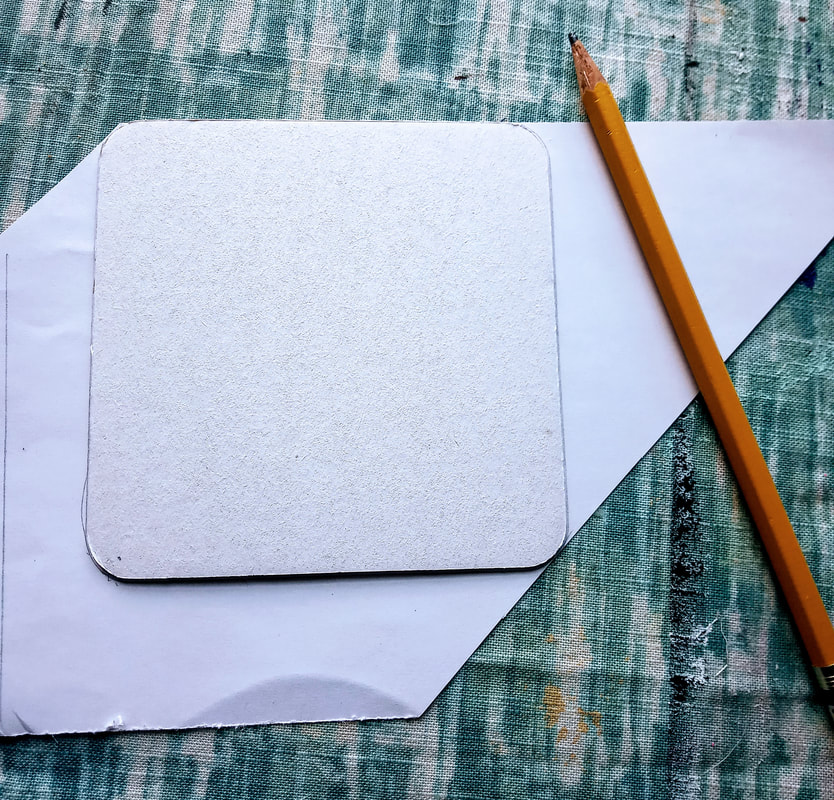
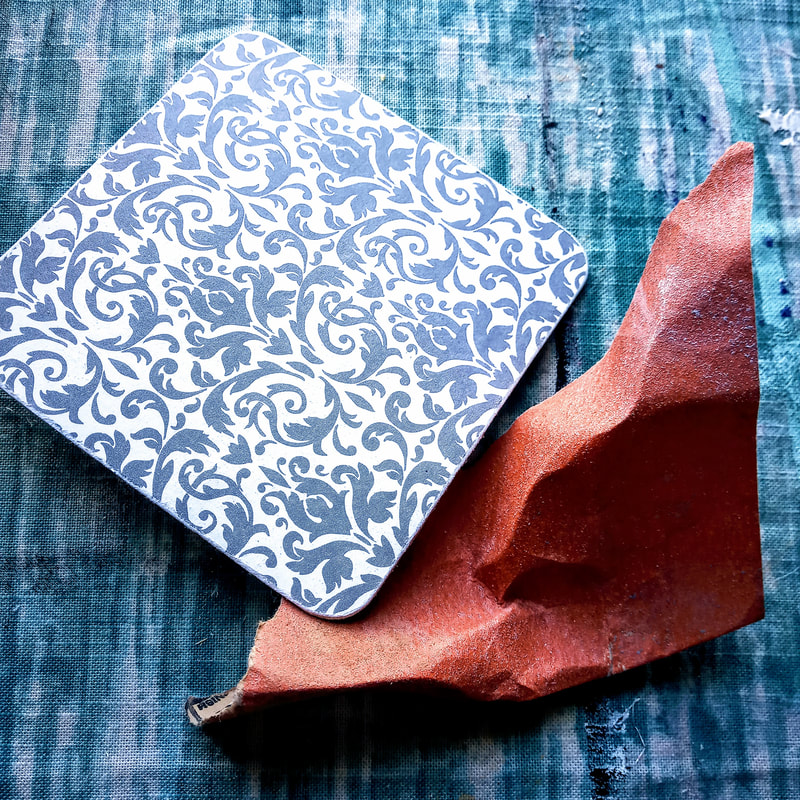
2. I then traced the coasters onto the backs of the scrapbook paper I would use for the main sheets so I could cut them out to size.
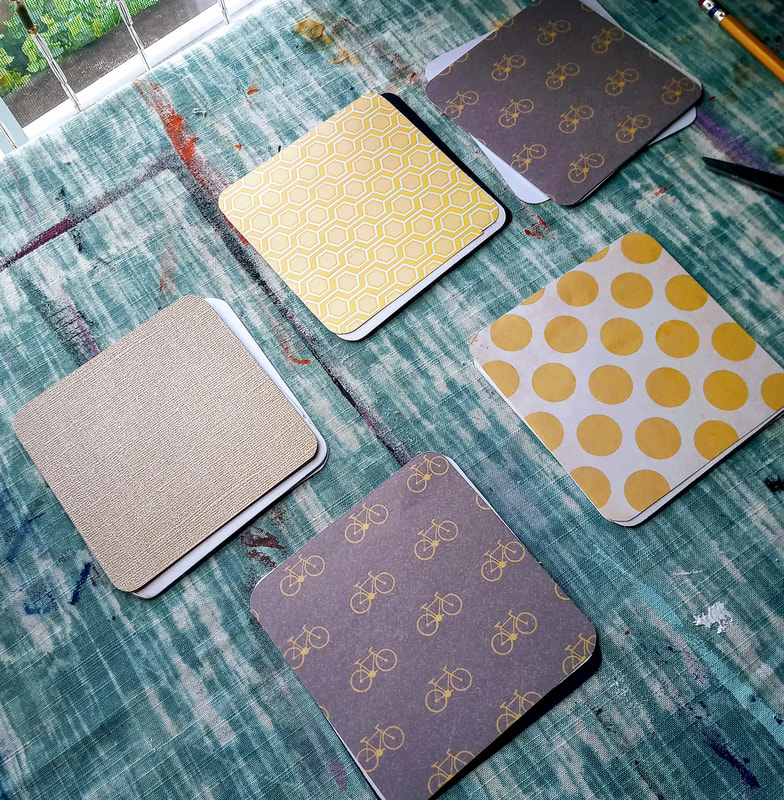
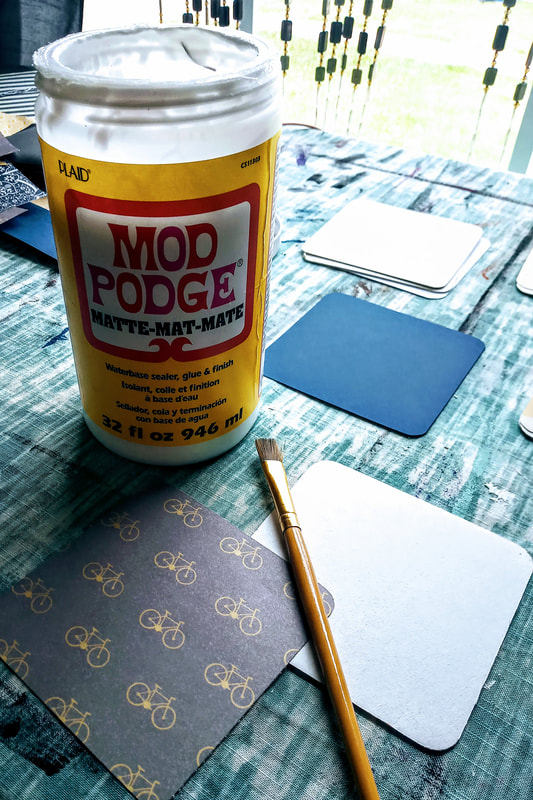
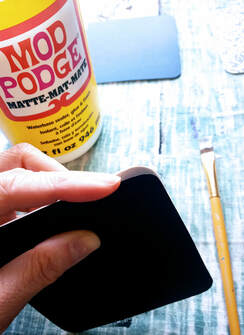
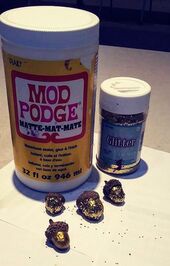
3. I decided the order of the pages that I wanted and laid them out on the coasters. Next, I glued the sheets onto the coasters using the Mod Podge and a paint brush. I did half at a time instead of trying to glue the whole sheet at once, that way I could be more aware of bubbles showing up.
6. Start to plan out your pages by laying out the pieces and parts that you want to include before you officially glue anything down!
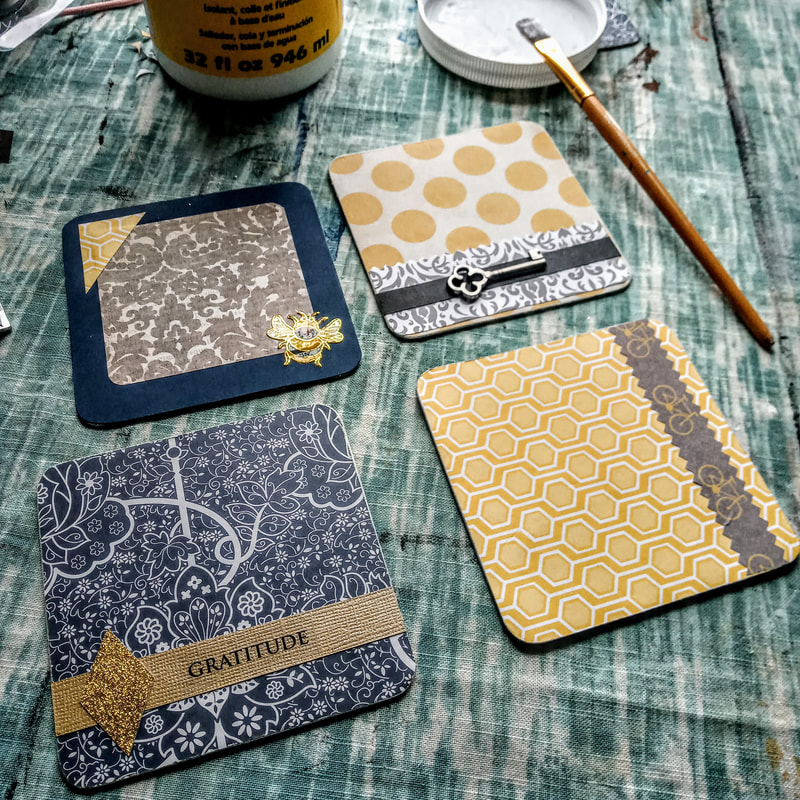
7. Mod Podge dries pretty quick so this part of the project will go fast. You can use a hot glue gun for heavier/awkward objects to secure them to the boards.
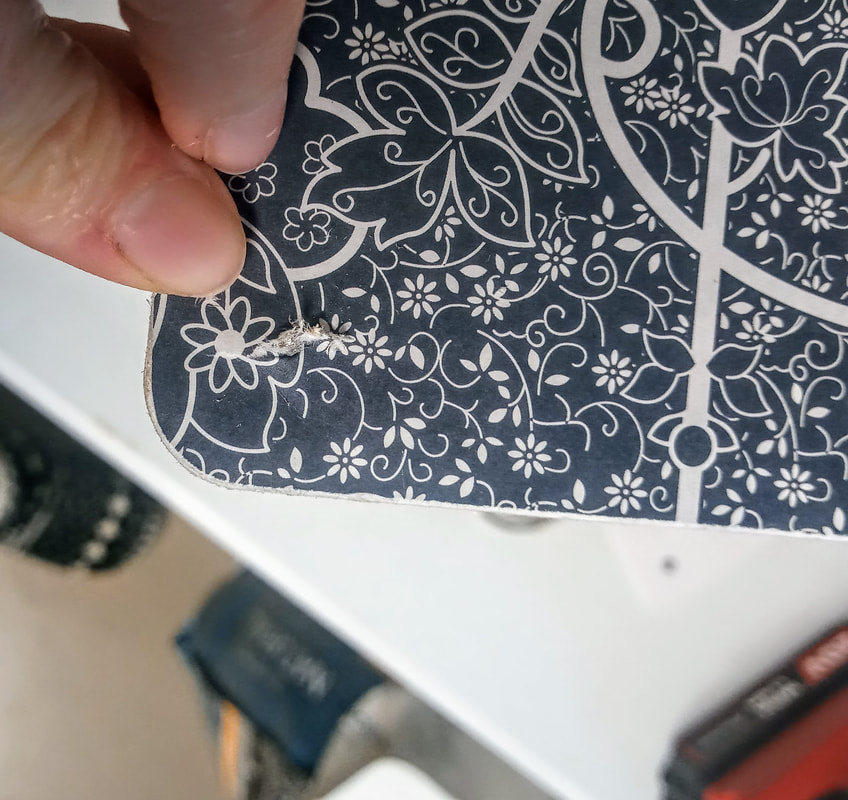
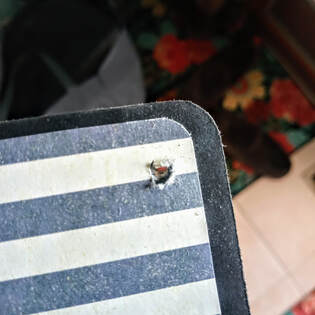
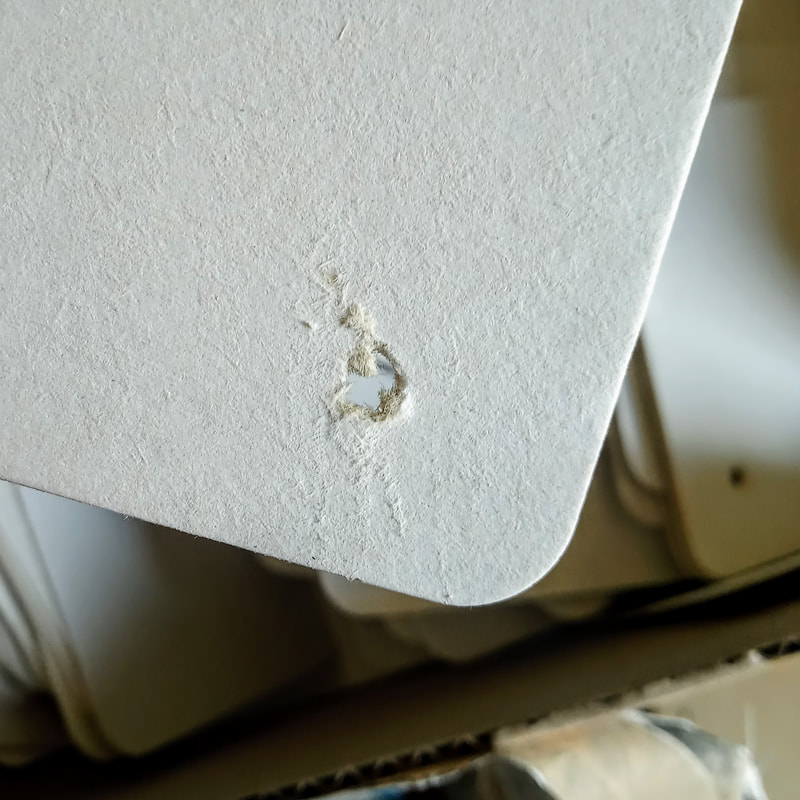
8. Looks super cute, right?! Well, this is where I realized... oh crap... how do I hold it together?! I looked up some ideas and liked the nonrestrictive binder ring option. But, this meant there needed to be holes for the ring to pass through. I decided to use a drill as this was the only option we had to my knowledge that could accomplish this. I think if I had some sort of press that would have been the way to go! I drilled through and it slightly tore up my paper! Ugg not cool!
I am going to be doing this for an upcoming work program so decided to create holes in all 125 coasters... yay!... that way they are done ahead of time instead of afterwards. Still, I do not think this is the best option... it seems to tear through the chipboard (these are really flimsy chipboard!) and I encourage you to find a better way if possible :) It still turned out cute overall!
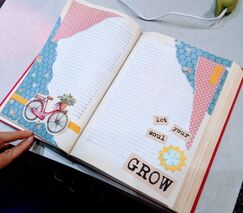 Let me start by saying anything... and I mean anything can be used for an altered book journal! This is what makes this project so much fun and so versatile. Every book is different, every page is different, and every material is different. The purpose of an "altered book" is making an old book into a new piece of art. There are many types of altered books, but for this project, we are beginning an altered book "journal". A journal can be used as a "smash book" for travel or random memories or can be used for a literal journal to write in. There are many possibilities. I did this journal page spread for one of my classes. This was a little tricky as I had to come up with something that we could all do together in our own books but something that could get everyone started and get those creative gears moving! The page above is what I came up with. It is something very simple and uses minimal supplies. We could've gone crazy and used paints, textures, inks, stamps, stickers, etc. but I kept it simple for an easy clean up and to also show that you don't need anything fancy for this type of project! Supplies:
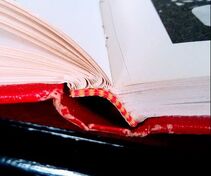
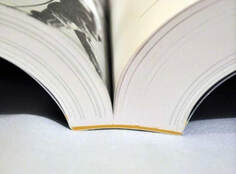
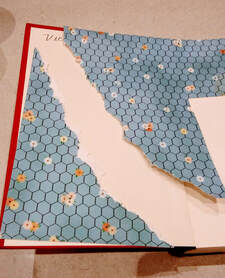
1. First off, let's talk about picking our book. If you can find something with "sewn" pages, that's the way to go! The modern glued pages are terrible for an altered book project! They are too flimsy and as you cut away more pages it loses its stability and could fall apart! These photos show what a sewn spine looks like verses a glued spine.
3. Once you are done cutting out pages throughout the book, you are ready to start gluing. As mentioned above, glue the pages to the left and right of the cut together, hiding that cut line. I use Mod Podge for this, putting it on in an even, thin layer. You can always come back and add more if the corners aren't glued down after it dries. 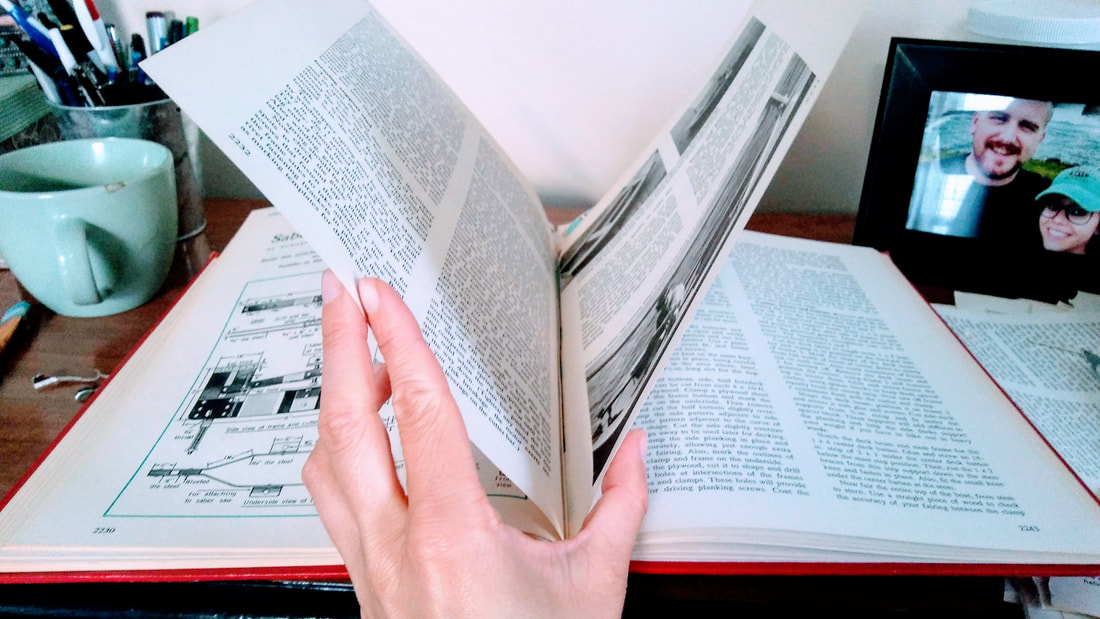
6. All I did to finish this page spread up was glue! First, I arranged everything on the pages to figure out where I wanted it all to go. Once I was good with it all I glued everything down with a thin layer of Elmer's Glue, you could use Mod Podge instead. I also used the hot glue gun to glue the ribbon and the flowers down. But that was it! 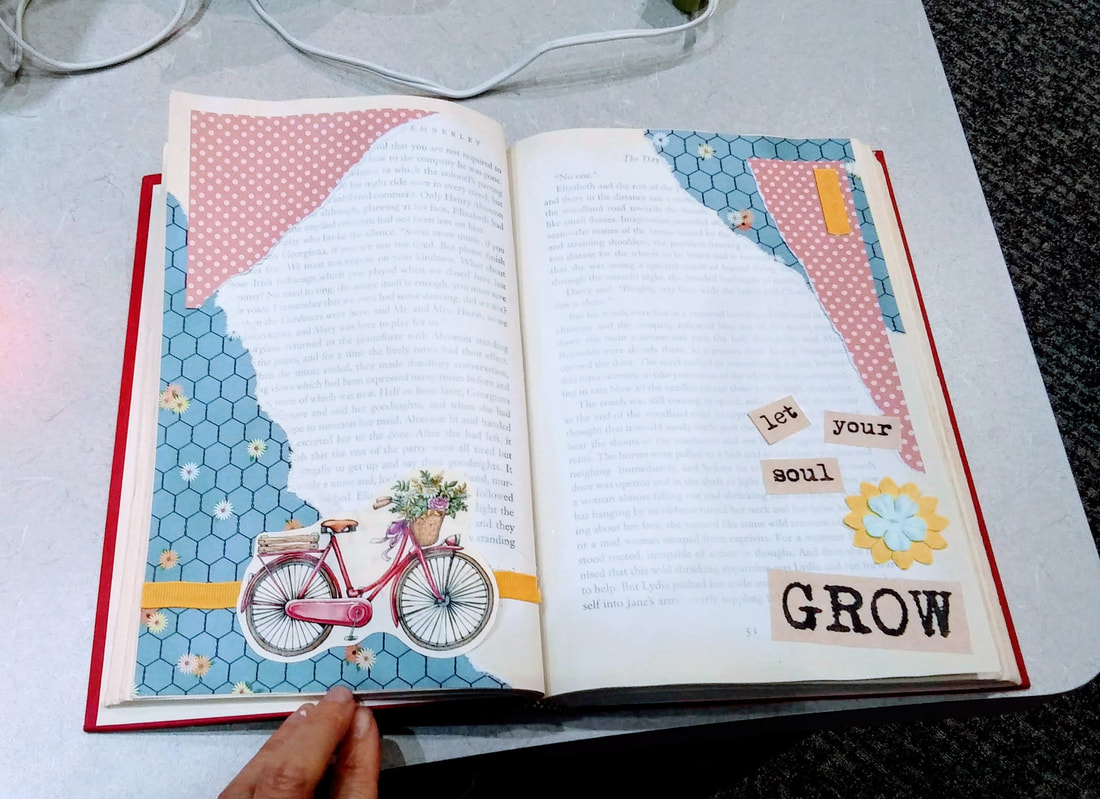 This was a pretty simple page. But you could really get crazy and do pages like the examples below! Happy Journaling!
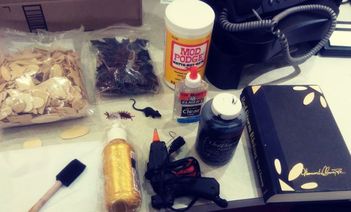
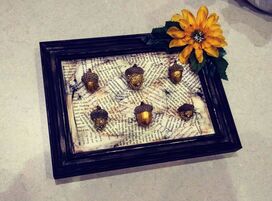 This is a pretty quick fall craft to spruce up your shelf space for the autumn weather or maybe a gift idea! The one I originally saw on Pinterest was very cute with bright fall colors. There are so many options with this type of craft, it's almost overwhelming. I thought about going with a subtle brown, tan, and white color combination at first. I thought it would be very elegant for Thanksgiving but somehow I ended up switching to more of a Halloween based theme with a distressed frame and distressed pages. The possibilities are endless but I hope you find one that you love! Supplies:
1. Gather up all of your supplies so that you have them near and dear to your project space. 2. If you're like me, I had a few frames to choose from and was very stressed with all the options! Finally, I decided on something medium-sized and relatively simple in structure. I forgot to take a picture ahead of time, but I "distressed" my frame a bit by very lightly adding black in light strokes to make it seem old/give it some more depth to the frame. 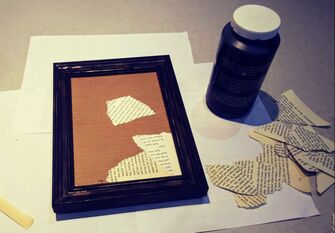 3. The original post I saw for this project involved using cute polka dot scrapbook paper as a background. I was going to do this as well, but saw I had some old book pages lying around and thought that would be a much cooler effect! If you're using a piece of scrapbook paper make sure you glue/tape it on carefully, making sure there are no air bubbles forming on your background! For me, I added torn strips of book pages by gluing each piece one by one to the background. Keep adding and adding until your background is full. 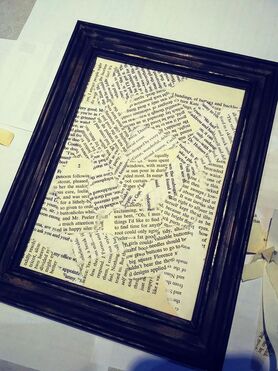 4. While your background is setting/drying, this is a good time to decide what you're going to do with your acorns. I decided to paint mine a metallic gold. I used 3 "craft" acorns and 3 real acorns that I found in the woods just to try out the different types to see if there were any differences... there aren't (but if you use real ones make sure you "bake" them to get rid of all the little buggies in there!) You'll want to do a couple of coats. 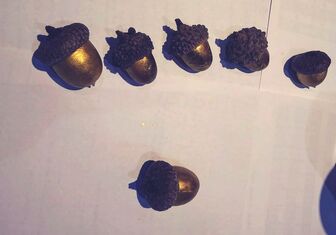 There are many ways to do this. You could leave the acorns in their natural state, paint them, decorate them, wrap them with thread/yarn/twine, oooo!
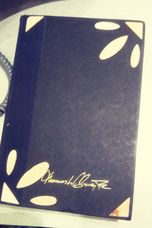
6. While my acorns were drying I also made the glued book pages look more distressed/eerie for a more Halloween look. I lightly brushed very little black and brown paint over the pages giving them that look which you can see in the following photo. 7. Lay out your acorns and see how you like them before you glue them. I used hot glue. Make sure you put enough on there and hold the acorn while it sets. 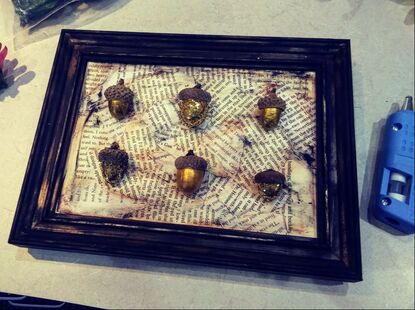 8. Lastly, I decided to add a little extra somethin' somethin' to the frame and hot glued a flower to the upper corner. That's it, we're all done!  Do you remember that awesome spooky spell book I did back in October? Well, it started a whirlwind for Christmas gifts that I got completely lost in! Ahhh, the wonderful world of altered books! This is the main reason I haven't really posted too much because I was so enveloped in this realm, I didn't have time for anything else. Nothing! If you don't know what I'm talking about, do a general search on Pinterest for "altered books" or "altered book journal" and behold. It is endless. You will get lost in a rabbit hole that you might never get out of! Altered books can be created for any type of person, for any reason. The possibilities are endless and it is so incredibly creative. It is a very messy hobby but the results are beautiful. I also found it stress-relieving. I would go into my art room for hours and come out feeling calm and inspired. Anywho, here is one of the books I created. This one was for my mom who decorates in the vintage/americana type decor. You need to download the file in order to watch it as it is too large for the online restrictions. Enjoy, and Happy Holidays!
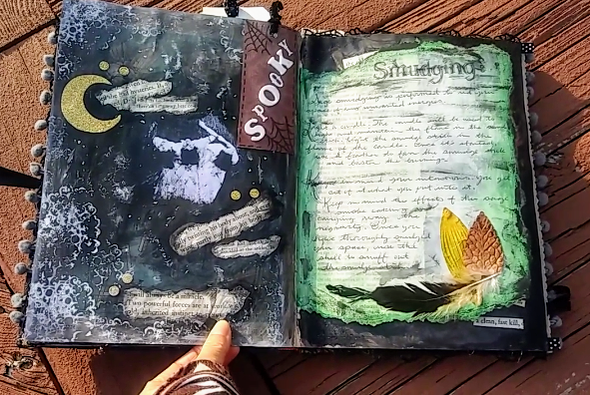
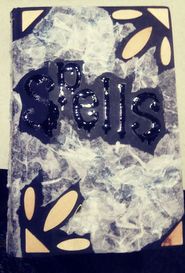
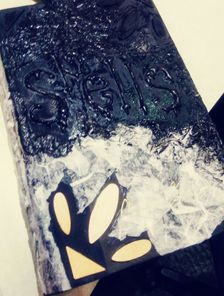
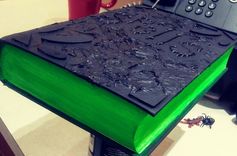
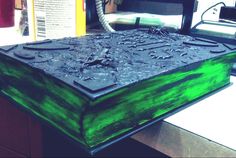
Can you believe it's September already? I love fall, definitely my favorite, but... seriously... where did summer go? In preparation for the coming comforting season what better craft to make than a Spooky Spell Book for your holiday decorating or gift giving!
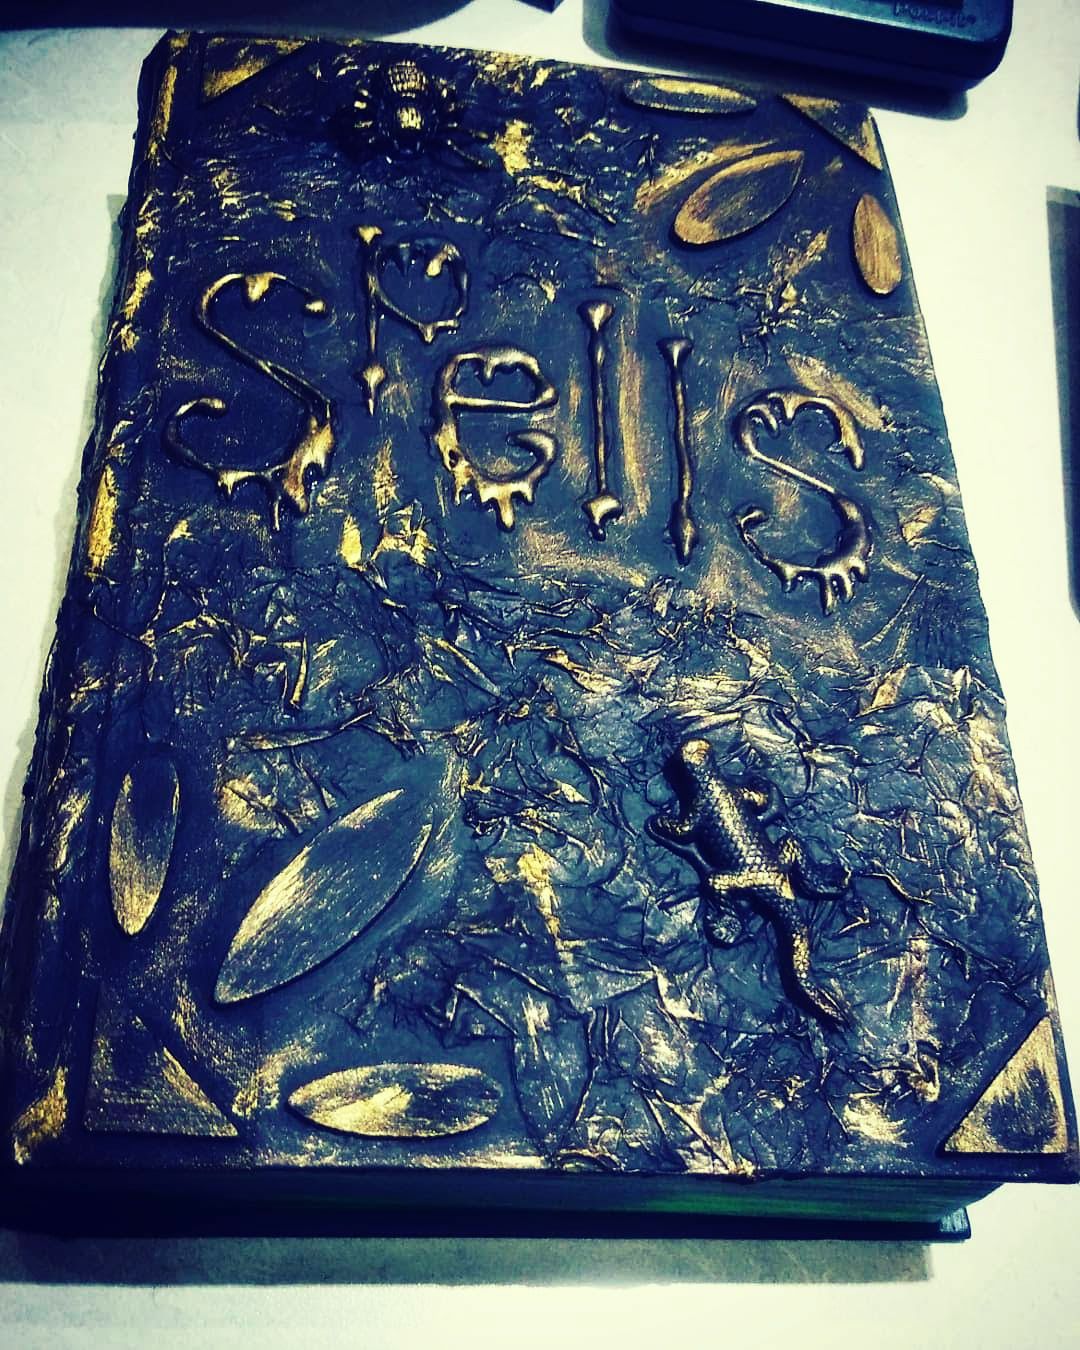
2. Once you like where they are, go ahead and glue them down. I used Elmer's glue for this but you can also use a glue gun of course... it would be much faster too! 3. Next we want to create our creepy title. I went simple and just went with "SPELLS" but you can switch it up and maybe do "HEXES", "CURSES", etc. I created my letters by just using the hot glue gun and "writing" the letters out. However, you could get wood letters and put them on the cover just like you did with the first pieces. Up to you. If you go with the glue technique, do NOT, use Elmer's glue..... awful! It will take forever to dry and will barely be raised - stick with the hot glue and work relatively fast. 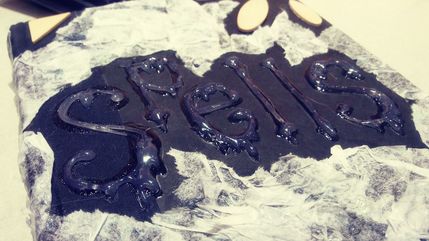
6. Next, you can add your creepy crawlies! Ooo! It took me a while to figure out what I wanted to do. I could not decide if I wanted to paint over them or not! Decisions, decisions. I decided the paint over option and was very happy I did. Glue your guys on with hot glue and they will stick great! Then just paint right over them as well. 
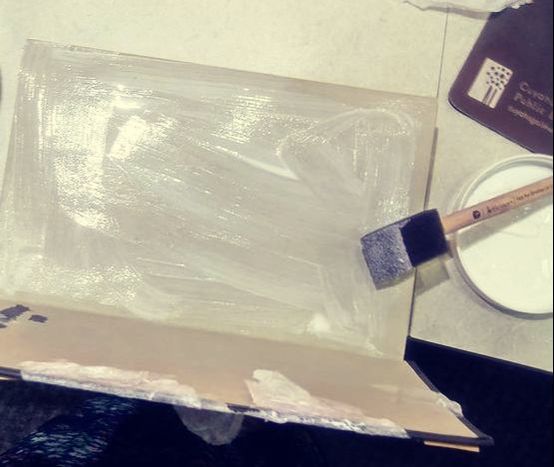
8. After the glue is dry, you can then paint over the exterior of the pages. I painted mine a neon green, super fun! But I think purple, red, and orange would also look awesome. I also took my brush from the black paint and lightly brushed over the green to give it a distressed look.
|

Rebecca MyersHey there, I'm Becca, or Rebecca, but not Becky, never Becky, unless you're my family from down south! I'm a simply modern librarian by day and an artist by night. My pursuit is for a simple, happy, healthy, and more fulfilling life! I hope I inspire you to get crafty! Archives
March 2022
Categories
All
|
||||||||||||||||||||||||||||||||||||||||||||||||||||||||||


 RSS Feed