
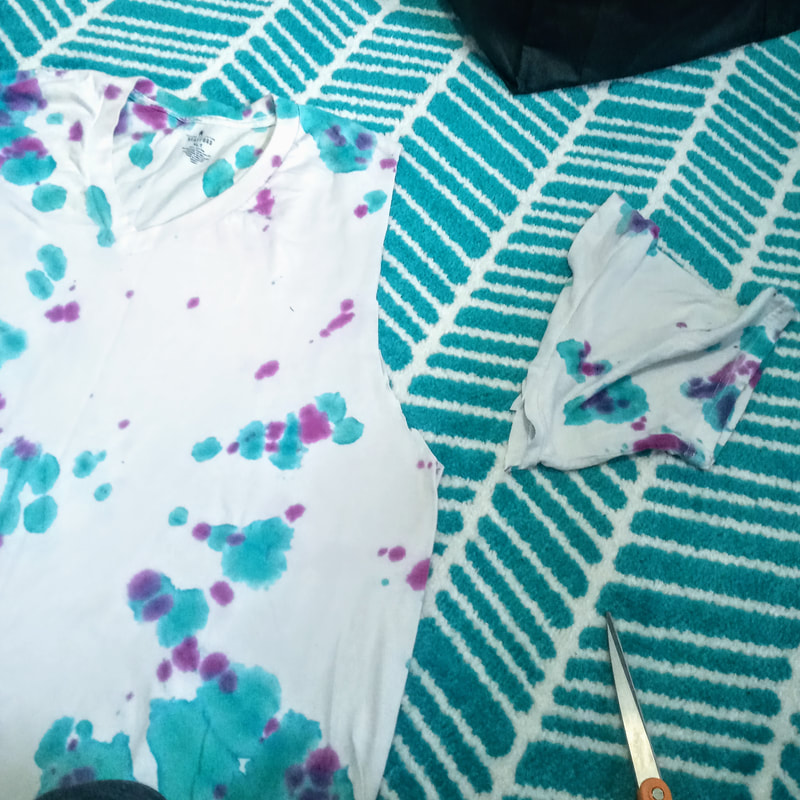
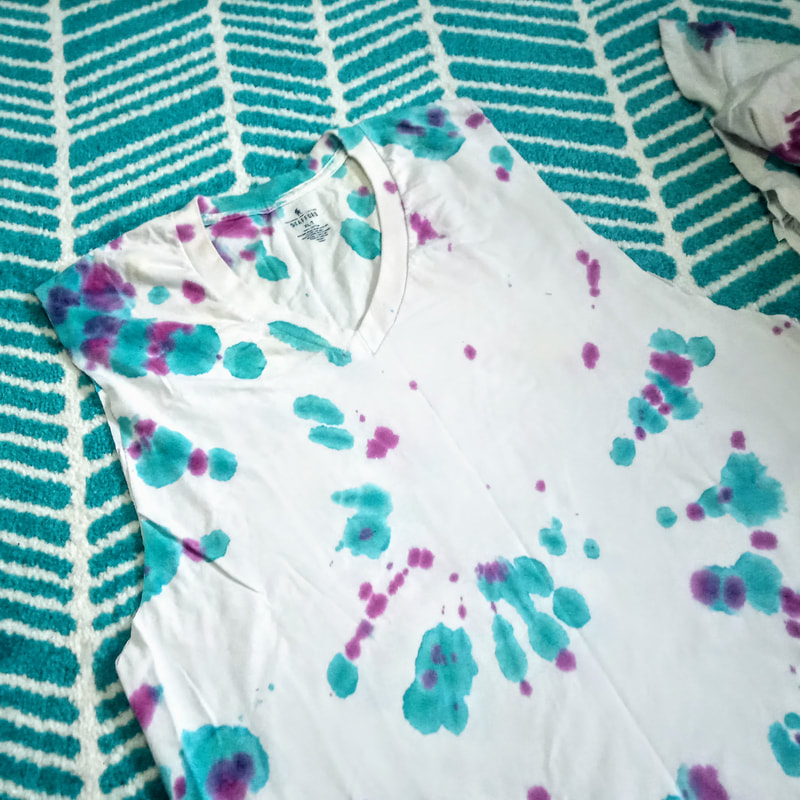
Supplies: -Old t-shirt (the bigger the better unless you have itty bitties doing this project!) -Good pair of scissors (that's it, crazy!) 1. Lay your t-shirt on the floor or a flat surface (actually make sure it's laid out evenly unlike me!) 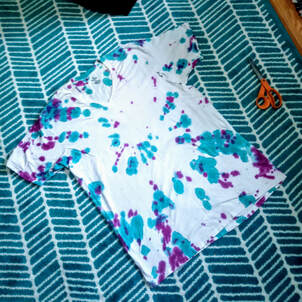 2. Cut off the sleeves of your shirt in a half U-shape (you're creating the handles of the bag with this step). You can draw this out if you prefer but I just went ahead and cut away!
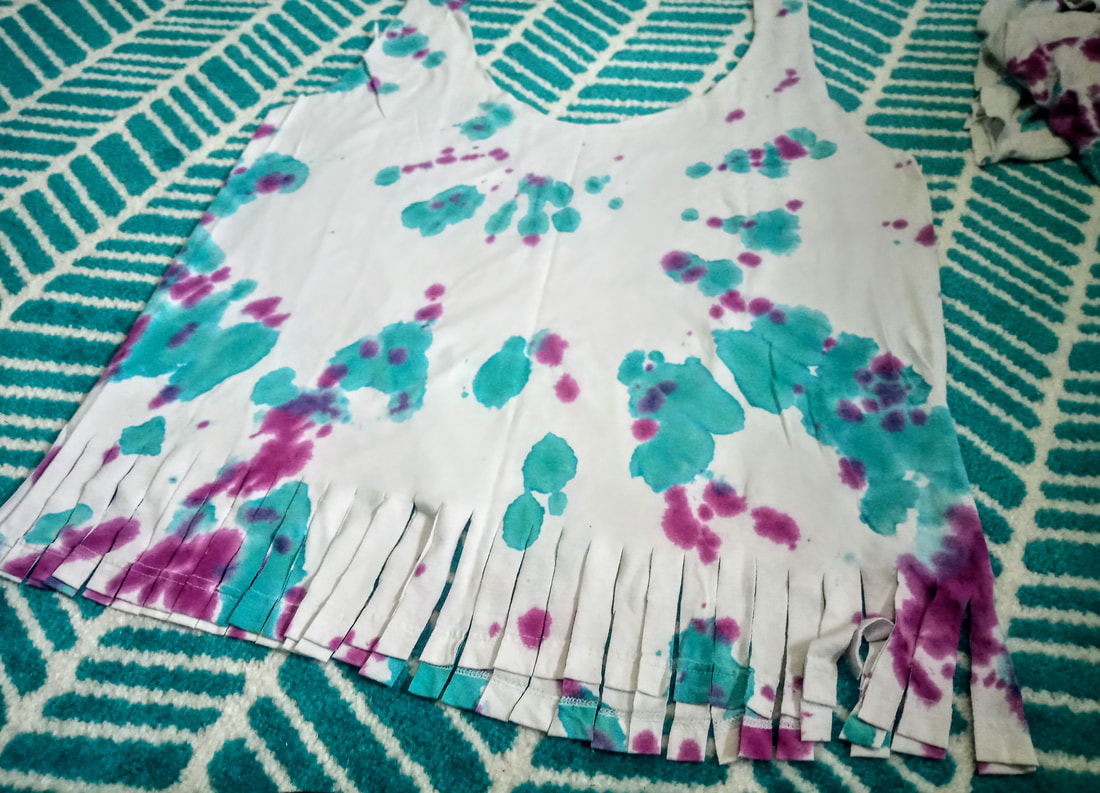
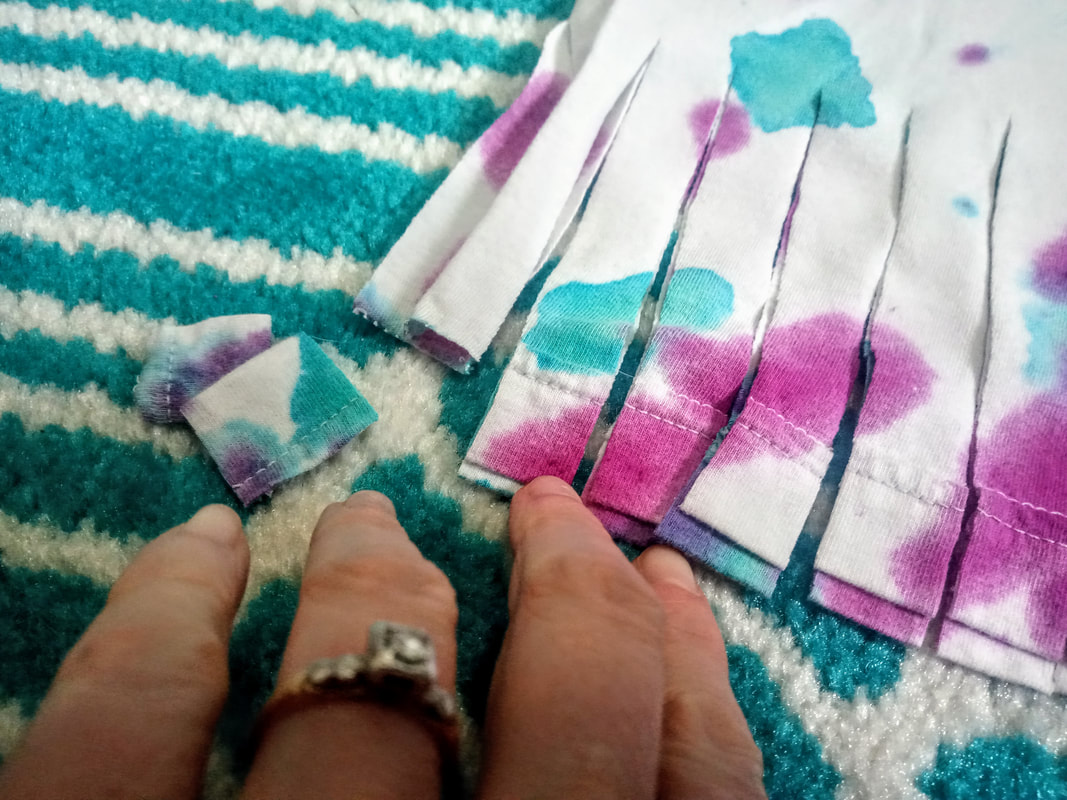
3. Next, cut the neckline into a complete U-shape (you are creating the bag opening here). 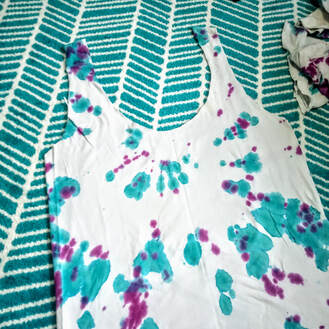 4. Next, cut "fringe" strips at the bottom of the shirt (exactly like you were making a fleece tie blanket!). You are cutting through both the front and back layers here. Note: I should have cut off the hem strip on the bottom of the shirt because I, personally, do not like that extra chunk of fabric. I ended up having to cut this off each piece afterwards!
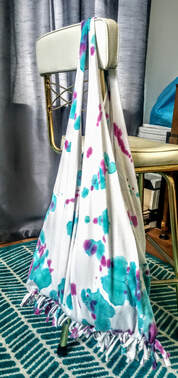
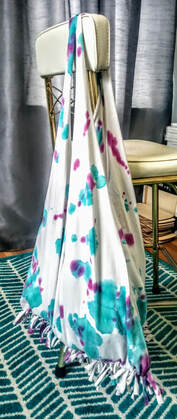
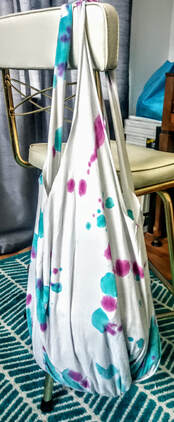
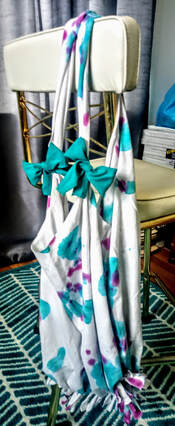
5. Tie the front and back fringes together in a knot and continue all the way across the bottom of the shirt. 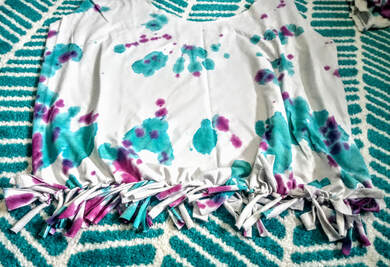 6. And just like that, you have a new tote bag! ...But let me show you the cool thing about this bag... If you're into the hippie vibe and dig those fringes, you can totally rock it that way! BUT, if fringe just ain't your thing then go ahead and flip the whole bag inside out! Those fringes will be hidden on the inside and no one will know! Check it... Note: you can even add some embellishments like these cute bows made out of scrap fabric!
0 Comments
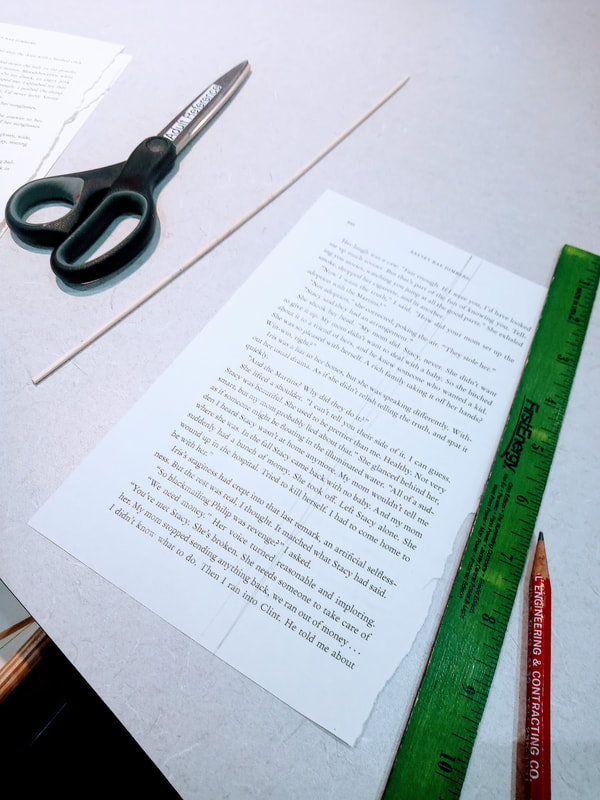
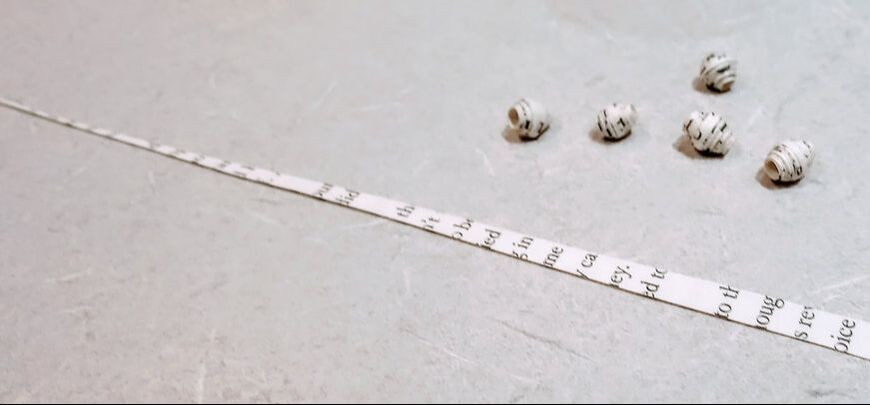
1. Decide what type (size/shape) beads you would like to create. This will determine how to cut your paper. You can find many templates online for various paper beads. I went with very simple designs. 
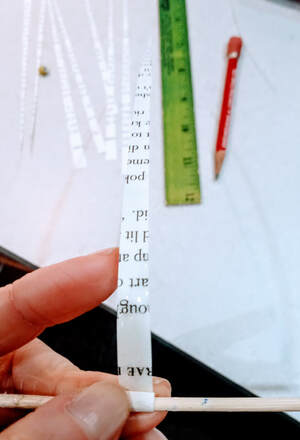
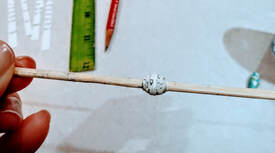
3. Cut out your strips of paper and get ready to roll! Literally. 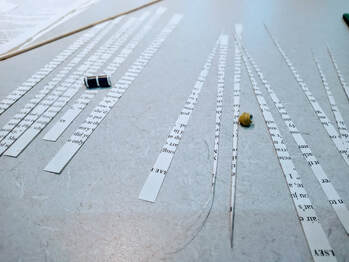 4. Wrap the end of your paper around the skewer. With the tail of the paper sticking out, put a light line of glue on the paper facing up towards you and begin to roll the skewer forward into the glue, wrapping the paper around at the same time, smoothing the glue with your finger as you roll. Keep rolling until you have used all of your strand that you want to use (add more glue when necessary).
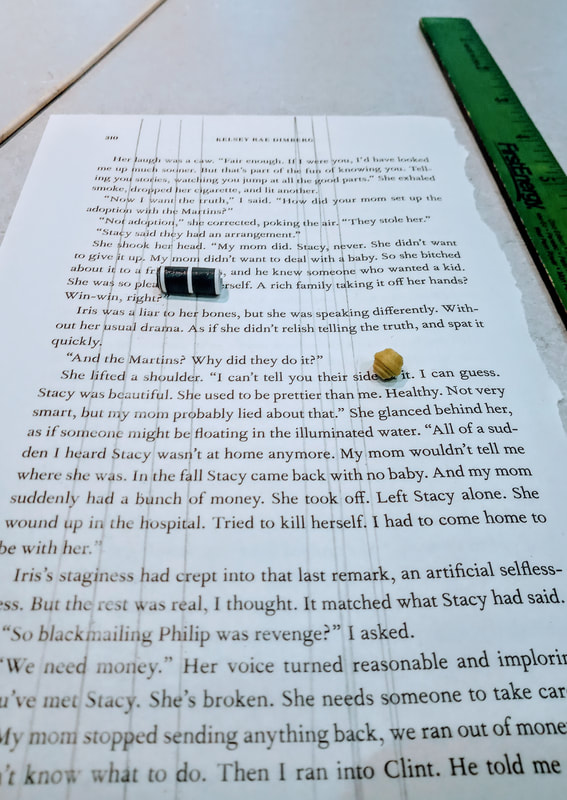
5. My second set of beads I made were more cylindrical by cutting parallel strips of paper and using the same rolling technique with the skewer. 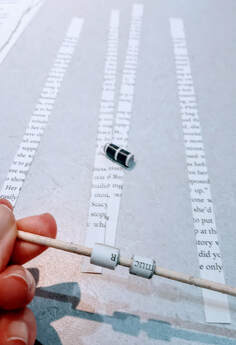
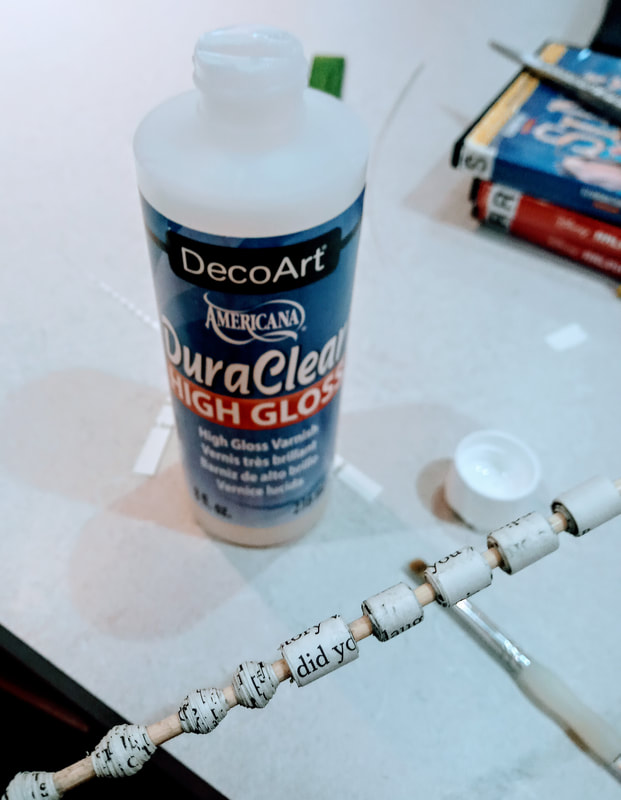
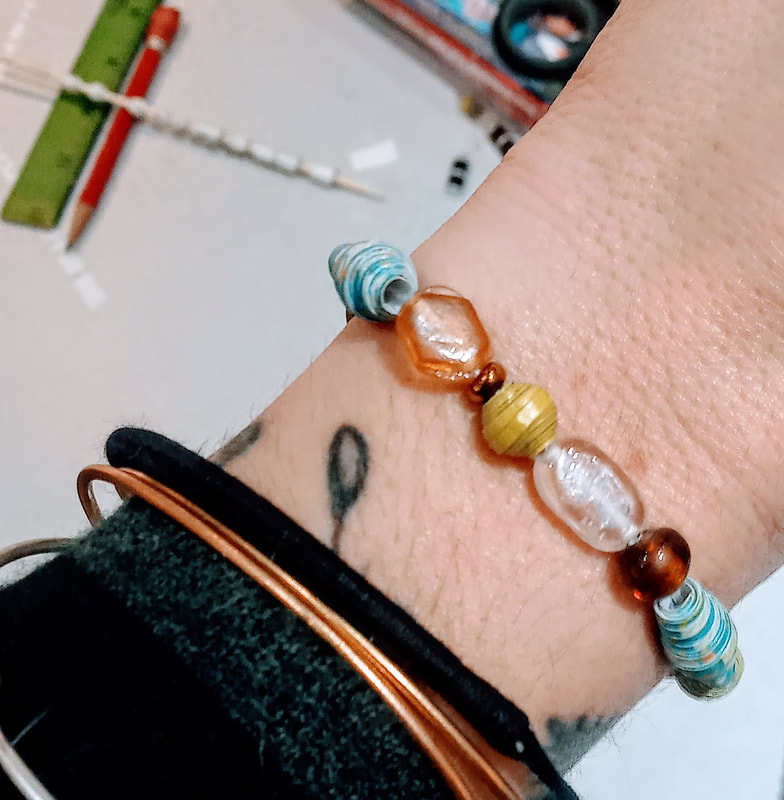
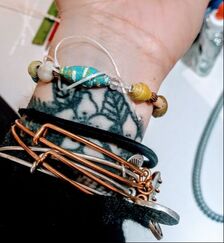
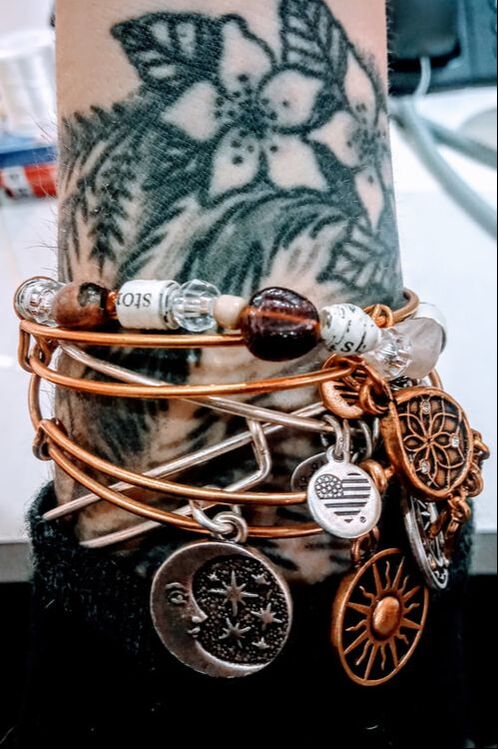
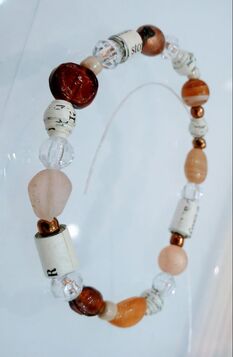
7. I used these to make bracelets with for a future program. I used elastic beading string so I wouldn't have to deal with any clasps or rings. I strung the beads onto the string, tied it off, and used the same sealer to coat the knot so that it (hopefully) stays together. 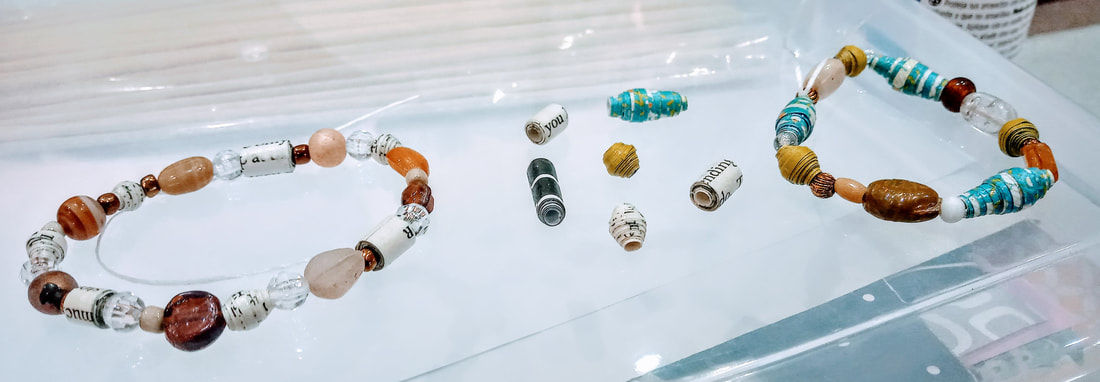 The first bracelet I made, I failed at. Although it had colors I liked, it was just too much for my taste. I also made it way too small. It should have had another handful of beads on it. You can see the gap in the photo.
Here's some images of my final bracelet that I actually like.

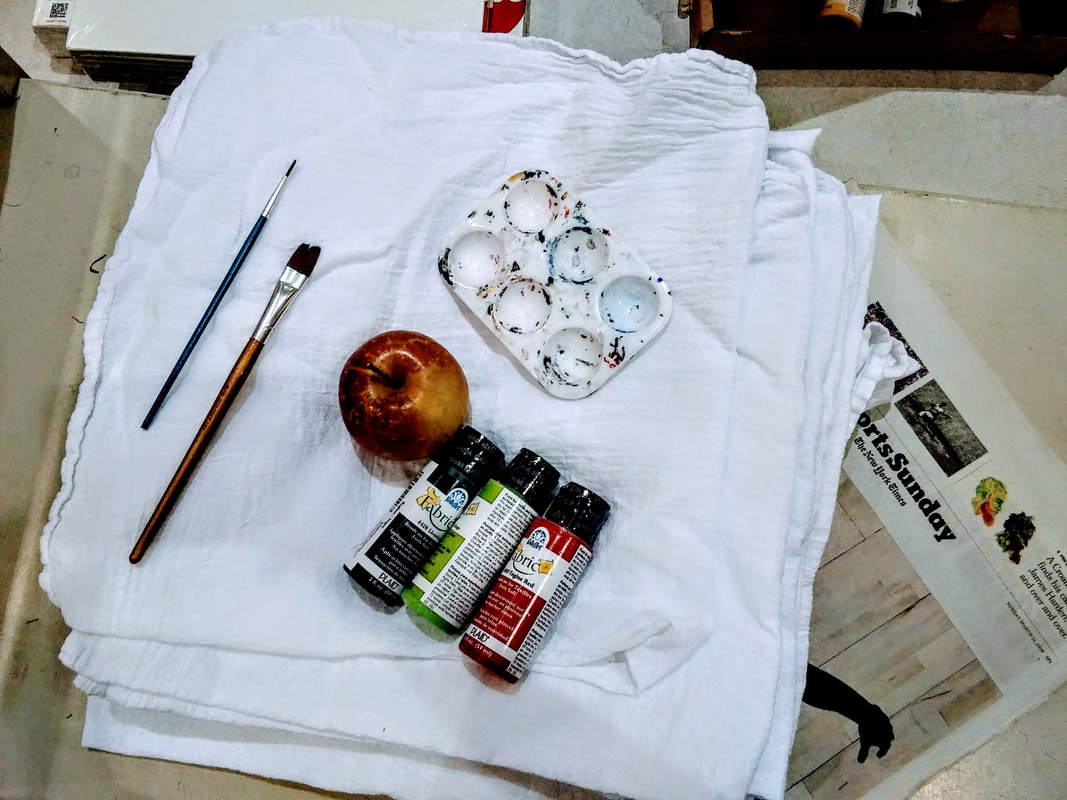
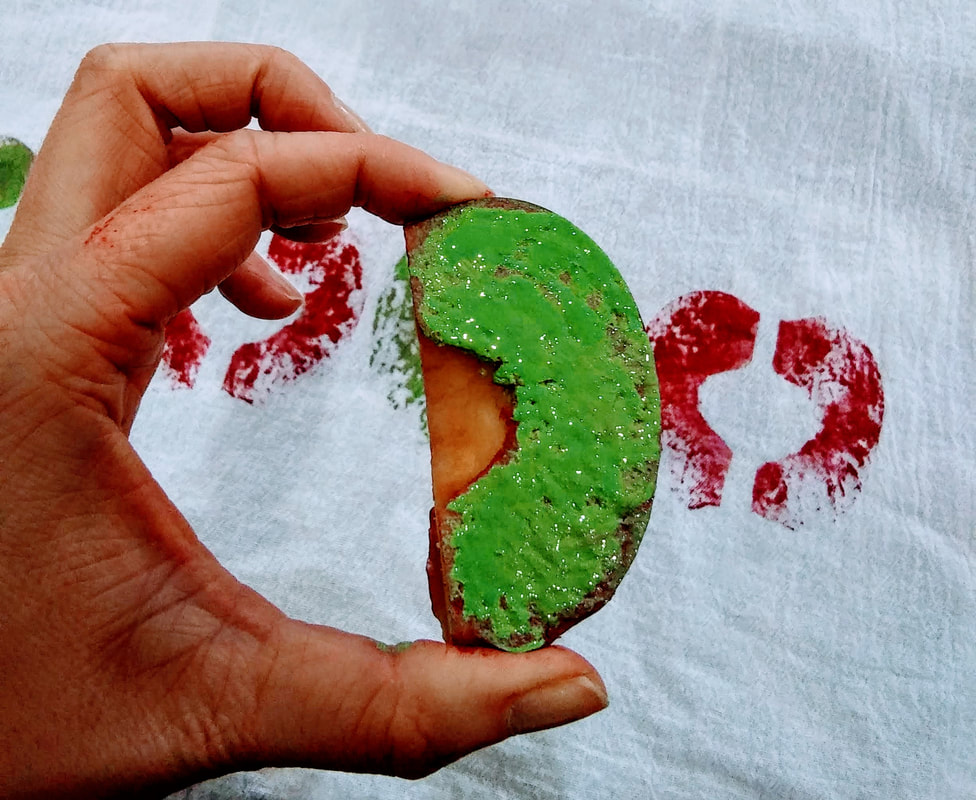
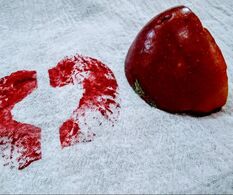
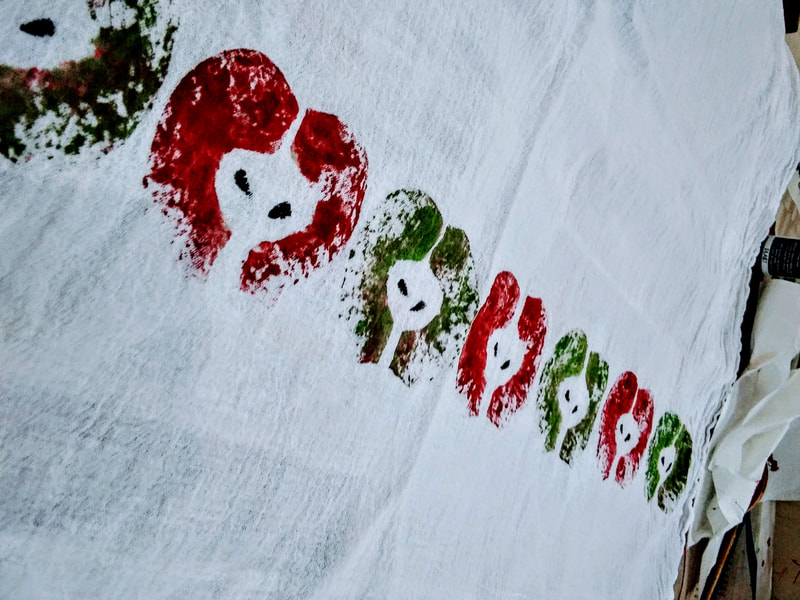
1. Wash and dry your tea towel. (At first I thought "nahhh, I don't need to do that but boy am I glad I did! It was soooo linty! My dryer vent was pure white fluff!) 2. Put something underneath where you will be work so that the paint doesn't go through the towel onto something important! I used newspaper for this. (You can also iron your towel first to make it flatter but.. who wants to do that?!) 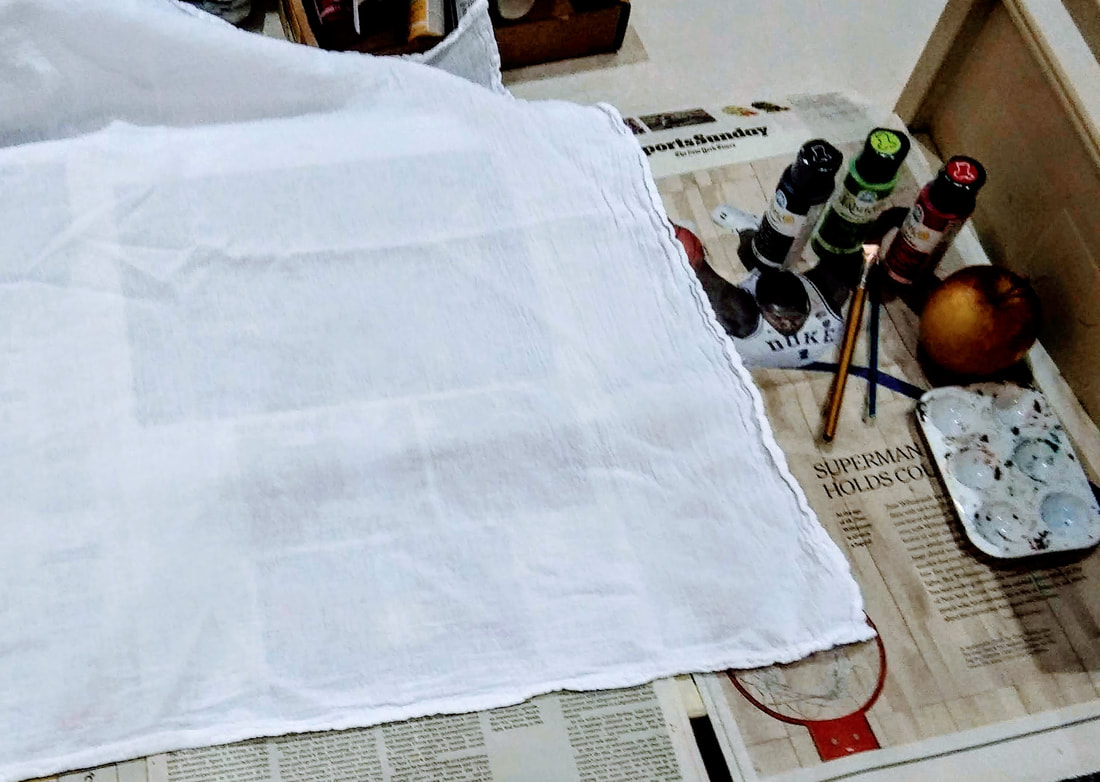 3. Slice up your apple into quarters. You can do a slice for every color you want to use but I was lazy and reused the same slice each time, I kind of liked the red-green haze of colors. Paint your slice with the desired color fabric paint and plop it down wherever you want to stamp, make sure you apply pressure if you want a heavier print. If you want it more distressed, press it on lightly.
4. Keep printing as much as you'd like. Then add little "seeds" in the center of each slice with the black paint. I also painted a stem and a leaf on some of them but not all.
5. The fabric paint I used said to allow the paint to dry for 24 hours and then heat set it with an iron. To do this, cover the prints with a scrap piece of fabric and place a heated iron with no steam on the design. Make sure to go across the whole thing. That's it! 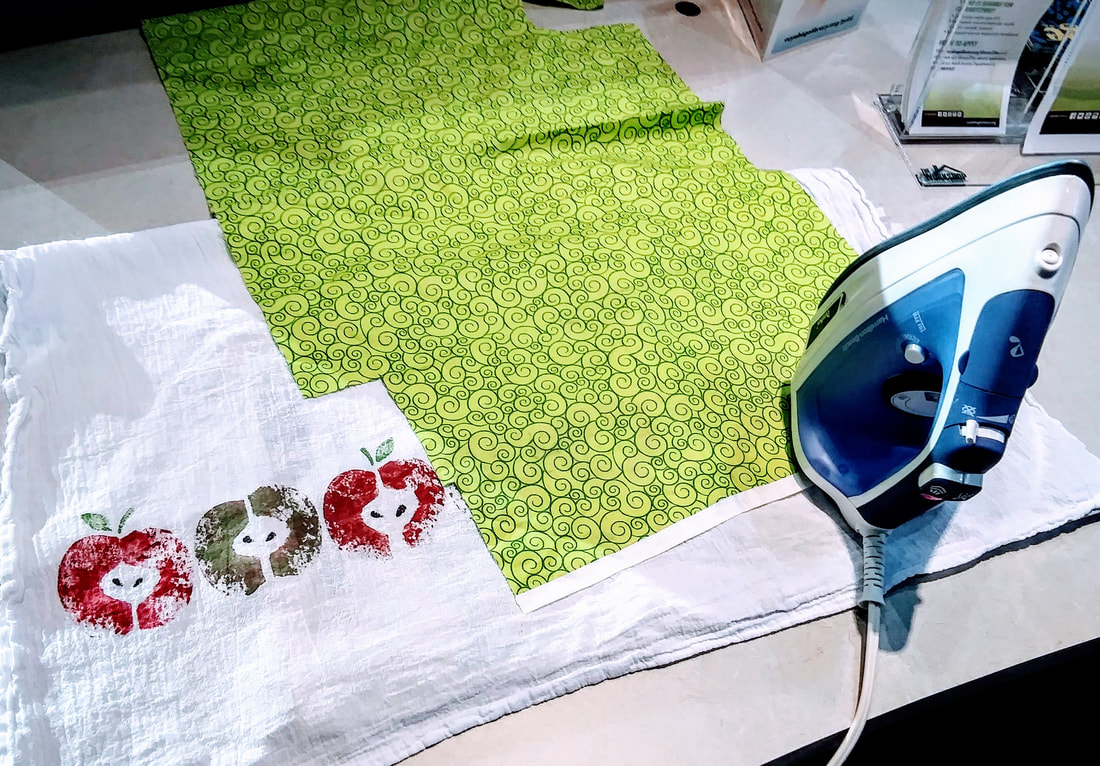 I think this is a fun craft for pretty much any age! And would also be fun to make as gifts too! 
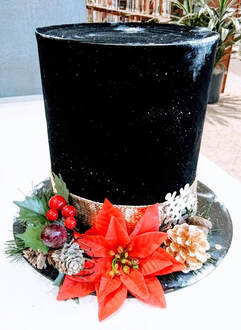
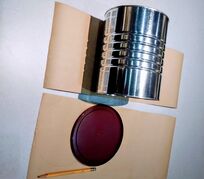
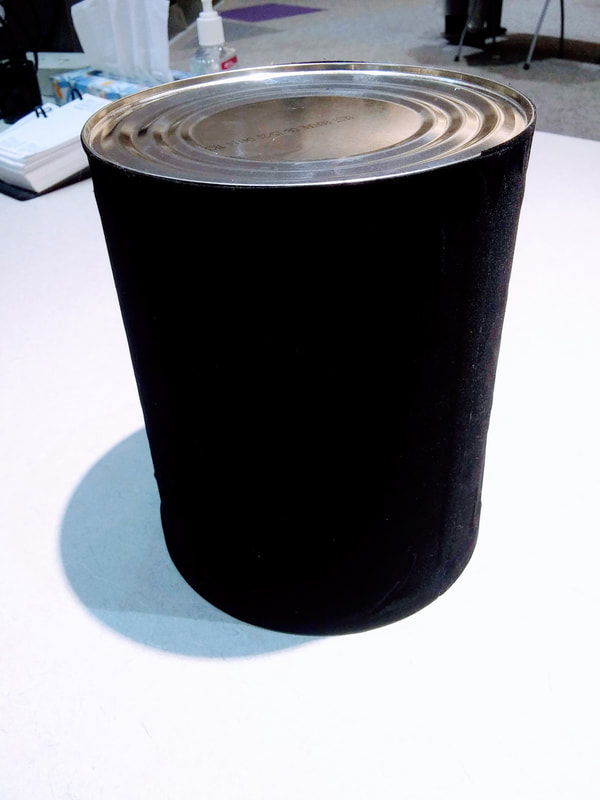
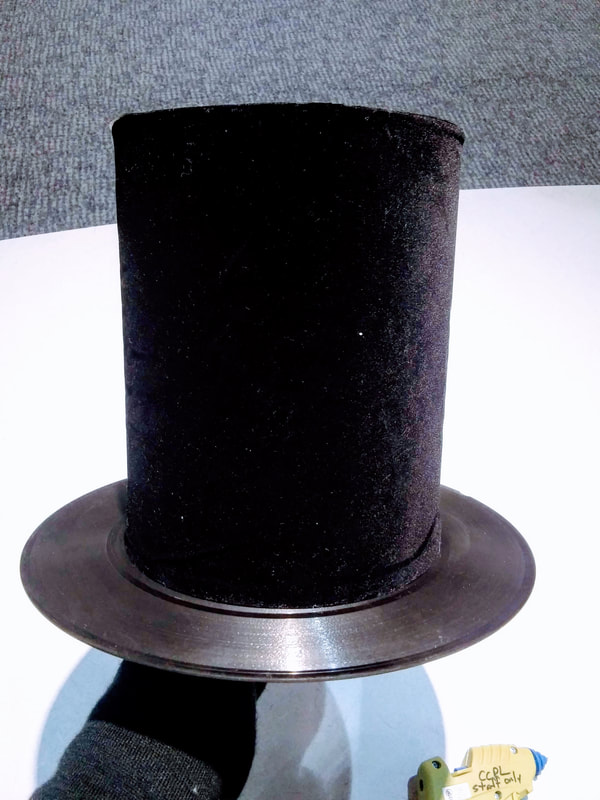
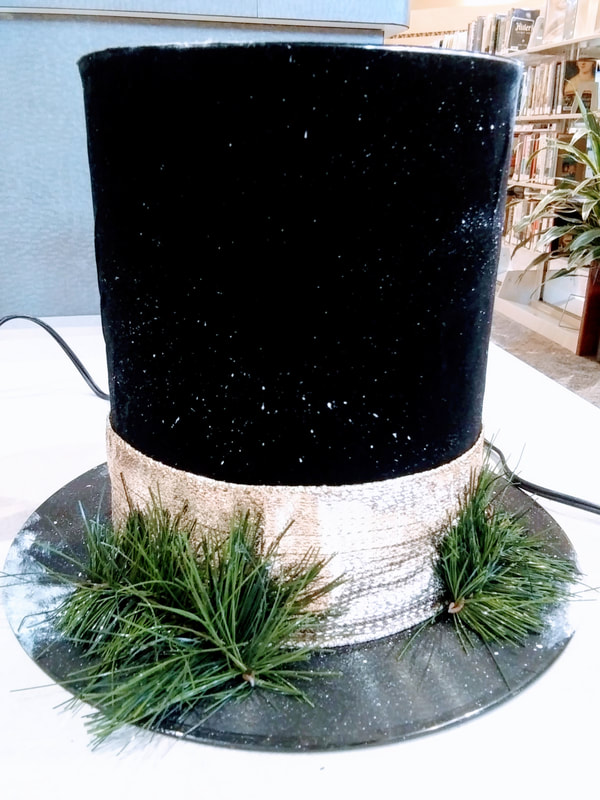
1. I couldn't decide what I wanted to use to cover the coffee can and make it look like a Frosty hat! I finally made the decision on adhesive jewelry box liner. This is a very thin material but also very soft and very sticky! Measure out how much you need to cover the can and the top of the hat (covering the top is optional, you could leave the top open so you can put items inside! such as candy or a poinsettia!)
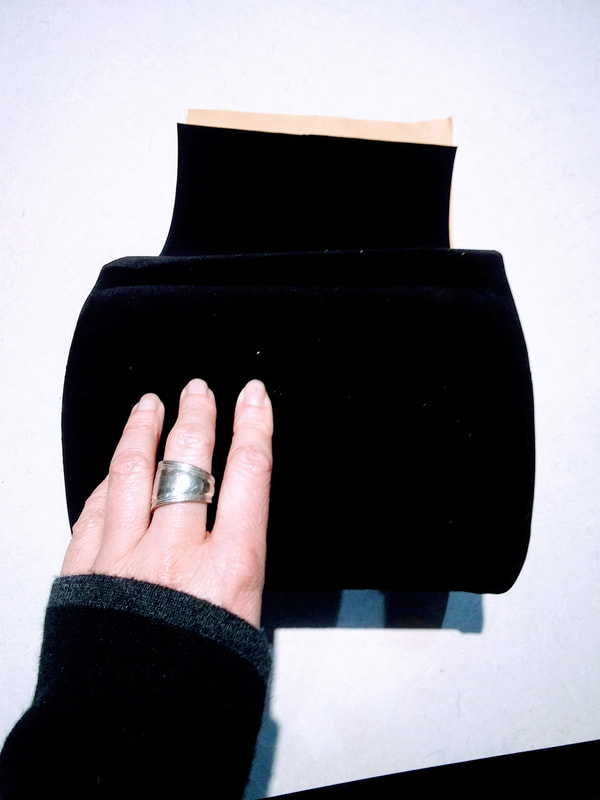
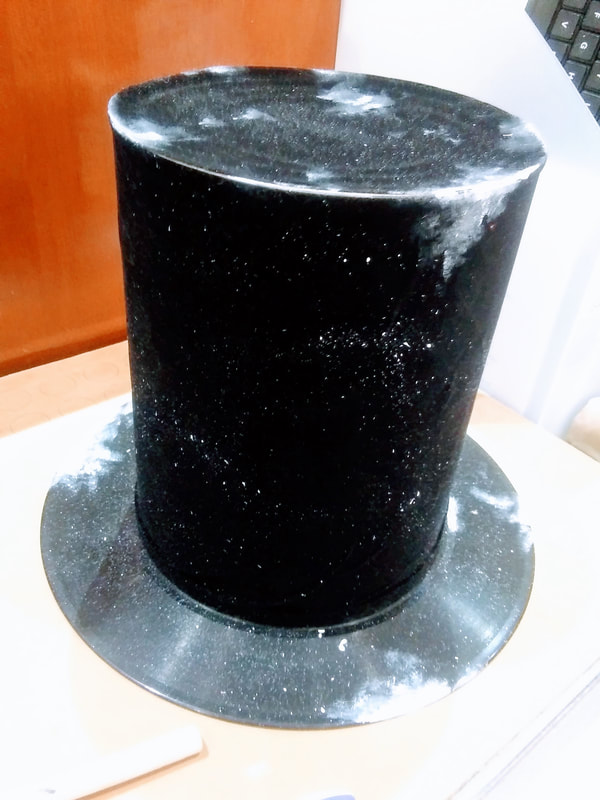
2. Slowly cover the coffee can with the material you are using. I did this slowly with the adhesive felt because it left air bubbles if it wasn't completely flush. Then cover the top if you chose to do so.
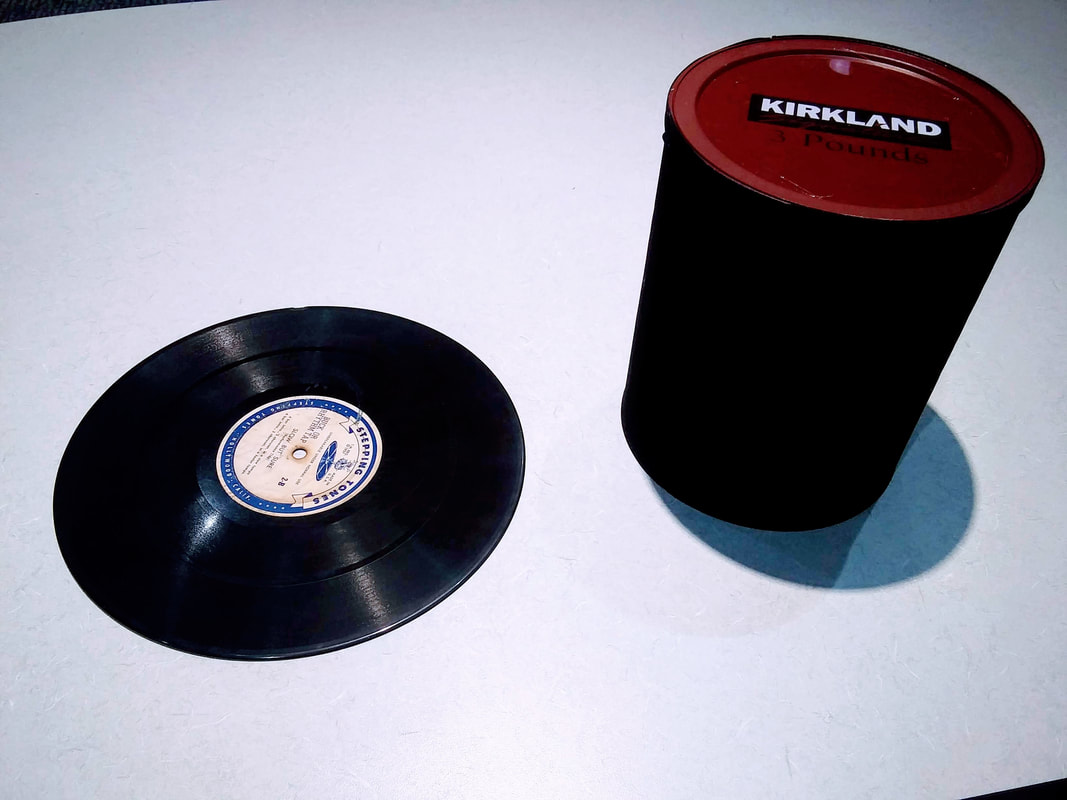
3. Adhere your coffee can to the record. I chose the side with the lid to glue to the record as I felt it was closer to the surface of the record vs. using the bottom of the can that has an indentation. Make sure you use enough glue here so that it really sticks (you don't want it falling off later!). You may choose to use a super glue here or something stronger.
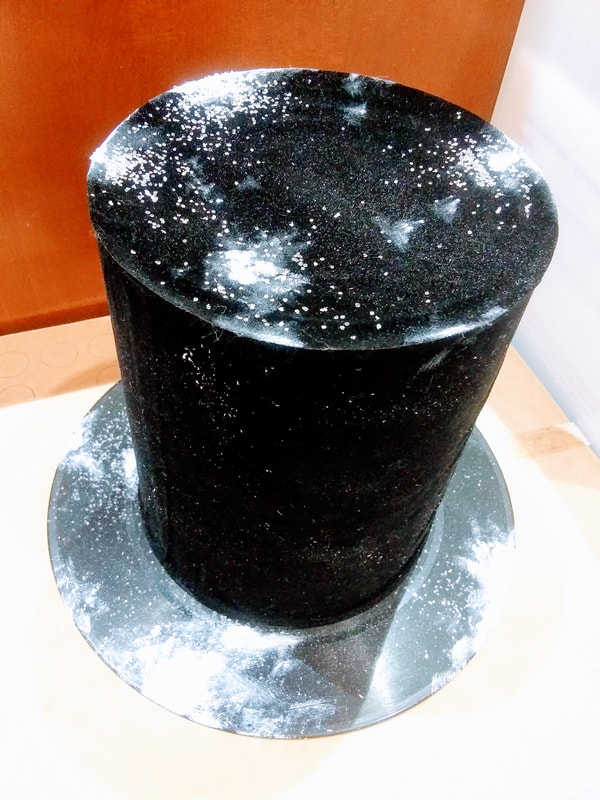
4. I used white acrylic paint to make snow "bursts" around the hat and rim. I did this by lightly dabbing an area in layers with a paint brush. I then used a toothbrush to "flick" paint on the hat, creating a snowy appearance. I went over each of these areas with some glue and sprinkled glitter on top!
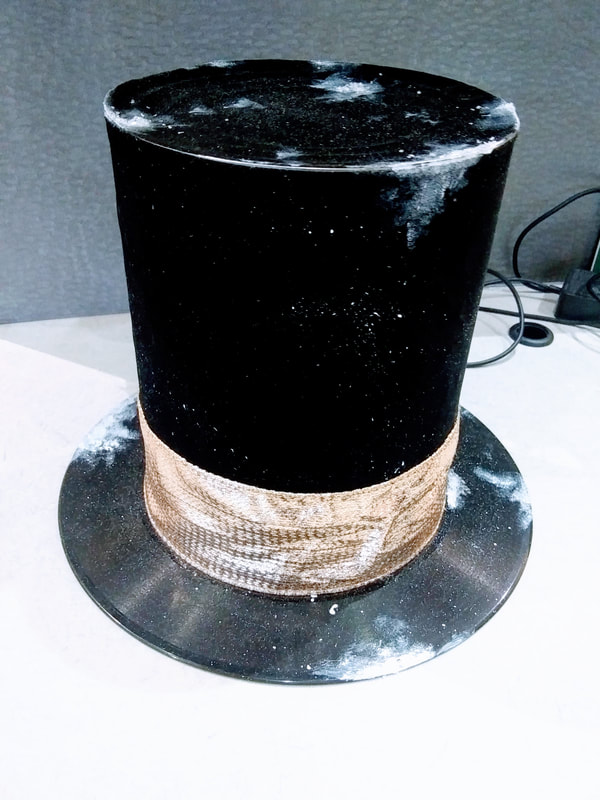
5. I added a thick ribbon around the bottom of the hat, adhering it with hot glue. This is where the embellishing comes in! Someone gave me a whole tree's worth of pine branches that I cut with wire cutters. I made sure to use a lot of glue here so that they would stick to create a nice foundation for whatever else I would add!
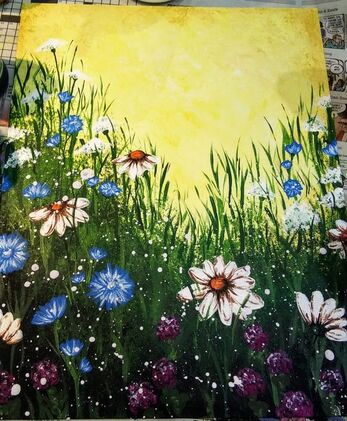
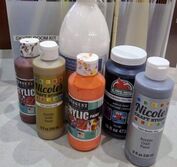
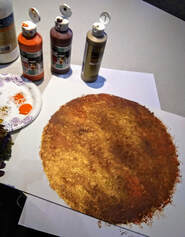
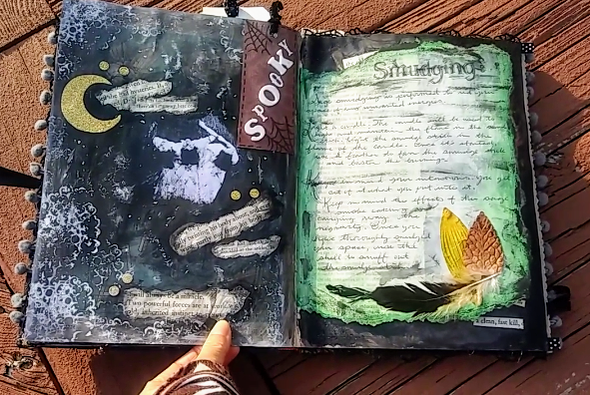
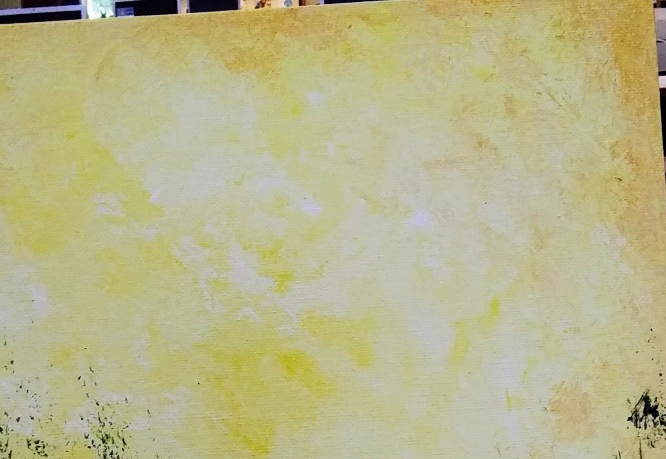
6. Continue gluing other embellishments until you are satisfied! Just check out all the possible options you might have - sleigh bells, felt snowflakes, holographs, flowers, acorns, jewels, the list can go on and on! 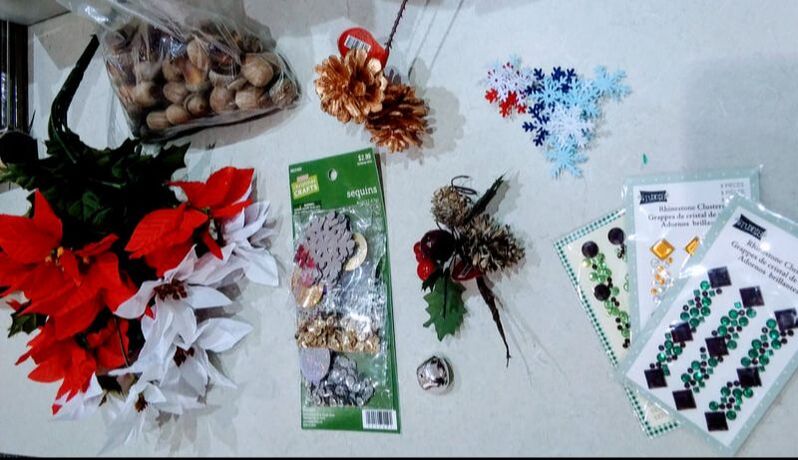 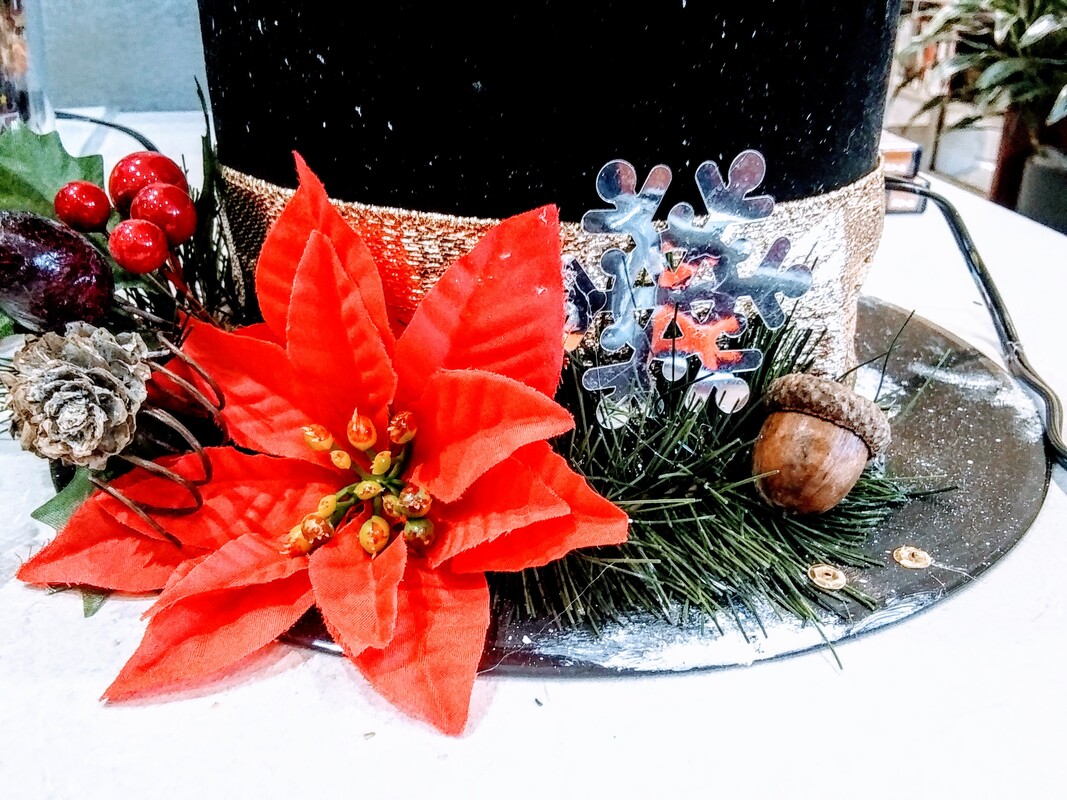 7. Once you are done gluing everything, you have created a beautiful winter decoration!  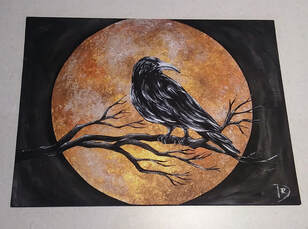 This painting is what I chose to mimic for my October Painted Canvas program at work. I run a "Painted Canvas" program once every quarter along with other monthly craft programs, but the Painted Canvas is, by far, people's favorite. With my other craft programs I usually always have empty seats even if the class had a full registration list but that is definitely not the case with Painted Canvas! The seats are always full! I wanted to do something "spooky" for this quarter's painting program especially since it's October. I had something else in mind originally but ended up picking this one! I followed the tutorial from "Painting with Jane" on Youtube, she's amazing! I didn't go about it exactly as she did. She used a gold metallic canvas (have never seen those before!!) and a paint/gel medium mixture to create translucent paint. I changed mine to just using a sponge on top of gold metallic paint. It's an "ok" effect, and one I think is easier for people in my class but maybe sometime I'll give the gel medium technique a shot!
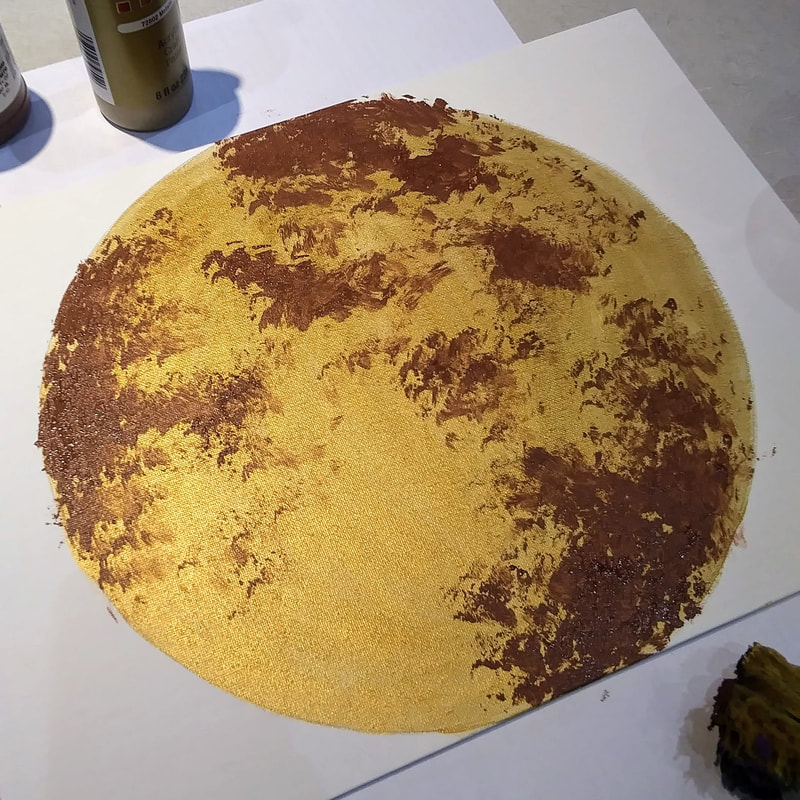
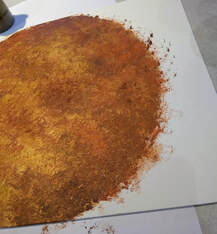
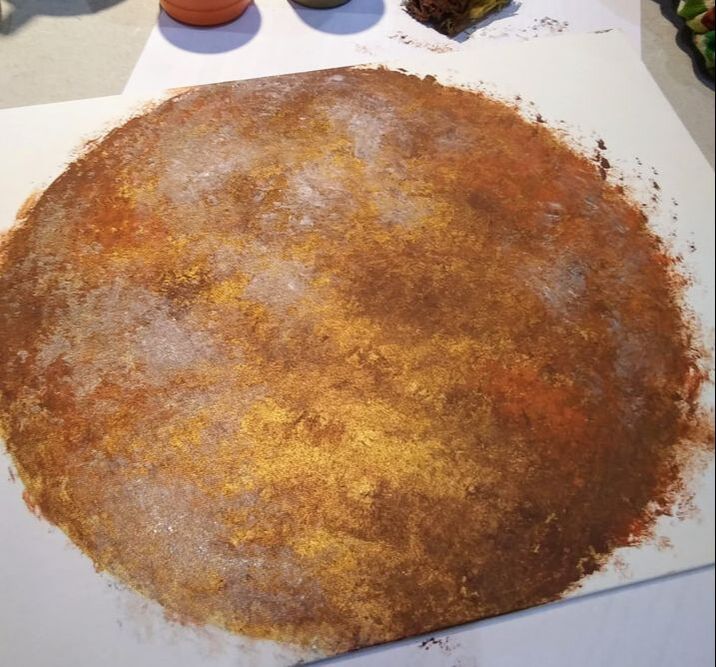
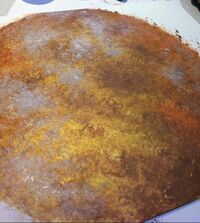
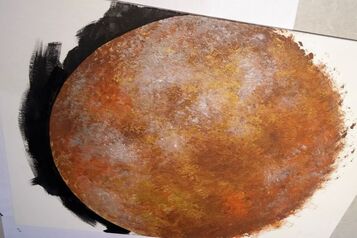
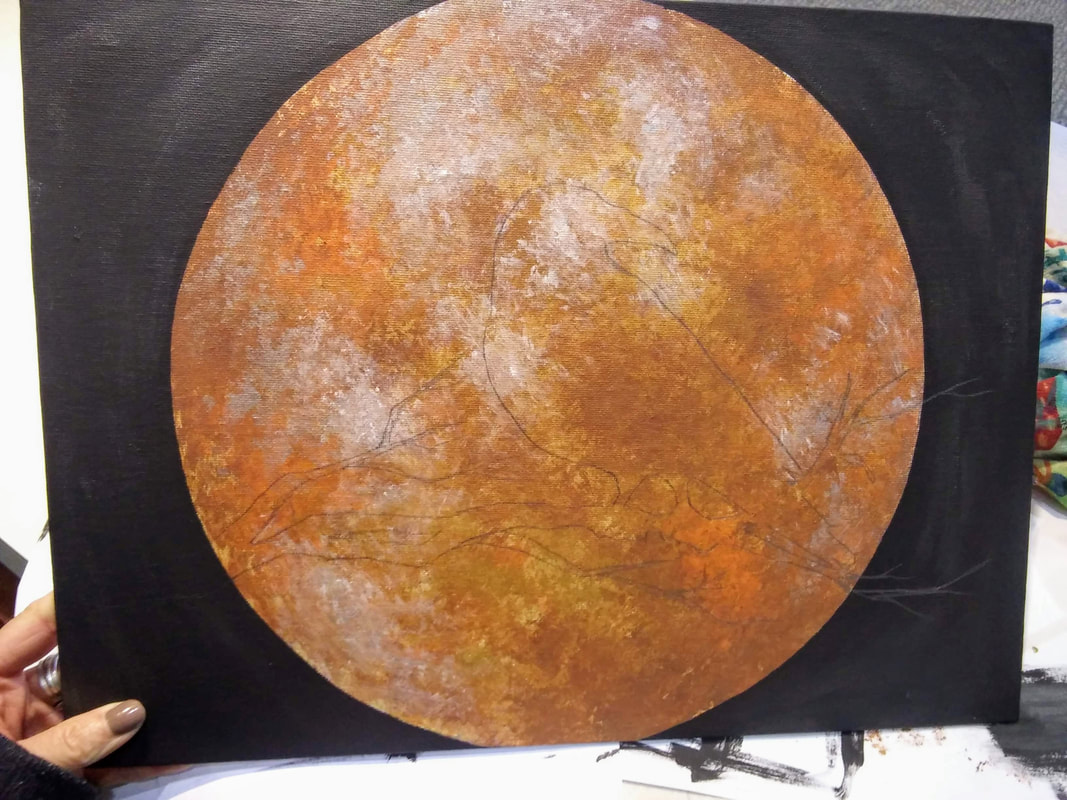
1. The first step is to trace your large circular object for your blood moon (I used a large plastic bowl). You want it to be nice and big to fill up your background. Paint this circle with your gold metallic paint (you should do 2 coats). 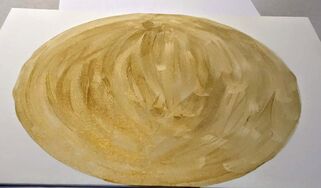 2. "Painting with Jane" recommended using translucent paint so that the colors do not get "muddy". I understood what she meant when I started sponge painting the colors. It did seem to get muddy but I was ok with it overall once it was done. Like I said earlier, I would like to try the original artist's technique in the future. I used a dry sponge and dipped it slightly in the paint, do not saturated your sponge! I started with brown for the dark shadows on the moon, then went into orange, blending slightly, I went back through with more gold to still have the gold represented, it's too pretty not to!
3. Before we are done with the moon, add some silver highlights with your sponge, you can add a dab of white too if you're feeling daring!
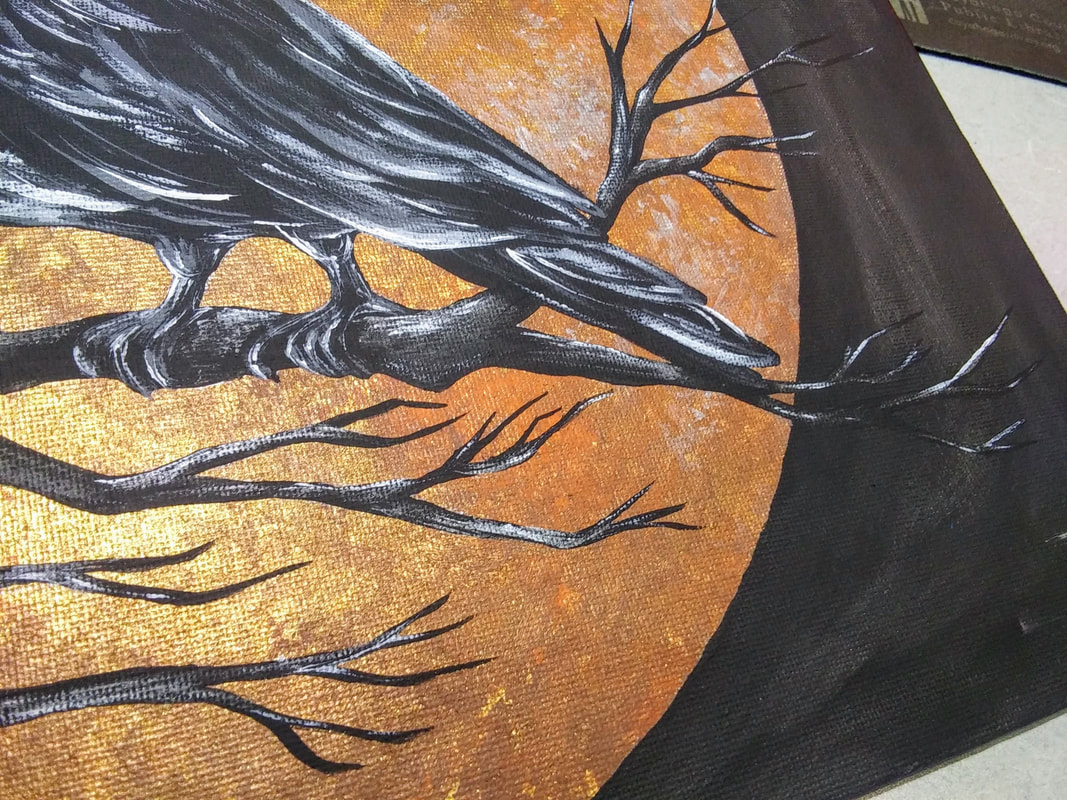
4. Retrace the same object you used to reemphasize your circle. With a flat or angled brush, trace the outline of your moon with black paint. Take your time and be patient on this step. Paint the remaining white space black. I used two coats of black paint. As I put the second coat on, I also mixed in a bit of silver to make the background seem "shimmery". You don't have to do this part, it is a personal preference. You will notice this effect more in later photos.
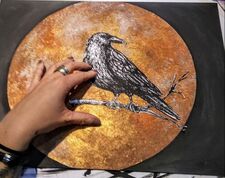
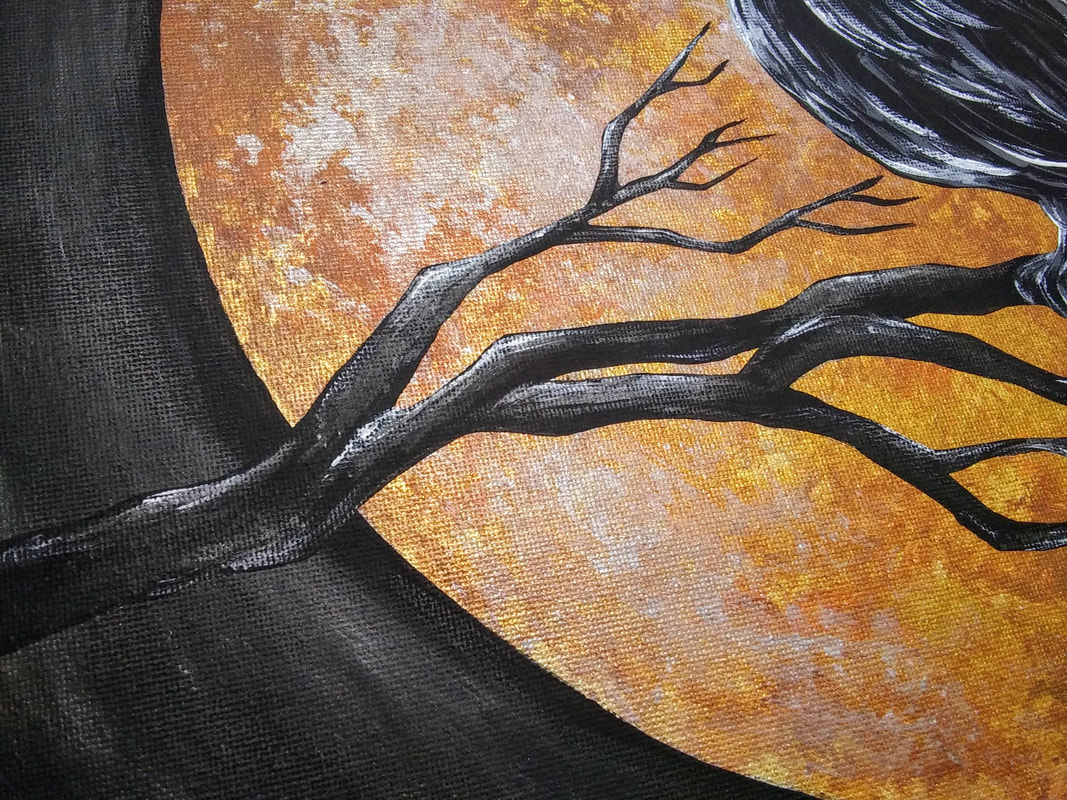
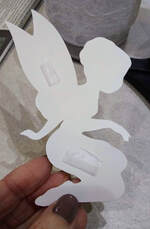
5. Trace your bird/branch template or free draw a bird if you feel comfortable. Paint this entire space black for a good base coat. I left a spot open for the raven's eye so that some of the gold shows through later.
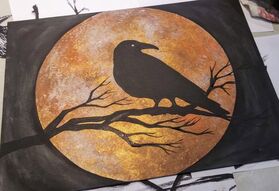
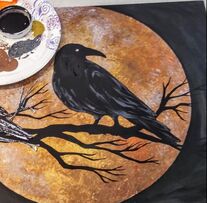
7. In between painting feathers, I went in for the beak and tried to mimic the shape done in the video. 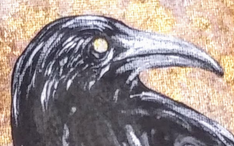 8. I highlighted everything with white. I used my smallest/pointiest brush for this and went over the previous grey with light, quick strokes. 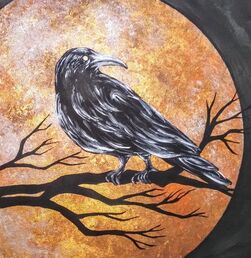 9. The last step is to highlight the gnarly tree branch! To do this, I lightly added some silver in various spots then, again, lightly added some white to those same highlights in smaller strokes.
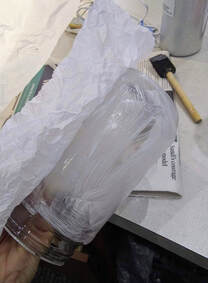
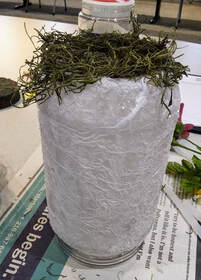
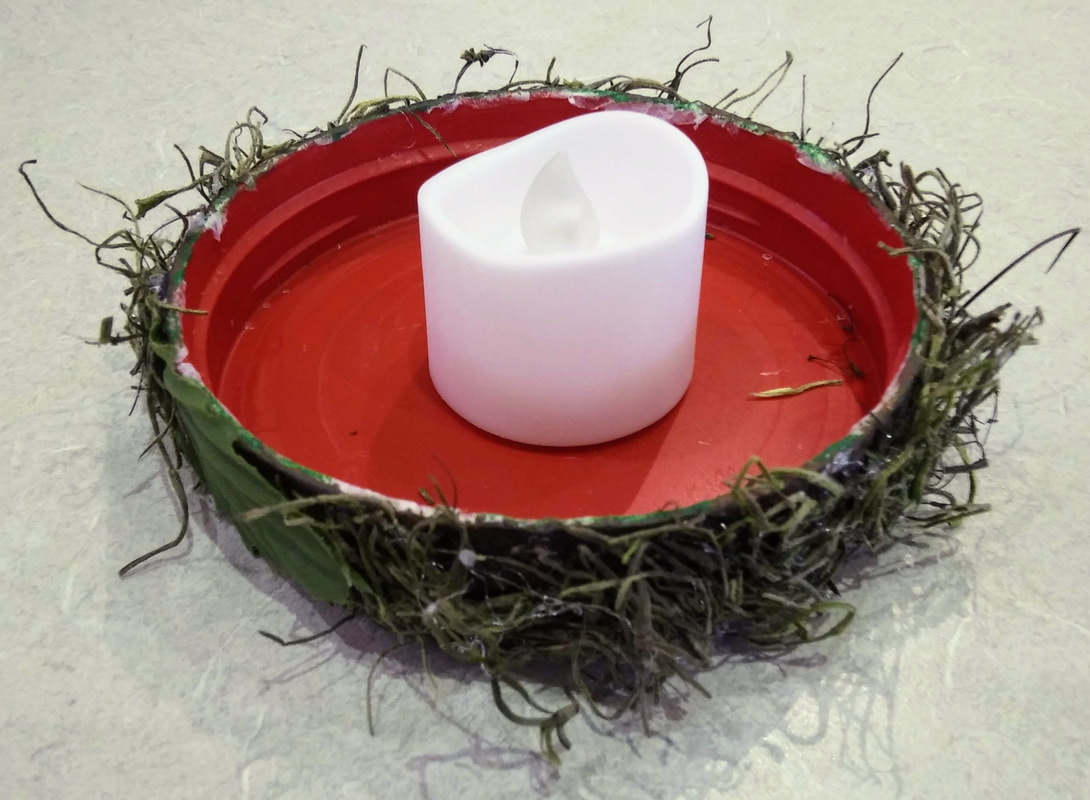
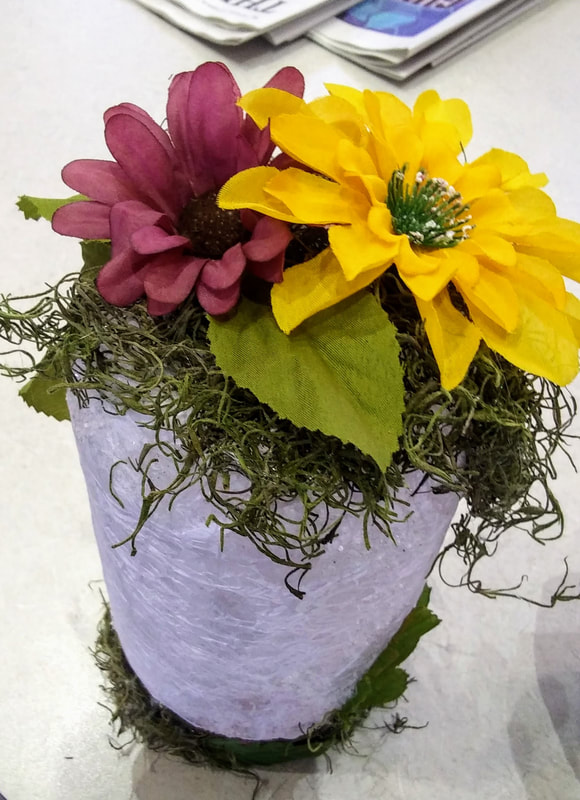
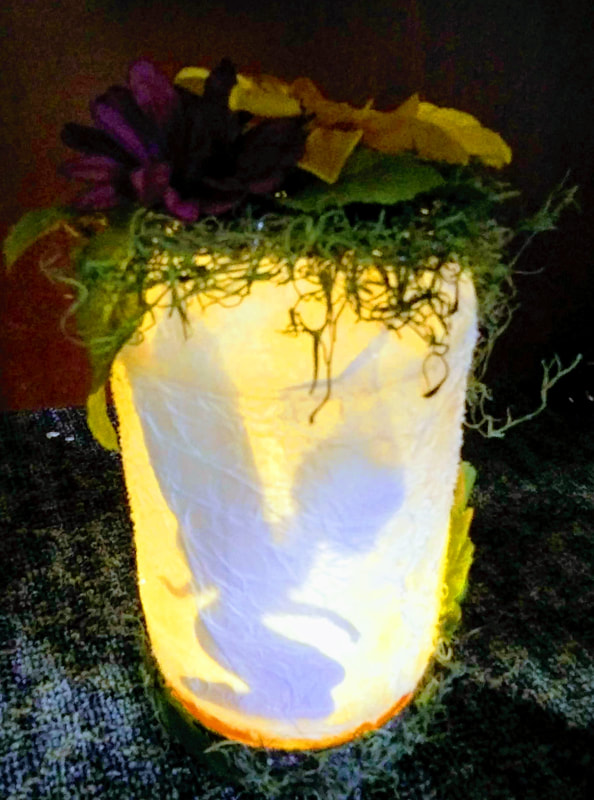
That's really it! Sign your painting with your initials and you are good to go! Talk about an awesome addition to some holiday decor! (And let's all be honest here, this would look pretty good with some glitter too)   I've done this fairy lantern craft before with glass jars and people loved it! They couldn't wait to take it home, show it off, and replicate it with kids/grandkids/friends. I left that night feeling really great about the program and that I helped people create something they fell in love with. Time for some self-shaming. David, my boyfriend, and I eat a tonnnnn of peanut butter. Like, a tonnnnn, probably way more than we should to be honest. We've actually recently cut down on it but, boy oh boy, do we love us some PB. On that note, I was getting anxiety over using up so many plastic containers. There had to be something I could use them for! With no plan in mind, I started soaking them, washing them, and de-labeling them meticulously one at a time with no purpose at the end of the tunnel. Then, the fairy lanterns came into mind. I had done it before with glass and thought, well, why not give it a try... I have plenty more to use if it doesn't work! I gotta say it turned out pretty darn cute. I think it's decently disguised but if I were doing it for myself, or for a gift, I think I would choose to add a lot more moss and other items to disguise it even more. Anywho, the instructions are as follows, happy crafting! Supplies:
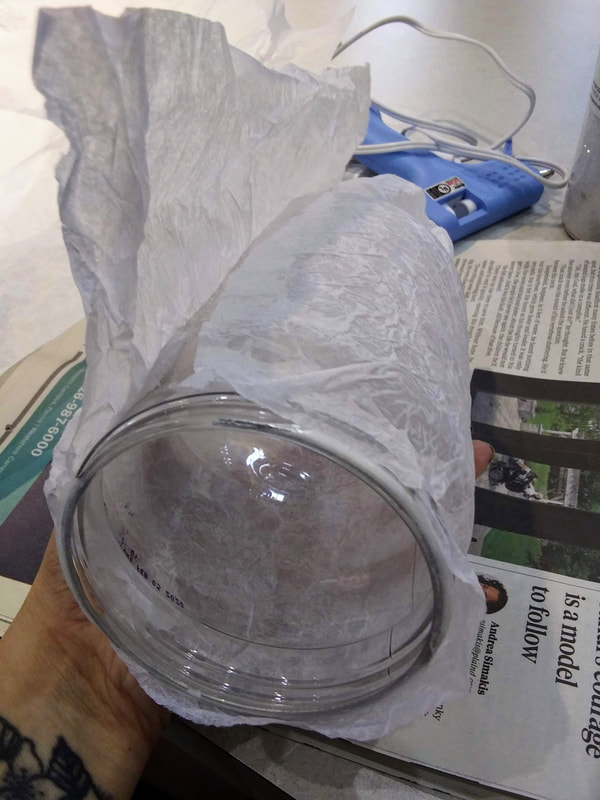
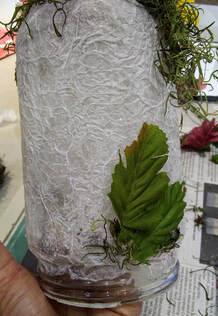
Note: I did not cover the entire lip of the jar so that it can still be twisted shut if desired. 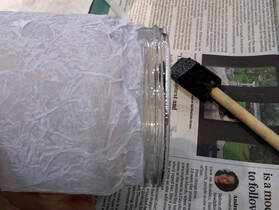 4. Next, I did the same thing with the lid of the jar. I knew I wanted to paint it and glue items to it so I thought covering it with tissue paper would create a nice textured layer for this purpose.
Note: I did not cover the inside of the lid and afterwards, I wish I had. I can, of course, do this at any time but I wanted to point this out. I feel if you do not cover the inside, you can see the red of the lid on the outside. It isn't super noticeable, but I notice it.
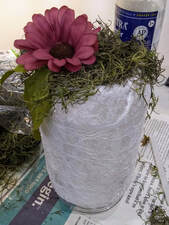
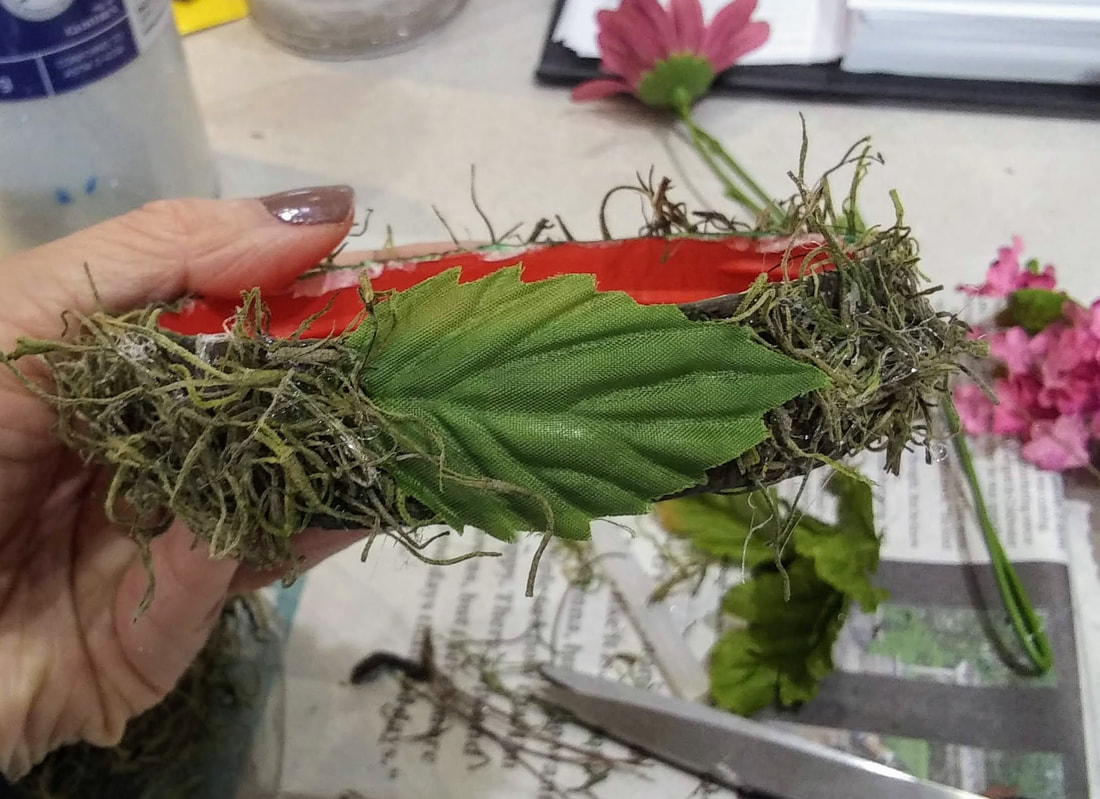
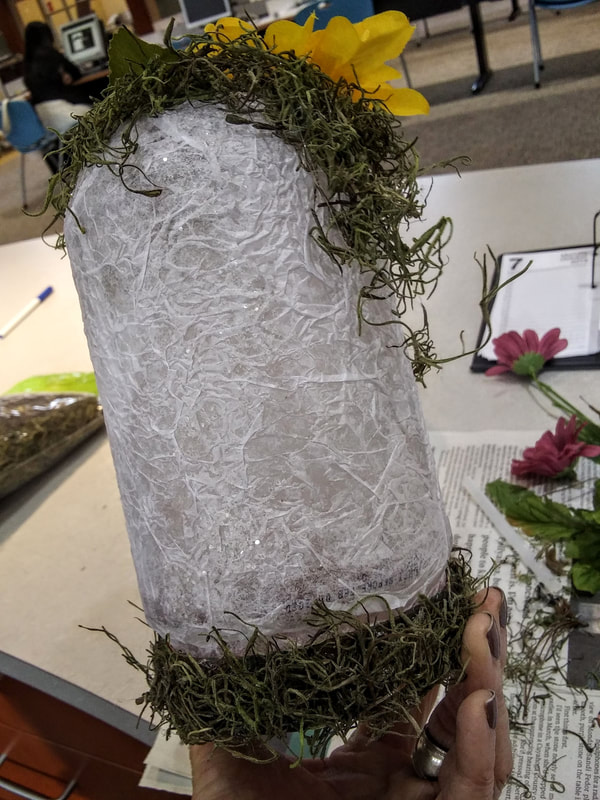
7. Here is where I painted my lid to camouflage it. I knew I would be adding moss later, but I didn't want any of the white tissue paper coming through! I sponged on a layer of green, then brown, then black with the foam brush, just enough to cover most of the white.
Note: I wanted to point out that I noticed the expiration date and other numbers was printed on the plastic and was totally showing through the tissue paper! Eww! I covered this up with yet another leaf and some more moss.
Turn that beauty on and look at her glow!
Were using the PB Jar method at work for a mother-daughter craft program. This makes it even better that we are using plastic jars instead of glass in case we have any little ones attend! We are also including in the description that these are actually Peanut Butter jars and that if you have a peanut allergy we do not recommend attending just in case any residue is leftover.
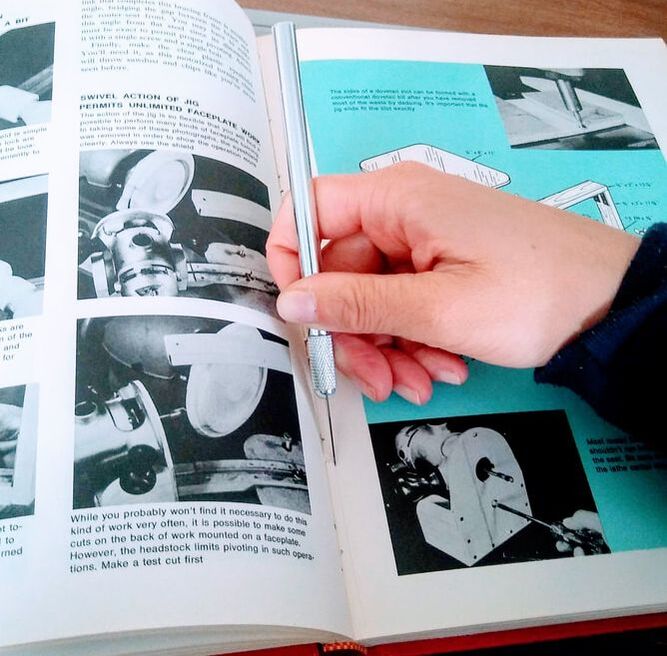
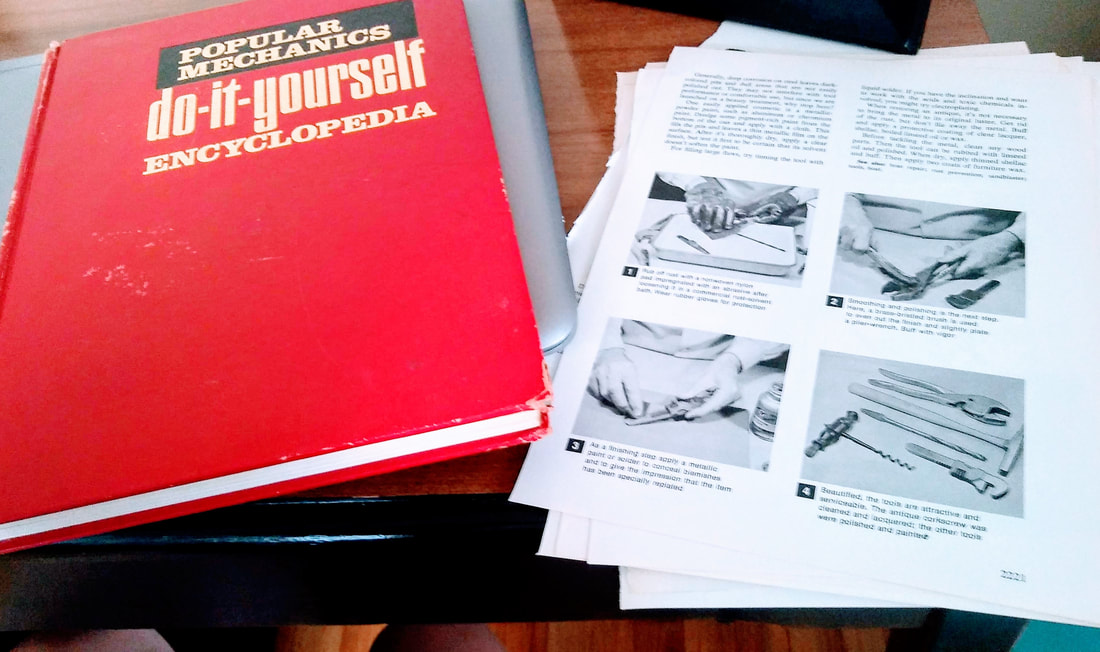
Let me know if you have any questions! 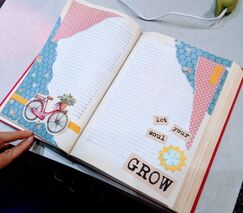 Let me start by saying anything... and I mean anything can be used for an altered book journal! This is what makes this project so much fun and so versatile. Every book is different, every page is different, and every material is different. The purpose of an "altered book" is making an old book into a new piece of art. There are many types of altered books, but for this project, we are beginning an altered book "journal". A journal can be used as a "smash book" for travel or random memories or can be used for a literal journal to write in. There are many possibilities. I did this journal page spread for one of my classes. This was a little tricky as I had to come up with something that we could all do together in our own books but something that could get everyone started and get those creative gears moving! The page above is what I came up with. It is something very simple and uses minimal supplies. We could've gone crazy and used paints, textures, inks, stamps, stickers, etc. but I kept it simple for an easy clean up and to also show that you don't need anything fancy for this type of project! Supplies:
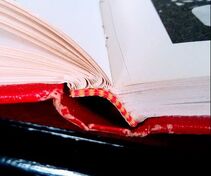
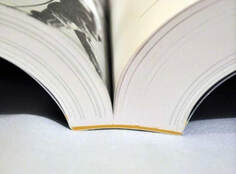
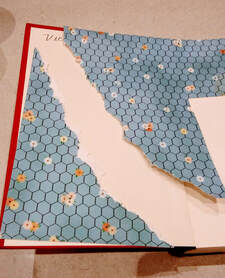
1. First off, let's talk about picking our book. If you can find something with "sewn" pages, that's the way to go! The modern glued pages are terrible for an altered book project! They are too flimsy and as you cut away more pages it loses its stability and could fall apart! These photos show what a sewn spine looks like verses a glued spine.
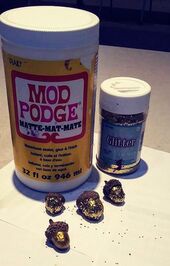
3. Once you are done cutting out pages throughout the book, you are ready to start gluing. As mentioned above, glue the pages to the left and right of the cut together, hiding that cut line. I use Mod Podge for this, putting it on in an even, thin layer. You can always come back and add more if the corners aren't glued down after it dries. 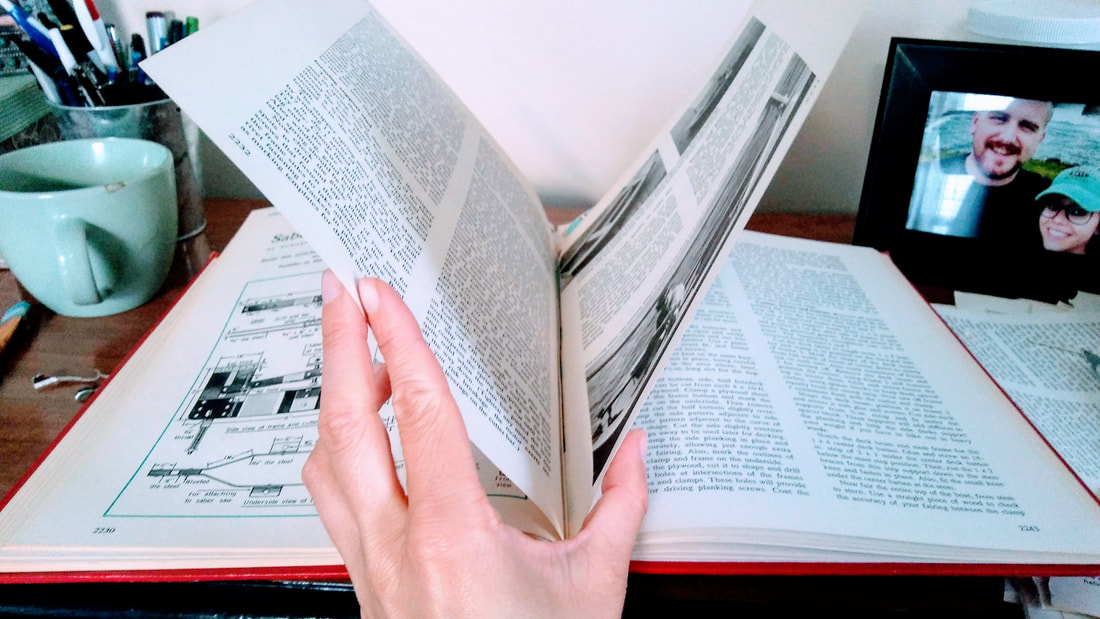
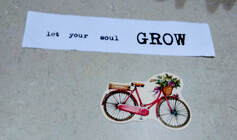
6. All I did to finish this page spread up was glue! First, I arranged everything on the pages to figure out where I wanted it all to go. Once I was good with it all I glued everything down with a thin layer of Elmer's Glue, you could use Mod Podge instead. I also used the hot glue gun to glue the ribbon and the flowers down. But that was it! 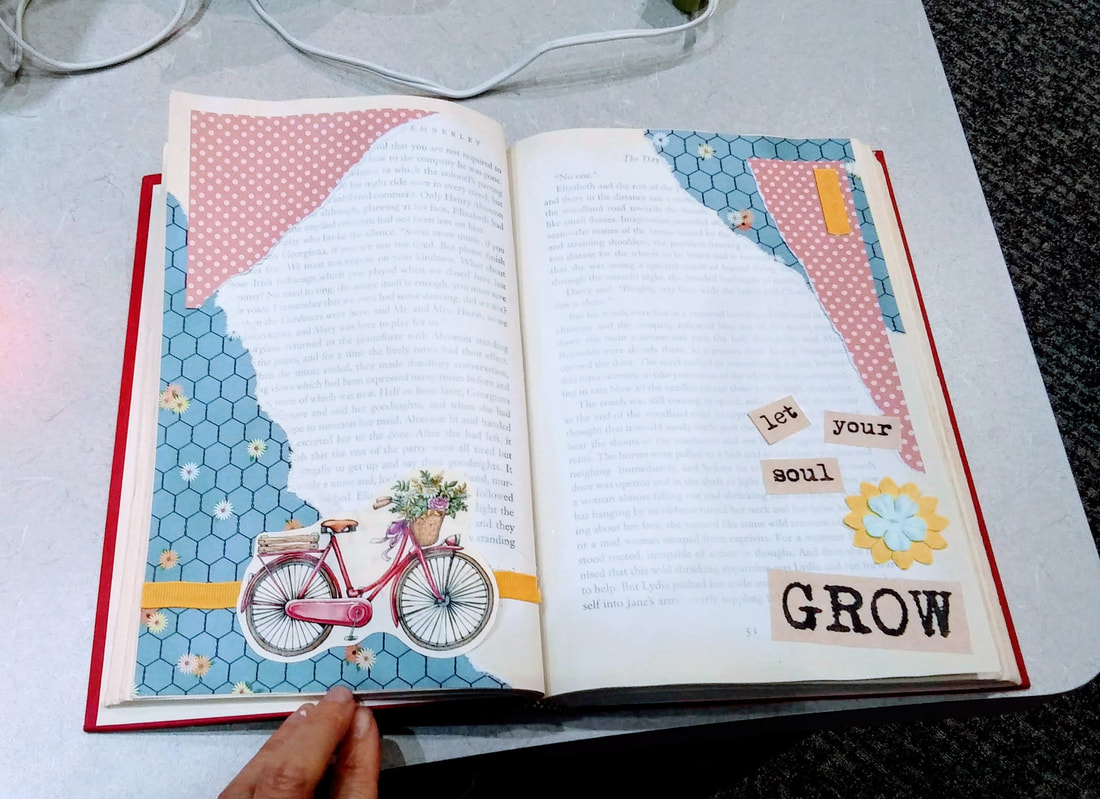 This was a pretty simple page. But you could really get crazy and do pages like the examples below! Happy Journaling!
 This is a pretty quick fall craft to spruce up your shelf space for the autumn weather or maybe a gift idea! The one I originally saw on Pinterest was very cute with bright fall colors. There are so many options with this type of craft, it's almost overwhelming. I thought about going with a subtle brown, tan, and white color combination at first. I thought it would be very elegant for Thanksgiving but somehow I ended up switching to more of a Halloween based theme with a distressed frame and distressed pages. The possibilities are endless but I hope you find one that you love! Supplies:
1. Gather up all of your supplies so that you have them near and dear to your project space. 2. If you're like me, I had a few frames to choose from and was very stressed with all the options! Finally, I decided on something medium-sized and relatively simple in structure. I forgot to take a picture ahead of time, but I "distressed" my frame a bit by very lightly adding black in light strokes to make it seem old/give it some more depth to the frame. 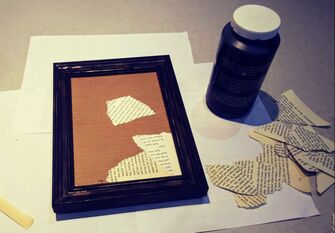 3. The original post I saw for this project involved using cute polka dot scrapbook paper as a background. I was going to do this as well, but saw I had some old book pages lying around and thought that would be a much cooler effect! If you're using a piece of scrapbook paper make sure you glue/tape it on carefully, making sure there are no air bubbles forming on your background! For me, I added torn strips of book pages by gluing each piece one by one to the background. Keep adding and adding until your background is full. 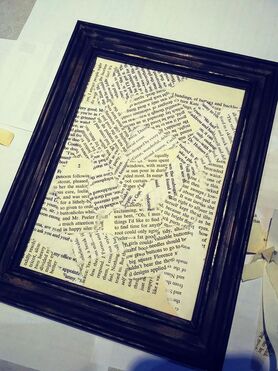 4. While your background is setting/drying, this is a good time to decide what you're going to do with your acorns. I decided to paint mine a metallic gold. I used 3 "craft" acorns and 3 real acorns that I found in the woods just to try out the different types to see if there were any differences... there aren't (but if you use real ones make sure you "bake" them to get rid of all the little buggies in there!) You'll want to do a couple of coats. 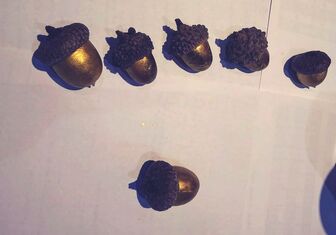 There are many ways to do this. You could leave the acorns in their natural state, paint them, decorate them, wrap them with thread/yarn/twine, oooo!
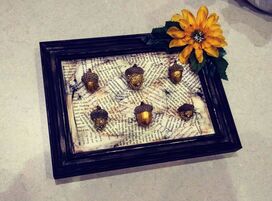
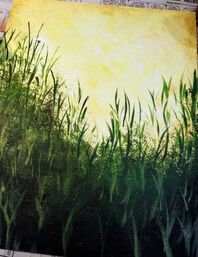
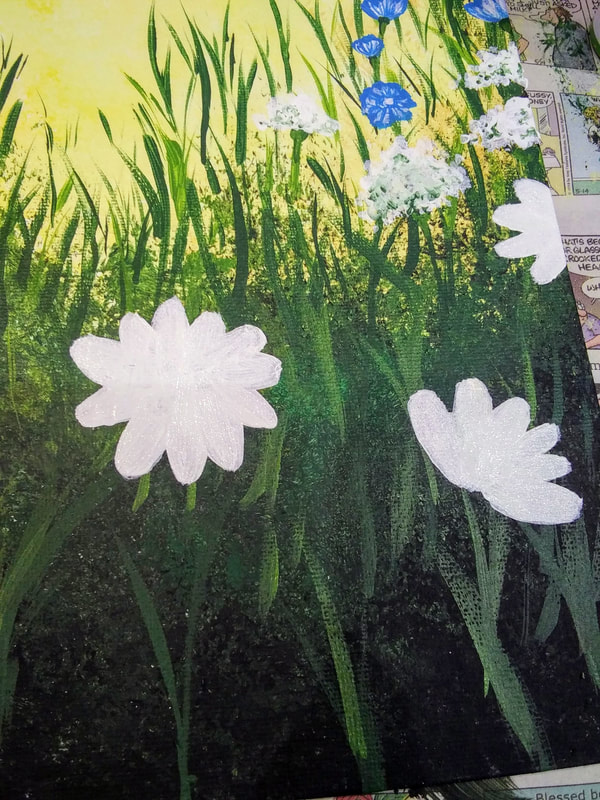
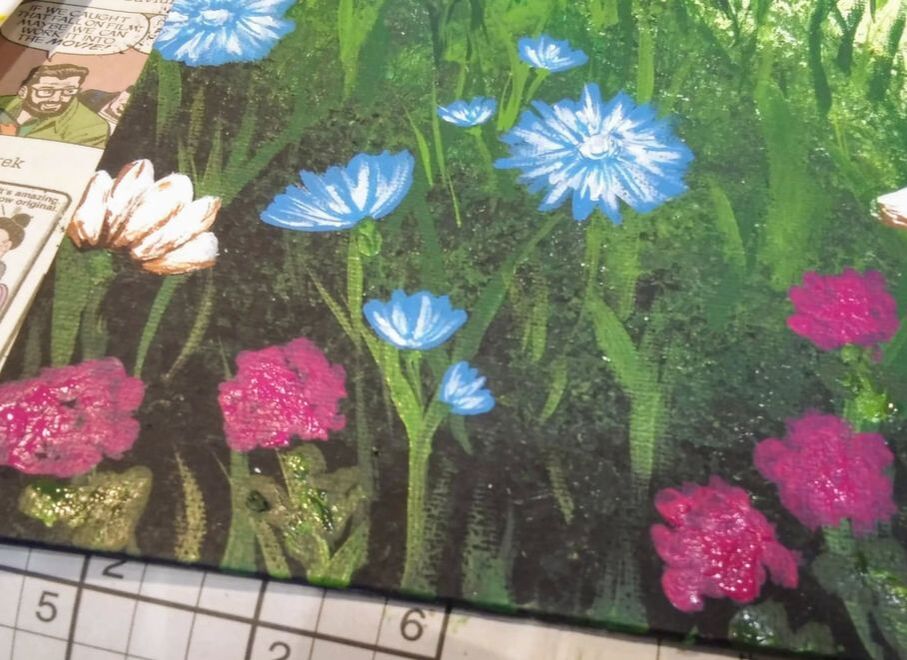
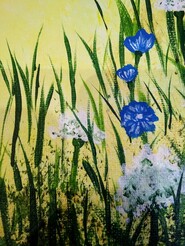
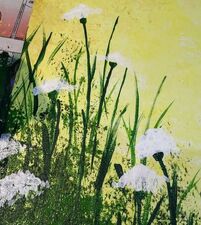
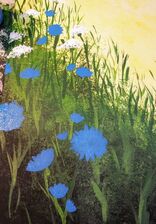
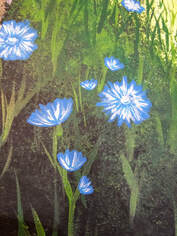
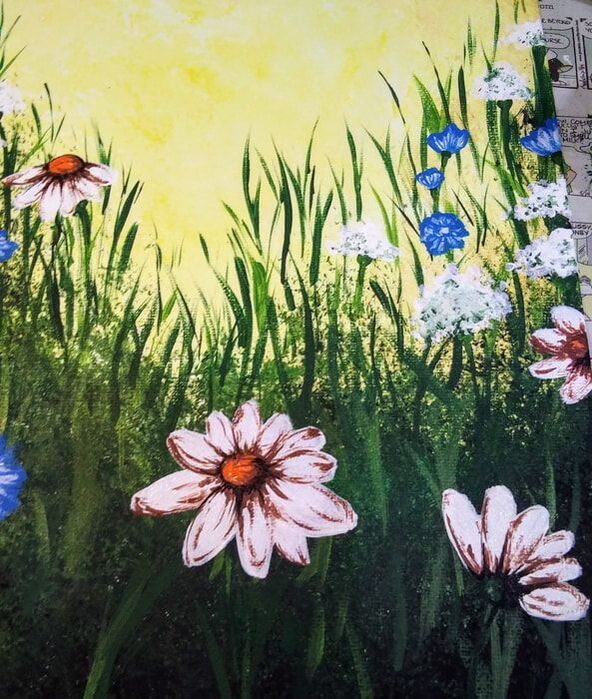
6. While my acorns were drying I also made the glued book pages look more distressed/eerie for a more Halloween look. I lightly brushed very little black and brown paint over the pages giving them that look which you can see in the following photo. 7. Lay out your acorns and see how you like them before you glue them. I used hot glue. Make sure you put enough on there and hold the acorn while it sets. 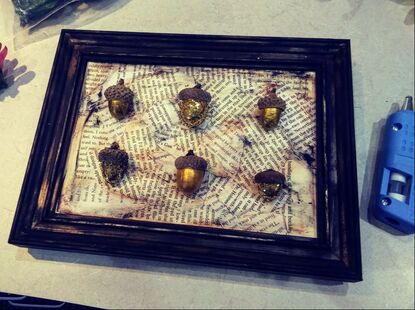 8. Lastly, I decided to add a little extra somethin' somethin' to the frame and hot glued a flower to the upper corner. That's it, we're all done!  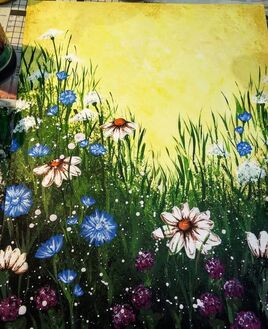 Who doesn't love wildflowers?! This is a fun, whimsical painting to do with friends during the spring or summer months, they'll love it! Supplies:
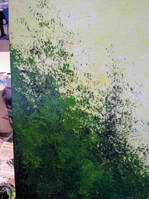
14. After adding some more grass in, it’s time for the really messy part!
  Supplies:
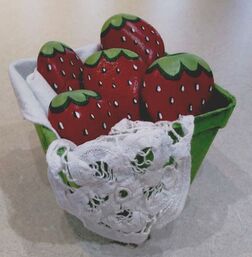
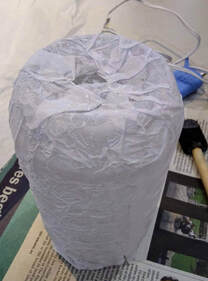
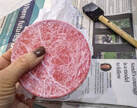
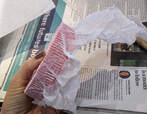
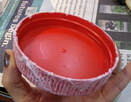
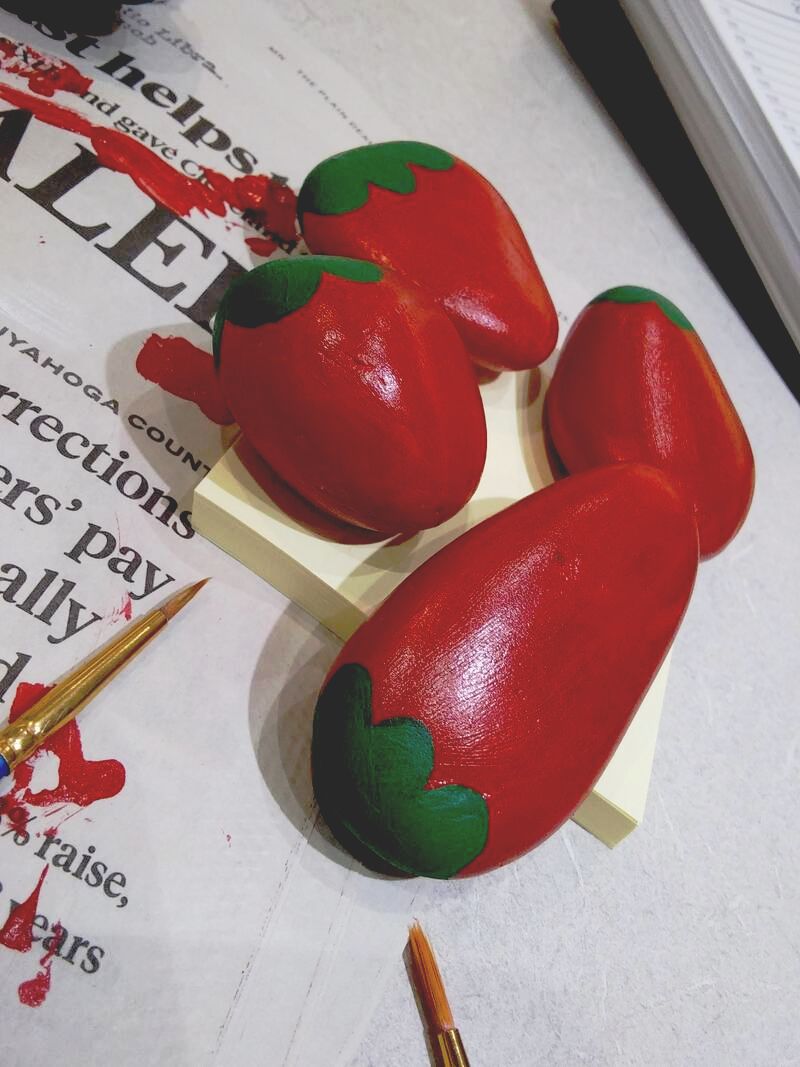
When I saw posts on Pinterest regarding these rocks I thought they were adorable and felt like I had to do them for a program at work, which here I am, prepping to do just that! My goal was to travel around to local parks and search for the perfect "strawberry-shaped" rocks to use, however, doing them for a public program meant that I needed about 110 of these rare diamonds and lets be real... that did not happen. I love using up supplies from previous projects and a coworker of mine had left over "mexican river rocks" from a rock-painting program, so, this is what I ended up using, cool. Taking a quick look at project photos on Pinterest, I saw that some showed that the rocks were painted white first. "Nah, I don't need to do that" I thought to myself peering at the 110 rocks waiting on my cart. So I went ahead and painted the first couple with red... "huh... this doesn't look too good" I quickly realized. "Do I seriously have to paint these white?" I begrudgingly thought to myself. So, I took a shot at the next one with a nice single coat of white acrylic paint. After it dried, I put the first coat of red over it and WOW, what a difference! You can see in the below photo the ones I painted first laying in the background on newspaper vs. the new beautifully vibrant rock in my hand. 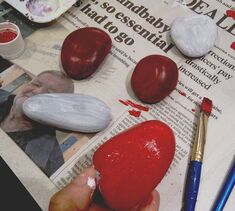 Thankfully, we have people who work with us who are often looking for "odd" jobs to do in down time.... well.... I think painting 110 rocks white is the perfect job to do for that! Thank you, thank you, thank you! I thought 5 rocks would be a good amount for this project which ended up working well for dry times as you make your way through each rock and each layer of paint. So, paint all rocks white, then paint all rocks red. I put 2 coats of red on top so it's a nice even layer.
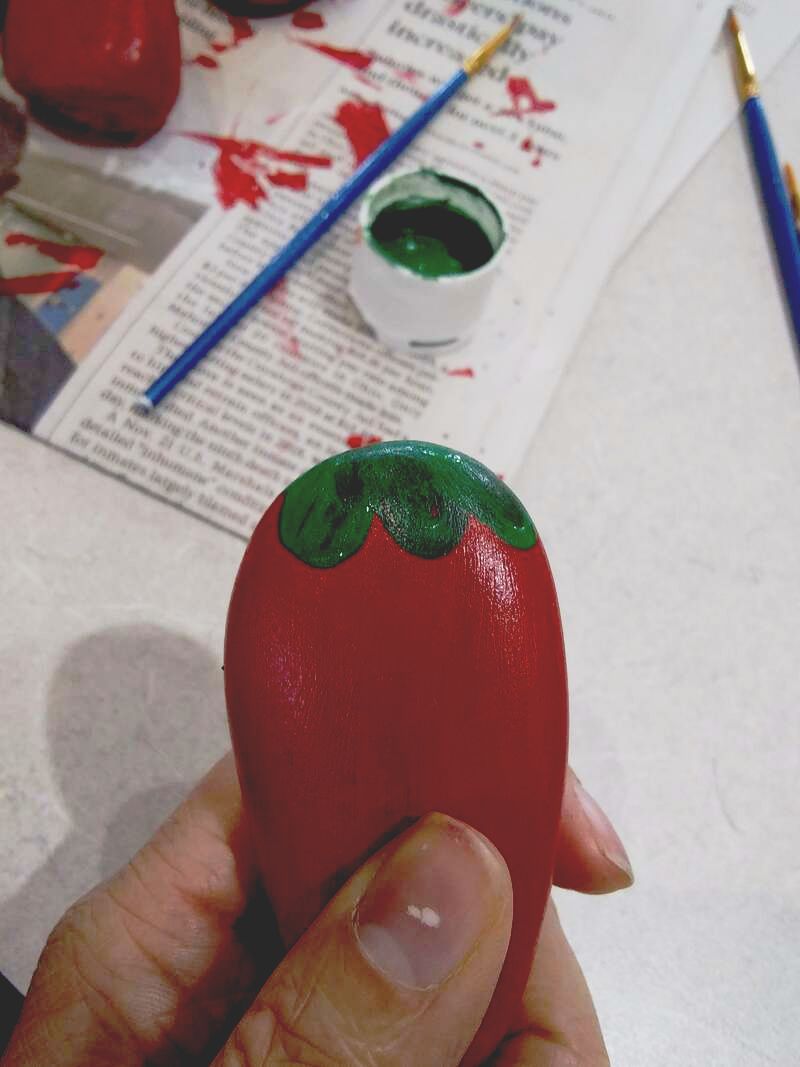
After my dark green dried, I went over it in a smaller reflection with light green. Then, I added a dot of the dark green in the center to represent where the stem would technically be. I'm not gonna lie... I hated this... still hate it. I do not like the way this came out but got even more stressed out the more I tried to "fix" it. I found it best to just leave it as is and move on full steam ahead! 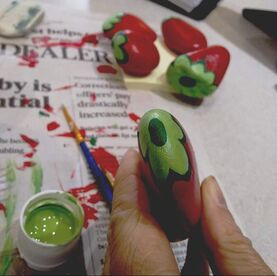 Next, will be your act of patience. Using a tiny pointy brush, paint "raindrop" shaped black "dots" all over your rocks to represent the strawberry seeds. And do this with every... single... rock! 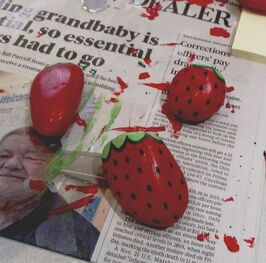 Now, go over every... single... dot.... on every... single... rock... with a tiny white "raindrop"/"dot". You could also change this up and be more realistic by making the seeds a golden yellow or changing the look of some so they're not all exactly the same. But I didn't have time for that and was shooting for a simple, easy project for my participants!  Lastly, put them in a cute bowl, basket, container, whatever! I found farmer market style containers at our local craft store. They came in a pack of six so were super affordable! I also put a piece of fabric in to drape over the sides before I put the rocks in and wa-la, Adorable summer decor!  |

Rebecca MyersHey there, I'm Becca, or Rebecca, but not Becky, never Becky, unless you're my family from down south! I'm a simply modern librarian by day and an artist by night. My pursuit is for a simple, happy, healthy, and more fulfilling life! I hope I inspire you to get crafty! Archives
March 2022
Categories
All
|


 RSS Feed